Loading ...
Loading ...
Loading ...
ENG
ENGLISH
16
ASSEMBLING AND PREPARING
ASSEMBLING AND PREPARING
Disconnect the power before moving or
installing the TV.
If you install the TV on a ceiling or slanted
wall, it may fall and result in severe
injury. Use an authorized LG wall mount
and contact the local dealer or qualified
personnel.
Do not over tighten the screws as this
may cause damage to the TV and void
your warranty.
Use only screws and wall mounts that
meet the VESA standard. Any damages
or injuries by misuse or using an improper
accessory are not covered by the
warranty.
CAUTION
A wall mount bracket is optional. You can
obtain additional accessories from your
local dealer.
Use only screws that are listed on the
VESA standard screw specifications.
The wall mount kit includes an installation
manual and necessary parts.
The length of screws may differ
depending on the wall mount. Make sure
to use the proper length.
For more information, refer to the manual
supplied with the wall mount.
NOTE
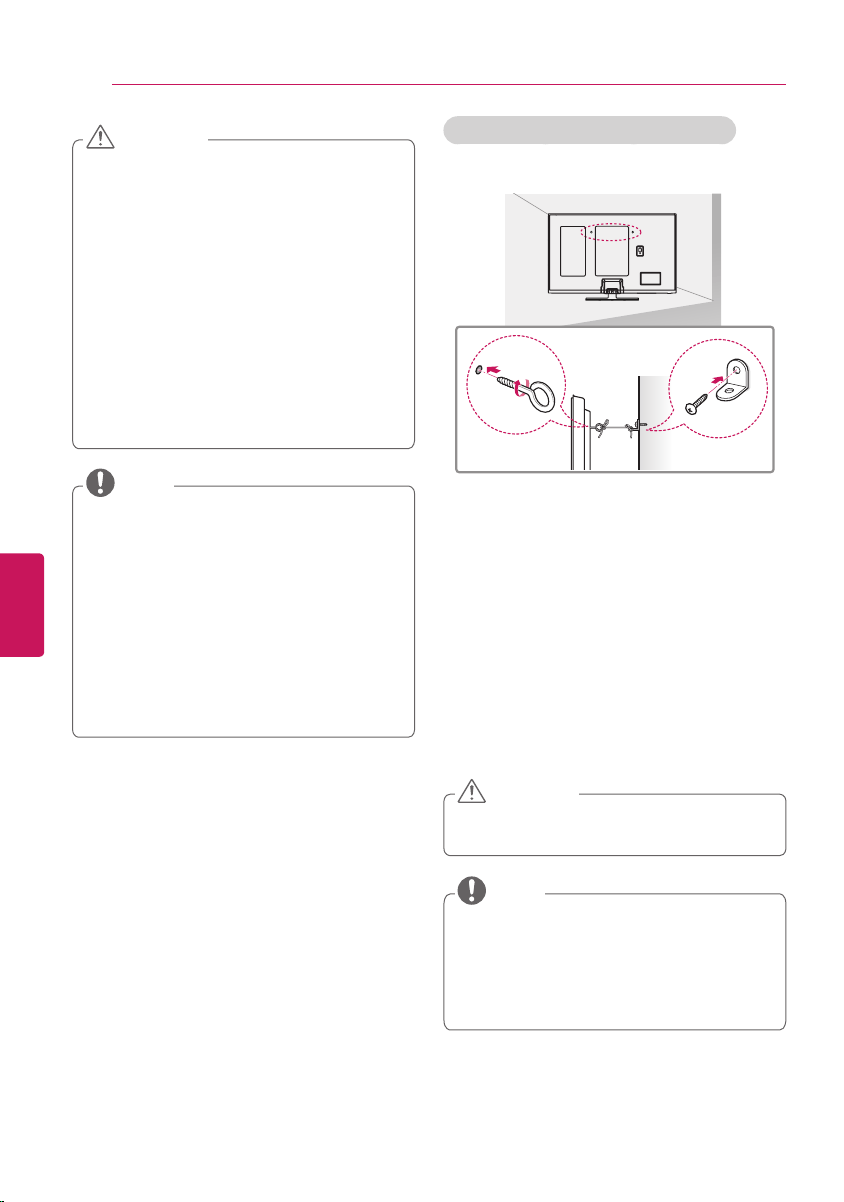
Securing the TV to a wall (optional)
(Depending on model)
1
Insert and tighten the eye-bolts, or TV
brackets and bolts on the back of the TV.
- If there are bolts inserted at the eye-bolts
position, remove the bolts first.
2
Mount the wall brackets with the bolts to
the wall.
Match the location of the wall bracket and
the eye-bolts on the rear of the TV.
3
Connect the eye-bolts and wall brackets
tightly with a sturdy rope.
Make sure to keep the rope horizontal with
the flat surface.
Make sure that children do not climb on or
hang on the TV.
CAUTION
Use a platform or cabinet that is strong
and large enough to support the TV
securely.
Brackets, bolts and ropes are optional.
You can obtain additional accessories from
your local dealer.
NOTE
Tidying Cables
1
Install the power cord holder and power
cord. It will help prevent the power cable
from being removed by accident.
2
Gather and bind the cables with the cable
holder.
Cable Holder
Loading ...
Loading ...
Loading ...