Loading ...
Loading ...
Loading ...
21
In TV mode, it is possible to start a direct recording of the programme which is being displayed on the TV
screen. Continue to press the ® record key on the remote control for more than 2 seconds.
Note: Switching programme numbers on your TV does not disturb recording !
When recording a programme from a peripheral connected to
EXT1, EXT3 or Side, you can not select another TV
programme on the screen without disturbing the recording.
AUDIO
DVI
L
R
1
2
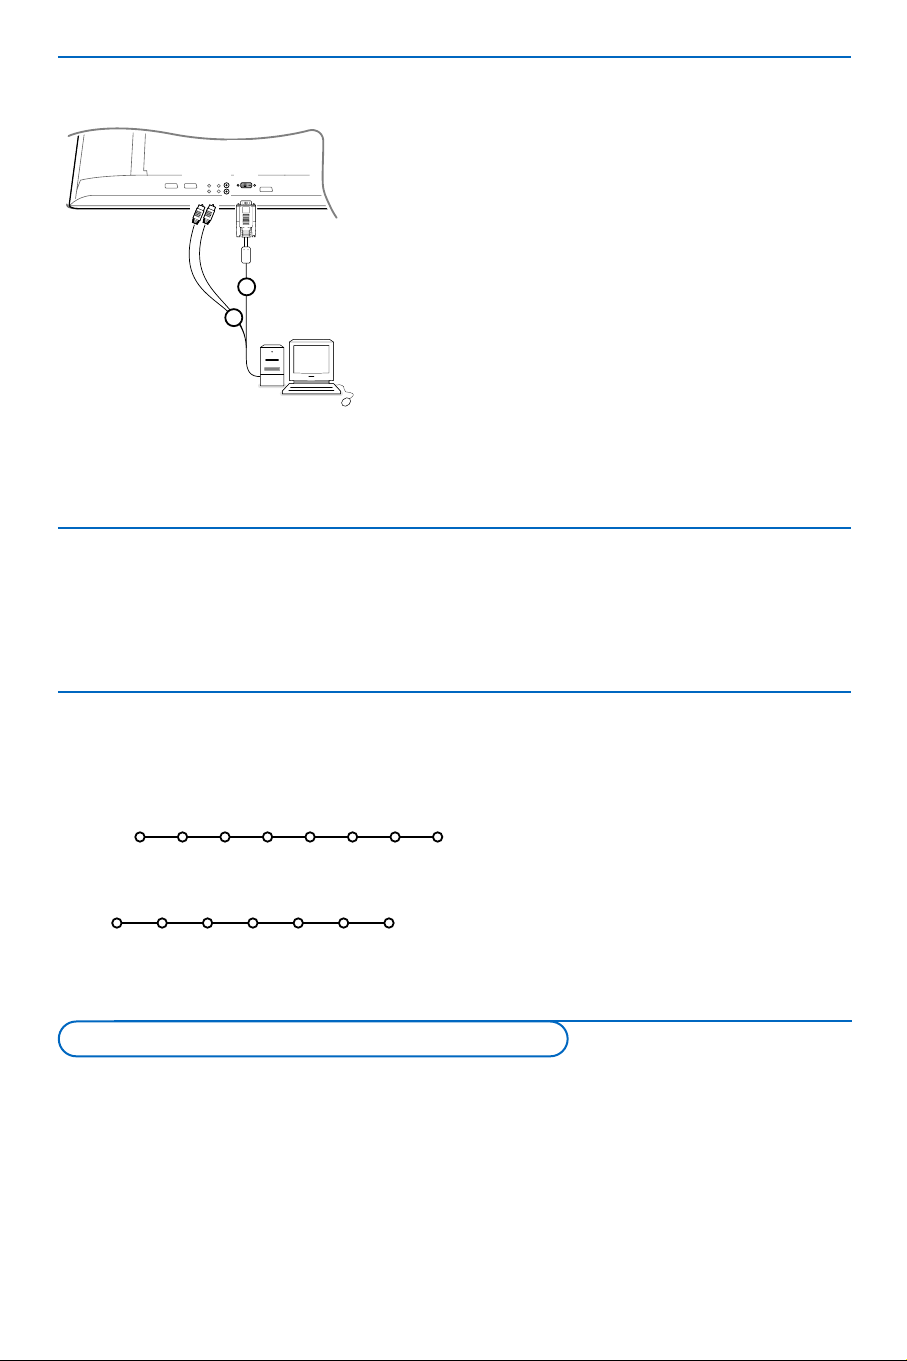
& Connect one end of a VGA cable 1 (if necessary via a
supplied VGA to DVI adaptor) to the video card of the
computer and the other end to the
DVI connector at the
bottom of the TV.
Fix the connectors firmly with the screws on the plug.
é In case of a Multimedia computer, connect the audio cable
2 to the audio outputs of your Multimedia computer and
to the
AUDIO R (right) and L (left) inputs.
The
DVI connector allows the following TV and monitor
display modes:
EDTV 640/720 x 480p
720 x 576p
HDTV 1920 x1080i
1280 x 720 p (only 50PF9966)
VGA 640 x 480 60 Hz
SVGA 800 x 600 60 Hz
XGA 1024 x 768 60 Hz (only 50PF9966)
Press the v key on the remote control repeatedly, or select Source in the Setup menu (see p. 10) to
select
EXT1, EXT2, EXT3, Side or DVI according to where you connected your equipment.
Remark : Most equipment (decoder, recorder) carries out the switching itself, when it is switched on.
Record with your recorder with EasyLink
Recorder or DVD with EasyLink
The recorder or DVD can be operated with
the remote control via the
Recorder or DVD
menu on screen.
& Press the MENU key on the remote control.
é Select the Recorder or DVD menu with the
cursor up/down.
“ Press the cursor left/right, up/down to select
one of the recorder or DVD functions.
The key ® for recording can be operated in the TV
mode.
If your EasyLink recorder has the system standby
function, when you press the B key for 3 seconds,
both TV and the recorder are switched to standby.
Ò p ‡ π † ® Ï
Rwd Play Stop Play Ffw Rec Eject
Recorder
Ò p ‡ π † Ï
Prev. Play Stop Play Next Eject
DVD
To select connected equipment
Connect your computer
Loading ...
Loading ...
Loading ...