Loading ...
Loading ...
Loading ...
6
4 PLACE
4.1 Desktop placement
Place the soundbar on a at and stable surface.
TV
NOTES:
− The power cord shall be properly connected to power.
− Do not place any objects on the top of the soundbar.
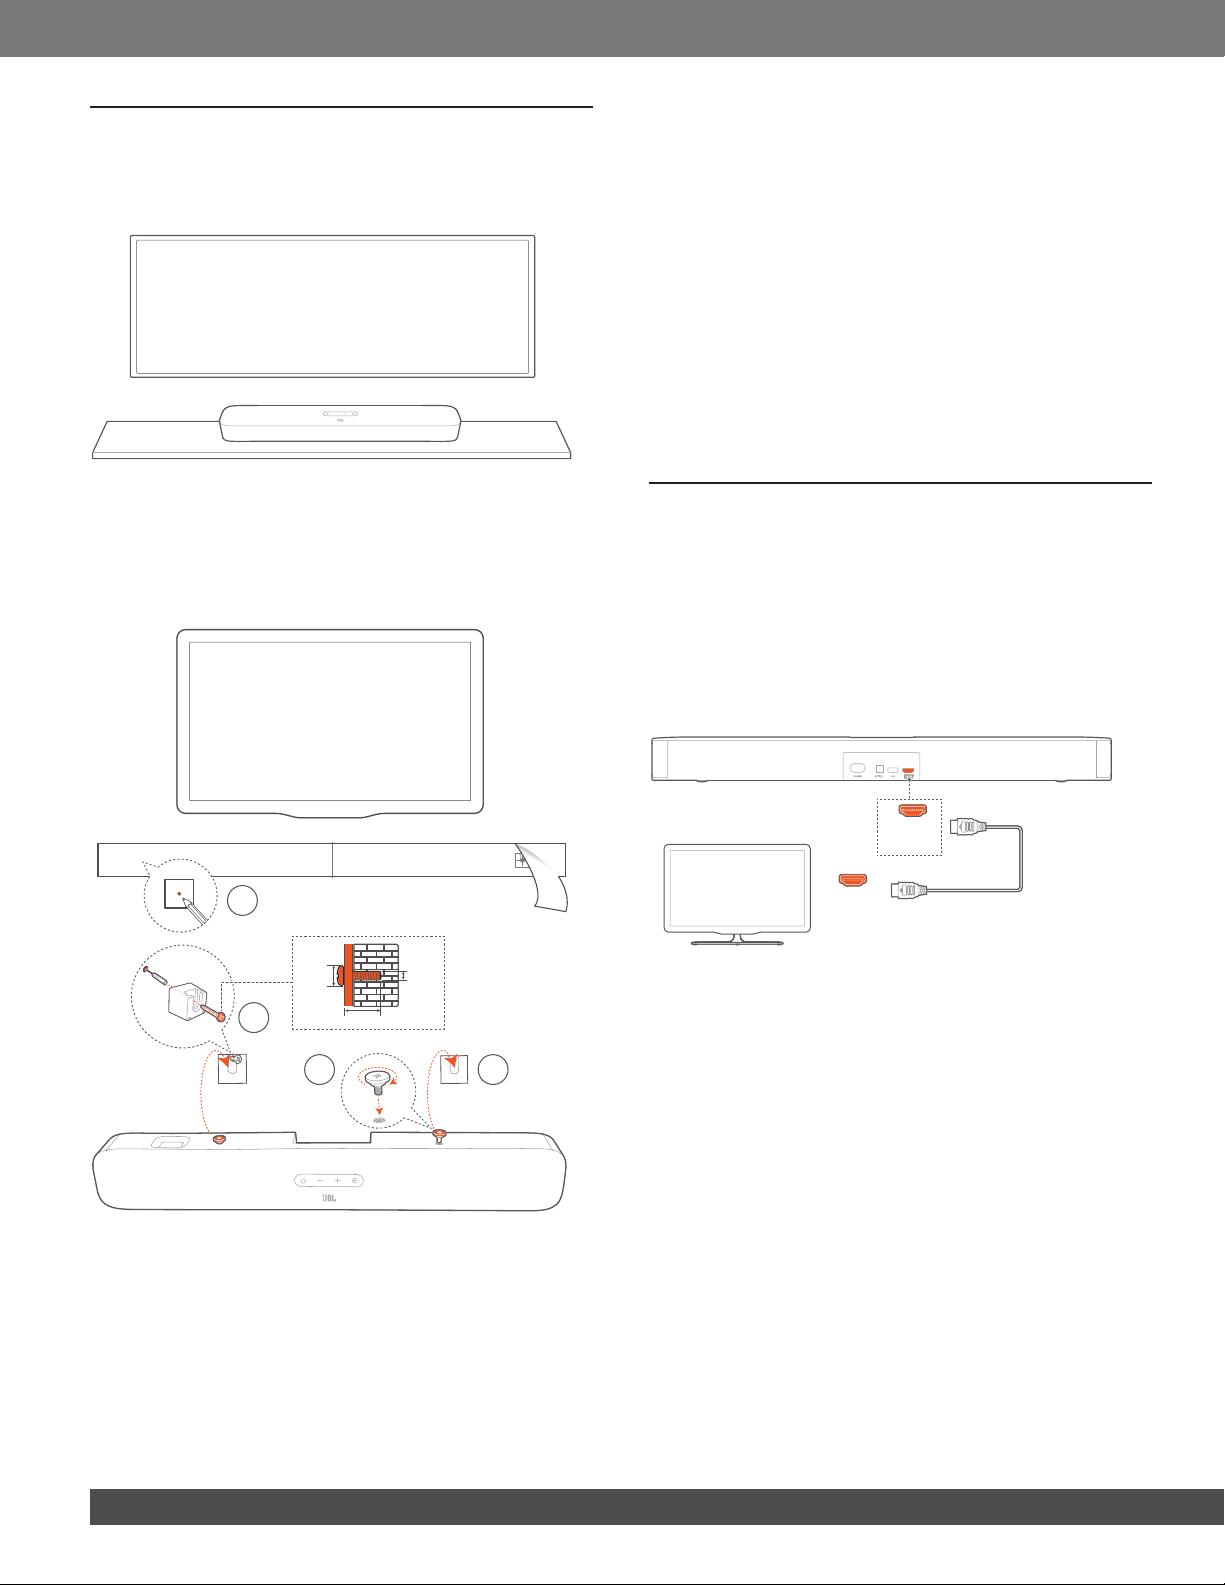
4.2 Wall-mounting
1
3 4
2
≤8 mm/
0.31"
4mm/
0.16"
≥30 mm/1.18"
Figure 1
1. Preparation:
a) With a minimum distance of 2” (50mm) from your TV, stick
the supplied wall-mounting template to a wall by using
adhesive tapes.
b) Use your ballpen tip to mark the screw holder location.
Remove the template.
c) On the marked location, drill a 4 mm/0.16” hole. Refer to
Figure 1 for the screw size.
2. Install the wall-mounting bracket.
3. Fasten the screw onto the back of the soundbar.
4. Mount the soundbar.
NOTES:
− Make sure that the wall can support the weight of the soundbar.
− Install on a vertical wall only.
− Avoid a location under high temperature or humidity.
− Before wall-mounting, make sure that cables can be properly
connected between the soundbar and external devices.
− Before wall-mounting, make sure that the soundbar is unplugged from
power. Otherwise, it may cause an electric shock.
5 CONNECT
5.1 TV connection
Connect the soundbar with your TV through the supplied HDMI
cable or an optical cable (sold separately).
Through the supplied HDMI cable
An HDMI connection supports digital audio and video with a
single connection. HDMI connectivity is the best option for your
soundbar.
HDMI OUT
(TV ARC)
HDMI
(ARC)
1. Connect the soundbar with your TV by using the supplied
HDMI cable.
2. On your TV, check that HDMI-CEC and HDMI ARC have been
enabled. Refer to the owner’s manual of your TV for more
information.
NOTES:
− Full compatibility with all HDMI-CEC devices is not guaranteed.
− Contact your TV manufacturer if you have problems with the HDMI-
CEC compatibility of your TV.
Loading ...
Loading ...
Loading ...