Loading ...
Loading ...
Loading ...

EN
Using 6V. [Press & Hold for 3 seconds]
6V charge mode is designed for 6-volt lead-acid batteries only, like Wet Cell, Gel Cell, Enhanced Flooded, Maintenance-Free and Calcium batteries. Press and hold for
three (3) seconds to enter 6V Charge Mode. Consult the battery manufacturer before using this mode.
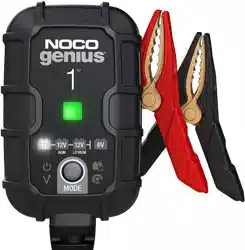
Using 12V Lithium.
12V Lithium charge mode is designed for 12-volt lithium-ion batteries only, including lithium iron phosphate.
CAUTION. USE THIS MODE WITH EXTREME CARE. THIS MODE SHOULD ONLY BE USED WITH 12-VOLT LITHIUM BATTERIES THAT HAVE A BUILT-IN BATTERY
MANAGEMENT SYSTEM (BMS). LITHIUM-ION BATTERIES ARE MADE AND CONSTRUCTED IN DIFFERENT WAYS AND SOME MAY OR MAY NOT CONTAIN A BATTERY
MANAGEMENT SYSTEM (BMS). CONSULT THE LITHIUM BATTERY MANUFACTURER BEFORE CHARGING AND ASK FOR RECOMMENDED CHARGING RATES AND
VOLTAGES. SOME LITHIUM-ION BATTERIES MAY BE UNSTABLE AND UNSUITABLE FOR CHARGING.
Force Mode. [Press & Hold for 5 seconds]
Force mode allow the charger to manually begin charging when the connected battery’s voltage is too low to be detected. If battery voltage is too low for the charger
to detect, press and hold the mode button for 5 seconds to activate Force Mode, then select the appropriate mode. All available modes will flash. Once a charge
mode is selected, the Charge Mode LED and Charge LED will alternate between each other, indicating Force Mode is active. After five (5) minutes the charger will
return to the normal charge operation and low voltage detection will be reactivated.
CAUTION. USE THIS MODE WITH EXTREME CARE. FORCE MODE DISABLES SAFETY FEATURES AND LIVE POWER IS PRESENT AT THE CONNECTORS. ENSURE ALL
CONNECTIONS ARE MADE PRIOR TO ENTERING FORCE MODE, AND DO NOT TOUCH CONNECTIONS TOGETHER. RISK OF SPARKS, FIRE, EXPLOSION, PROPERTY
DAMAGE, INJURY, AND DEATH.
Connecting to the Battery.
Do not connect the AC power plug until all other connections are made. Identify the correct polarity of the battery terminals on the battery. The positive battery
terminal is typically marked by these letters or symbol (POS,P,+). The negative battery terminal is typically marked by these letters or symbol (NEG,N,-). Do not make
any connections to the carburetor, fuel lines, or thin, sheet metal parts. The below instructions are for a negative ground system (most common). If your vehicle is a
positive ground system (very uncommon), follow the below instructions in reverse order.
1.) Connect the positive (red) battery clamp or eyelet terminal connector to the positive (POS,P,+) battery terminal.
2.) Connect the negative (black) battery clamp or eyelet terminal connector to the negative (NEG,N,-) battery terminal or vehicle chassis.
3.) Connect the battery charger into a suitable electrical outlet. Do not face the battery when making this connection.
4.) When disconnecting the battery charger, disconnect in the reverse sequence, removing the negative first (or positive first for positive ground systems).
Loading ...
Loading ...
Loading ...