
www.signaturekitchensuite.com
DRAWER MICROWAVE OVEN
OWNER’S MANUAL
Read this owner’s manual thoroughly before operating the appliance
and keep it handy for reference at all times.
SKSMD2401S
ENGLISH
FRANÇAIS
Copyright © 2020 Signature Kitchen Suite. All Rights Reserved.
US ENGLISH (US) CA FRANÇAIS (FC)
MFL71665801
Rev.01_060420
TINSKB274MRR0
TABLE OF CONTENTS
2
PRECAUTIONS TO AVOID POSSIBLE EXPOSURE TO
EXCESSIVE MICROWAVE ENERGY
• Do not attempt to operate this oven with the door open since open-door operation can result in harmful exposure to microwave energy. It
is important not to defeat or tamper with the safety interlocks.
• Do not place any object between the oven front face and the door or allow soil or cleaner residue to accumulate on sealing surfaces.
• Do not operate the oven if it is damaged. It is particularly important that the oven door closes properly and that there is no damage to the:
− door (bent)
− hinges and latches (broken or loosened)
− door seals and sealing surfaces.
• The oven should not be adjusted or repaired by anyone except properly qualified service personnel.
3 IMPORTANT SAFETY INSTRUCTIONS
3 READ ALL INSTRUCTIONS BEFORE USE
3 WARNING
6 INSTALLATION
6 Parts and Specifications
7 Installation Requirements
8 OPERATION
8 Cookware Guide
9 Cooking Guide
10 Control Panel
10 Menu Guide
11 Getting Started
13 Using Sensor Operations
19 MAINTENANCE
19 Cleaning
20 TROUBLESHOOTING
20 Before Calling for Service
21 LIMITED WARRANTY
21 USA
24 LIMITED WARRANTY
24 CANADA

3
ENGLISH
Technical Safety
• This appliance is not intended for use by persons (Including children) with reduced physical, sensory or mental capabilities, or lack of
experience and knowledge, unless they have been given supervision or instruction concerning use of the appliance by a person responsible
for their safety. Children should be supervised to ensure that they do not play with the appliance.
• To reduce the risk of burns, electric shock, fire, injury to persons or exposure to excessive microwave energy when using the microwave
oven, read all instructions before using the appliance.
• Children must not be allowed to play with accessories or hang down from the door or any part of the oven. Doing so can cause serious injury
and damage. As with any appliance, close supervision is necessary when used by children.
• Read and follow the PRECAUTIONS TO AVOID POSSIBLE EXPOSURE TO EXCESSIVE MICROWAVE ENERGY found on page 2.
• This appliance must be grounded. Connect only to a properly grounded outlet. See the electrical GROUNDING INSTRUCTIONS section.
• Use this appliance only for its intended use as described in the manual. Do not use corrosive chemicals or vapors, such as sulfide and
chloride, in this appliance. This type of oven is specifically designed to heat, cook, or dry food. It is not designed for industrial or laboratory
use.
• To avoid electric shock:
− Do not operate this appliance if it has a damaged cord or plug, if it is not working properly or if it has been damaged or dropped.
− Do not immerse the electrical cord or plug in water. Keep cord away from heated surfaces.
− Do not let cord hang over edge of table or counter.
• To reduce the risk of fire in the oven cavity:
− Do not overcook food. Carefully attend to the microwave oven when paper, plastic or other combustible materials are placed inside the
oven to facilitate cooking.
− Do not use the cavity for storage purposes. Do not leave paper products, cooking utensils or food in the cavity when not in use.
− Remove wire twist-ties from paper or plastic bags before placing bags in oven.
• Install or locate this appliance only in accordance with the provided installation instructions.
IMPORTANT SAFETY INSTRUCTIONS
READ ALL INSTRUCTIONS BEFORE USE
Safety Messages
Your safety and the safety of others are very important.
We have provided many important safety messages in this manual and on your appliance. Always read and follow all safety
messages.
This is the safety alert symbol.
This symbol alerts you to potential hazards that can kill or injure you and others. All safety messages will follow the
safety alert symbol and either the word WARNING or CAUTION.
These words mean:
WARNING
You may be killed or seriously injured if you do not follow instructions.
CAUTION
You may be injured or cause damage to the product if you do not follow instructions.
All safety messages will tell you what the potential hazard is, tell you how to reduce the chance of injury, and tell you what may
happen if the instructions are not followed.
WARNING
WARNING
• To reduce the risk of explosion, fire, death, electric shock, injury or scalding to persons when using this product, follow basic precautions,
including the following:

4
• If materials inside the oven ignite:
− Keep oven door closed and turn the oven off.
− Disconnect the power cord or shut off power at the fuse or circuit breaker panel.
• Some products such as whole eggs and sealed containers – for example, closed glass jars – are able to explode and should not be heated
in this oven.
• Liquids, such as water, coffee, or tea can be overheated beyond the boiling point without appearing to be boiling due to surface tension of
the liquid. Visible bubbling or boiling when the container is removed from the microwave oven is not always present.
• THIS COULD RESULT IN VERY HOT LIQUIDS SUDDENLY BOILING OVER WHEN THE CONTAINER IS DISTURBED OR A SPOON OR
OTHER UTENSIL IS INSERTED INTO THE LIQUID.
To reduce the risk of injury to persons:
− Do not overheat the liquid. Stir the liquid both before and halfway through heating it.
− Do not use straight-sided containers with narrow necks. Use extreme care when inserting a spoon or other utensil into the container.
− After heating, allow the container to stand in the microwave oven for a short time before removing the container.
• Do not cover or block any openings on the appliance.
• Do not store this appliance outdoors. Do not use this product near water - for example, near a kitchen sink, in a wet basement, near a
swimming pool, or similar location.
• This appliance should be serviced only by qualified service personnel. Contact the nearest authorized service facility for examination, repair,
or adjustment.
• When cleaning surfaces of door and oven that come together on closing the door, use only mild, nonabrasive soaps, or detergents applied
with a sponge or soft cloth.
• Do not operate any heating or cooking appliance beneath this appliance.
• Do not mount unit over or near any portion of a heating or cooking appliance.
• Do not mount over a sink.
• Do not store anything directly on top of the appliance surface when the appliance is in operation.
• Only use cookware that is suitable for use in warming drawers.
Operation
• Do not use this oven for commercial purposes. It is made for household use only.
• Do not run the oven while it is empty.
• If your oven is dropped or damaged, have it thoroughly checked by a qualified service technician before using it again.
• Take care when the door is opened to avoid injury.
• To avoid improperly cooking some foods:
− Do not heat any type of baby bottle or baby food. Uneven heating may occur and possibly cause personal injury.
− Do not heat small-necked containers, such as syrup bottles.
− Do not deep-fat fry in the microwave oven.
− Do not attempt home canning in the microwave oven.
• Do not use the oven for the purpose of dehumidification (for example, operating the microwave oven with wet newspapers, clothes, toys,
electric devices, plants, soil, pets or any other living matter inside it). The oven must only be used for heating or cooking food. The results of
misuse can include safety risks such as fire, burns, or death due to electric shock.
• During use the appliance becomes hot. Care should be taken to avoid touching heating elements inside the oven.
• The appliance and its accessible parts become hot during use. Care should be taken to avoid touching heating elements. Children must be
kept away unless continuously supervised.
• Do not use recycled paper products. They may contain impurities which may cause sparks and/or fires when used in cooking.
• The door or the outer surface may get hot when the appliance is operating.
• Liquids heated in certain shaped containers (especially cylindrical-shaped containers) may become overheated. The liquid may splash out
with a loud noise during or after heating or when adding ingredients (instant coffee. etc.), resulting in harm to the oven and possible injury. In
all containers, for best results, stir the liquid several times before heating. Always stir liquid several times between reheatings.
Maintenance
• If the door or door seals are damaged, the oven must not be operated until it has been repaired by an authorized service person.
• The oven should be cleaned regularly and any food deposits should be removed. Failure to maintain the oven in a clean condition could lead
to deterioration of the surface that could adversely affect the life of the appliance and possibly result in a hazardous situation.
• Do not rinse trays and racks by placing them in water just after cooking. This may cause breakage or damage. Improper use could result in
damage to the oven.

5
ENGLISH
Radio/TV/Wireless Equipment Interference
• Operating the microwave oven near equipment-such as a radio, TV, wireless LAN, Bluetooth devices, medical equipment, or wireless
equipment-which uses the same frequency, may cause interference. This interference is not an indication of a defect in the product or its
operation. The product is safe to use.
• Do not use medical equipment near the microwave oven, as the interference could affect the medical equipment’s operation.
• When there is interference, it may be reduced or eliminated by taking the following measures:
− Clean the door and the sealing surfaces of the oven.
− Reorient the receiving antenna of the radio, TV, Bluetooth, or other equipment.
− Relocate the microwave oven in relation to the radio, TV, Bluetooth, or other equipment.
− Move the microwave oven away from the receiver.
− Plug the microwave oven into a different outlet so that microwave oven and receiver are on different branch circuits
FEDERAL COMMUNICATIONS COMMISSION RADIO FREQUENCY INTERFERENCE STATEMENT
(U.S.A. ONLY)
• This equipment generates and uses ISM frequency energy and if not installed and used properly, that is in strict accordance with the
manufacturer’s instructions, may cause interference to radio and television reception. It has been type tested and found to comply with limits
for ISM Equipment pursuant to part 18 of FCC Rules, which are designed to provide reasonable protection against such interference in a
residential installation. However, there is no guarantee that interference will not occur in a particular installation. If this equipment does cause
interference to radio or television reception, which can be determined by turning the equipment off and on, the user is encouraged to try to
correct the interference by one or more of the following:
− Reorient the receiving antenna of the radio or television.
− Relocate the Microwave Oven with respect to the receiver.
− Move the microwave oven away from the receiver.
− Plug the microwave oven into a different outlet so that the microwave oven and the receiver are on different branch circuits.
• The manufacturer is not responsible for any radio or TV interference caused by unauthorized modification to this microwave oven. It is the
responsibility of the user to correct such interference.
SAVE THESE INSTRUCTIONS
6
INSTALLATION
INSTALLATION
Parts and Specifications
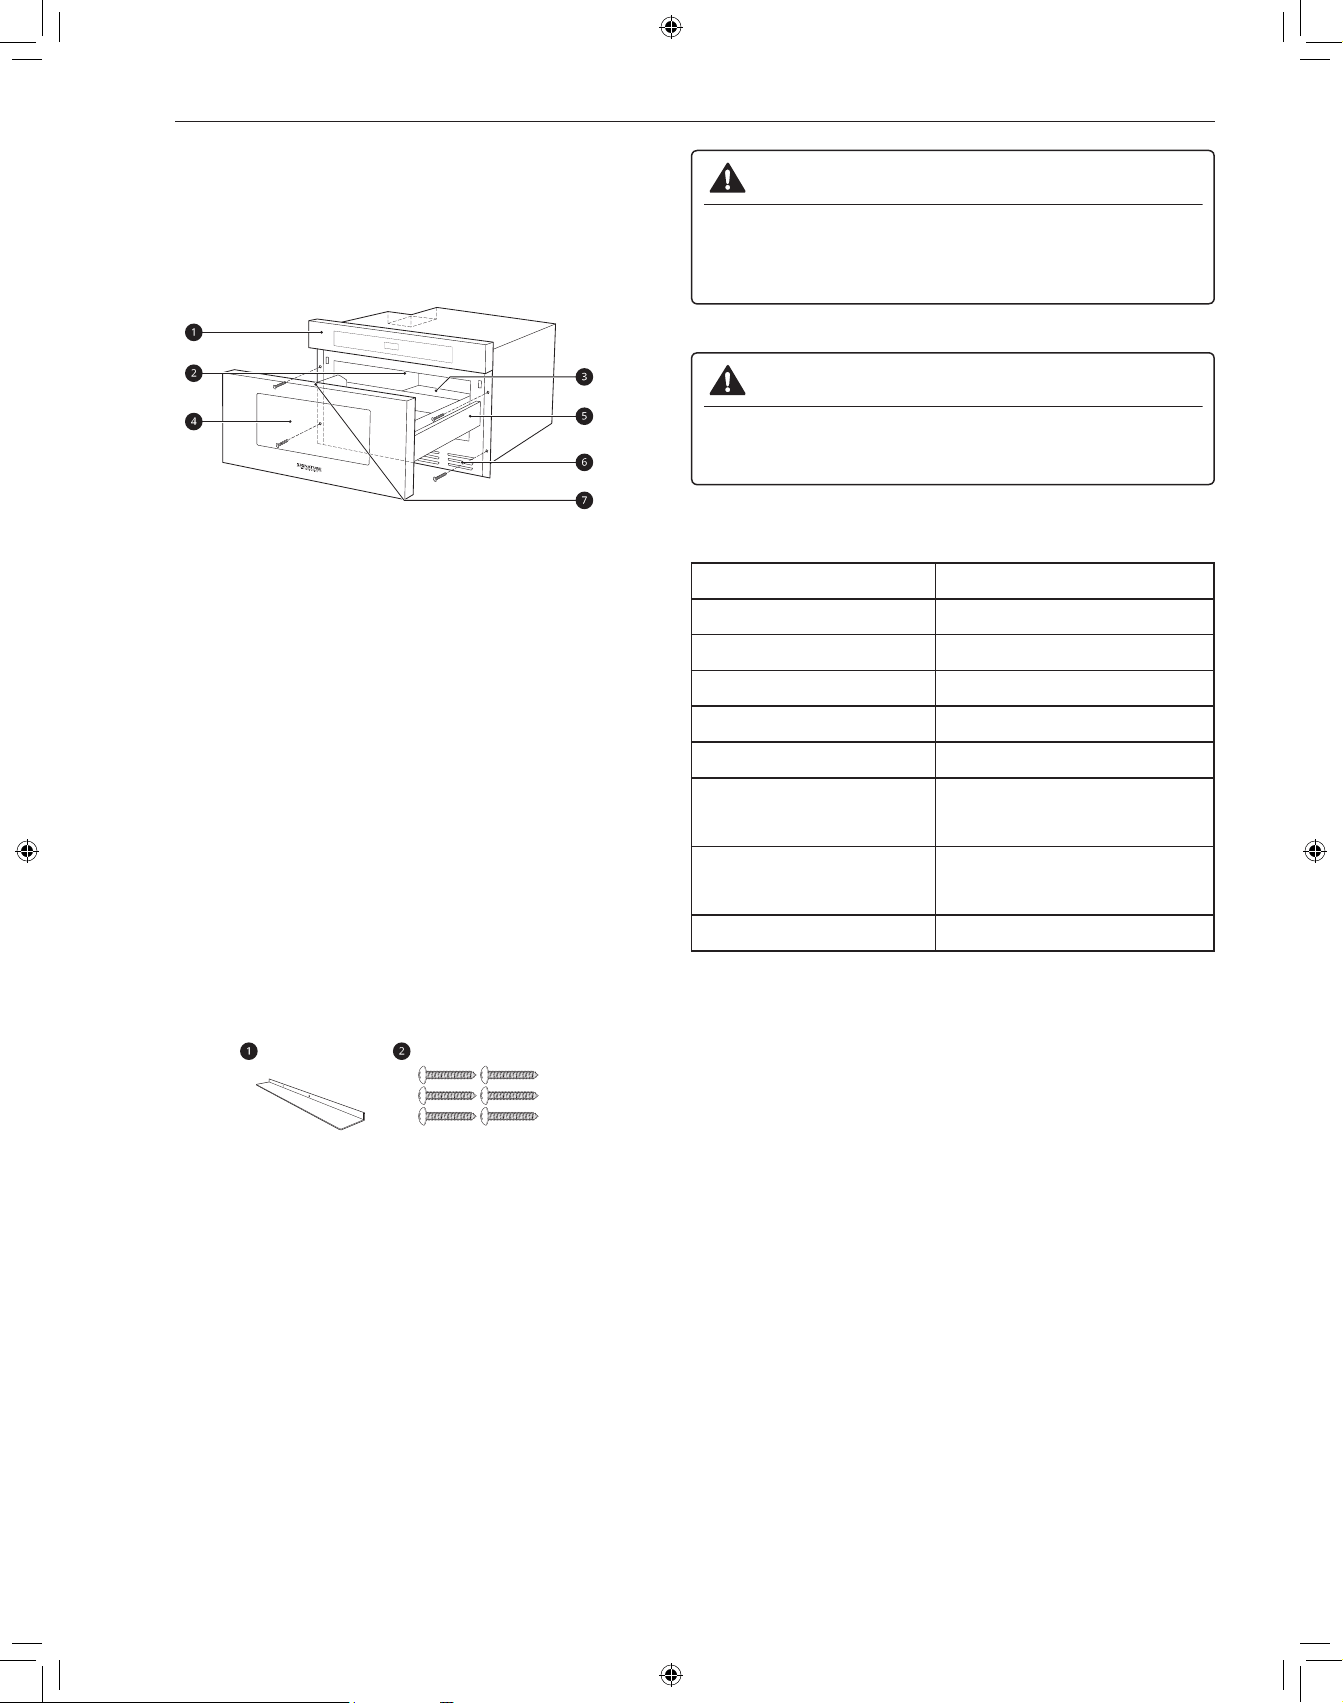
Front View
a
Control Panel
b
Waveguide Cover
c
Nameplate
d
Window
e
Drawer Microwave guides
f
Vent
g
Menu label
NOTE
• Do not remove the waveguide cover from the inside cavity of the
oven. It is there to protect the microwave components from food
spatters.
• Open the Drawer Microwave fully. The name plate is beyond the
back wall of the microwave cavity facing up from the flat surface.
Accessories
Accessories will vary depending on the model purchased.
a
Flush Mount Deflector Vent (Stainless Steel)
b
Mounting Screws (Stainless Steel)
WARNING
• Do not operate the oven when it is empty or without the glass
tray. It is best to leave a glass of water in the oven when not in
use. The water will safely absorb all microwave energy, if the
oven is accidentally started.
CAUTION
• To avoid risk of personal injury or property damage, do not use
stoneware, metal cookware, or metal rimmed cookware in the
oven.
Specifications
Model SKSMD2401S
Power Supply 120/117 V AC, 60 Hz
Rated Power Consumption 1500 W
Microwave Output Max. 900 W*
Frequency 2450 MHz
Rated Current 13.6 A
Dimensions
(W x H x D)
23.9 x 15.9 x 23.3 inches
(60.6 x 40.4 x 59.2 cm)
Oven Cavity Dimensions
(W x H x D)
17.3 x 7.1 x 16.6 inches
(44.0 x 18.1 x 42.1 cm)
Capacity of Oven Cavity 1.2 cu.ft. (0.034 m³)
* IEC 60705 RATING STANDARD. Specifications are subject to
change without prior notice.
NOTE
• This microwave oven is designed for household use only. It is not
recommended for commercial use.
• Do not cook food for too long. The microwave oven can be
damaged.
7
INSTALLATION
ENGLISH
Installation Requirements
Unpacking and Examining
1
Remove all packing materials from inside the Drawer
Microwave. DO NOT REMOVE THE WAVEGUIDE COVER,
which is located on the top of the Drawer Microwave.
2
Remove the feature sticker, if there is one. Check the drawer
for any damage, such as misaligned or bent drawer, damaged
drawer seals and sealing surfaces, broken or loose drawer
guides and dents inside the cavity or on the front side of the
drawer. If there is any damage, do not operate the Drawer
Microwave and contact your dealer or the Signature Kitchen
Suite Customer Information Center.
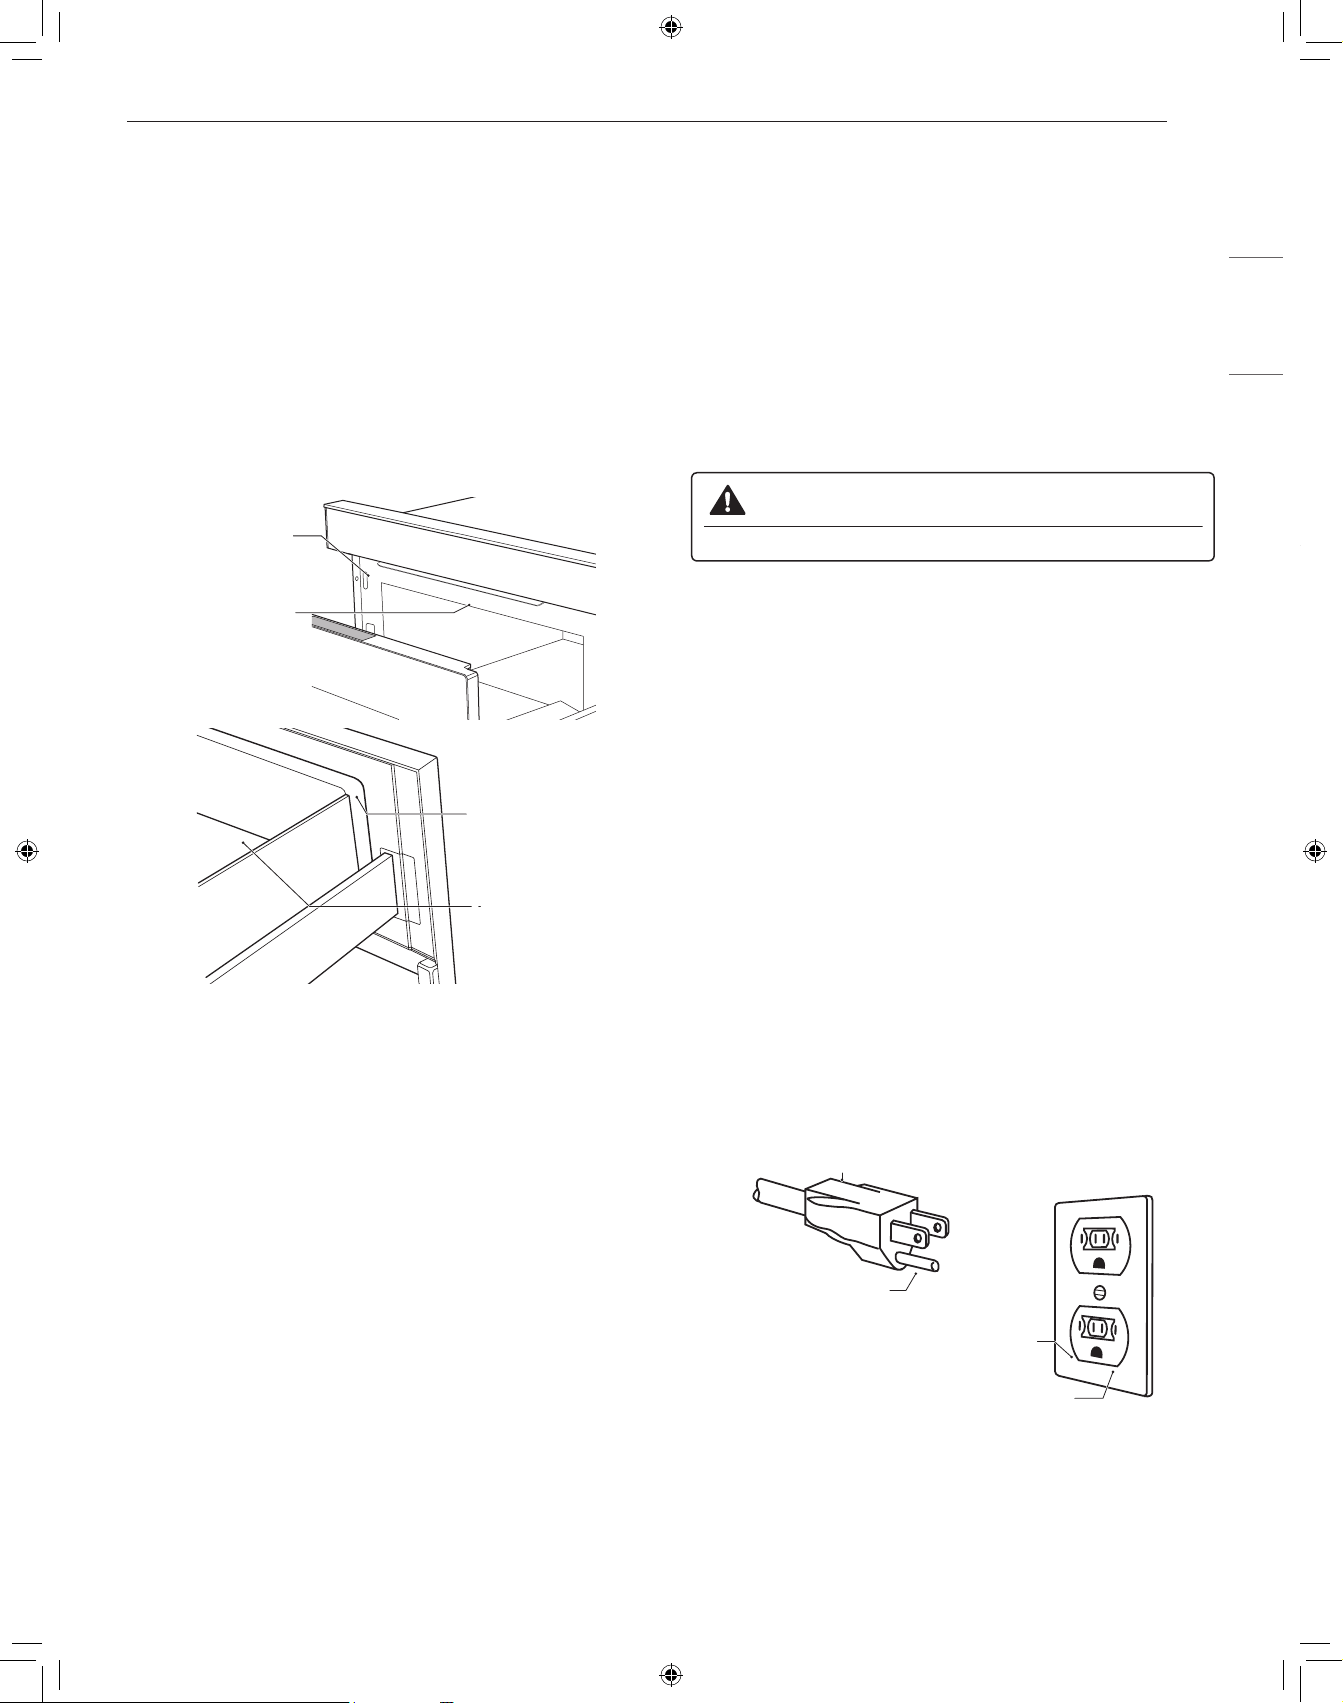
Oven
Cavity
Sealing
Surface
Sealing Surface
Waveguide
Cover
Electrical Requirements
The oven is designed to operate on a Standard 120/117 V, 60Hz
household outlet. Be sure the circuit is at least 15 A or 20 A and the
microwave oven is the only appliance on the circuit. It is not designed
for 50 Hz or any circuit other than a 120/117 V, 60Hz circuit. No other
electrical appliances or lighting circuits should be on this line. If in
doubt, consult a licensed electrician.
Voltage Warning
The voltage used at the wall socket must be the same as specified
on the oven name plate located on the back or on the side of the
control panel of the oven. Using a higher voltage is dangerous and
may result in a fire or other type of accident causing oven damage.
Low voltage will cause slow cooking. If the microwave oven does not
perform normally in spite of proper voltage, unplug and reconnect the
power cord.
Do Not Block Air Vents
All air vents should be kept clear during cooking. If air vents are
covered during oven operation the oven may overheat. To prevent
damage to the oven, a sensitive safety device detects overheating
and automatically turns the oven off. The oven cannot be used until it
has cooled sufficiently.
Grounding Instructions
This appliance must be grounded. In the event of an electrical short
circuit, grounding reduces the risk of electric shock by providing an
escape wire for the electric current. This appliance is equipped with
a cord having a grounding wire with a grounding plug. The plug must
be plugged into an outlet that is properly installed and grounded.
WARNING
• Improper use of grounding can result in a risk of electric shock.
Consult a qualified electrician or service person if the grounding
instructions are not completely understood, or if doubt exists as to
whether the appliance is properly grounded.
1. Use of an extension cord is not recommended. If the power supply
cord is too short, have a qualified electrician or service person install
an outlet near the appliance.
2. If it is necessary to use an extension cord, use only a 3-wire
extension cord that has a 3-blade grounding plug, and a 3-slot socket
that will accept the plug on the appliance. The marked rating of the
extension cord must be equal to or greater than the electrical rating
of the appliance.
NOTE
• A short power supply cord is provided to reduce the risks resulting
from becoming entangled in or tripping over a longer cord.
• Longer cord sets or extension cords are available and may be
used if care is exercised in their use.
• If a long cord or extension cord is used, (1) the marked electrical
rating of the cord set or extension cord must be at least as great
as the electrical rating of the appliance, (2) the extension cord
must be a grounding-type 3-wire cord, and (3) the longer cord
should not be draped over a counter or table where children could
pull on it, or located where it could present a trip hazard.
See below for directions on placing the cord properly.
Grounding pin
3-Prong receptacle
Grounded receptacle box
3-Prong plug
Keep the electrical power cord dry and do not pinch or crush it in any
way.

8
OPERATION
OPERATION
Cookware Guide
Microwave-Safe Cookware
Use microwavable cookware.
• Ovenproof Glass
− Ovenproof glassware that is treated for high intensity heat so it
is heat-resistant is microwave-safe.
− Use utility dishes, loaf dishes, pie plates, cake plates, liquid
measuring cups, casseroles and bowls without metal rims.
− Do not use delicate glassware, such as tumblers or wine
glasses, as these might shatter when heated.
• China: Use bowls, cups, serving plates, pottery, stoneware,
ceramic, and platters without metal rims or handles. Many
containers made of these materials are microwave-safe, but test
them before use.
• Plastic
− Plastic Storage Containers: Use plastic dishes, cups, semi-
rigid freezer containers and plastic bags only for short cooking
times. Do not use them when cooking food for long periods or
at high power levels, as the hot food will eventually warp or melt
the plastic.
− Plastic wrap (as a cover): Lay the plastic wrap loosely over
the dish and press it to the sides. Vent plastic wrap by turning
back one edge slightly to allow excess steam to escape. The
dish should be deep enough so that the plastic wrap will not
touch the food. As the food heats it may melt the plastic wrap
wherever the wrap touches the food.
− Plastic Cooking Bags: Provided they are specially made for
cooking, cooking bags are microwave safe. Remember to make
a slit in the bag so that steam can escape. Never use ordinary
plastic bags for cooking in the microwave oven, as they will melt
and rupture.
− Plastic Microwave Cookware: A variety of shapes and sizes
of microwave cookware are available. You may be able to use
items you already have on hand rather than investing in new
kitchen equipment.
• Paper
− Use paper towels, waxed paper, paper napkins, and paper
plates with no metal rims or design. Look for the manufacturer’s
label for use in the microwave oven.
− Paper plates and containers are convenient and safe to use in
the microwave oven, provided that the cooking time is short and
foods to be cooked are low in fat and moisture. Paper towels are
also very useful for wrapping foods and for lining baking trays in
which greasy foods such as bacon are cooked.
− Avoid colored paper products as the color may run. Do not
use recycled paper products in the microwave oven. They may
contain impurities which could cause arcing or fires when used
in the microwave.
• Tableware
− Many containers made of pottery, stoneware and ceramic are
also microwave-safe. If in doubt consult the manufacturer’s
literature or perform the microwave test.
− Do not put plates with painted decoration in the oven, as the
paint may contain metal and cause arcing.
Microwave-Unsafe Cookware
• Metal Containers/Metal Decoration
− Never use metal or metal-rimmed cookware in the microwave
oven.
− Microwaves cannot penetrate metal. They will bounce off
any metal object in the oven and cause arcing, an alarming
phenomenon that resembles lightning.
− Metal shields the food from microwave energy and produces
uneven cooking. Also avoid metal skewers, thermometers, foil
trays, metal-rimmed or metal-banded dinnerware, casserole
dishes, etc. The metal rim interferes with normal cooking and
may damage the oven.
• Aluminum Foil
− Avoid large sheets of aluminum foil because they hinder cooking
and may cause harmful arcing.
− Use small pieces of foil to shield poultry legs and wings.
− Keep ALL aluminum foil at least 1 inch from the side walls and
door of the oven.
• Wood
− Wood bowls and boards will dry out and may split or crack when
you use them in the microwave oven.
− Baskets react in the same way.
• Tightly Covered Cookware
− Be sure to leave openings for steam to escape from covered
containers.
− Pierce plastic pouches of vegetables or other food items before
cooking.
− Tightly closed pouches could explode.
• Brown Paper
− Avoid using brown paper bags.
− They absorb too much heat and could burn.
• Flawed or Chipped Cookware: Any container that is cracked,
flawed, or chipped may break in the oven.
• Metal Twist-Ties
− Remove metal twist-ties from plastic or paper bags.
− They become hot and could cause a fire.
Testing Cookware before Use
Most heat resistant and non-metallic cookware is safe for use in
your oven. However, some cookware may contain materials that are
not suitable for microwave use. Follow the steps below to find out if
cookware can be used in the microwave.
1
Place the container in question and a glass measuring cup filled
with water next to each other inside the oven.
2
Heat the container and glass measuring cup for 1 minute at
HIGH power.
• If the water heats up but the container remains cool to the
touch, the container is microwave-safe.
• If the temperature of the water does not change but the
container becomes warm, it is not safe for use in the
microwave oven.

9
OPERATION
ENGLISH
CAUTION
• Use cookware when heating food. Do not place food directly on
floor of oven.
• Some items with high lead or iron content are not suitable for
microwave cooking.
• Cookware should be checked to ensure that it is suitable for use
in the microwave.
• Always be careful when taking cookware out of the oven. Some
dishes absorb heat from the cooked food and may be hot.
Cooking Guide
Cooking Tips
Carefully monitor the food in the microwave oven while it is cooking.
Directions given in recipes to elevate, stir, etc., are the minimum
steps recommended. If food is overcooked (dry), undercooked, or
unevenly cooked, make adjustments before or during cooking to
correct the problem.
• Overcooked or Dry Food
− Sprinkling: Sprinkle low-moisture foods such as roasts and
vegetables with water before cooking, or cover them to retain
moisture.
− Density: Light, porous food such as cakes and breads cook
more quickly than heavy, dense foods such as roasts and
casseroles.
− Shielding: Cover the corners of square dishes with small strips
of aluminum foil to prevent overcooking. Don’t use too much foil,
and secure the foil to the dish. Foil can cause arcing if it gets too
close to the oven walls during cooking.
− Bones and Fat: Bones conduct heat, and fat cooks more
quickly than meat. Take care with bony or fatty cuts of meat.
• Undercooked Food
− Covering: Cover food with a microwave-safe lid, parchment
paper (not waxed paper), or plastic wrap to trap heat and steam
and cook food more quickly.
− Standing Time: Let food stand for several minutes after being
removed from the oven to allow it to finish cooking and help
flavors blend and develop.
− Quantity: The more food you place in the oven, the longer the
required cooking time.
− Temperature: Ice-cold ingredients take much longer to cook
than room temperature ingredients.
• Unevenly Cooked Food
− Stirring: Stir food from the outside toward the center during
cooking, as food at the outside of the dish heats more quickly.
− Arranging: Turn food over several times during cooking. The
upper portion of thick foods cooks more quickly than the lower
portion.
− Shaping: Place the thickest portions of foods like meat, poultry
or fish toward the outside of the cookware to help them cook
more evenly. If possible, shape foods into thin rounds or rings.
• Brownies
− For best results when cooking brownies, place the pan about 1
1/2 in. (38.1 mm) from the door.
Precautions
WARNING
• Do not use your microwave oven to cook eggs in the shell.
Pressure can build up inside the shell, causing it to burst.
• Never operate the oven when it is empty. Food or water should
always be in the oven during operation to absorb the microwave
energy.
• Place the front surface of the door three inches or more from the
edge of a countertop to avoid accidental tipping of the microwave
oven during normal use.
• To program the oven, press the center of each pad firmly. When a
pad is pressed correctly, a beep sounds and the oven is activated.
Do not press several pads at once.
• Do not strike the control panel with silverware, utensils, etc. It may
be damaged or broken.
• Always be careful when taking cookware out of the oven. Some
dishes absorb heat from the cooked food and may be hot. See the
Cookware Guide section for more information.
• Do not rinse containers by placing them in water immediately
after cooking. This may cause breakage. Also, always allow the
turntable to cool before removing it from the oven.
• Do not use the oven to dry newspapers or clothes. They may
catch fire.
• Use thermometers that have been approved for microwave oven
cooking.
• The turntable must always be in place when you operate the oven.
10
OPERATION
Control Panel
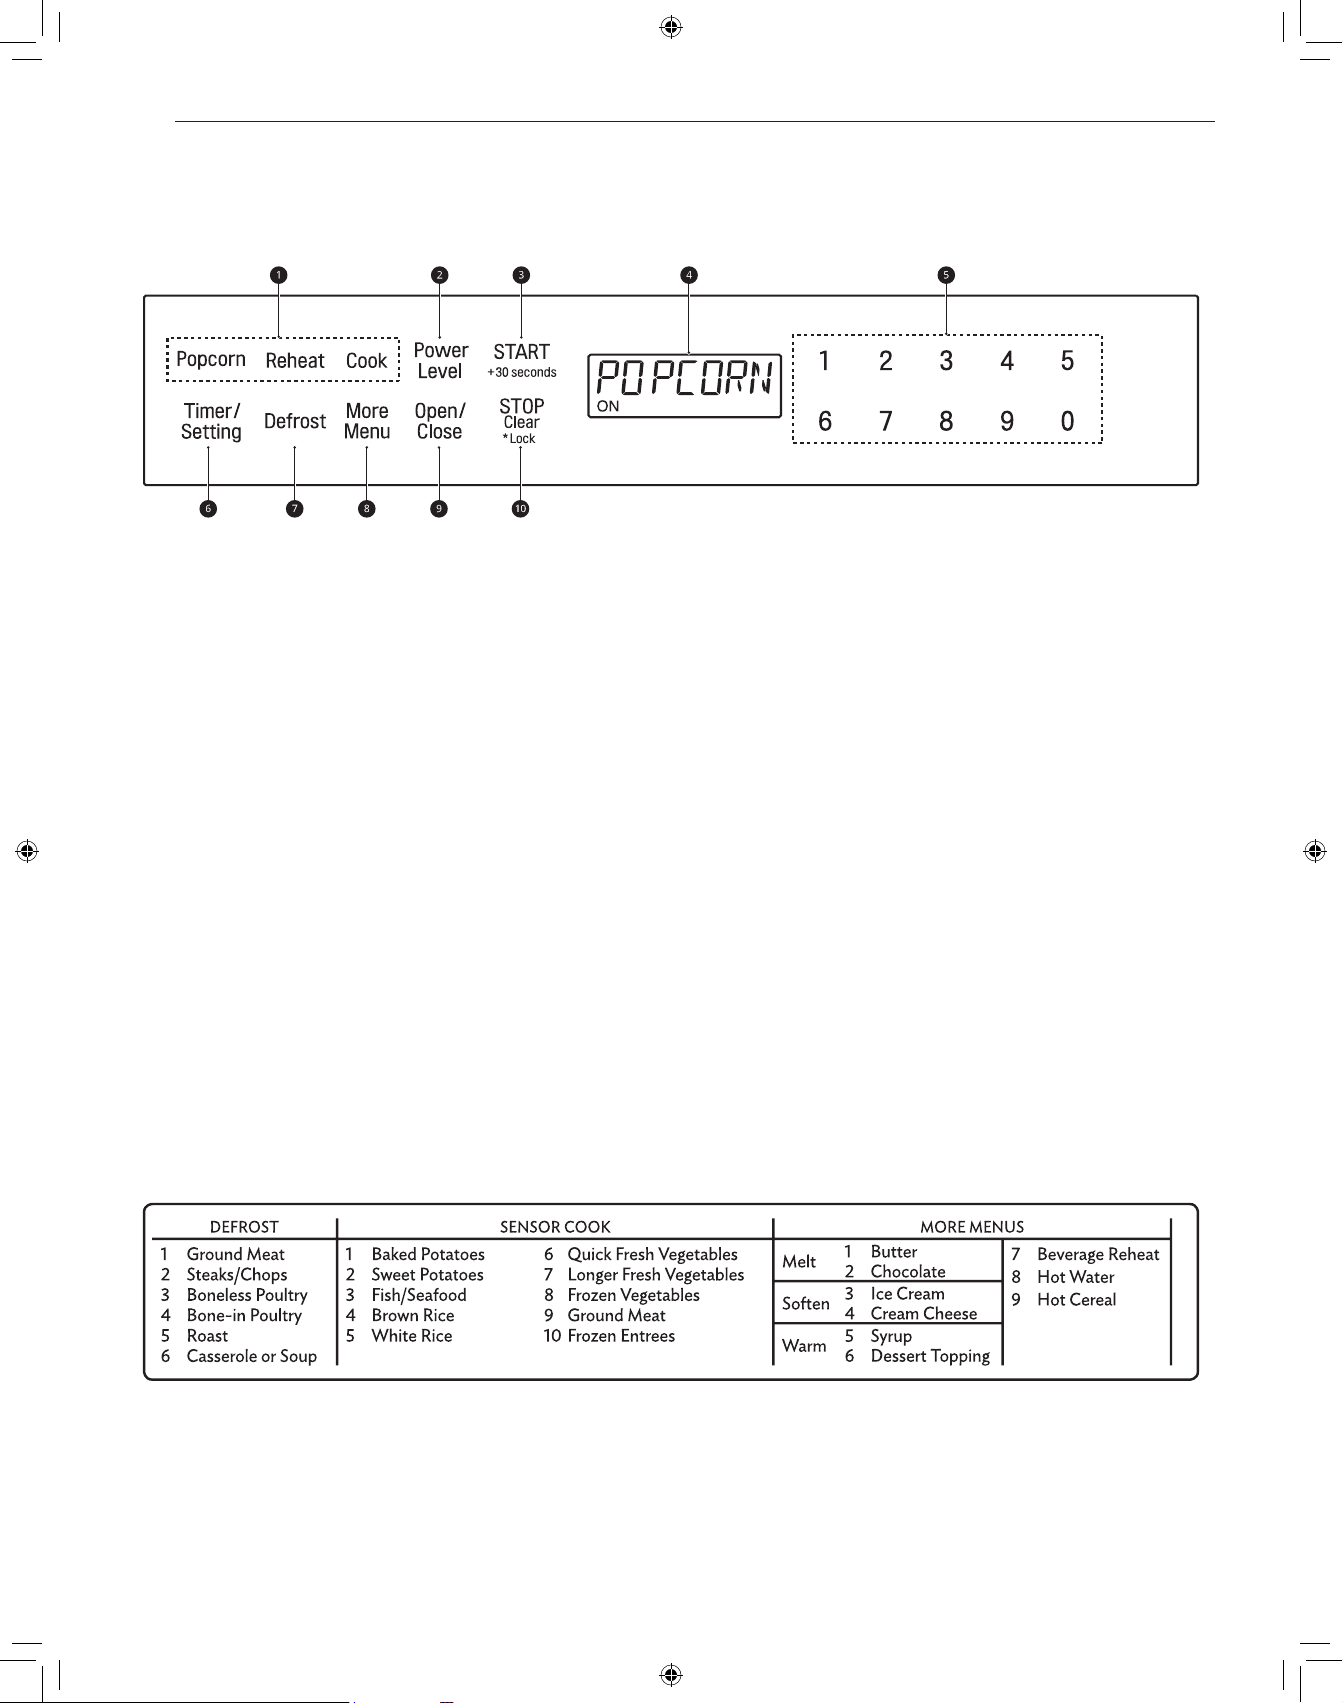
Control Panel Features
a
Sensor Operations
• Touch the buttons to select preprogrammed cook and reheat
settings for popular food items.
b
Power Level
• Touch Power Level to set a cooking power.
c
START/+30 seconds
• Touch START/+30 seconds to start the oven.
• Touch START/+30 seconds to cook at 100% cook power for
30 seconds.
• Touch START/+30 seconds during cooking to increase cook
time by 30 seconds. (Up to 99 minutes and 59 seconds)
d
Display
• Shows the time of day, cooking time settings, and selected
cooking functions.
e
Number Keys
• Touch the number keys to set cooking time, power level,
quantity, or weight.
f
Timer/Setting
• Touch Timer/Setting to use your microwave oven as a kitchen
timer.
• Touch Timer/Setting to set the time of day.
g
Defrost
• Touch this key to select food type and defrost food by weight.
h
More Menu
• Touch More Menu to melt, soften or warm the foods shown on
the Menu Label.
• Touch More Menu to reheat coffee, tea or hot cereal.
i
Open/Close
• Touch Open/Close to open or close the microwave.
j
STOP/Clear/Lock
• Touch STOP/Clear to stop the oven or clear all entries.
• Touch and hold STOP/Clear for 3 seconds to lock the control
panel.
Menu Guide
11
OPERATION
ENGLISH
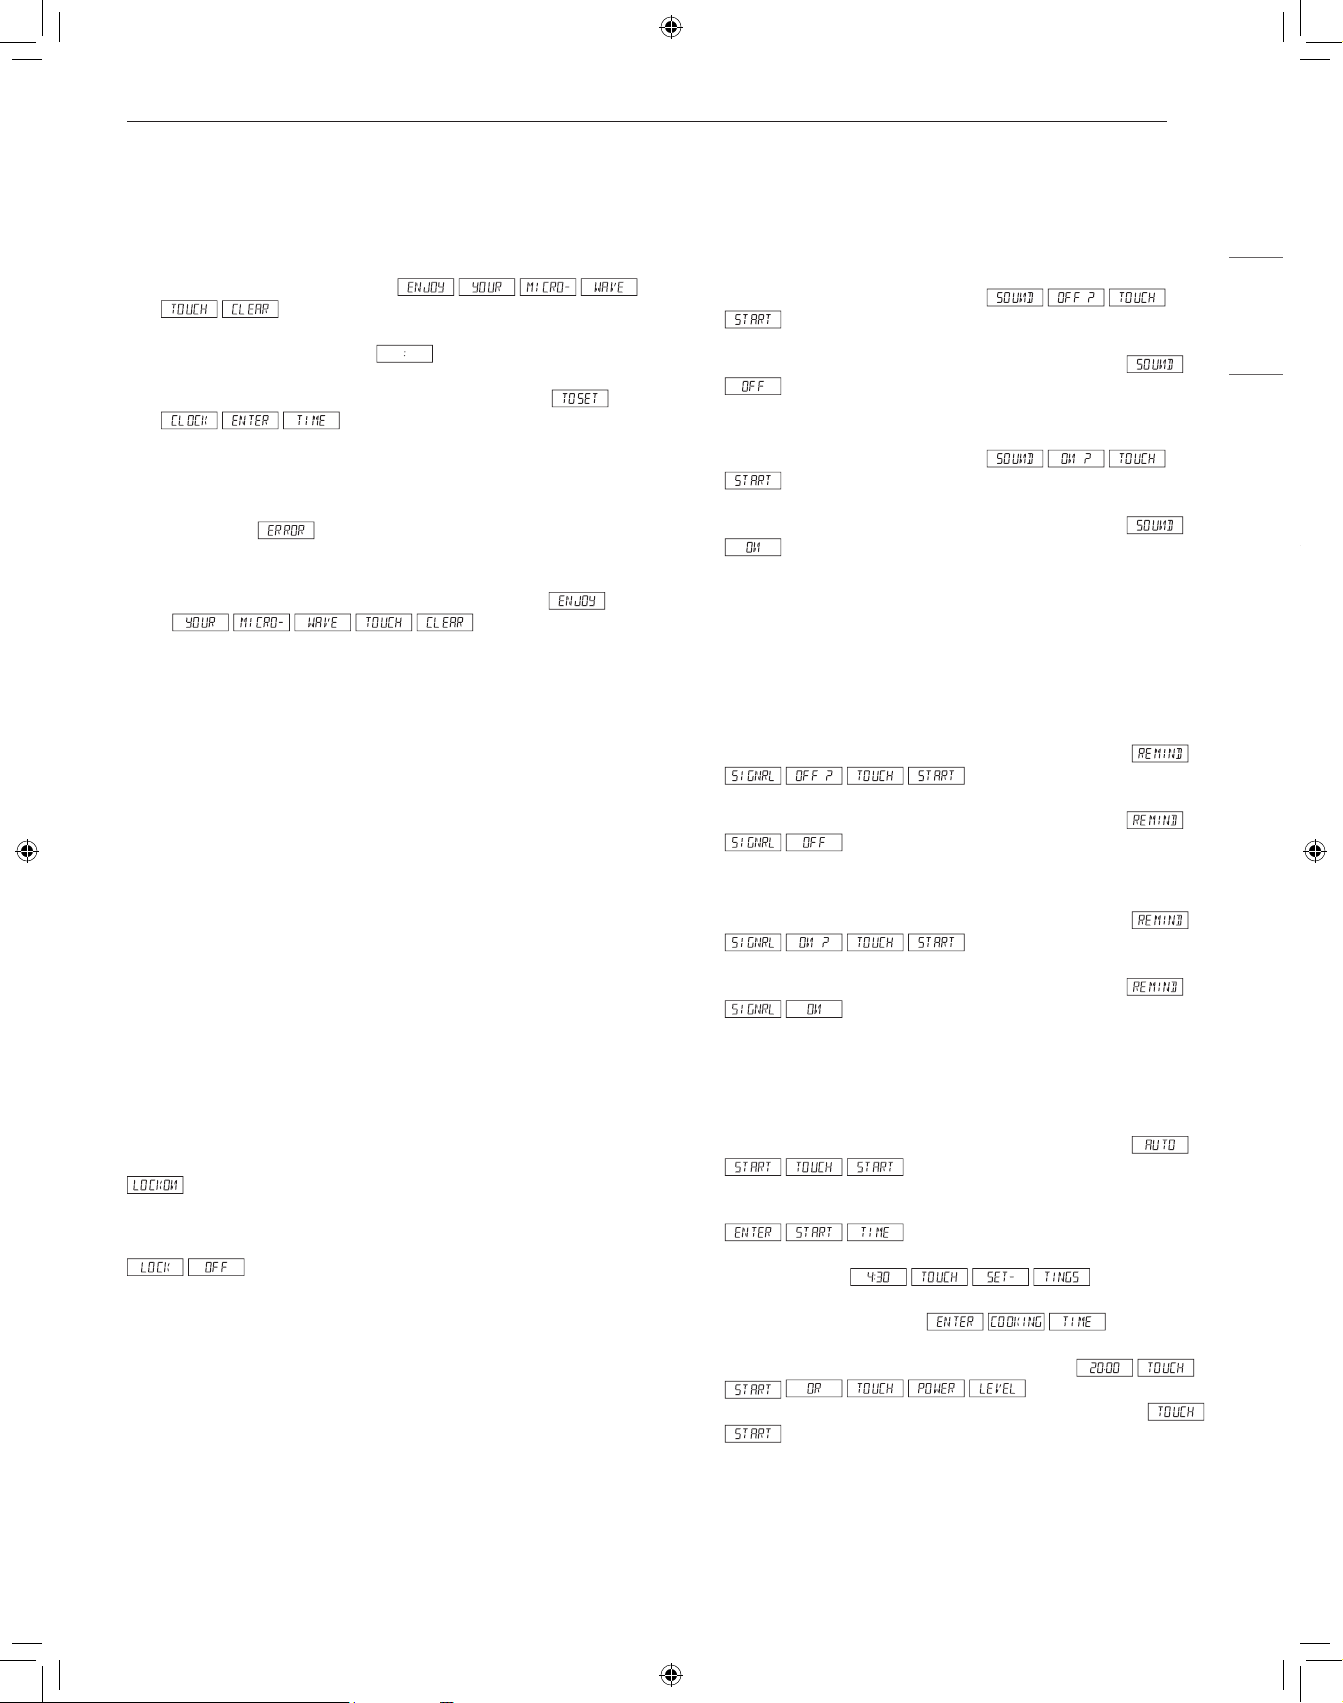
Getting Started
Setting the Clock
Set the current time to operate the microwave oven.
1
Plug in the Drawer Microwave.
will appear.
2
Touch the STOP/Clear pad. will appear.
3
Touch Timer/Setting pad twice. The display shows
.
4
Touch number pads for correct time of day and touch
START/+30 seconds pad.
• This is a 12 hour clock. If you attempt to enter an incorrect
clock time,
will appear in the display. Touch the
STOP/Clear pad and re-enter the time.
• If the electrical power supply to your Drawer Microwave should
be interrupted, the display will intermittently show
after the power is
reinstated. If this occurs during cooking, the program will be
erased. The time of day will also be erased. Simply touch
STOP/Clear pad and reset the clock for the correct time of day.
NOTE
• The Drawer Microwave can be programmed with the drawer open
except for START/+30 seconds.
Open or Close Microwave
Press the Open/Close pad on the control panel or wave twice over
top left side of the drawer to open the microwave.
• The Easy Wave only works to open the microwave, not close.
The Drawer Microwave also can be closed by gently pushing on
the drawer. Do not pull the drawer by hand, except in case of
emergency, such as a power failure. If necessary, push or pull
slowly.
Child Lock
Use this safety feature to lock the control panel before cleaning the
oven or to prevent children from unsupervised use of the oven.
Setting Child Lock to ON
Touch STOP/Clear pad and hold for 3 seconds. The display shows
.
Canceling Child Lock
Touch STOP/Clear pad and hold for 3 seconds. The display shows
.
• The Child Lock is canceled when the electrical power supply to
your oven is interrupted. Set the Child Lock again when power to
the oven is restored.
Kitchen Timer
The Timer function serves as an extra kitchen timer. It chimes when
the set time runs out. It does not start or stop cooking.
1
Touch Timer/Setting pad 3 times.
2
Enter time.
3
Touch START/+30 seconds pad.
• To cancel timer, touch STOP/Clear.
Audible Signals
At the end of timed cook, beeps will sound. The audible signal can
be turned off if you prefer quiet operation.
To Turn Sound Off
1
Touch Timer/Setting pad 4 times.
2
Touch START/+30 seconds pad. The display shows
.
To Restore Sound
1
Touch Timer/Setting pad 4 times.
2
Touch START/+30 seconds pad. The display shows
.
End of Cooking Reminder
At end of timed cooking, the microwave will signal every 10 seconds
for the first minute; then every 3 minutes until STOP/Clear pad is
touched, up to one hour.
To Turn Reminder Off
1
Touch Timer/Setting pad 5 times. The display shows
.
2
Touch START/+30 seconds pad. The display shows
.
To Turn Reminder Signal Back On
1
Touch Timer/Setting pad 5 times. The display shows
.
2
Touch START/+30 seconds pad. The display shows
.
Auto Start
If you wish to program the Drawer Microwave to begin cooking
automatically at a designated time of day, follow this procedure.
1
Touch Timer/Setting pad 6 times. The display shows
.
2
Touch START/+30 seconds pad.
3
Enter start time.
4
Touch Timer/Setting pad.
5
Touch the number pads to enter cooking time.
Touch Power Level
pad repeatedly until the desired power level is reached.
6
Touch START/+30 seconds pad.
12
OPERATION
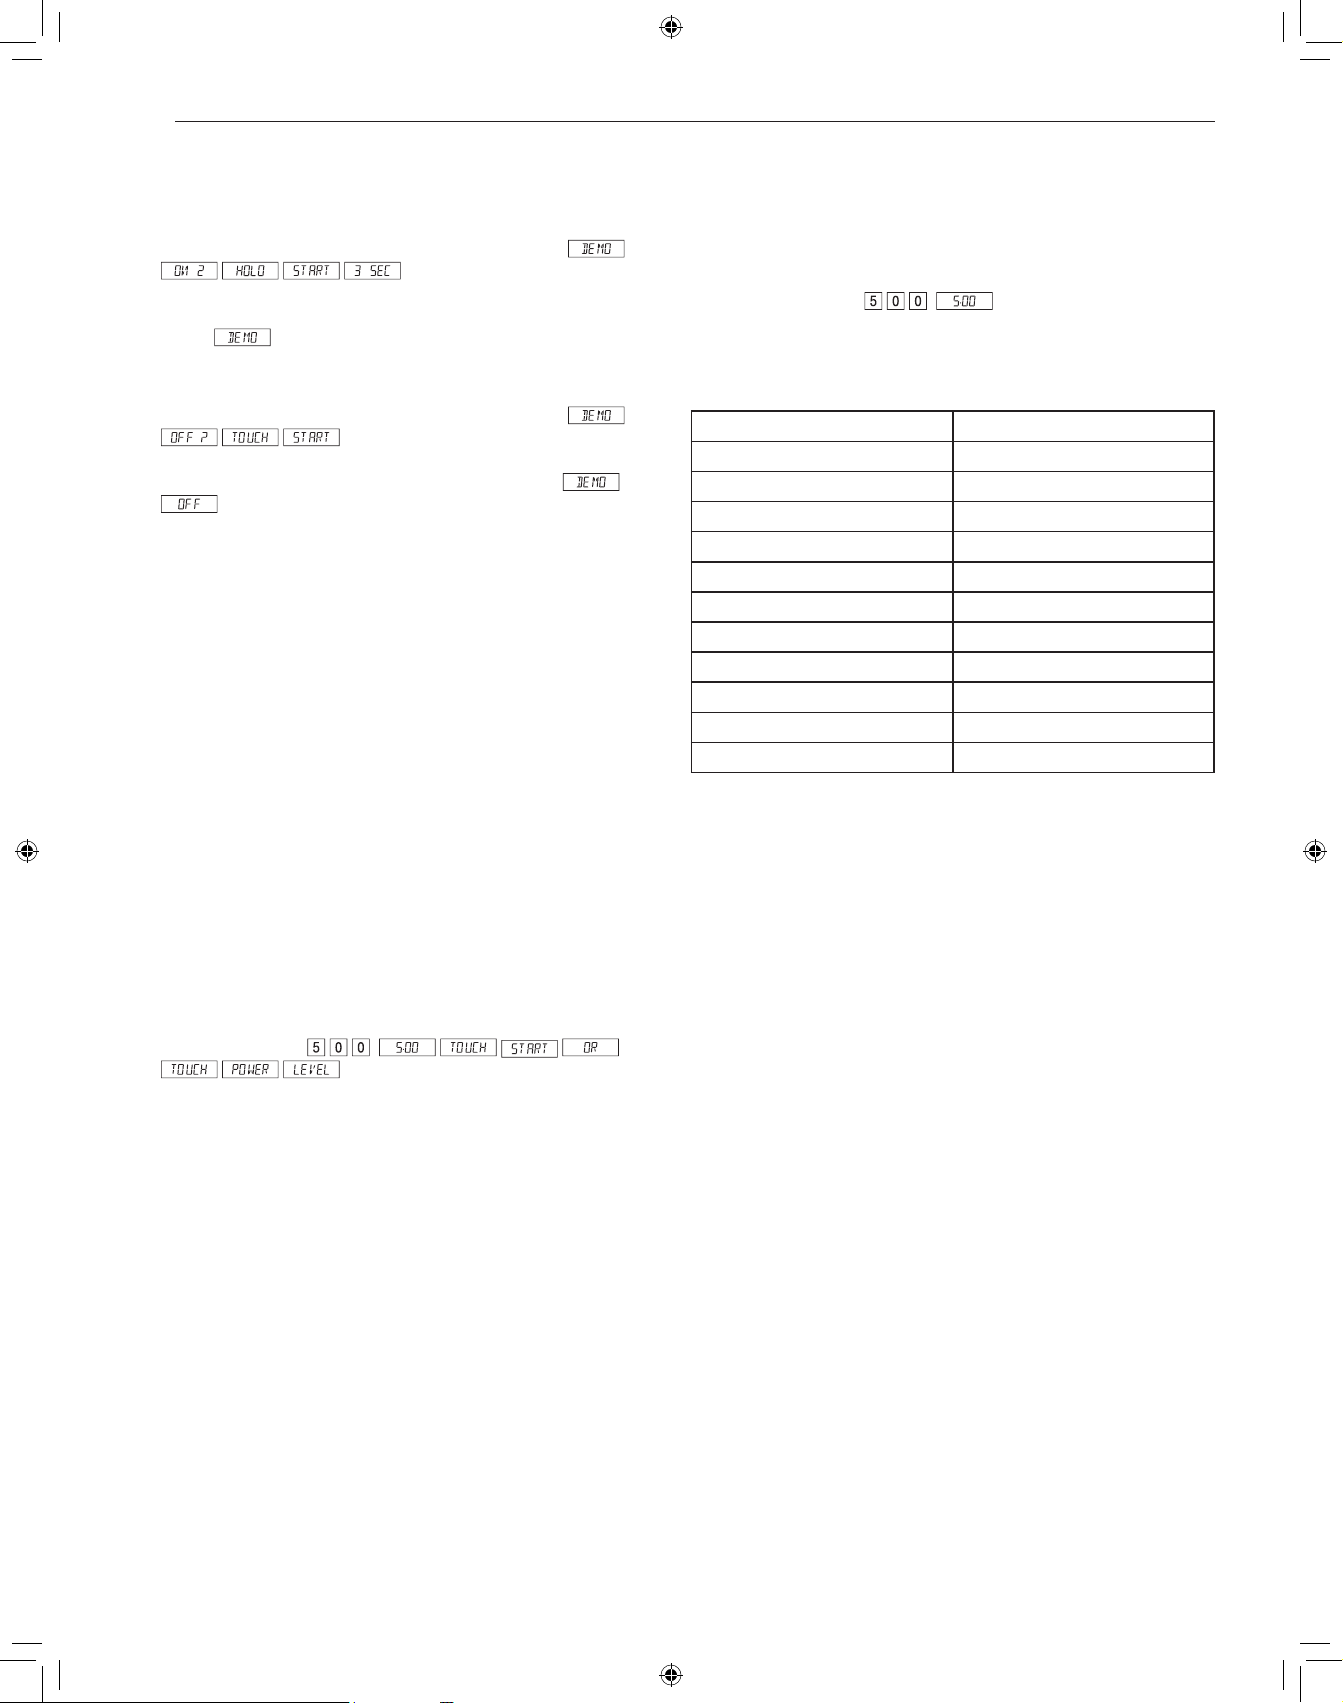
Demonstration Mode
To Select Demo Mode
1
Touch Timer/Setting pad 7 times. The display shows
.
2
Hold START/+30 seconds pad for 3 seconds. The display
shows
.
To Cancel Demo Mode
1
Touch Timer/Setting pad 7 times. The display shows
.
2
Touch START/+30 seconds pad. The display shows
.
NOTE
• Drawer Microwave doesn’t heat in Demo Mode.
• Display counts down quickly.
Energy Saving
This microwave will go into standby mode after a period of inactivity.
The backlight of the display will automatically dim after 3 minutes if
the unit has not been in operation. If the display is in standby mode,
simply touch the control panel or open/close the door to return the
backlight to maximum brightness.
Setting Manual Cooking Times
Time Cooking
Your Drawer Microwave can be programmed for 99 minutes 99
seconds (99.99). Always enter the seconds after the minutes, even if
they are both zeros.
Cooking for 5 minutes at 100%.
1
Enter cooking time .
2
To cook at 100% power (High), touch START/+30 seconds pad.
NOTE
• If a power level is not selected, the oven defaults to 100% power.
Microwave Power Levels
This microwave oven is equipped with 11 power levels to give you
maximum flexibility and control over cooking.
Defrosting for 5 minutes at 30%.
1
Enter defrost time .
2
Touch Power Level pad 8 times.
3
Touch START/+30 seconds pad.
Touch Power Level x Times Power Level
1 100% (High)
2 90%
3 80%
4 70% (Medium High)
5 60%
6 50% (Medium)
7 40%
8 30% (Med Low/Defrost)
9 20%
10 10% (Low)
11 0%
Help
Each setting of Popcorn, Reheat, Cook, Defrost and Beverage has
a cooking hint. If you wish to check, touch Timer/Setting whenever
HELP is lighted in the Interactive Display for these and other manual
operation hints.

13
OPERATION
ENGLISH
+30 seconds
+30 seconds allows you to cook for 30 seconds at 100% by simply
touching the +30 seconds pad. You can also extend cooking time
in multiples of 30 seconds by repeatedly touching the +30 seconds
pad during manual cooking.
NOTE
• To use +30 seconds, touch pad within 3 minutes after cooking,
closing the drawer or touching the STOP/Clear pad.
• +30 seconds cannot be used with Sensor Cook, Reheat, or
Defrost mode.
More or Less Time Adjustment
Should you discover that you like any of the Reheat, or Defrost
settings slightly more done, touch the Power Level pad once after
touching your selection. The display will show
.
For slightly less done, touch the Power Level pad twice after
touching your selection. The display will show
.
Multiple Sequence Cooking
Your Drawer Microwave can be programmed for up to 4 automatic
cooking sequences, switching from one power level setting to
another automatically.
Sometimes cooking directions tell you to start on one power level
and then change to a different power level. Your Drawer Microwave
can do this automatically.
1
First enter cooking time. Then touch Power Level pad once for
100% cooking or repeatedly touch Power Level pad to select a
lower power level.
2
Enter second cooking time. Repeatedly touch Power Level pad
to select desired level. You can follow this procedure up to 4
times.
3
Touch START/+30 seconds pad.
NOTE
• If Power Level pad is touched once, will be displayed.
• If 100% is selected as the final sequence, it is not necessary to
touch the Power Level pad.
• If you wish to know power level during cooking, simply touch
the Power Level pad. As long as your finger is touching the
Power Level pad, the power level will be displayed.
Using Sensor Operations
Using the Sensor Functions
The sensor features offer convenient cooking or reheating of popular
food items automatically using preprogrammed settings. The Sensor
system works by detecting built up steam so there is no need to set
cook times or power levels.
• Make sure the door remains closed.
• Opening the door or touching the STOP/Clear button before the
steam is detected will stop the process and the oven.
• Appropriate containers and coverings help assure good sensor
cooking results.
− Always use microwavable containers and cover them with lids
or vented plastic wrap.
− Never use tight-sealing plastic covers. They can prevent steam
from escaping and cause food to overcook.
− Match the amount to the size of the container.
− Fill containers at least half full for best results.
− Be sure the outside of the cooking container and the inside of
the microwave oven are dry before placing food in the oven.
Beads of moisture turning into steam can mislead the sensor.
− Wax paper: Cover dish completely; fold excess wrap under dish
to secure. If dish is wider than paper, overlaptwo pieces at least
one inch to cover.
− Be careful when removing any covering to allow steam to
escape away from you.
Using Sensor Settings
1
After the Drawer Microwave is plugged in, wait 2 minutes before
using any sensor setting.
2
Be sure the exterior of the cooking container and the interior of
the Drawer Microwave are dry. Wipe off any moisture with a dry
cloth or paper towel.
3
The sensor works with foods at normal storage temperature. For
example, popcorn would be at room temperature.
4
Any sensor selection can be programmed with More or Less
Time Adjustment.
5
More or less food than the quantity listed in the charts should be
cooked following the guidelines in any microwave cookbook.
6
During the first part of sensor use, the food name will appear
on the display. Do not open the Drawer Microwave or touch
STOP/Clear during this part of the cycle. The measurement of
vapor will be interrupted. If this occurs, an error message will
appear. To continue cooking, touch the STOP/Clear pad and
cook manually.
When the sensor detects the vapor emitted from the food, the
remainder of cooking/reheating time will appear. The Drawer
Microwave may be opened when the remaining time appears on
the display. At this time, you may stir or season food, as desired.
7
Except for Popcorn, if the sensor does not detect vapor properly
when cooking other foods,
will be displayed, and the
microwave will turn off.
14
OPERATION
8
Check food temperature after cooking. If additional time is
needed, continue to cook manually.
9
Each food has a cooking hint. Touch the Timer/Setting pad
when the HELP indicator is lighted in the display.
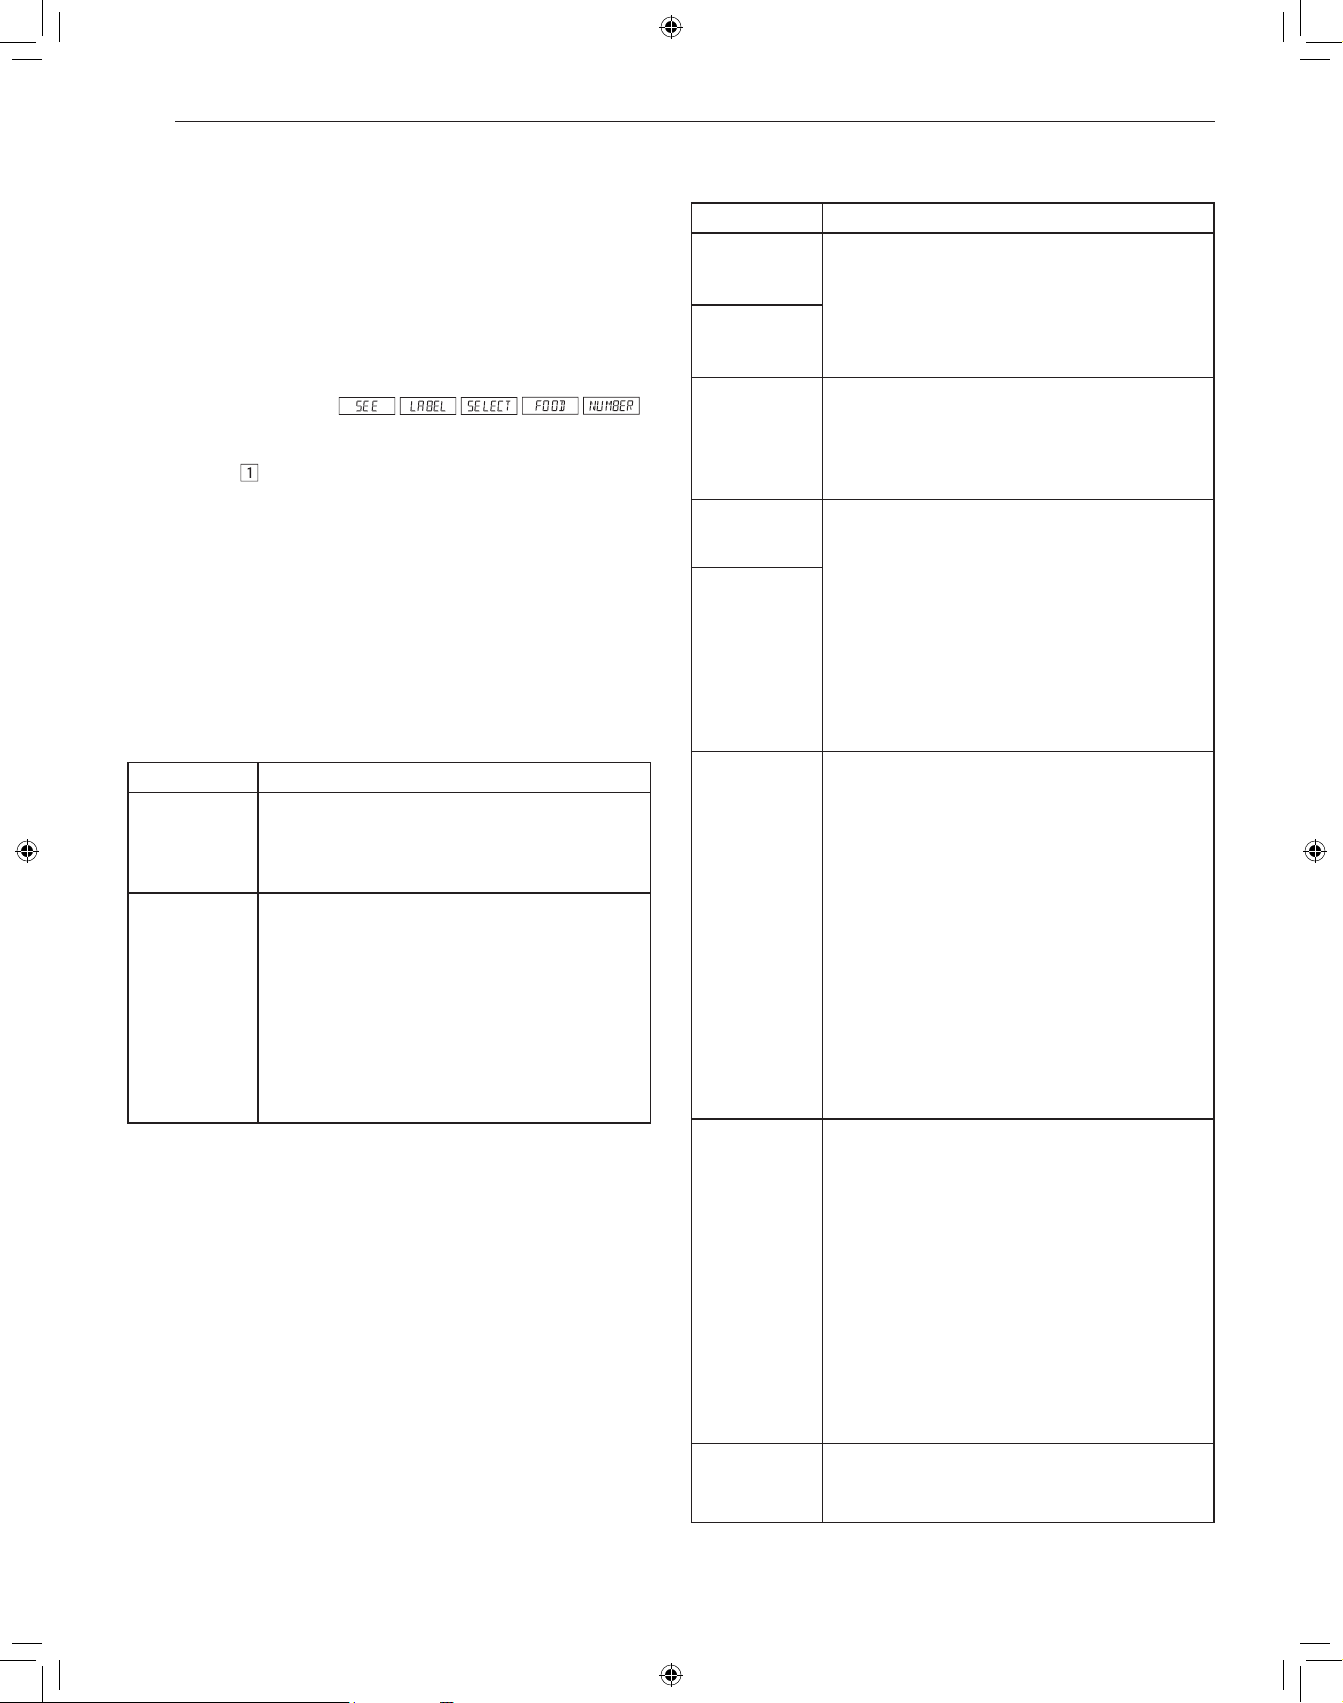
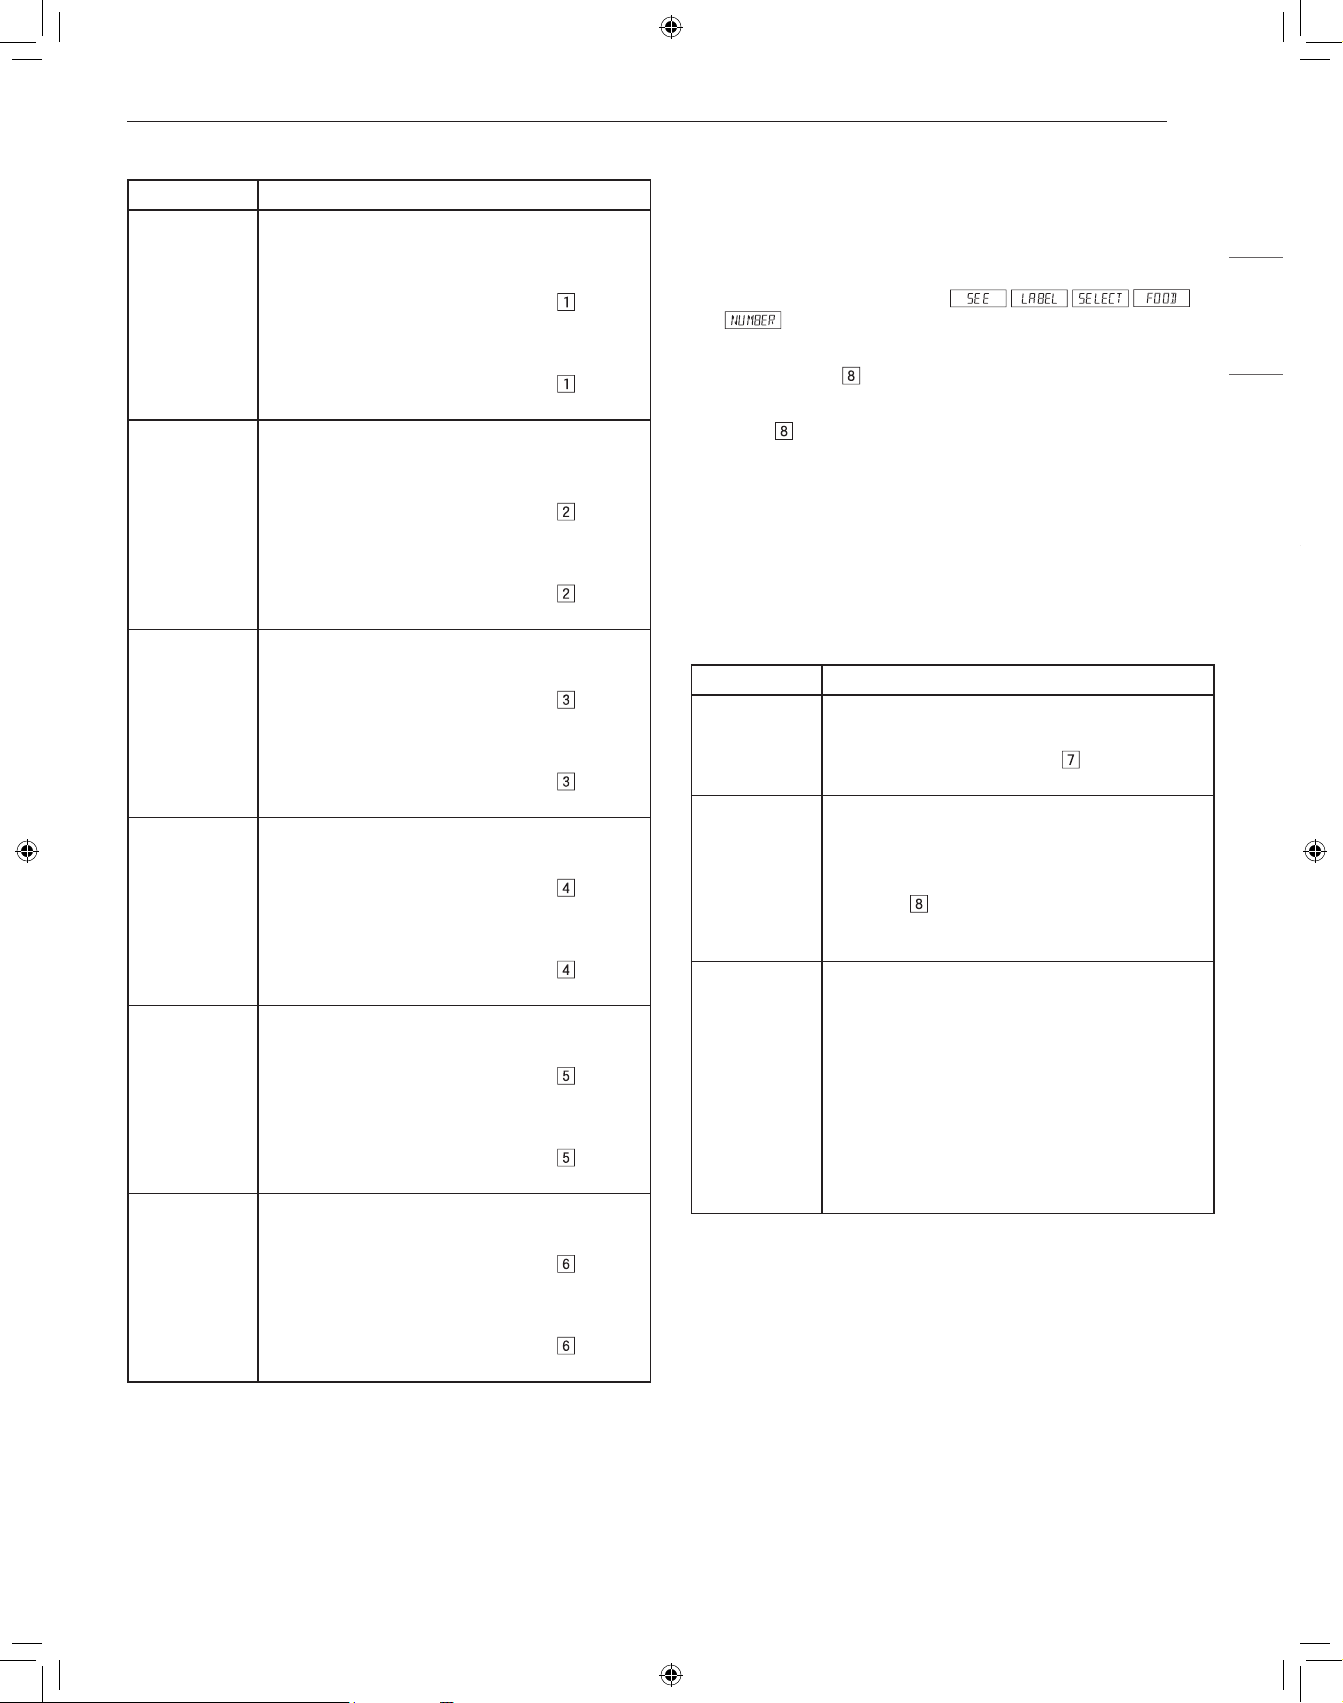
Sensor Cook Mode
Sensor Operations allows you to cook some of your favorite foods
without having to select cooking times and power levels. The oven
automatically adjusts cooking times for many food items.
1
Touch Cook pad once. .
2
See Menu Label. Select desired food by touching number pad.
Ex: Touch
for Baked Potatoes.
3
Touch START/+30 seconds pad.
NOTE
• To heat or cook other foods or foods above or below the quantity
allowed on the chart, cook manually.
• Use only popcorn packaged for the microwave. Do not try to pop
unpopped kernels.
• Only 1 package at a time.
Popcorn, Reheat Table
Menu Directions
Popcorn • Amount: 2.85 - 3.5 oz. (Regular/Regular light) -
Touch Popcorn pad once.
• Amount: 1.2 - 1.75 oz. (Mini/Snack) - Touch
Popcorn pad twice.
Reheat • Amount: 4 - 36 oz.
• Place in dish or casserole slightly larger than
amount to be reheated. Flatten, if possible.
Cover with lid, plastic wrap or wax paper. Use
covers such as plastic wrap or lids with larger
quantities of more dense foods such as stews.
After reheating, stir well, if possible. Re-cover
and allow to stand 2 to 3 minutes. Foods
should be very hot. If not, continue to heat with
variable power and time.
Cook Table
Menu Directions
1 Baked
Potatoes
• Amount: 1 - 6 med
• Pierce. Place in paper-towel-lined Drawer
Microwave. After cooking, remove from
microwave, wrap in aluminum foil and let stand
5 to 10 minutes.
2 Sweet
Potatoes
3 Fish/
Seafood
• Amount: 0.25 - 2.0 lb.
• Arrange in ring around shallow glass dish (roll
fillet with edges underneath). Cover with vented
plastic wrap. After cooking, let stand, covered
for 3 minutes.
4 Brown Rice • Amount: 0.5 - 2.0 cups
• Place rice into a deep casserole and add
double quantity of water. Cover with lid or
plastic wrap. After cooking, stir, cover and let
stand 3 to 5 minutes or until all liquid has been
absorbed.
Rice Water Size of casserole
0.5 cup..... 1 cup..... 1.5 quart
1 cup........ 2 cups... 2 quart
1.5 cups... 3 cups... 2.5 or 3 quart
2 cups...... 4 cups... 3 quart or larger
5 White Rice
6 Quick Fresh
Vegetables
Amount
• Broccoli 0.25 - 2.0 lb.
• Brussels sprouts 0.25 - 2.0 lb.
• Cabbage 0.25 - 2.0 lb.
• Cauliflower (flowerets) 0.25 - 2.0 lb.
• Cauliflower (whole) 1 med.
• Spinach 0.25 - 2.0 lb.
• Zucchini 0.25 - 2.0 lb.
• Baked apples 2 - 4 med.
• Wash and place in casserole. Add no water if
vegetables have just been washed. Cover with
lid for tender vegetables. Use plastic wrap for
tender-crisp vegetables. After cooking, stir, if
possible. Let stand, covered, for 2 to 5 minutes.
7 Longer
Fresh
Vegetables
Amount
• Carrots, sliced 0.25 - 1.0 lb.
• Corn on the cob 2 - 4
• Green beans 0.25 - 1.0 lb.
• Winter squash
− diced 0.25 - 1.0 lb.
− halves 1 - 2
• Place in casserole. Add 1 - 4 tablespoons
water. Cover with lid for tender vegetables. Use
plastic wrap cover for tender-crisp vegetables.
After cooking, stir, if possible. Let stand,
covered, for 2 to 5 minutes.
8 Frozen
Vegetables
• Amount: 0.25 - 1.25 lb.
• Add no water. Cover with lid. After cooking, stir
and let stand, covered, for 3 minutes.
15
OPERATION
ENGLISH
9 Ground Meat • Amount: 0.25 - 2.0 lb.
• Use this setting to cook ground beef or
turkey as patties or in a casserole to be
added to other ingredients. Place patties on
a microwave-safe rack and cover with wax
paper. Place ground meat in a casserole and
cover with wax paper or plastic wrap. When
microwave stops, turn patties over or stir meat
in casserole to break up large pieces. Re-cover
and touch START/+30 seconds. After cooking,
let stand, covered, for 2 to 3 minutes.
10 Frozen
Entrees
• Amount: 6 - 17 oz.
• Use this pad for frozen convenience foods. It
will give satisfactory results for most brands.
You may wish to try several and choose your
favorite. Remove package from outer wrapping
and follow package directions for covering.
After cooking, let stand, covered, for 1-3
minutes.
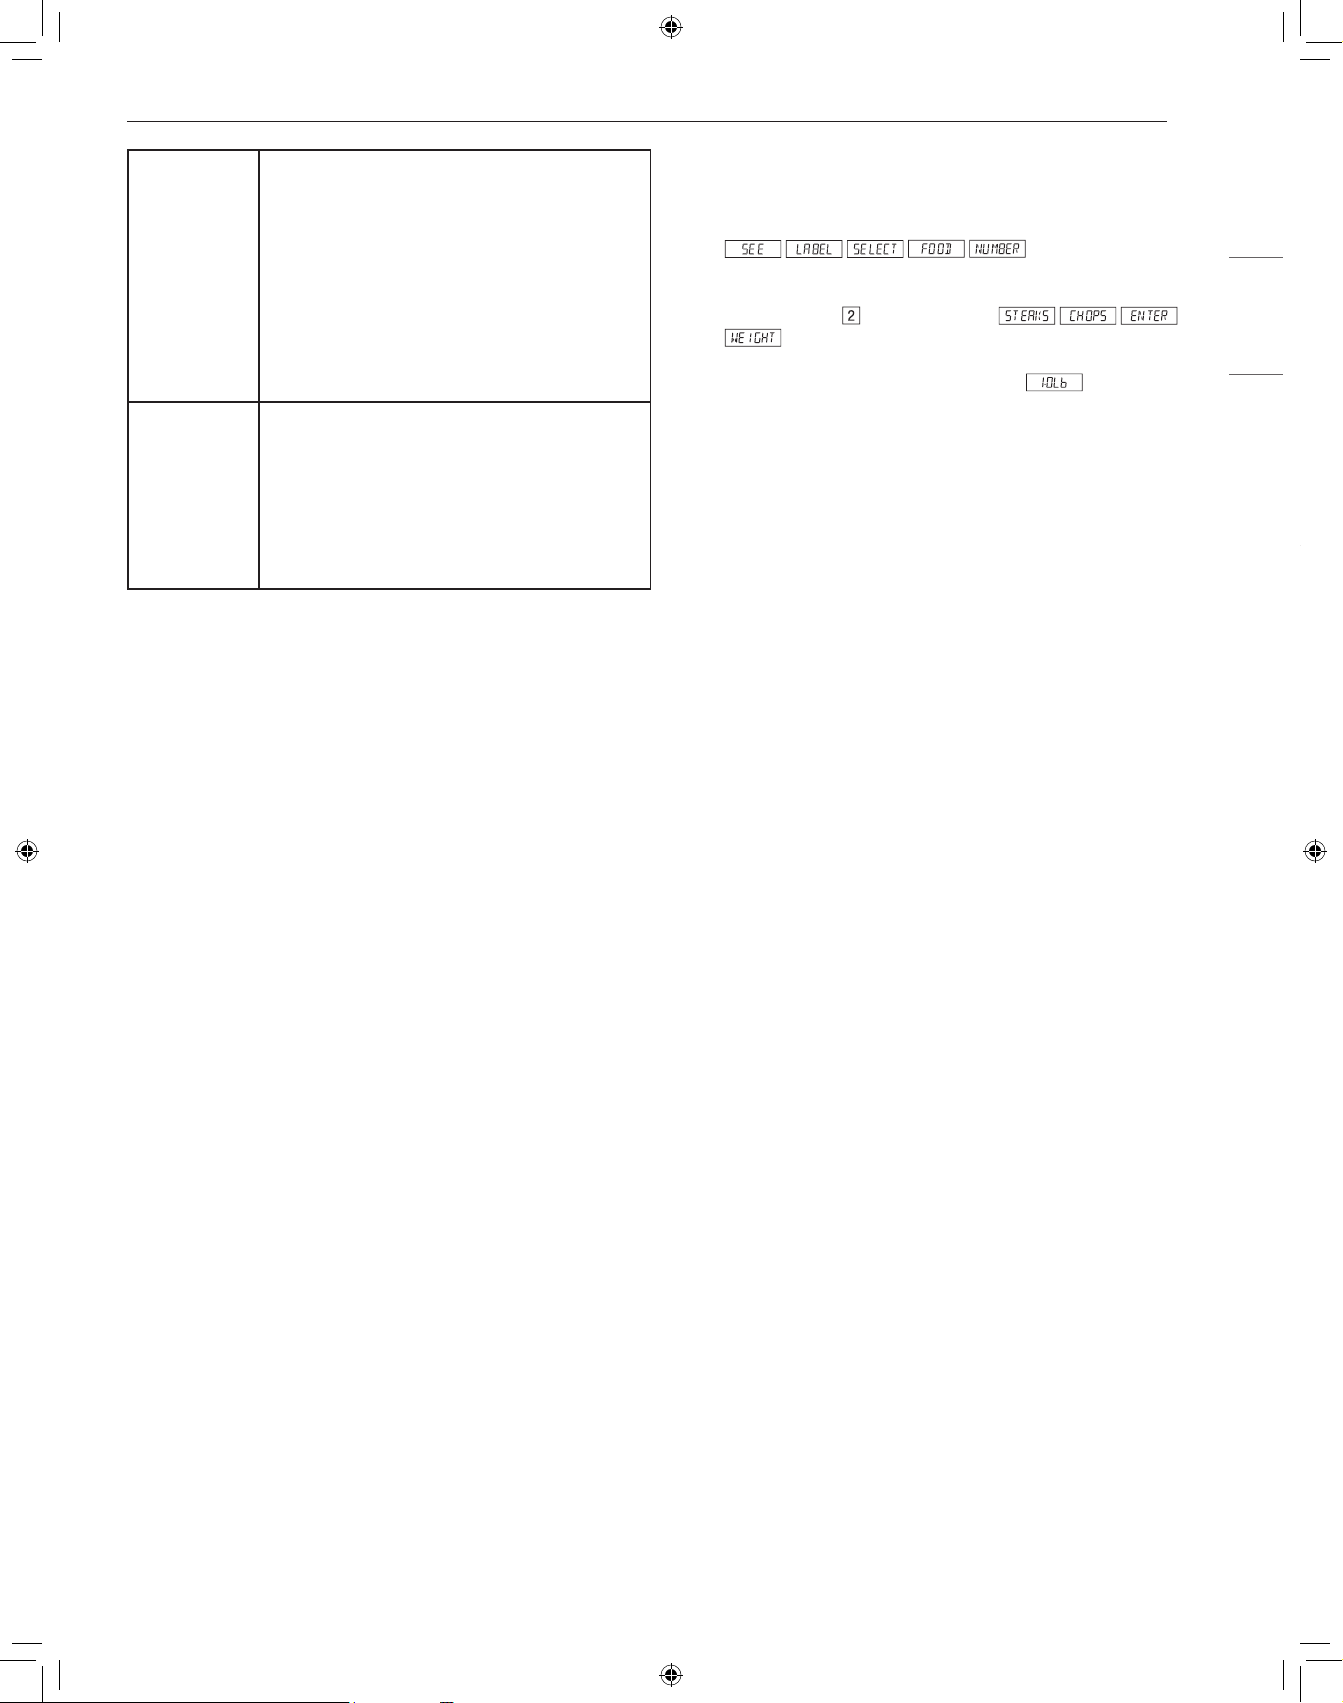
Defrost Mode
Use this feature to defrost the foods shown in the Defrost Table.
1
Touch DEFROST pad.
2
See Menu Label. Select desired food by touching the number
pad. Ex: Touch
for steaks/chops.
3
Enter weight by touching number pads.
4
Touch START/+30 seconds pad.
The oven will stop twice during the defrost cycle so that the food
can be checked.
5
After the first stage, open the Drawer Microwave. Turn
steak over and shield any warm portions. Close the Drawer
Microwave. Touch START/+30 seconds pad.
6
After the second stage, open the Drawer Microwave. Shield
any warm portions. Close the Drawer Microwave. Touch
START/+30 seconds pad.
7
After defrost cycle ends, cover and let stand as indicated in the
chart below.
Note:
• Defrost can be programmed with More or Less Time Adjustment.
• To defrost other foods or foods above or below the weights
allowed on the Defrost Table, see Manual Defrost.
• Check foods when oven signals. After final stage, small sections
may still be icy. Let stand to continue thawing. Do not cook until all
ice crystals are thawed.
• Shielding prevents cooking from occurring before the center of
the food is defrosted. Use small smooth strips of aluminum foil to
cover edges and thinner sections of the food.
Manual Defrost
If the food that you wish to defrost is not listed on the Defrost Table
or is above or below the limits in the AMOUNT column on the Defrost
Table, you need to defrost manually.
You can defrost any frozen food, either raw or previously cooked,
by setting POWER LEVEL to 30%. Follow the instructions in the
Microwave Power Levels section. Estimate defrosting time and touch
POWER LEVEL pad eight times for 30% power.
For either raw or previously cooked frozen food the rule of thumb is
approximately 4 minutes per pound. For example, defrost 4 minutes
for 1 pound of frozen spaghetti sauce.
Always stop the oven periodically to remove or separate the portions
that are defrosted. If food is not defrosted at the end of the estimated
defrosting time, program the oven in 1 minute increments on
POWER LEVEL 30% until totally defrosted.
When using plastic containers from the freezer, defrost only long
enough to remove from the plastic in order to place in a microwave-
safe dish.
16
OPERATION
Defrost Table
Menu Directions
1 Ground Meat • Amount: 0.5 - 2.0 lb
• Remove any thawed pieces after each audible
signal. Let stand, covered, for 5 to 10 minutes.
2 Chops • Amount: 0.5 - 3.0 lb
• After each audible signal, rearrange and if
there are warm or thawed portions, shield with
small flat pieces of aluminum foil. Remove any
meat or fish that is almost defrosted. Let stand,
covered, for 10 to 20 minutes.
3 Boneless
Poultry
• Amount: 0.5 - 2.0 lb
• After each audible signal, if there are warm
or thawed portions, rearrange or remove. Let
stand, covered, for 10 to 20 minutes.
4 Bone-in
Poultry
• Amount: 0.5 - 3.0 lb
• After each audible signal, rearrange pieces or
remove portions should they become warm
or thawed. Let stand, covered, for 10 to 20
minutes.
5 Roast • Amount: 2.0 - 4.0 lb
• Start defrosting with fat side down. After each
stage, turn roast over and shield the warm
portions with aluminum foil. Let stand, covered,
for 30 to 60 minutes.
6 Casserole
Soup
• Amount: 2 - 6 cups / 1 - 6 cups
• After each audible signal, break apart and
remove any defrosted part. At end, stir well and
let stand, covered, for 5 to 10 minutes.
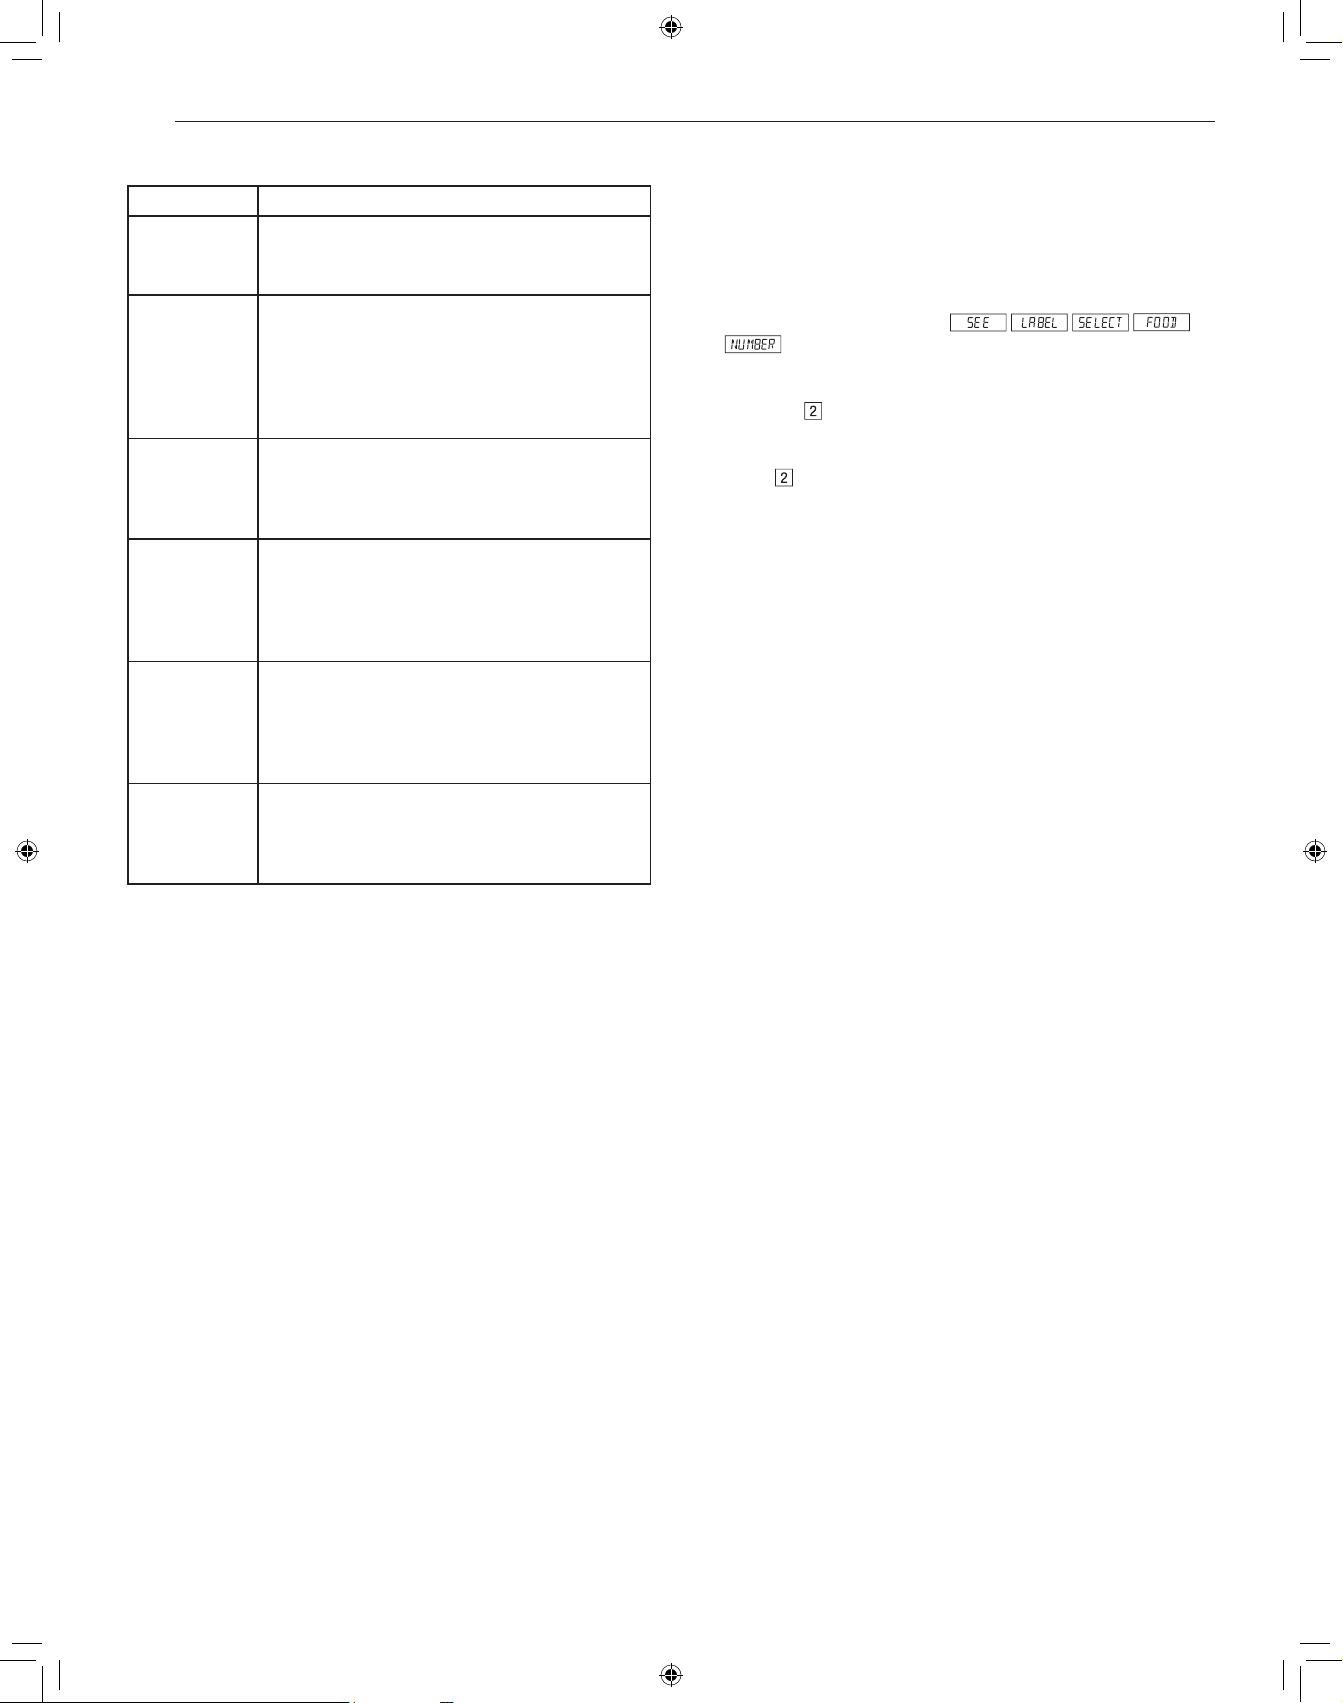
More Menu
Melt/Soften/Warm
These features automatically compute the correct heating time and
microwave power level for melting, softening and warming foods
shown in the chart.
1
Touch More Menu pad once.
2
See Menu Label. Select desired food by touching number pad.
Ex: Touch
for chocolate.
3
Repeatedly touch same number pad to select quantity. Ex:
Touch
two more times for 1 square.
4
Touch START/+30 seconds pad.
NOTE
• Melt/Soften/Warm can be programmed with More or Less Time
Adjustment.
• To melt, soften or warm other food or foods above or below the
quantity allowed on the Melt/Soften/Warm Table, use manual
operation.
17
OPERATION
ENGLISH
Melt/Soften/Warm Table
Menu Directions
Melt
1 Butter
• Use a Pyrex measuring cup. Cover with plastic
wrap.
• Amount: 2 tbsp
− After touching More Menu, touch
two
times for 2 tbsp.
• Amount: 0.5 cup
− After touching More Menu, touch
three
times for 0.5 cup.
2 Chocolate • Use a Pyrex measuring cup. Cover with plastic
wrap.
• Amount: 1 cup chips
− After touching More Menu, touch
two
times for 1 cup chips.
• Amount: 1 square (1 oz.)
− After touching More Menu, touch
three
times for 1 square.
Soften
3 Ice cream
• Do not cover.
• Amount: 1 pint
− After touching More Menu, touch
two
times for 1 pint.
• Amount: 1.5 qt.
− After touching More Menu, touch
three
times for 1.5 quart.
4 Cream
cheese
• Do not cover.
• Amount: 3 oz.
− After touching More Menu, touch
two
times for 3 oz.
• Amount: 8 oz.
− After touching More Menu, touch
three
times for 8 oz.
Warm
5 Syrup
• Use a Pyrex measuring cup. DO not cover.
• Amount: 0.25 cup
− After touching More Menu, touch
two
times for 0.25 cup.
• Amount: 0.5 cup
− After touching More Menu, touch
three
times for 0.5 cup.
6 Dessert
Toppings
• Use a Pyrex measuring cup. DO not cover.
• Amount: 0.25 cup
− After touching More Menu, touch
two
times for 0.25 cup.
• Amount: 0.5 cup
− After touching More Menu, touch
three
times for 0.5 cup.
Beverage Reheat
These features enable you to reheat coffee or tea to restore it to a
more suitable drinking temperature or to make instant coffee, tea or
hot cereal.
To Heat 2 Cups of Coffee
1
Touch More Menu pad once.
2
See Menu Label. Select desired menu item by touching number
pad. Ex: Touch
to make coffee.
3
Repeatedly touch same number pad to select quantity. Ex:
Touch
two more times for 2 cups of coffee.
4
Touch START/+30 seconds pad.
NOTE
• Beverage Reheat can be programmed with More or Less Time
Adjustment.
• Should you attempt to enter more or less than the allowed amount,
an error message will appear in the display.
Beverage Reheat Table
Menu Directions
7 Beverage
Reheat
• Amount: 0.5 - 2 cups
• Use this setting to reheat hot beverages that
have cooled. Touch number
pad for a 0.5
cup increase per touch. Stir after heating.
8 Hot Water • Amount: 1 - 6 cups
• Use this setting for heating COLD TAP WATER
to a temperature somewhat below the boiling
point to make instant coffee or tea. Touch
number
pad for 1 cup increase per touch.
Stir liquid briskly before and after heating to
avoid sudden boilover.
9 Hot Cereal • Amount: 1 - 6 servings
• Use individual packets or bulk cereal in your
favorite variety: oatmeal, oat bran, farina, etc.
Follow the package directions for the correct
amount of water or milk. To prevent boilovers,
it is very important to choose a large container
because microwave cooking of cereal causes
high boiling. Touch number 9 pad for 1 serving
increase per touch. If the oven stops, stir and
touch START/+30 seconds After cooking, stir
and let stand, covered, for 2 minutes.
Defrosting Tips
• Remove fish, shellfish, meat, and poultry from its original wrapping
paper or plastic package. Otherwise, the wrap close to the foods
will hold steam and heat, which can cause the outer surface of the
foods to be cooked.
• Remove any metal twist-ties.
• Always slit or pierce plastic pouches or packaging.
• Open containers such as cartons before they are placed in the
oven.
• If food is foil wrapped, remove foil and place the food in a suitable
container.
• The length of defrosting time varies depending on the shape of the
food and on how solidly the food is frozen.

18
OPERATION
• As food begins to defrost, separate the food into pieces so that
they can defrost more easily.
• Turn over food during defrosting or standing time. Separate into
pieces and remove food as required.
• Let food stand after defrosting. Food should still be somewhat icy
in the center when removed from the oven.
Weight Conversion Table
Most food weights are given in pounds and ounces. If using pounds,
food weights must be entered into Auto Defrost in pounds and tenths
of pounds (decimals).
Use the following table if necessary to convert food weights to
decimals.
Equivalent Weight
OUNCES DECIMAL WEIGHT
1.6 0.10
3.2 0.20
4.8 0.30
6.4 0.40
8.0 0.50 One-Half Pound
9.6 0.60
11.2 0.70
12.8 0.80
14.4 0.90
16.0 1.00 One Pound

19
MAINTENANCE
ENGLISH
MAINTENANCE
Cleaning
Keep the oven clean inside and outside. Take special care to keep
the inner door panel and the front frame free of food or grease build
up. Clean your oven weekly or more often, if needed.
NOTE
• Abrasive cleansers, steel wool pads, gritty wash cloths, some
paper towels, etc., can damage the control panel and the interior
and exterior of the oven.
Exterior
The outside surface is precoated metal and glass. Clean the outside
with mild soap and water; rinse and dry with a soft cloth. Do not use
any type of household or abrasive cleaner.
Stainless Steel Surface
The exterior should be wiped often with a soft damp cloth and
polished with a soft dry cloth to maintain its beauty. There are also
a variety of products designed especially for cleaning and shining
the stainless exterior of the oven. We recommend that the cleaner
be applied to a soft cloth and then carefully used on the stainless
exterior rather than sprayed directly on to it. Follow package
directions carefully.
Front Side of the Drawer
Wipe the window on both sides with a soft damp cloth to remove
any spills or spatters. Metal parts will be easier to maintain if wiped
frequently with a soft damp cloth. Avoid the use of spray and other
harsh cleaners as they may stain, streak or dull the drawer surface.
Touch Control Panel
If desired, the touch pads may be deactivated before cleaning. See
the Child Lock information. Wipe the panel with a cloth dampened
slightly with water only. Dry with a soft cloth. Do not scrub or use
any sort of chemical cleaners. Close drawer and follow directions for
turning Child Lock off. Touch STOP/Clear.
Interior
Before cleaning the Drawer Microwave, touch and hold the
STOP/Clear button for 3 seconds to lock the control pad and the
automatic door mechanism. The drawer can be locked in either
the open or closed position. The display will show . This
will prevent the drawer from accidentally opening or closing during
cleaning. After cleaning, touch and hold the STOP/Clear button for 3
seconds to turn the lock off. The display will show
.
Cleaning is easy because no heat is generated to the interior
surfaces; therefore, there is no baking and setting of spills or
spattering. To clean the interior surfaces, including drawer sealing
surfaces, wipe with a soft damp cloth. DO NOT USE ABRASIVE
OR HARSH CLEANERS OR SCOURING PADS. For heavier soil,
use mild soap; wipe clean with a soft damp cloth. Do not use any
chemical oven cleaners.
Drawer Microwave Guides
Remove the food crumbs from the Drawer Microwave guides. Wipe
with a soft dry cloth in order to keep the Drawer Microwave opening
and closing smoothly.
Waveguide Cover
The waveguide cover, located on the inside top of the Drawer
Microwave area, is made from mica, so it requires special care.
Keep the waveguide cover clean to assure good microwave
performance. Carefully wipe with a soft damp cloth any food
spatters from the surface of the cover immediately after they
occur. Built-up splashes may overheat and cause smoke or
possibly catch fire. Do not remove the waveguide cover.
Odor Removal
Occasionally, a cooking odor may remain in the Drawer Microwave.
To remove odor, combine 1 cup water, grated peel and juice of one
lemon and several whole cloves in a 2-cup glass microwave-safe
measuring cup. Boil for several minutes using 100% power. Leave
in the Drawer Microwave until water cools. Wipe interior with a soft
cloth.
20
TROUBLESHOOTING
TROUBLESHOOTING
Before Calling for Service
Operation
Save time and money by checking the following before calling for service.
Symptoms Possible Causes & Solution
Part or all of Drawer Microwave does not operate. Power cord of Drawer Microwave is not completely connected to the electrical
outlet.
• Make sure the power cord is tightly connected to the outlet.
Power outage.
• Check house lights to be sure. Call your local electric company for service.
Fuse/circuit breaker at home doesn’t work.
• Replace the fuse or reset the circuit breaker.
Drawer Microwave is in Demo Mode.
• Refer to Demo Mode section.
Food in Drawer Microwave is not heated. No power to the appliance.
• Plug in power cord.
Drawer controls improperly set.
• Check if the controls have been properly set.
Drawer is in Demo Mode.
• Refer to Demo Mode section.
Drawer Microwave light does not work. Light bulb is loose or burned out.
• Call for service.
Touch controls will not operate. Child Lock is on.
• Refer to Child Lock section.
Display flashes. Power failure.
• Touch Clear pad and reset the clock. If the Drawer Microwave was in use, you must
reset the cooking function.
Steam from the vent During microwaving, water vapor may come from the left side of the vent (when
facing the microwave).
21
LIMITED WARRANTY
ENGLISH
LIMITED WARRANTY
USA
TERMS AND CONDITIONS
ARBITRATION NOTICE: THIS LIMITED WARRANTY CONTAINS AN ARBITRATION PROVISION THAT REQUIRES YOU AND SIGNATURE
KITCHEN SUITE, A DIVISION OF LG ELECTRONICS, TO RESOLVE DISPUTES BY BINDING ARBITRATION INSTEAD OF IN COURT,
UNLESS YOU CHOOSE TO OPT OUT. IN ARBITRATION, CLASS ACTIONS AND JURY TRIALS ARE NOT PERMITTED. PLEASE SEE
THE SECTION TITLED “PROCEDURE FOR RESOLVING DISPUTES” BELOW.
Should your SIGNATURE KITCHEN SUITE Microwave Oven (“Product”) fail due to a defect in materials or workmanship under normal
and proper use, during the warranty period set forth below, SIGNATURE KITCHEN SUITE will, at its option, repair or replace the
Product. This limited warranty is valid only to the original retail purchaser of the Product (“You”) and applies only when purchased
lawfully and used within the United States including U.S. Territories.
WARRANTY PERIOD
SIGNATURE KITCHEN SUITE Microwave Oven SIGNATURE KITCHEN SUITE Magnetron
Three (3) years from the date of original retail purchase. Ten (10) years from the date of original retail purchase
Parts and Labor (internal/functional parts only excluding magnetron) Parts only (You are responsible for any applicable labor cost)
• Replacement Products and parts are warranted for the remaining portion of the original warranty period or ninety (90) days, whichever is
greater.
• Replacement Products and parts may be new, reconditioned, refurbished, or otherwise factory remanufactured.
• Replaced Product or part(s) will be the property of SIGNATURE KITCHEN SUITE.
• Proof of original retail purchase specifying the Product model and date of purchase is required to obtain warranty service under this limited
warranty.
• Warranty start date will be ninety (90) days from manufacture date absent valid proof of purchase.
EXCEPT TO THE EXTENT PROHIBITED BY APPLICABLE LAW, ANY IMPLIED WARRANTY OF MERCHANTABILITY OR FITNESS FOR
A PARTICULAR PURPOSE ON THE PRODUCT IS LIMITED IN DURATION TO THE DURATION OF THE ABOVE LIMITED WARRANTY.
UNDER NO CIRCUMSTANCES SHALL SIGNATURE KITCHEN SUITE OR ITS U.S. DISTRIBUTORS/DEALERS BE LIABLE FOR
ANY INDIRECT, INCIDENTAL, CONSEQUENTIAL, SPECIAL, OR PUNITIVE DAMAGES, INCLUDING, WITHOUT LIMITATION, LOST
GOODWILL, LOST REVENUES OR PROFITS, WORK STOPPAGE, IMPAIRMENT OF OTHER GOODS, COST OF REMOVAL AND
REINSTALLATION OF THE PRODUCT, LOSS OF USE, OR ANY OTHER DAMAGES WHETHER BASED IN CONTRACT, TORT, OR
OTHERWISE. SIGNATURE KITCHEN SUITE’S TOTAL LIABILITY, IF ANY, SHALL NOT EXCEED THE PURCHASE PRICE PAID BY YOU
FOR THE PRODUCT.
SOME STATES DO NOT ALLOW THE EXCLUSION OR LIMITATION OF INCIDENTAL OR CONSEQUENTIAL DAMAGES OR LIMITATIONS
ON HOW LONG AN IMPLIED WARRANTY LASTS, SO THE ABOVE EXCLUSIONS OR LIMITATIONS MAY NOT APPLY TO YOU. THIS
LIMITED WARRANTY GIVES YOU SPECIFIC LEGAL RIGHTS AND YOU MAY ALSO HAVE OTHER RIGHTS THAT VARY FROM STATE TO
STATE.
THIS LIMITED WARRANTY DOES NOT COVER:
• Service trips to deliver, pick up, or install, educate how to operate, correct wiring, or correct unauthorized repairs.
• Damage or failure of the Product to perform during power failures and interrupted or inadequate electrical service.
• Damage or failure of the Product resulting from operating the Product in a corrosive atmosphere or contrary to the Product owner’s manual.
• Damage or failure of the Product caused by accidents, pests and vermin, lightning, wind, fire, floods, acts of nature, or any other causes
beyond the control of SIGNATURE KITCHEN SUITE.
• Damage or failure of the Product caused by unauthorized modification or alteration, or if the Product is used for other than the intended
purpose.
• Damage or failure of the Product caused by incorrect electrical current, voltage, or ventilation codes.
• Damage or failure of the Product caused by transportation, storage, and/or handling, including scratches, dents, chips, and/or other damage
to the finish of the Product, unless such damage is reported within one (1) week of delivery.
• Damage or missing items to any display, open box, or discounted Product.
• Refurbished Product or any Product sold “As Is”, “Where Is”, “With all Faults”, or similar disclaimer.
• Products with original serial numbers that have been removed, altered, or cannot be readily determined.
• Increases in utility costs and additional utility expenses.
• Any noises associated with normal operation.

22
LIMITED WARRANTY
• Products used for other than normal and proper household use (e.g. commercial or industrial use, offices, and recreational facilities or
vehicles) or contrary to the Product owner’s manual.
• Costs associated with removal and reinstallation of the Product for repairs.
• Replacement of light bulbs, filters, or any consumable parts.
• The removal and reinstallation of the Product if it is installed in an inaccessible location or is not installed in accordance with the Product
owner’s manual.
• Damage or failure of the Product resulting from misuse, abuse, improper installation, repair, or maintenance. Improper repair includes the use
of parts not authorized by SIGNATURE KITCHEN SUITE. Improper installation or maintenance includes installation or maintenance contrary
to the Product owner’s manual.
• Damage or failure of the Product caused by the use of parts, components, accessories, consumable cleaning products, any other products,
or services that are not authorized by SIGNATURE KITCHEN SUITE.
• Shelves, drawers, handle and accessories, except for internal/functional parts covered under this limited warranty.
The cost of repair or replacement under these excluded circumstances shall be borne by You.
TO OBTAIN WARRANTY SERVICE AND ADDITIONAL INFORMATION
Call 1-855-790-6655 and select the appropriate option from the menu.
Or visit our website at http://www.signaturekitchensuite.com
Or by mail: SIGNATURE KITCHEN SUITE, Attn: Customer Service, P.O. Box 240007, Huntsville, AL 35813
PROCEDURE FOR RESOLVING DISPUTES:
ALL DISPUTES BETWEEN YOU AND SIGNATURE KITCHEN SUITE ARISING OUT OF OR RELATING IN ANY WAY TO THIS LIMITED
WARRANTY OR THE PRODUCT SHALL BE RESOLVED EXCLUSIVELY THROUGH BINDING ARBITRATION, AND NOT IN A COURT OF
GENERAL JURISDICTION. BINDING ARBITRATION MEANS THAT YOU AND SIGNATURE KITCHEN SUITE ARE EACH WAIVING THE
RIGHT TO A JURY TRIAL AND TO BRING OR PARTICIPATE IN A CLASS ACTION.
Definitions. For the purposes of this section, references to “SIGNATURE KITCHEN SUITE” mean Signature Kitchen Suite, a division of
LG Electronics U.S.A., Inc., its parents, subsidiaries and affiliates, and each of their officers, directors, employees, agents, beneficiaries,
predecessors in interest, successors, assigns and suppliers; references to “dispute” or “claim” shall include any dispute, claim or controversy
of any kind whatsoever (whether based in contract, tort, statute, regulation, ordinance, fraud, misrepresentation or any other legal or equitable
theory) arising out of or relating in any way to the sale, condition or performance of the product or this Limited Warranty.
Notice of Dispute. In the event you intend to commence an arbitration proceeding, you must first notify SIGNATURE KITCHEN SUITE in
writing at least 30 days in advance of initiating the arbitration by sending a letter to SIGNATURE KITCHEN SUITE at Signature Kitchen Suite
Attn: Legal Department- Arbitration 1000 Sylvan Ave, Englewood Cliffs 07632. You and SIGNATURE KITCHEN SUITE agree to engage in good
faith discussions in an attempt to amicably resolve your claim. The notice must provide your name, address, and telephone number; identify
the product that is the subject of the claim; and describe the nature of the claim and the relief being sought. If you and SIGNATURE KITCHEN
SUITE are unable to resolve the dispute within 30 days, either party may proceed to file a claim for arbitration.
Agreement to Binding Arbitration and Class Action Waiver. Upon failure to resolve the dispute during the 30 day period after sending
written notice to SIGNATURE KITCHEN SUITE, you and SIGNATURE KITCHEN SUITE agree to resolve any claims between us only by
binding arbitration on an individual basis, unless you opt out as provided below. Any dispute between you and SIGNATURE KITCHEN SUITE
shall not be combined or consolidated with a dispute involving any other person’s or entity’s product or claim. More specifically, without limitation
of the foregoing, any dispute between you and SIGNATURE KITCHEN SUITE shall not under any circumstances proceed as part of a class or
representative action. Instead of arbitration, either party may bring an individual action in small claims court, but that small claims court action
may not be brought on a class or representative basis.
Arbitration Rules and Procedures. To begin arbitration of a claim, either you or SIGNATURE KITCHEN SUITE must make a written demand
for arbitration. The arbitration will be administered by the American Arbitration Association (“AAA”) and will be conducted before a single
arbitrator under the AAA’s Consumer Arbitration Rules that are in effect at the time the arbitration is initiated (referred to as the “AAA Rules”)
and under the procedures set forth in this section. The AAA Rules are available online at www.adr.org/consumer. Send a copy of your written
demand for arbitration, as well as a copy of this provision, to the AAA in the manner described in the AAA Rules. You must also send a copy
of your written demand to SIGNATURE KITCHEN SUITE at Signature Kitchen Suite Attn: Legal Department- Arbitration 1000 Sylvan Avenue
Englewood Cliffs, NJ 07632. If there is a conflict between the AAA Rules and the rules set forth in this section, the rules set forth in this section
will govern. This arbitration provision is governed by the Federal Arbitration Act. Judgment may be entered on the arbitrator’s award in any court
of competent jurisdiction. All issues are for the arbitrator to decide, except that issues relating to the scope and enforceability of the arbitration
provision and to the arbitrability of the dispute are for the court to decide. The arbitrator is bound by the terms of this provision.
Governing Law. The law of the state of your residence shall govern this Limited Warranty and any disputes between us except to the extent
that such law is preempted by or inconsistent with applicable federal law.

23
LIMITED WARRANTY
ENGLISH
Fees/Costs. You do not need to pay any fee to begin an arbitration. Upon receipt of your written demand for arbitration, SIGNATURE KITCHEN
SUITE will promptly pay all arbitration filing fees to the AAA unless you seek more than $25,000 in damages, in which case the payment of
these fees will be governed by the AAA Rules. Except as otherwise provided for herein, SIGNATURE KITCHEN SUITE will pay all AAA filing,
administration and arbitrator fees for any arbitration initiated in accordance with the AAA Rules and this arbitration provision. If you prevail in the
arbitration, SIGNATURE KITCHEN SUITE will pay your attorneys’ fees and expenses as long as they are reasonable, by considering factors
including, but not limited to, the purchase amount and claim amount. Notwithstanding the foregoing, if applicable law allows for an award of
reasonable attorneys’ fees and expenses, an arbitrator can award them to the same extent that a court would. If the arbitrator finds either the
substance of your claim or the relief sought in the demand is frivolous or brought for an improper purpose (as measured by the standards set
forth in Federal Rule of Civil Procedure 11(b)), then the payment of all arbitration fees will be governed by the AAA Rules. In such a situation,
you agree to reimburse SIGNATURE KITCHEN SUITE for all monies previously disbursed by it that are otherwise your obligation to pay under
the AAA Rules. Except as otherwise provided for, SIGNATURE KITCHEN SUITE waives any rights it may have to seek attorneys’ fees and
expenses from you if SIGNATURE KITCHEN SUITE prevails in the arbitration.
Hearings and Location. If your claim is for $25,000 or less, you may choose to have the arbitration conducted solely on the basis of (1)
documents submitted to the arbitrator, (2) through a telephonic hearing, or (3) by an in-person hearing as established by the AAA Rules. If your
claim exceeds $25,000, the right to a hearing will be determined by the AAA Rules. Any in-person arbitration hearings will be held at a location
within the federal judicial district in which you reside unless we both agree to another location or we agree to a telephonic arbitration.
Opt Out. You may opt out of this dispute resolution procedure. If you opt out, neither you nor SIGNATURE KITCHEN SUITE can require the
other to participate in an arbitration proceeding. To opt out, you must send notice to SIGNATURE KITCHEN SUITE no later than 30 calendar
days from the date of the first consumer purchaser’s purchase of the product by either: (i) sending an e-mail to [email protected], with the
subject line: “Arbitration Opt Out” or (ii) calling 1-855-790-6655. You must include in the opt out e-mail or provide by telephone: (a) your name
and address; (b) the date on which the product was purchased; (c) the product model name or model number; and (d) the serial number (the
serial number can be found (i) on the product; or (ii) online by accessing https://www.signaturekitchensuite.com/us/support/repair-service/
schedule-repair continued and clicking on “Find My Model & Serial Number”).
You may only opt out of the dispute resolution procedure in the manner described above (that is, by e-mail or telephone); no other form of notice
will be effective to opt out of this dispute resolution procedure.
Opting out of this dispute resolution procedure will not affect the coverage of the Limited Warranty in any way, and you will continue to enjoy
the full benefits of the Limited Warranty. If you keep this product and do not opt out, then you accept all terms and conditions of the arbitration
provision described above.

24
LIMITED WARRANTY
LIMITED WARRANTY
CANADA
TERMS AND CONDITIONS
ARBITRATION NOTICE: THIS LIMITED WARRANTY CONTAINS AN ARBITRATION PROVISION THAT REQUIRES YOU AND SIGNATURE
KITCHEN SUITE, A DIVISION OF LG ELECTRONICS, TO RESOLVE DISPUTES BY BINDING ARBITRATION INSTEAD OF IN COURT,
UNLESS THE LAWS OF YOUR PROVINCE OR TERRITORY DO NOT PERMIT THAT, OR, IN OTHER JURISDICTIONS, IF YOU CHOOSE
TO OPT OUT. IN ARBITRATION, CLASS ACTIONS AND JURY TRIALS ARE NOT PERMITTED. PLEASE SEE THE SECTION TITLED
“PROCEDURE FOR RESOLVING DISPUTES” BELOW.
Should your SIGNATURE KITCHEN SUITE Microwave (“Product”) fail due to a defect in materials or workmanship under normal and proper
use, during the warranty period set forth below, Signature Kitchen Suite, a division of LG Electronics Canada, Inc. will, at its option, repair or
replace the Product upon receipt of proof of the original retail purchase. This limited warranty is valid only to the original retail purchaser of the
Product and applies only to a Product distributed, purchased and used within Canada, as determined at the sole discretion of SIGNATURE
KITCHEN SUITE.
WARRANTY PERIOD: (Note: If the original date of purchase cannot be verified, the warranty will begin sixty (60) days from the date
of manufacture).
Over-the-Range / All Convection /
Microwaves in Built-in application / All other
Microwave Oven
Extended Component Warranty (Parts Only)
Three (3) years from the date of original retail
purchase.
Five (5) years from the date of original retail
purchase
Ten (10) years from the date of original retail
purchase
Parts and Labor (In-Home ; OTR &
Convection) (internal/functional parts only)
Magnetron Only Inverter Magnetron Only
• Replacement products and parts are warranted for the remaining portion of the original warranty period or ninety (90) days, whichever is
greater.
• Replacement products and parts may be new, reconditioned, refurbished, or otherwise factory remanufactured, all at the sole discretion of
SIGNATURE KITCHEN SUITE.
• Proof of original retail purchase specifying the Product model and date of purchase is required to obtain warranty service under this Limited
Warranty.
SIGNATURE KITCHEN SUITE’S SOLE LIABILITY IS LIMITED TO THE LIMITED WARRANTY SET OUT ABOVE. EXCEPT AS EXPRESSLY
PROVIDED ABOVE, SIGNATURE KITCHEN SUITE MAKES NO, AND HEREBY DISCLAIMS, ALL OTHER WARRANTIES AND
CONDITIONS RESPECTING THE PRODUCT, WHETHER EXPRESS OR IMPLIED, INCLUDING BUT NOT LIMITED TO, ANY IMPLIED
WARRANTY OR CONDITION OF MERCHANTABILITY OR FITNESS FOR A PARTICULAR PURPOSE, AND NO REPRESENTATIONS
SHALL BE BINDING ON SIGNATURE KITCHEN SUITE. SIGNATURE KITCHEN SUITE DOES NOT AUTHORIZE ANY PERSON TO
CREATE OR ASSUME FOR IT ANY OTHER WARRANTY OBLIGATION OR LIABILITY IN CONNECTION WITH THE PRODUCT. TO THE
EXTENT THAT ANY WARRANTY OR CONDITION IS IMPLIED BY LAW, IT IS LIMITED TO THE WARRANTY PERIOD SET OUT ABOVE.
UNDER NO CIRCUMSTANCES SHALL SIGNATURE KITCHEN SUITE, THE MANUFACTURER OR DISTRIBUTOR OF THE PRODUCT, BE
LIABLE FOR ANY INCIDENTAL, CONSEQUENTIAL, SPECIAL, DIRECT, INDIRECT, PUNITIVE OR EXEMPLARY DAMAGES, INCLUDING,
WITHOUT LIMITATION, LOSS OF GOODWILL, LOST PROFITS, LOSS OF ANTICIPATED PROFITS, LOST REVENUE, LOSS OF USE,
OR ANY OTHER DAMAGE, WHETHER ARISING DIRECTLY OR INDIRECTLY FROM ANY CONTRACTUAL BREACH, FUNDAMENTAL
BREACH, TORT OR OTHERWISE, OR FROM ANY ACTS OR OMISSIONS. SIGNATURE KITCHEN SUITE’S TOTAL LIABILITY, IF ANY,
SHALL NOT EXCEED THE PURCHASE PRICE PAID BY YOU FOR THE PRODUCT.
This Limited Warranty gives you specific legal rights. You may also have other rights that vary from province to province depending on
applicable provincial laws. Any term of this Limited Warranty that negates or varies any implied condition or warranty under provincial law is
severable where it conflicts with such provincial law without affecting the remainder of this warranty’s terms.
THIS LIMITED WARRANTY DOES NOT COVER:
• Service trips to i) deliver, pick up, or install or; educate on how to operate the Product; ii) correct wiring or plumbing; or iii) correct
unauthorized repairs or installations of the Product;
• Damage or failure of the Product to perform during power failures and interrupted or inadequate electrical service;
• Damage or failure resulting from operating the Product in a corrosive atmosphere or contrary to the instructions outlined in the Product’s
owner’s manual;
• Damage or failure to the Product caused by accidents, pests and vermin, lightning, wind, fire, floods, acts of God, or any other causes
beyond the control of SIGNATURE KITCHEN SUITE or the manufacturer;
• Damage or failure resulting from misuse, abuse, improper installation, repair, or maintenance of the Product. Improper repair includes use of
parts not authorized or specified by SIGNATURE KITCHEN SUITE. Improper installation or maintenance includes installation or maintenance
contrary to the Product’s owner’s manual;.

25
LIMITED WARRANTY
ENGLISH
• Damage or failure caused by unauthorized modification or alteration of the Product, or if used for other than the intended household purpose/
use of the Product, or damage or failure resulting from any water leakage due to improper installation of the Product;
• Damage or failure caused by incorrect electrical current, voltage or plumbing codes;
• Damage or failure caused by use that is other than normal household use, including, without limitation, commercial or industrial use, including
use in commercial offices or recreational facilities, or as otherwise outlined in the Product’s owner’s manual;
• Damage or failure caused by transportation and handling, including scratches, dents, chips and/or other damage to the finish of the Product,
unless such damage results from defects in materials or workmanship and is reported to SIGNATURE KITCHEN SUITE within one (1) week
of delivery of the Products;
• Damage or missing items to any display, open box, refurbished or discounted Product;
• Refurbished Product or any Product sold “As Is”, “Where Is”, “With all Faults”, or any similar disclaimer;
• Products with original serial numbers that have been removed, altered or cannot be readily determined at the discretion of SIGNATURE
KITCHEN SUITE;
• Increases in utility costs and additional utility expenses in any way associated with the Product;
• Any noises associated with normal operation of the Product;
• Replacement of light bulbs, filters, fuses or any other consumable parts;
• Replacement of any part that was not originally included with the Product;
• Costs associated with removal and/or reinstallation of the Product for repairs; and
• Shelves, drawers, handle and accessories to the Product, except for internal/functional parts covered under this Limited Warranty.
• Coverage for “in Home” repairs, for products in-warranty, will be provided if the Product is within a 150 km radius from the nearest authorized
service center (ASC), as determined by SIGNATURE KITCHEN SUITE. If your Product is located outside a 150 km radius from a ASC, as
determined by SIGNATURE KITCHEN SUITE, it will be your responsibility to bring the Product, at your sole expense, to the ASC for in-
warranty repair.
All costs and expenses associated with the above excluded circumstances, listed under the heading, This Limited Warranty Does Not
Cover, shall be borne by the consumer.
TO OBTAIN WARRANTY SERVICE AND ADDITIONAL INFORMATION, PLEASE CALL OR VISIT OUR WEBSITE: Call 1-888-289-2802 (7
A.M. to 12 A.M., 365 days a year) and select the appropriate option from the menu, or visit our website at https://www.signaturekitchensuite.
com/ca
PROCEDURE FOR RESOLVING DISPUTES:
EXCEPT WHERE PROHIBITED AT LAW, ALL DISPUTES BETWEEN YOU AND SIGNATURE KITCHEN SUITE ARISING OUT OF OR
RELATING IN ANY WAY TO THIS LIMITED WARRANTY OR THE PRODUCT SHALL BE RESOLVED EXCLUSIVELY THROUGH BINDING
ARBITRATION, AND NOT IN A COURT OF GENERAL JURISDICTION. EXCEPT WHERE PROHIBITED AT LAW, YOU AND SIGNATURE
KITCHEN SUITE BOTH IRREVOCABLY AGREE TO WAIVE THE RIGHT TO A JURY TRIAL AND TO BRING OR PARTICIPATE IN A CLASS
ACTION.
Definitions. For the purposes of this section, references to “SIGNATURE KITCHEN SUITE” mean Signature Kitchen Suite, a division of
LG Electronics Canada, Inc., its parents, subsidiaries and affiliates, and each of their officers, directors, employees, agents, beneficiaries,
predecessors in interest, successors, assigns and suppliers; references to “dispute” or “claim” shall include any dispute, claim or controversy
of any kind whatsoever (whether based in contract, tort, statute, regulation, ordinance, fraud, misrepresentation or any other legal or equitable
theory) arising out of or relating in any way to the sale, condition or performance of the product or this Limited Warranty.
Notice of Dispute. In the event you intend to commence an arbitration proceeding, you must first notify SIGNATURE KITCHEN SUITE in
writing at least 30 days in advance of initiating the arbitration by sending a letter to SIGNATURE KITCHEN SUITE Legal Team at 20 Norelco
Drive, North York, Ontario, Canada M9L 2X6 (the “Notice of Dispute”). You and SIGNATURE KITCHEN SUITE agree to engage in good faith
discussions in an attempt to amicably resolve your claim. The notice must provide your name, address, and telephone number; identify the
product that is the subject of the claim; and describe the nature of the claim and the relief being sought. If you and SIGNATURE KITCHEN
SUITE are unable to resolve the dispute within 30 days of SIGNATURE KITCHEN SUITE’s receipt of the Notice of Dispute, the dispute shall be
resolved by binding arbitration in accordance with the procedure set out herein. You and SIGNATURE KITCHEN SUITE both agree that, during
the arbitration proceeding, the terms (including any amount) of any settlement offer made by either you or SIGNATURE KITCHEN SUITE will
not be disclosed to the arbitrator until the arbitrator determines the dispute.
Agreement to Binding Arbitration and Class Action Waiver. Upon failure to resolve the dispute during the 30 day period after SIGNATURE
KITCHEN SUITE’s receipt of the Notice of Dispute, you and SIGNATURE KITCHEN SUITE agree to resolve any claims between you and
SIGNATURE KITCHEN SUITE only by binding arbitration on an individual basis, unless you opt out as provided below, or you reside in
a jurisdiction that prevents full application of this clause in the circumstances of the claims at issue (in which case if you are a consumer,
this clause will only apply if you expressly agree to the arbitration). To the extent permitted by applicable law, any dispute between you and
SIGNATURE KITCHEN SUITE shall not be combined or consolidated with a dispute involving any other person’s or entity’s product or claim.
More specifically, without limitation of the foregoing, except to the extent such a prohibition is not permitted at law, any dispute between
you and SIGNATURE KITCHEN SUITE shall not under any circumstances proceed as part of a class or representative action. Instead of
arbitration, either party may bring an individual action in small claims court, but that small claims court action may not be brought on a class
or representative basis except to the extent this prohibition is not permitted at law in your province or territory of jurisdiction as it relates to the
claims at issue between you and SIGNATURE KITCHEN SUITE.

26
LIMITED WARRANTY
Arbitration Rules and Procedures. To begin arbitration of a claim, either you or SIGNATURE KITCHEN SUITE must make a written demand
for arbitration. The arbitration will be private and confidential, and conducted on a simplified and expedited basis before a single arbitrator
chosen by the parties under the provincial or territorial commercial arbitration law and rules of the province or territory of your residence. You
must also send a copy of your written demand to SIGNATURE KITCHEN SUITE at Signature Kitchen Suite, a division of LG Electronics,
Canada, Inc., Attn: Legal Department- Arbitration, 20 Norelco Drive, North York, Ontario M9L 2X6. This arbitration provision is governed by
your applicable provincial or territorial commercial arbitration legislation. Judgment may be entered on the arbitrator’s award in any court of
competent jurisdiction. All issues are for the arbitrator to decide, except that, issues relating to the scope and enforceability of the arbitration
provision and to the arbitrability of the dispute are for the court to decide. The arbitrator is bound by the terms of this provision.
Governing Law. The law of the province or territory of your purchase shall govern this Limited Warranty and any disputes between you and
SIGNATURE KITCHEN SUITE except to the extent that such law is preempted by or inconsistent with applicable federal or provincial/territorial
law. Should arbitration not be permitted for any claim, action, dispute or controversy between you and SIGNATURE KITCHEN SUITE, you and
SIGNATURE KITCHEN SUITE attorn to the exclusive jurisdiction of the courts of the province or territory of your purchase for the resolution of
the claim, action, dispute or controversy between you and SIGNATURE KITCHEN SUITE.
Fees/Costs. You do not need to pay any fee to begin an arbitration. Upon receipt of your written demand for arbitration, SIGNATURE KITCHEN
SUITE will promptly pay all arbitration filing fees unless you seek more than $25,000 in damages, in which case the payment of these fees
will be governed by the applicable arbitration rules. Except as otherwise provided for herein, SIGNATURE KITCHEN SUITE will pay all filing,
administration and arbitrator fees for any arbitration initiated in accordance with the applicable arbitration rules and this arbitration provision.
If you prevail in the arbitration, SIGNATURE KITCHEN SUITE will pay your attorneys’ fees and expenses as long as they are reasonable, by
considering factors including, but not limited to, the purchase amount and claim amount. Notwithstanding the foregoing, if applicable law allows
for an award of reasonable attorneys’ fees and expenses, an arbitrator can award them to the same extent that a court would. If the arbitrator
finds either the substance of your claim or the relief sought in the demand is frivolous or brought for an improper purpose (as measured by the
applicable laws), then the payment of all arbitration fees will be governed by the applicable arbitration rules. In such a situation, you agree to
reimburse SIGNATURE KITCHEN SUITE for all monies previously disbursed by it that are otherwise your obligation to pay under the applicable
arbitration rules. Except as otherwise provided for, SIGNATURE KITCHEN SUITE waives any rights it may have to seek attorneys’ fees and
expenses from you if SIGNATURE KITCHEN SUITE prevails in the arbitration.
Hearings and Location. If your claim is for $25,000 or less, you may choose to have the arbitration conducted solely (1) on the basis of
documents submitted to the arbitrator, (2) through a telephonic hearing, or (3) by an in-person hearing as established by the applicable
arbitration rules. If your claim exceeds $25,000, the right to a hearing will be determined by the applicable arbitration rules. Any in-person
arbitration hearings will be held at the nearest, most mutually-convenient arbitration location available within the province or territory in which
you reside unless you and SIGNATURE KITCHEN SUITE both agree to another location or agree to a telephonic arbitration.
Severability and Waiver. If any portion of this Limited Warranty (including these arbitration procedures) is unenforceable, the remaining
provisions will continue in full force and effect to the maximum extent permitted by applicable law. Should SIGNATURE KITCHEN SUITE fail to
enforce strict performance of any provision of this Limited Warranty (including these arbitration procedures), it does not mean that SIGNATURE
KITCHEN SUITE intends to waive or has waived any provision or part of this Limited Warranty.
Opt Out. You may opt out of this dispute resolution procedure. If you opt out, neither you nor SIGNATURE KITCHEN SUITE can require the
other to participate in an arbitration proceeding. To opt out, you must send notice to SIGNATURE KITCHEN SUITE no later than 30 calendar
days from the date of the first consumer purchaser’s purchase of the product by either (i) sending an e-mail to [email protected], with the subject
line: “Arbitration Opt Out;” or (ii) calling 1-888-289-2802. You must include in the opt out e-mail or provide by telephone: (a) your name and
address; (b) the date on which the product was purchased; (c) the product model name or model number; and (d) the serial number (the serial
number can be found (i) on the product; or (ii) online by accessing https://www.signaturekitchensuite.com/ca/support/repair-service/schedule-
repair and clicking on “Find My Model & Serial Number”).
In the event that you “Opt Out”, the law of the province or territory of your residence shall govern this Limited Warranty and any disputes
between you and SIGNATURE KITCHEN SUITE except to the extent that such law is preempted by or inconsistent with applicable federal
or provincial/territorial law. Should arbitration not be permitted for any claim, action, dispute or controversy between you and SIGNATURE
KITCHEN SUITE, you and SIGNATURE KITCHEN SUITE agree to attorn to the exclusive jurisdiction of the courts of the province or territory of
your residence for the resolution of the claim, action, dispute or controversy between you and SIGNATURE KITCHEN SUITE.
You may only opt out of the dispute resolution procedure in the manner described above (that is, by e-mail or telephone); no other form of notice
will be effective to opt out of this dispute resolution procedure. Opting out of this dispute resolution procedure will not affect the coverage of the
Limited Warranty in any way, and you will continue to enjoy the full benefits of the Limited Warranty. If you keep this product and do not opt out,
then you accept all terms and conditions of the arbitration provision described above.
Conflict of Terms. In the event of a conflict or inconsistency between the terms of this Limited Warranty and the End User License Agreement
(“EULA”) in regards to dispute resolution, the terms of this Limited Warranty shall control and govern the rights and obligations of the parties
and shall take precedence over the EULA.

27
MEMO

28
MEMO
www.signaturekitchensuite.com
FRANÇAIS
TIROIR FOUR À MICRO-ONDES
MANUEL DU PROPRIÉTAIRE
Veuillez lire attentivement le présent manuel de lʼutilisateur avant de faire fonctionner
lʼappareil et conservez-le à portée de la main pour le consulter en tout temps.
Copyright © 2020 Signature Kitchen Suite. Tous droits réservés.
MFL71665801
Rev.01_060420
TINSKB274MRR0
TABLE DES MATIÈRES
2
PRÉCAUTIONS POUR ÉVITER L’EXPOSITION POSSIBLE
À L’ÉNERGIE MICRO-ONDES EXCESSIVE
• Ne pas tenter de faire fonctionner ce four lorsque la porte est ouverte; le fonctionnement du four lorsque la porte est ouverte peut soumettre
toute personne présente à une exposition à l’énergie des micro-ondes. Il est important de ne pas contourner ou entraver le fonctionnement des
dispositifs de verrouillage de sécurité.
• Ne placer aucun objet entre la face avant du four et la porte, et veiller à ne pas laisser des souillures ou résidus de produits de nettoyage
s’accumuler sur les surfaces de contact.
• Ne pas faire fonctionner le four s’il est endommagé. Il est particulièrement important que la porte du four ferme adéquatement et que les
composants suivants ne soient pas endommagés :
− de la porte (déformation)
− des charnières et loquets (brisés ou desserrés)
− des joints de la porte et des surfaces de contact.
• Le four ne doit pas être réglé ni réparé sauf par des personnes qualifiées.
3 IMPORTANTES INSTRUCTIONS DE SÉCURITÉ
3 LISEZTOUTESLESCONSIGNESAVANTLʼUTILISATION
3 AVERTISSEMENT
6 INSTALLATION
6 Pièces et spécifications
7 Exigences relatives à l’installation
8 FONCTIONNEMENT
8 Guide des accessoires de cuisson
9 Guide de cuisson
10 Panneau de commande
10 Guide de menus
11 Pour commencer
13 Utilisation des opérations de cuisson par capteur
19 ENTRETIEN
19 Nettoyage
20 GUIDE DE DÉPANNAGE
20 Avant d’appeler le réparateur
21 GARANTIE LIMITÉE
21 CANADA

3
FRANÇAIS
Sécurité technique
• Cet appareil ne doit pas être utilisé par des personnes (y compris des enfants) dont les capacités physiques, sensorielles ou mentales sont réduites,
ou dont l’expérience et les connaissances sont insuffisantes, sauf sous surveillance ou si des instructions d’utilisation leur ont été données par une
personne responsable de leur sécurité. Les enfants doivent être surveillés pour s’assurer qu’ils ne jouent pas avec l’appareil.
• Afin de réduire le risque de brûlures, de décharge électrique, d’incendie, de blessures ou d’une exposition éventuelle à l’énergie des micro-ondes
lors de l’utilisation du four à micro-ondes, lisez toutes les instructions avant d’utiliser l’appareil.
• Les enfants ne doivent pas être autorisés à jouer avec des accessoires ou à s’accrocher à la porte ou à toute autre partie du four. Le faire peut
entraîner des blessures et des dégâts matériels graves. Comme pour tout appareil, une étroite supervision est nécessaire lorsqu’il est utilisé par des
enfants.
• Lisez et suivez les PRÉCAUTIONS POUR ÉVITER UNE EXPOSITION EXCESSIVE ÉVENTUELLE AUX MICRO-ONDES qui se trouvent à la page
2.
• Cet appareil doit être mis à la terre. Branchez uniquement l’appareil sur une prise de courant convenablement mise à la terre. Consultez la section
INSTRUCTIONS DE MISE À LA TERRE.
• Utilisez cet appareil uniquement pour les applications prévues et décrites dans ce manuel. Avec cet appareil, n’utilisez pas de produits chimiques
corrosifs ou susceptibles d’émettre des vapeurs, tels que du sulfure ou du chlorure. Ce type de four est spécifiquement conçu pour chauffer, cuire ou
déshydrater des aliments. Il n’est pas conçu pour une utilisation industrielle ou en laboratoire.
• Pour éviter toute électrocution :
− Ne pas faire fonctionner cet appareil si son cordon d’alimentation ou sa fiche de branchement sont endommagés, s’il ne fonctionne pas
correctement, s’il a été endommagé ou a subi une chute.
− Ne pas immerger le cordon ou la fiche de branchement dans de l’eau. Éloigner le cordon des surfaces chauffées.
− Ne pas laisser le cordon pendre de la table ou du comptoir.
• Pour réduire le risque d’incendie dans la cavité du four :
− Ne faites pas trop cuire les aliments. Surveillez attentivement l’appareil si du papier, du plastique ou tout autre matériau combustible a été placé
dans la cavité pour faciliter la cuisson.
IMPORTANTES INSTRUCTIONS DE SÉCURITÉ
LISEZ TOUTES LES CONSIGNES AVANT LʼUTILISATION
Messages de sécurité
Il est très important dʼassurer votre sécurité et celle des autres.
Nous fournissons de nombreux conseils de sécurité importants dans ce manuel et sur votre appareil. Lisez toujours l’ensemble des
messages de sécurité et respectez-les.
Ceci est le symbole d’alerte de sécurité.
Ce symbole vous alerte de dangers potentiels qui peuvent causer la mort ou des blessures. Tous les messages de sécurité
seront précédés du symbole d’alerte de sécurité et du terme AVERTISSEMENT ou MISE EN GARDE.
Ces mots signifient :
AVERTISSEMENT
Vous pouvez être tué ou gravement blessé si vous ne suivez pas les consignes.
MISE EN GARDE
Vous pourriez vous blesser ou endommager le produit si vous ne suivez pas les consignes.
Tous les messages de sécurité vous avertissent d’un danger potentiel et vous disent comment réduire le risque de blessure, ainsi que
ce qui peut arriver si les instructions ne sont pas suivies.
AVERTISSEMENT
AVERTISSEMENT
• Pourréduirelesrisquesdʼexplosion,dʼincendie,demort,dedéchargeélectrique,debrûlureoudeblessureslorsdelʼutilisationdelʼappareil,
prenez les précautions élémentaires, y compris les suivantes :

4
− N’utilisez pas la cavité du four comme espace de rangement. Ne laissez pas des produits faits de papier, des ustensiles de cuisson ou des
aliments dans la cavité du four lorsque celui-ci n’est pas utilisé.
− Enlevez les ligatures métalliques des sachets de plastique ou de papier avant de les placer dans le four.
• Lors de l’installation et du choix de l’emplacement de cet appareil, veuillez respecter les instructions d’installation fournies.
• Dans le cas où un matériau placé à l’intérieur du four prend feu :
− Gardez la porte du four fermée et éteignez le four.
− Débranchez le cordon d’alimentation ou coupez l’alimentation électrique en enlevant le fusible ou en basculant le disjoncteur dans le panneau
électrique.
• Certains produits comme les œufs entiers et les contenants scellés (par exemple un pot de verre fermé) peuvent exploser et ne doivent pas être
chauffés dans ce four.
• Les liquides comme l’eau, le café ou le thé peuvent être chauffés au-delà du point d’ébullition sans paraître en ébullition à cause de la tension
superficielle du liquide. Des bulles ou une ébullition visible ne sont pas toujours présentes quand le contenant est retiré du four à micro-ondes.
• CELA PEUT PROVOQUER L’ÉBULLITION SOUDAINE DE LIQUIDES TRÈS CHAUDS LORSQUE LE CONTENANT EST AGITÉ OU QUAND
UNE CUILLÈRE OU UN AUTRE USTENSILE EST PLONGÉ DANS LE LIQUIDE.
Pour réduire le risque de blessures:
− Ne réchauffez pas trop le liquide. Remuez le liquide avant la cuisson et à mi-cuisson.
− N’utilisez pas de contenants de forme droite avec un col étroit. Faites très attention quand vous plongez une cuillère ou un autre ustensile dans le
contenant.
− Après l’avoir chauffé, laissez le contenant dans le four à micro-ondes pendant quelques instants avant de le retirer.
• Il ne faut pas recouvrir ou obstruer les ouvertures de ventilation de l’appareil.
• Ne rangez pas cet appareil à l’extérieur. N’utilisez pas cet appareil à proximité d’une source d’eau, par exemple près de l’évier de la cuisine, dans un
sous-sol humide, à proximité d’une piscine, ou dans tout autre endroit similaire.
• Seul un technicien qualifié peut effectuer une révision de cet appareil. Pour toute opération d’inspection, de réparation ou de réglage, communiquez
avec l’établissement de service agréé le plus près.
• Pour le nettoyage des surfaces de la porte et du four qui entrent en contact lors de la fermeture de la porte, utilisez uniquement un savon ou un
détergent doux et non abrasif appliqué avec une éponge ou un chiffon doux.
• Ne faites fonctionner aucun appareil de chauffage ou de cuisson sous cet appareil.
• N’installez pas l’appareil au-dessus ou à proximité d’un appareil de chauffage ou de cuisson.
• N’installez pas l’appareil au-dessus d’un lavabo.
• N’entreposez rien directement sur la surface de l’appareil lorsque celui-ci est en marche.
• Utilisez seulement des accessoires de cuisson adaptés à une utilisation pour tiroirs-réchaud.
Fonctionnement
• N’utilisez pas ce four à des fins commerciales. Il est conçu pour une utilisation résidentielle seulement.
• Ne faites pas fonctionner le four lorsqu’il est vide.
• Si votre four tombe par terre ou est endommagé, assurez-vous de le faire soigneusement vérifier par un technicien qualifié avant de l’utiliser à
nouveau.
• Prenez soin de ne pas vous blesser lorsque vous ouvrez la porte.
• Pour éviter une mauvaise cuisson de certains aliments :
− Ne chauffez jamais de biberon ou de nourriture pour bébé. Ces aliments pourraient ne pas chauffer uniformément et causer des blessures.
− Ne pas faire chauffer des récipients à goulot étroit, comme les bouteilles de sirop.
− Ne faites pas de friture dans le four à micro-ondes.
− Ne faites pas de mise en conserve maison dans le four à micro-ondes.
• N’utilisez pas le four comme déshumidificateur (p. ex., il ne faut pas mettre de journaux mouillés, des vêtements, des jouets, des appareils
électriques, des plantes, de la terre, des animaux ou toute autre matière vivante dans le four à micro-ondes). Le four doit être utilisé uniquement
pour chauffer ou cuire des aliments. Une mauvaise utilisation peut entraîner des risques de sécurité tels qu’un incendie, des brûlures ou la mort par
électrocution.
• L’appareil devient chaud pendant l’utilisation. Prenez des précautions pour éviter de toucher les éléments chauffants à l’intérieur du four.
• L’appareil et ses parties accessibles deviennent chauds pendant l’utilisation. Prenez des précautions pour éviter de toucher les éléments chauffants.
Les enfants doivent être tenus à l’écart à moins d’être supervisés en permanence.
• N’utilisez pas de produits fabriqués à partir de papier recyclé. Ils peuvent contenir des impuretés et produire des étincelles ou s’enflammer quand ils
sont utilisés pour la cuisson.
• La porte ou la surface extérieure peuvent devenir chaudes lorsque l’appareil est en marche.

5
FRANÇAIS
• Un liquide chauffé dans un contenant d’une forme particulière (particulièrement un contenant cylindrique) peut devenir trop chaud. Le liquide
peut faire des éclaboussures et émettre un bruit fort pendant ou après avoir été chauffé, ou lors de l’ajout d’un ingrédient (du café instantané par
exemple), ce qui peut endommager le four ou entraîner des blessures.
Quel que soit le contenant utilisé, pour un résultat optimal, remuez le liquide plusieurs fois avant de le chauffer. Veillez à toujours remuer un liquide
plusieurs fois entre les phases de réchauffage.
Entretien
• Si la porte ou le joint de la porte sont endommagés, le four ne doit pas être utilisé tant qu’il n’aura pas été réparé par un technicien autorisé.
• Le four doit être régulièrement nettoyé et tout débris alimentaire doit être enlevé. Si le four n’est pas maintenu dans un bon état de propreté, sa
surface pourrait se dégrader et affecter la durée de vie de l’appareil, en plus de possiblement mener à une situation dangereuse.
• Ne rincez pas les plateaux et les grilles en les plaçant dans l’eau juste après la cuisson. Cela peut les endommager ou les casser. Une utilisation
incorrecte peut endommager le four.
Interférences Radio/TV/Appareil sans fil
• L’utilisation du four à micro-ondes à proximité de certains appareils utilisant la même fréquence, par exemple une radio, un téléviseur, un réseau
local sans fil, des périphériques Bluetooth, des appareils médicaux ou des appareils sans fil, peut provoquer des interférences. Ces interférences ne
sont pas une indication que le produit ou son fonctionnement sont défectueux. Le produit peut être utilisé sans danger.
• N’utilisez pas des appareils médicaux près du four à micro-ondes, puisque les interférences pourraient affecter leur bon fonctionnement.
• S’il y a des interférences, vous pouvez les éliminer ou les réduire en appliquant les mesures suivantes :
− Nettoyez la porte et les surfaces d’étanchéité du four.
− Réorientez l’antenne de réception de la radio, du téléviseur, du périphérique Bluetooth ou de tout autre appareil.
− Déplacez le four à micro-ondes en fonction de l’endroit où sont placés la radio, le téléviseur, le périphérique Bluetooth ou tout autre appareil.
− Éloignez le four à micro-ondes du récepteur.
− Branchez le four à micro-ondes sur une autre prise de façon à ce que le four à micro-ondes et le récepteur se trouvent sur différents circuits de
dérivation.
ÉNONCÉ DE LA COMMISSION FÉDÉRALE DES COMMUNICATIONS CONCERNANT LES
INTERFÉRENCES DES FRÉQUENCES RADIO (É.-U. SEULEMENT)
• Cet appareil génère et utilise de l’énergie de fréquences ISM et, s’il n’est pas installé et utilisé correctement, c’est-à-dire en stricte conformité avec
les instructions du fabricant, peut provoquer des interférences avec les postes de radio et les téléviseurs. Il a été testé et déclaré conforme aux
limites des appareils ISM conformément à l’article 18 des règlements de la FCC, conçus pour fournir une protection raisonnable contre de telles
interférences dans une installation résidentielle.
Cependant, il n’existe aucune garantie qu’il n’y aura pas d’interférences dans une installation particulière. Si cet appareil génère des interférences
avec les postes de radio et les téléviseurs, ce qui peut être vérifié en éteignant puis en rallumant l’appareil, l’utilisateur est invité à essayer de
corriger ces interférences à l’aide de l’une des mesures suivantes :
− Réorientez l’antenne de réception de la radio ou du téléviseur.
− Déplacez le four à micro-ondes en fonction de l’endroit où est placé le récepteur.
− Éloignez le four à micro-ondes du récepteur.
− Branchez le four à micro-ondes sur une autre prise de façon à ce que le four à micro-ondes et le récepteur se trouvent sur différents circuits de
dérivation.
• Le fabricant n’est pas responsable des interférences radio ou télévisées causées par des modifications non autorisées apportées à ce four à micro-
ondes. Il est de la responsabilité de l’utilisateur de corriger de telles interférences.
CONSERVEZ CES CONSIGNES
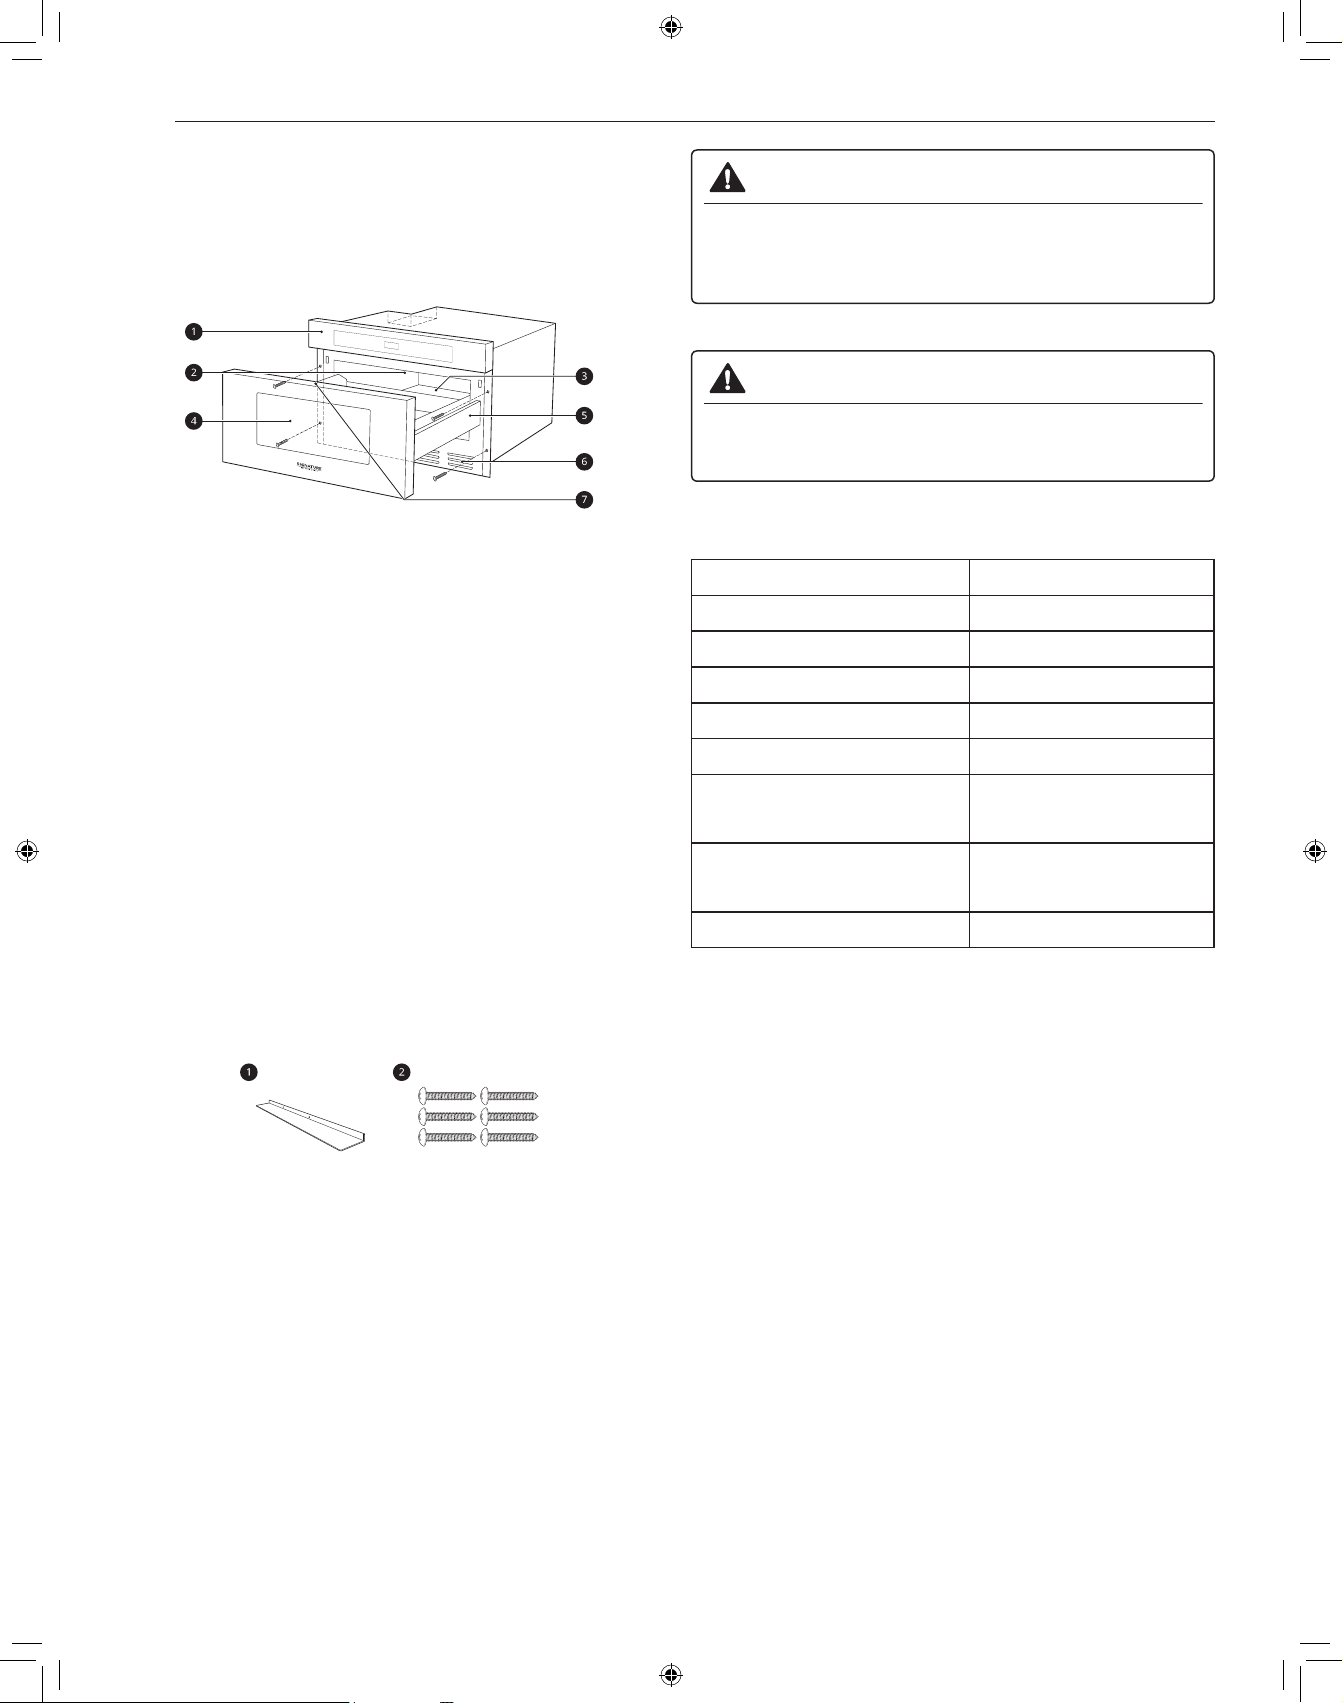
6
INSTALLATION
INSTALLATION
Pièces et spécifications
Vue de l’avant
a
Panneau de commande
b
Couvercle du guide d’ondes
c
Plaque d’identification
d
Fenêtre
e
Glissières du Drawer Microwave
f
Évent
g
Aide-Mémoie
REMARQUE
• Ne retirez pas le couvercle du guide d’ondes de la cavité intérieure
du four. Il sert à protéger les composants du four à micro-ondes des
éclaboussures d’aliments.
• Ouvrez le Drawer Microwave complètement. La plaque signalétique
est juste au-delà de la paroi arrière de la cavité du four à micro-ondes,
face vers le haut, sur la surface plate.
Accessoires
Les accessoires varient selon le modèle.
a
Évent de déflecteur encastré (acier inoxydable)
b
Vis de fixation (acier inoxydable)
AVERTISSEMENT
• Ne faites pas fonctionner le four alors qu’il est vide ou sans le
plateau en verre. Il est préférable de laisser un verre d’eau dans le
four lorsqu’il n’est pas utilisé. L’eau va absorber en toute sécurité
l’énergie micro-ondes si le four est démarré accidentellement.
MISE EN GARDE
• Pour éviter les risques de blessures ou les dégâts matériels,
n’utilisez pas de grès ni d’accessoires de cuisson métalliques ou
dotés de garnitures métalliques dans le four.
Caractéristiques
Modèle SKSMD2401S
Alimentation 120/117 V c.a., 60 Hz
Consommation d’énergie 1500 W
Puissance du four à micro-ondes Longueur max. 900 W*
Fréquence 2450 MHz
Courant nominal 13.6 A
Dimensions
(L x H x P)
23,9 x 15,9 x 23,3 po
(60,6 x 40,4 x 59,2 cm)
Dimensions de la cavité du four
(L x H x P)
17,3 x 7,1 x 16,6 po
(44,0 x 18,1 x 42,1 cm)
Capacité de la cavité du four 1,2 pi³ (0,034 m³)
*NORME DE PUISSANCE IEC 60705. Les caractéristiques sont
susceptibles d’être modifiées sans préavis.
REMARQUE
• Ce four est conçu pour une utilisation résidentielle seulement. Un
usage commercial n’est pas recommandé.
• Ne faites pas cuire des aliments trop longtemps. Cela peut
endommager le four.
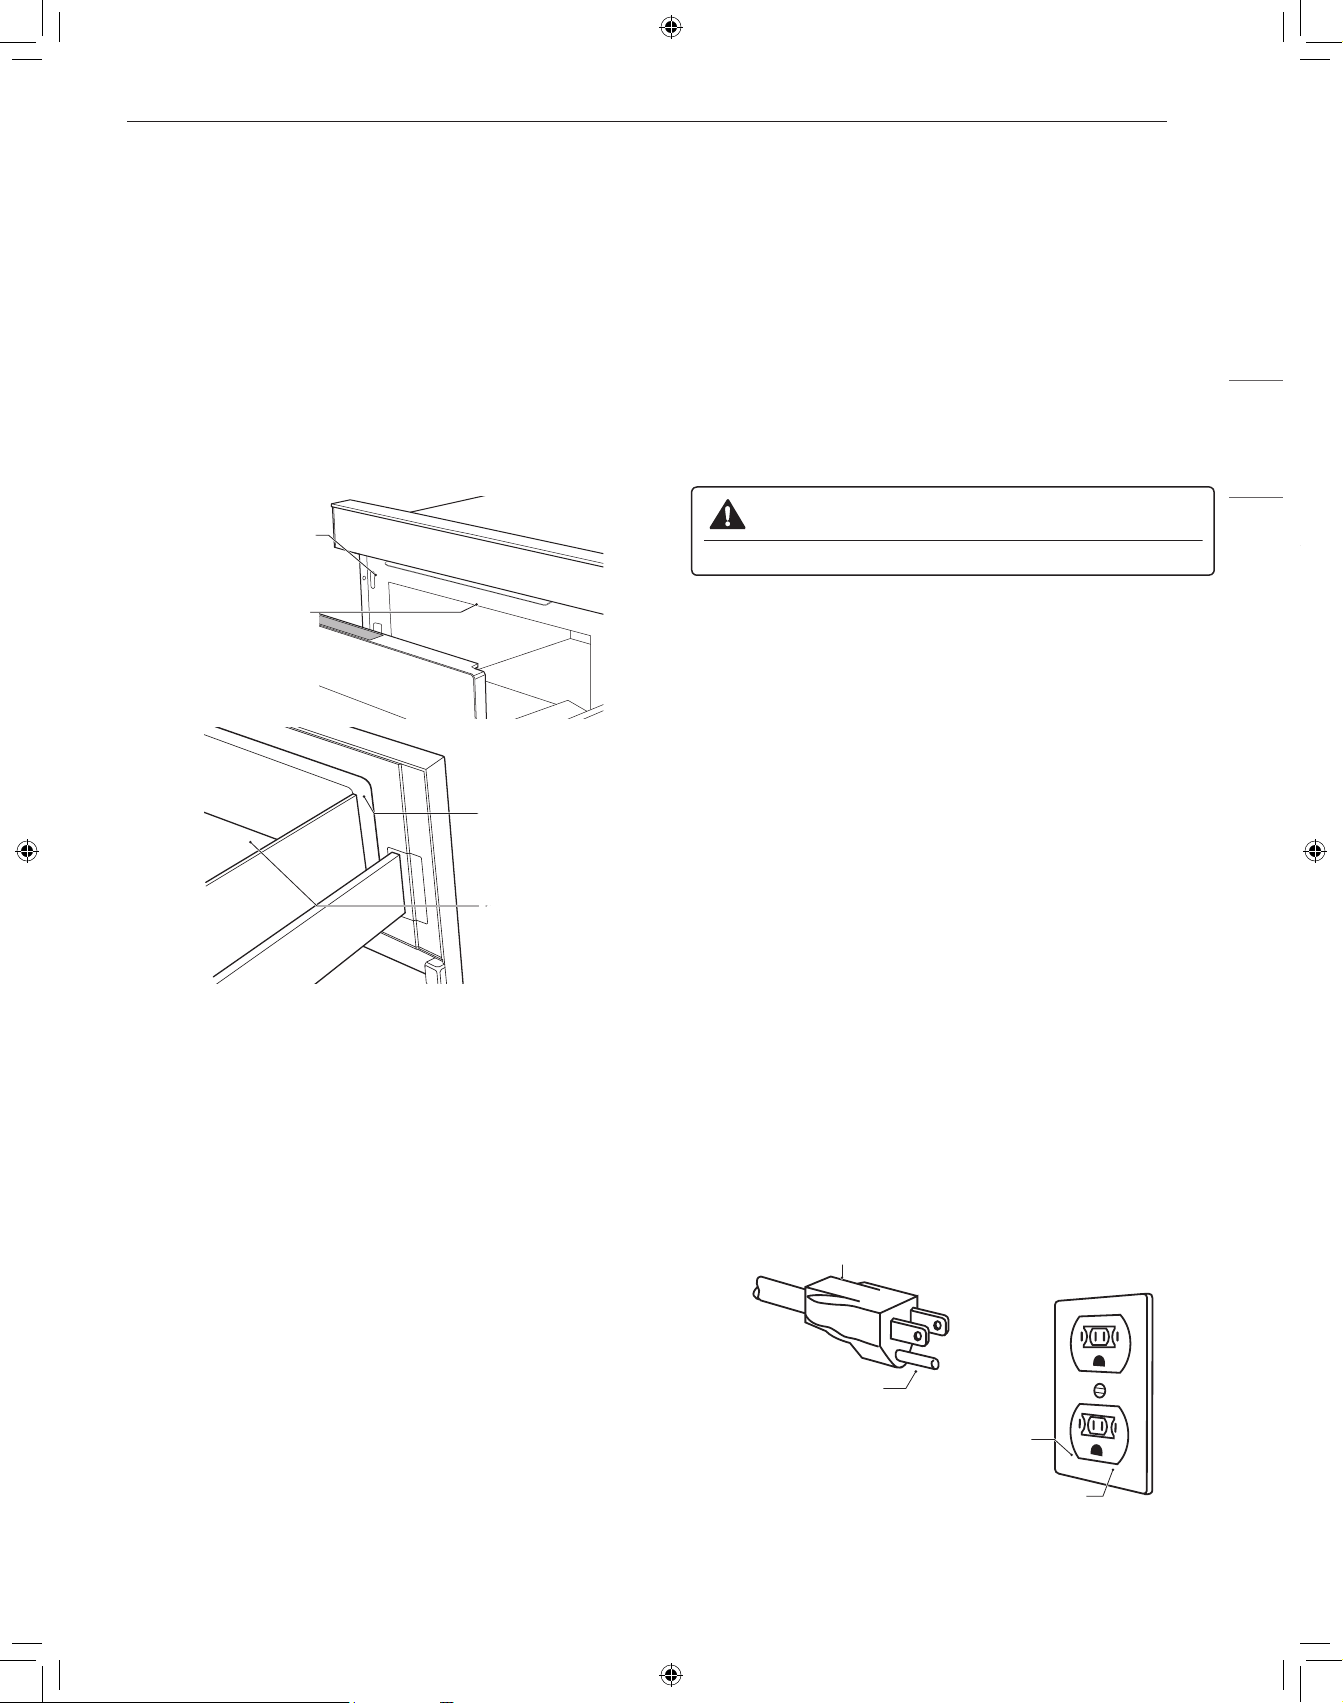
7
INSTALLATION
FRANÇAIS
Exigences relatives à l’installation
Déballage et vérification
1
Retirer tous les matériaux d’emballage de l’intérieur du Drawer
Microwave. NE PAS RETIRER LE GUIDE D’ONDES qui est situé
au plafond du Drawer Microwave.
2
Retirez l’étiquette des caractéristiques, s’il y en a une. Vérifiez que
le tiroir n’a aucun dommage, comme un tiroir mal aligné ou plié, des
joints ou des surfaces d’étanchéité endommagés, des glissières
cassées ou lâches, ou des bosses à l’intérieur de la cavité ou sur
la façade du tiroir. En cas de dommages, ne faites pas fonctionner
le Drawer Microwave et communiquez avec votre détaillant ou le
Centre de service à la clientèle de Signature Kitchen Suite.
Cavité
du four
Surface
d’étanchéité
Couvercle du
guide d’ondes
Surface d’étanchéité
Alimentation
Le four est conçu pour fonctionner sur une prise de courant standard de
120/117 V et de 60 Hz. Assurez-vous que le circuit est d’au moins 15 A
ou 20 A et que le four à micro-ondes est le seul appareil sur le circuit.
Il n’est pas conçu pour un circuit de 50 Hz ou tout autre circuit qu’un
circuit de 120/117 V et de 60 Hz. Aucun autre appareil électrique ou
circuit d’éclairage ne doit être branché sur ce circuit. En cas de doute,
consultez un électricien qualifié.
Avertissement sur la tension
La tension disponible sur la prise de courant murale doit être identique
à celle précisée sur la plaque signalétique du four située à l’arrière
ou sur le côté du panneau de commande du four. L’utilisation d’une
tension plus élevée est dangereuse et pourrait déclencher un incendie
ou tout autre type d’accident qui endommagerait le four. Une tension
inférieure ralentira la cuisson. Advenant que le four ne fonctionne
pas correctement, même s’il est alimenté sous la tension correcte,
débranchez puis rebranchez la fiche.
N’obstruez pas les évents d’aération
Il faut que l’air puisse circuler librement par tous les évents d’aération
pendant la cuisson. Si les évents d’aération sont obstrués pendant que
le four est en marche, celui-ci peut surchauffer. Dans ce cas, un dispositif
de sécurité sensible à la température déclenche automatiquement
l’arrêt du four. Le four ne pourra pas fonctionner tant qu’il n’aura pas
suffisamment refroidi.
Instructions de mise à la terre
Cet appareil doit être mis à la terre. Advenant un court-circuit, la mise à
la terre de l’appareil permet au courant électrique de retourner à la terre,
et protège l’utilisateur contre l’électrocution. Cet appareil est doté d’un
cordon d’alimentation qui comporte un conducteur de mise à la terre et
une prise de mise à la terre. On doit brancher cette fiche sur une prise
de courant correctement installée et mise à la terre.
AVERTISSEMENT
• Une mauvaise mise à la terre peut entraîner un risque d’électrocution.
En cas de difficulté de compréhension des instructions de mise à la terre,
ou en cas d’incertitude quant à la mise à la terre adéquate de l’appareil,
consultez un électricien ou un technicien qualifié.
1. L’utilisation d’un câble de rallonge n’est pas recommandée. Si le cordon
d’alimentation est trop court, demandez à un électricien ou un technicien
qualifié d’installer une prise de courant à proximité de l’appareil.
2. S’il est nécessaire d’utiliser un câble de rallonge, utilisez seulement
un câble à 3 fils comportant une prise de mise à la terre à 3 broches
et une prise de raccordement à 3 alvéoles pouvant recevoir la fiche de
branchement de l’appareil. La puissance indiquée sur le câble de rallonge
doit être égale ou supérieure aux caractéristiques électriques de l’appareil.
REMARQUE
• Un cordon d’alimentation court est fourni avec l’appareil afin de
réduire les risques d’emmêlement et de trébuchement posés par un
cordon d’alimentation plus long.
• Il est possible d’installer et d’utiliser un cordon d’alimentation plus long
ou un câble de rallonge si les précautions appropriées sont prises.
• En cas d’utilisation d’un cordon d’alimentation long ou d’un câble de
rallonge, (1) la puissance électrique indiquée du cordon d’alimentation
ou du câble de rallonge doit être au moins égale aux caractéristiques
électriques de l’appareil, (2) le câble de rallonge doit être un câble à 3
fils avec mise à la terre, (3) le cordon d’alimentation plus long doit être
placé de manière à ne pas pendre sur le bord du plan de travail ou
de la table, afin que des enfants ne puissent pas tirer dessus et que
personne ne risque de trébucher en passant.
Consultez les directives ci-dessous pour connaître la façon adéquate de
placer le cordon d’alimentation.
Fiche à trois
broches
Broche de mise
à la terre
Prise électrique pour
fiches à trois broches
Prise électrique mise à la terre
Gardez le cordon d’alimentation électrique au sec et évitez de le coincer
ou de l’écraser de quelque façon que ce soit.

8
FONCTIONNEMENT
FONCTIONNEMENT
Guide des accessoires de cuisson
Accessoires de cuisson allant au four à
micro-ondes
Utilisez des accessoires de cuisson allant au micro-ondes.
• Verre résistant au four
− Verre résistant au four traité pour être utilisé à très haute
température pour qu’il puisse résister à la chaleur et aller au micro-
ondes.
− Utilisez des plats, des moules à pain, des moules à tarte, des
moules à gâteaux, des tasses à mesurer, des cocottes et des bols
sans garnitures métalliques.
− N’utilisez pas de la verrerie délicate, tels que des gobelets ou des
verres à vin, car elle risque d’éclater si elle est chauffée.
• Porcelaine: Utilisez des bols, des tasses, des assiettes, de la poterie,
de la porcelaine, de la céramique et des plateaux sans garnitures
métalliques. Un grand nombre de contenants faits de ces matériaux
peuvent aller au four à micro-ondes, mais il vaut mieux les tester
avant de les utiliser.
• Plastique
− Contenants de stockage de plastique: Utilisez des contenants en
plastique, des tasses, des contenants pour congélateur semi-rigides
et des sacs de plastique seulement pour réchauffer rapidement des
aliments. Ne les utilisez pas pour cuire des aliments pendant de longues
périodes ou à de hauts niveaux de puissance, puisque les aliments
chauds vont éventuellement déformer ou faire fondre le plastique.
− Pellicule de plastique (utilisée comme couvercle): Placez la pellicule
de plastique sur le plat sans la serrer et appuyez sur les côtés. Laissez
l’un des coins de la pellicule de plastique légèrement relevé pour
permettre au surplus de vapeur de s’échapper. Assurez-vous que le plat
soit suffisamment profond pour que la pellicule de plastique ne touche
pas aux aliments. Pendant que les aliments chauffent, la pellicule de
plastique peut fondre aux endroits où elle touche les aliments.
− Sacs de cuisson de plastique: S’ils sont spécialement conçus pour
la cuisson, les sacs de cuisson peuvent être utilisés au four à micro-
ondes. N’oubliez pas de perforer le sac pour que la vapeur puisse
s’échapper. N’utilisez jamais de sacs de plastique ordinaires pour la
cuisson au four à micro-ondes, puisqu’ils vont fondre et se déchirer.
− Accessoire de cuisson de plastique pour four à micro-ondes:
Il existe une grande variété de formes et de tailles d’accessoires
de cuisson pour four à micro-ondes. Vous pourriez être en mesure
d’utiliser de l’équipement que vous possédez déjà plutôt que
d’investir dans un nouvel équipement de cuisine.
• Papier
− Papier essuie-tout, papier paraffiné, serviettes en papier et assiettes
en papier sans garniture ou décoration métallique. Voir l’étiquette du
fabricant pour confirmer l’utilisation possible dans le four à micro-ondes.
− Les assiettes et les contenants en carton sont pratiques et
sécuritaires à utiliser dans le four à micro-ondes, à condition que le
temps de cuisson soit court et que les aliments à cuire soient faibles
en gras et en humidité. Le papier essuie-tout est également très
utile pour emballer des aliments et recouvrir des plaques de cuisson
dans lesquelles des aliments gras tels que le bacon sont cuits.
− Évitez le carton de couleur, car il peut se décolorer. N’utilisez pas de
papier recyclé, car certains produits de papier recyclé peuvent contenir
des impuretés qui pourraient produire des arcs électriques ou déclencher
un incendie lorsqu’ils sont utilisés dans le four à micro-ondes.
• Vaisselle
− De nombreux contenants en poterie, en porcelaine et en céramique
peuvent également aller au micro-ondes. En cas de doute,
consultez la documentation du fabricant ou effectuez le test du
micro-ondes.
− Ne placez pas de plats avec des motifs peints au four, car la
peinture peut contenir du métal qui pourrait provoquer un arc
électrique.
Accessoires de cuisson n’allant pas au four
à micro-ondes
• Contenants métalliques/Décoration métallique
− N’utilisez jamais d’accessoires de cuisson métalliques ou dotés
d’une bordure métallique lorsque vous utilisez le four à micro-
ondes.
− Les micro-ondes ne peuvent pas traverser le métal. Ils rebondissent
sur tout objet métallique dans le four et peuvent produire des arcs
électriques, un phénomène alarmant qui ressemble à un éclair.
− Le métal protège les aliments contre l’énergie micro-ondes, ce qui
peut entraîner une cuisson inégale. Évitez de mettre dans le four
des brochettes métalliques, des thermomètres et des plateaux
d’aluminium. Les contenants métalliques peuvent provoquer des
arcs électriques, ce qui peut endommager le four à micro-ondes.
• Papier d’aluminium
− Évitez les grandes feuilles de papier aluminium, car elles nuisent à
la cuisson et peuvent produire des arcs électriques.
− Utilisez de petits morceaux de papier aluminium pour protéger les
cuisses et les ailes des volailles.
− Veillez à ce que TOUT le papier aluminium soit à au moins 1 po des
parois et de la porte du four.
• Bois
− Les planches et bols en bois vont se dessécher et peuvent se
fendiller ou se fendre si on les utilise dans le four à micro-ondes.
− Les paniers peuvent réagir de la même façon.
• Contenants hermétiquement fermés
− Assurez-vous de laisser des ouvertures pour que la vapeur puisse
s’échapper des contenants fermés.
− Percer les sachets de légumes en plastique et autres articles, avant
la cuisson.
− Des sachets hermétiquement fermés risqueraient d’exploser.
• Papier Brun
− Évitez d’utiliser des sacs de papier brun.
− Ils absorbent trop de chaleur et peuvent prendre feu.
• Ustensiles de cuisson défectueux ou ébréchés: Tout contenant qui
est fissuré, défectueux ou ébréché peut être endommagé dans le four.
• Attaches métalliques
− Retirer les attaches métalliques des sachets en papier ou plastique.
− Elles peuvent s’échauffer et risquent d’entraîner un feu.

9
FONCTIONNEMENT
FRANÇAIS
Tests à effectuer avant l’utilisation
d’accessoires de cuisson
La plupart des accessoires de cuisson non métalliques résistant à
la chaleur peuvent être utilisés en toute sécurité dans votre four.
Cependant, certains d’entre eux peuvent contenir des matériaux qui
les rendent inutilisables comme accessoires de cuisson allant au four
à micro-ondes. Suivez les étapes ci-dessous pour découvrir si vos
accessoires de cuisson peuvent être utilisés au four à micro-ondes.
1
Placez le contenant en question à côté d’un bol en verre rempli
d’eau à l’intérieur du four.
2
Passez-le au micro-ondes à puissance élevée pendant 1 minute.
• Si l’eau chauffe, mais
que le contenant reste froid au toucher, le contenant peut être
utilisé au four à micro-ondes.
• Si la température de l’eau ne change pas, mais que le contenant
devient chaud, les micro-ondes sont absorbées par le contenant et
il n’est pas sécuritaire de l’utiliser dans le four à micro-ondes.
MISE EN GARDE
• Utilisez des ustensiles de cuisson lorsque vous faites chauffer des
aliments. Ne déposez pas d’aliments directement dans le fond du four.
• Certains objets ayant une teneur élevée en plomb ou en fer ne sont
pas adaptés pour la cuisson au four à micro-ondes.
• Il faut vérifier les accessoires de cuisson afin de s’assurer qu’ils
sont adaptés à une utilisation au four à micro-ondes.
• Faites toujours preuve de prudence lorsque vous retirez des
accessoires de cuisson du four. Certains plats absorbent la chaleur
des aliments cuits et peuvent être chauds.
Guide de cuisson
Conseils de cuisson
Surveillez attentivement les aliments placés au four à micro-ondes
pendant leur cuisson. Les directives données dans des recettes pour
surélever, remuer, etc. doivent être considérées comme les mesures
minimales recommandées. Si les aliments sont trop cuits (secs),
pas assez cuits ou cuits de façon inégale, apportez les ajustements
nécessaires avant ou pendant la cuisson pour corriger le problème.
• Aliments trop cuits ou secs
− Eau : Arrosez les aliments relativement secs, comme les rôtis
et certains légumes, avec de l’eau avant de les faire cuire ou
recouvrez-les pour retenir l’humidité.
− Densité : Les aliments légers et poreux comme les gâteaux et le
pain cuisent plus rapidement que les aliments lourds et denses
comme les rôtis et les plats mijotés.
− Protection : Couvrez les coins des plats carrés de petites bandes
de papier d’aluminium pour éviter de trop cuire les aliments.
N’utilisez pas trop de papier d’aluminium et fixez-le solidement au
plat. Le papier d’aluminium peut causer des arcs électriques s’il se
trouve trop près des parois du four pendant la cuisson.
− Os et gras : Les os conduisent la chaleur et la graisse cuit plus
rapidement que la viande. Faites preuve de prudence avec les
morceaux de viande gras ou contenant des os.
• Les aliments ne sont pas assez cuits.
− Couvercle : Recouvrez les aliments d’un couvercle allant au micro-
ondes, de papier parchemin (pas de papier ciré) ou d’une pellicule
plastique pour emprisonner la chaleur et la vapeur et ainsi cuire les
aliments plus rapidement.
− Temps de repos : Laisser les aliments reposer pendant quelques
minutes avant de les sortir du four à micro-ondes pour leur
permettre de terminer leur cuisson et favoriser le mélange des
saveurs.
− Quantité : Plus vous placez d’aliments dans le four, plus le temps
de cuisson requis est long.
− Température : Les aliments très froids prennent beaucoup plus de
temps à cuire que les aliments qui sont à la température ambiante.
• La cuisson des aliments n’est pas uniforme.
− Remuer : Remuez de l’extérieur vers l’intérieur, puisque l’extérieur
des aliments se réchauffe en premier.
− Retourner les aliments : Retournez les aliments plusieurs fois
pendant la cuisson. La portion supérieure des aliments épais cuit
plus rapidement que la portion inférieure.
− Disposition : Déposez les portions de viande, de volaille et de
poisson les plus épaisses vers le bord extérieur du plat de cuisson
pour qu’elles cuisent plus uniformément. Si possible, façonnez les
aliments de façon à ce qu’ils soient ronds ou en forme d’anneaux.
• Brownies
− Pour obtenir les meilleurs résultats lorsque vous faites cuire des
brownies, placez le moule à cuisson à environ 1 1/2 po (38,1 mm)
de la porte.
Précautions
AVERTISSEMENT
• N’utilisez pas votre four à micro-ondes pour faire cuire des œufs
dans leur coquille. La pression peut croître à l’intérieur de la
coquille, ce qui la ferait éclater.
• Ne faites jamais fonctionner le four lorsqu’il est vide. Des aliments
ou de l’eau doivent toujours se trouver dans le four pendant qu’il est
en marche afin d’absorber l’énergie des micro-ondes.
• Placez la surface avant de la porte à trois pouces ou plus du bord du
plan de travail pour éviter tout risque de chute du four à micro-ondes
pendant son utilisation.
• Pour programmer le four, appuyez fermement au centre de chaque
touche. Lorsque vous appuyez correctement sur une touche, celle-ci
émet un son et le four est activé. N’appuyez pas sur plusieurs touches
en même temps.
• Ne frappez pas le panneau de commande avec de l’argenterie, des
ustensiles, etc. Des bris pourraient survenir.
• Faites toujours preuve de prudence lorsque vous retirez des
accessoires de cuisson du four. Certains plats absorbent la
chaleur des aliments cuits et peuvent être chauds. Consultez le
Guide des accessoires de cuisson plus haut pour obtenir plus de
renseignements.
• Ne rincez pas les contenants en les plaçant dans l’eau
immédiatement après la cuisson. Cela peut les endommager. En
outre, laissez toujours refroidir le plateau rotatif avant de le retirer du
four.
• N’utilisez pas le four pour sécher des journaux ou des vêtements. Ils
peuvent prendre feu.
• Utilisez des thermomètres qui ont été approuvés pour la cuisson au
four à micro-ondes.
• Le plateau rotatif doit toujours être en place lorsque vous utilisez le
four.
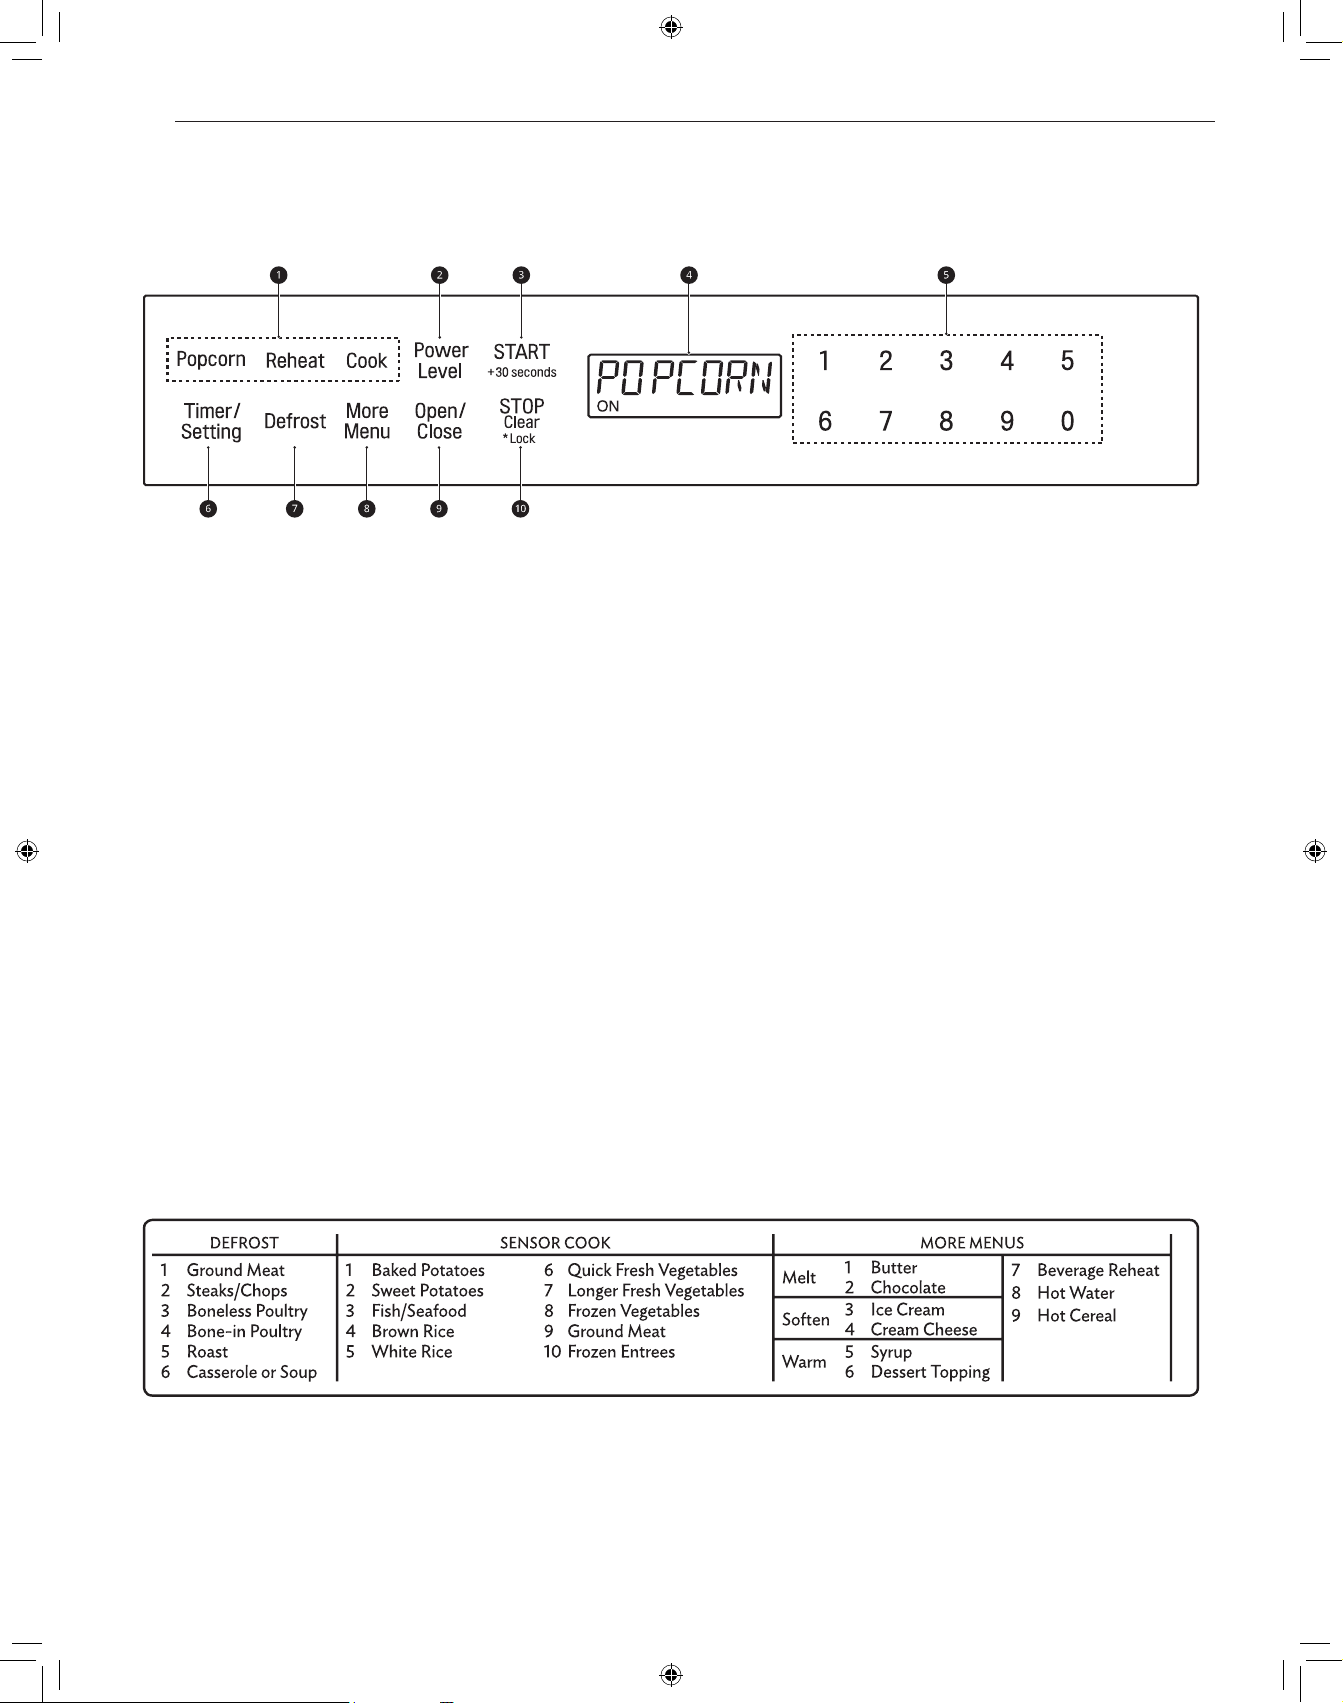
10
FONCTIONNEMENT
Panneau de commande
Caractéristiques du panneau de commande
a
Fonctionnement du capteur
• Appuyez sur les touches pour sélectionner un mode de cuisson
ou de réchauffage préprogrammé pour de nombreux aliments
populaires.
b
Niveau de puissance
• Appuyez sur Power Level (niveau de puissance) pour régler la
puissance de la cuisson.
c
START/+30 seconds (DÉMARRER/+30 secondes)
• Appuyez sur START/+30 seconds pour faire démarrer le four.
• Appuyez sur START/+30 seconds pour faire cuire un aliment
pendant 30 secondes à une puissance de 100 %.
• Appuyez sur START/+30 seconds pendant la cuisson
pour prolonger le temps de cuisson de 30 secondes. (Vous
pouvez prolonger le temps de cuisson jusqu’à 99 minutes et
59 secondes.)
d
Affichage
• Affiche l’heure, les paramètres du temps de cuisson et les
fonctions de cuisson sélectionnées.
e
Touches numériques
• Appuyez sur les touches numériques pour régler le temps de
cuisson, la puissance, la quantité ou le poids.
f
Timer/Setting (minuterie/réglages)
• Appuyez sur Timer/Setting pour utiliser votre four à micro-ondes
comme une minuterie.
• Appuyez sur Timer/Setting pour régler l’heure du jour.
g
Décongélation
• Appuyez sur cette touche pour sélectionner le type d’aliment et
décongeler les aliments selon leur poids.
h
More Menu (plus d’options)
• Appuyez sur More Menu pour faire fondre, ramollir ou réchauffer
les aliments inscrits à l’aide-mémoire.
• Appuyez sur More Menu pour faire réchauffer du café, du thé ou
des céréales chaudes.
i
Open/Close (ouvrir/fermer)
• Appuyez sur Open/Close pour ouvrir ou fermer le four à micro-
ondes.
j
STOP/Clear/Lock
• Appuyez sur STOP/Clear (arrêter/effacer) pour arrêter le four ou
effacer toute l’information entrée.
• Maintenez la touche STOP/Clear (arrêter/effacer) enfoncée
pendant trois secondes pour verrouiller le panneau de commande.
Guide de menus
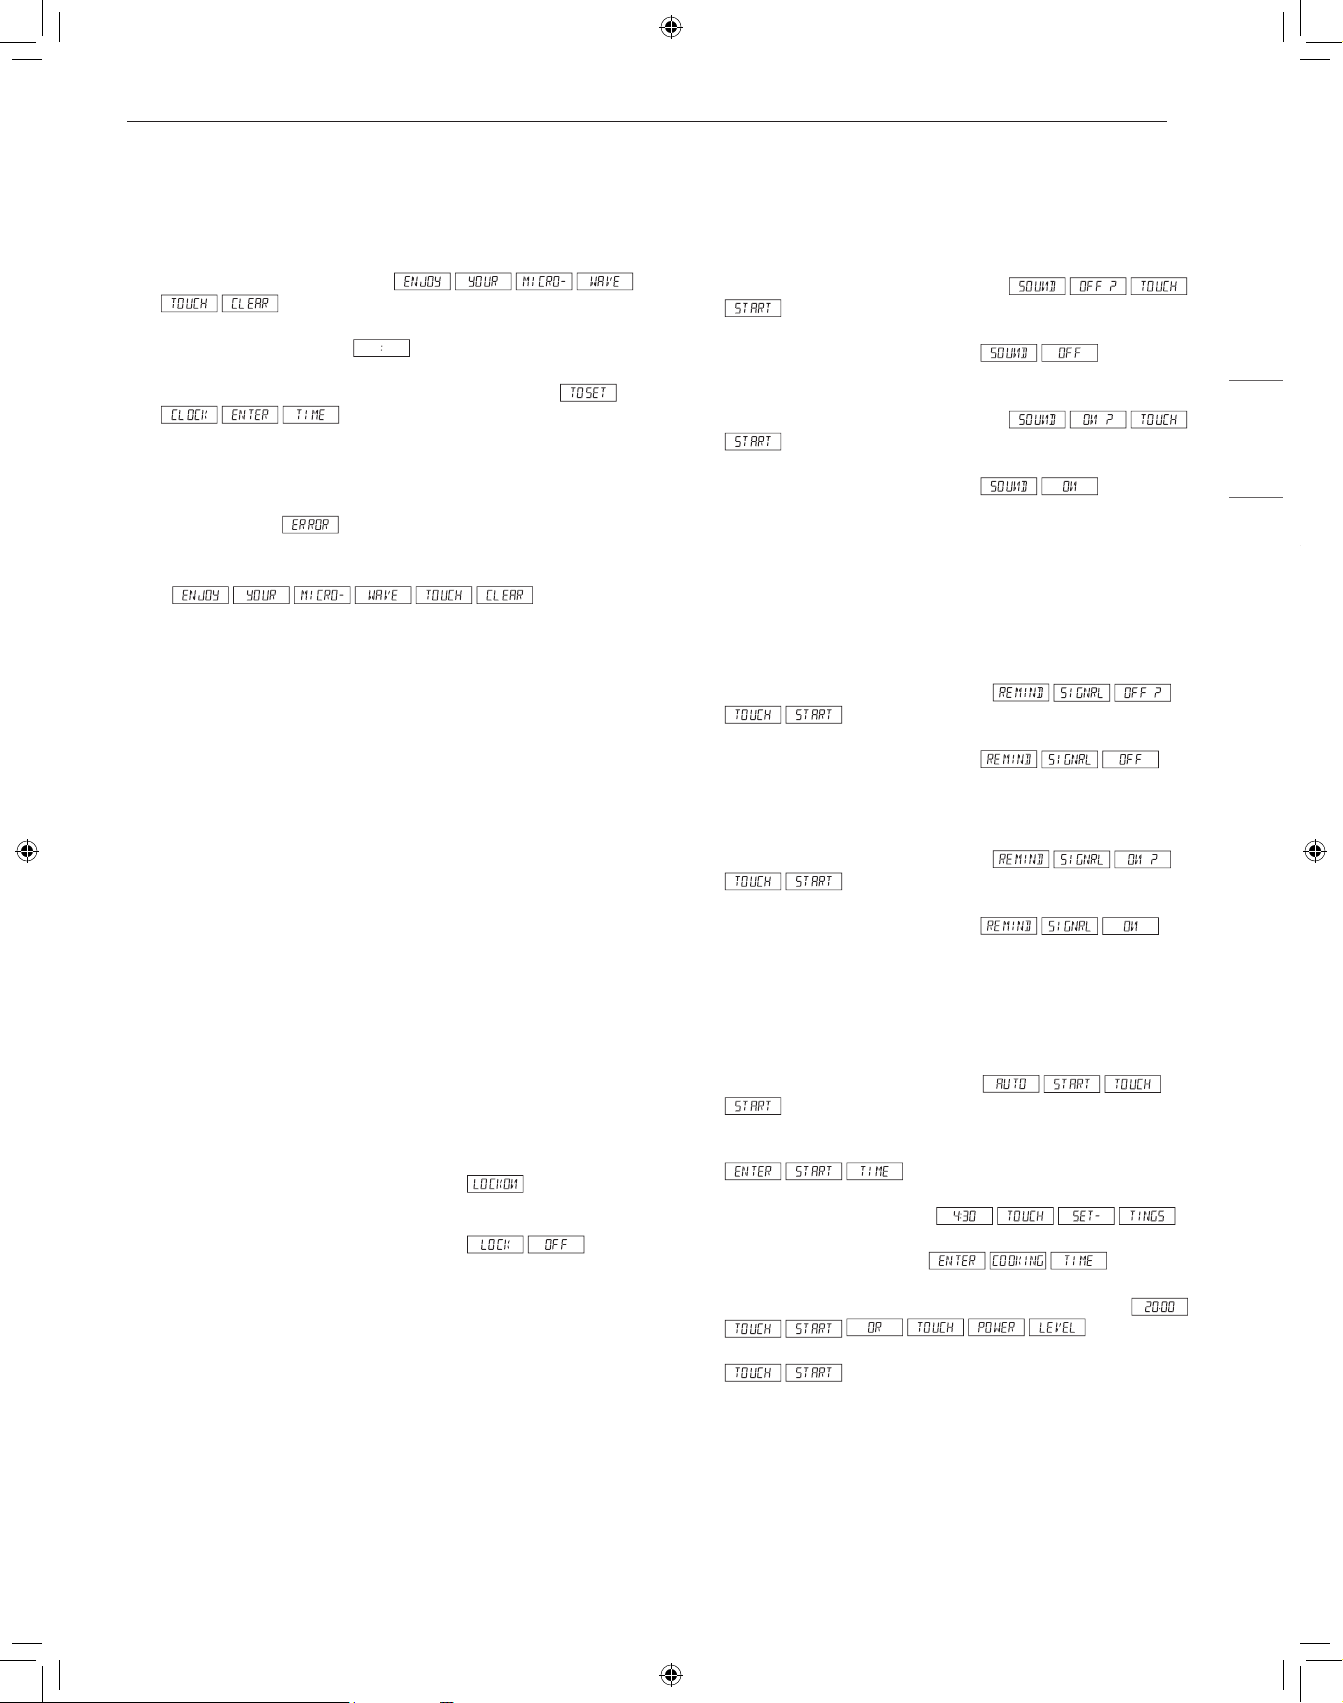
11
FONCTIONNEMENT
FRANÇAIS
Pour commencer
Réglage de l’horloge
Réglez l’heure actuelle pour faire fonctionner le micro-ondes.
1
Branchez le Drawer Microwave.
s’affichera.
2
Appuyez sur STOP/Clear. s’affichera.
3
Appuyez deux fois sur Timer/Setting. L’écran affichera
.
4
Appuyer sur les chiffres pour corriger l’heure du jour et appuyer sur
START/+30 seconds.
• Cette horloge a un cycle de 12 heures. En cas d’entrée d’une
heure invalide,
s’affichera. Appuyer sur la touche
STOP/Clear et entrer à nouveau l’heure.
• Si l’alimentation électrique du four à micro-ondes est coupée,
s’affichera et
clignotera dès que l’alimentation sera rétablie. Si cela se produit
durant la cuisson, la programmation sera effacée. L’heure aussi
sera effacée. Appuyer simplement sur la touche STOP/Clear et
remettre l’horloge à l’heure.
REMARQUE
• Le Drawer Microwave peut être programmé avec le tiroir ouvert sauf
pour START/+30 seconds.
Pour ouvrir ou fermer le four à micro-ondes
Appuyer sur la touche Open/Close sur le panneau de commande ou
secouer à deux reprises le côté supérieur gauche du tiroir pour ouvrir le
micro-ondes.
• Easy Wave ne fonctionne que pour ouvrir le four à micro-ondes,
non pour le fermer. Veuillez refermer le Drawer Microwave en le
poussant doucement. Ne tirez pas le tiroir manuellement, sauf en cas
d’urgence, telle qu’une panne de courant. Si nécessaire, poussez-le
ou tirez-le doucement.
Verrouillage à l’épreuve des enfants
Utilisez cette option de sécurité pour verrouiller le panneau de
commande avant de nettoyer le four ou pour empêcher les enfants
d’utiliser le four sans supervision.
Activer le verrouillage de sécurité
Appuyer sur STOP/Clear pendant 3 secondes.
s’affichera.
Annuler le verrouillage de sécurité
Appuyer sur STOP/Clear pendant 3 secondes.
s’affichera.
• Le verrouillage de sécurité est annulé en cas d’interruption de
la tension qui alimente le four à micro-ondes. Reprogrammez le
verrouillage de sécurité lorsque l’alimentation électrique est rétablie.
Minuterie de cuisine
La fonction de minuterie sert de minuterie de cuisine supplémentaire. Il
émet une sonnerie lorsque le temps réglé s’est écoulé. La minuterie ne
permet pas d’allumer ou d’éteindre le four.
1
Appuyer trois fois sur Timer/Setting.
2
Entrer l’heure.
3
Appuyer sur START/+30 seconds.
• Pour annuler la minuterie appuyer sur STOP/Clear.
Signaux sonores
À la fin d’une durée de cuisson, un bip résonnera. Si vous désirez que
votre appareil n’émette pas de signal sonore, vous pouvez le désactiver.
Pour désactiver le signal sonore
1
Appuyer quatre fois sur Timer/Setting.
2
Appuyer sur START/+30 seconds. s’affichera.
Pour réactiver le signal sonore
1
Appuyer quatre fois sur Timer/Setting.
2
Appuyer sur START/+30 seconds. s’affichera.
Rappel de fin de cuisson
À la fin d’une cuisson, le micro-onde signalera toutes les 10 secondes
pendant une minute et ensuite toutes les 3 minutes pendant une heure,
jusqu’à ce qu’on appuie sur STOP/Clear.
Pour désactiver le rappel
1
Appuyer cinq fois sur Timer/Setting.
s’affichera.
2
Appuyer sur START/+30 seconds.
s’affichera.
Pour réactiver le signal de rappel
1
Appuyer cinq fois sur Timer/Setting.
s’affichera.
2
Appuyer sur START/+30 seconds.
s’affichera.
Démarrage automatique
Si vous voulez programmer le Drawer Microwave pour commencer à
cuire automatiquement à une heure donnée, procéder comme suit.
1
Appuyer six fois sur Timer/Setting.
s’affichera.
2
Appuyer sur START/+30 seconds.
3
Entrer l’heure de démarrage.
4
Appuyer sur Timer/Setting.
5
Appuyer sur les chiffres pour entrer la durée de cuisson.
. Appuyer sur
Power Level répétitivement jusqu’au niveau de puissance désiré.
6
Appuyer sur START/+30 seconds.
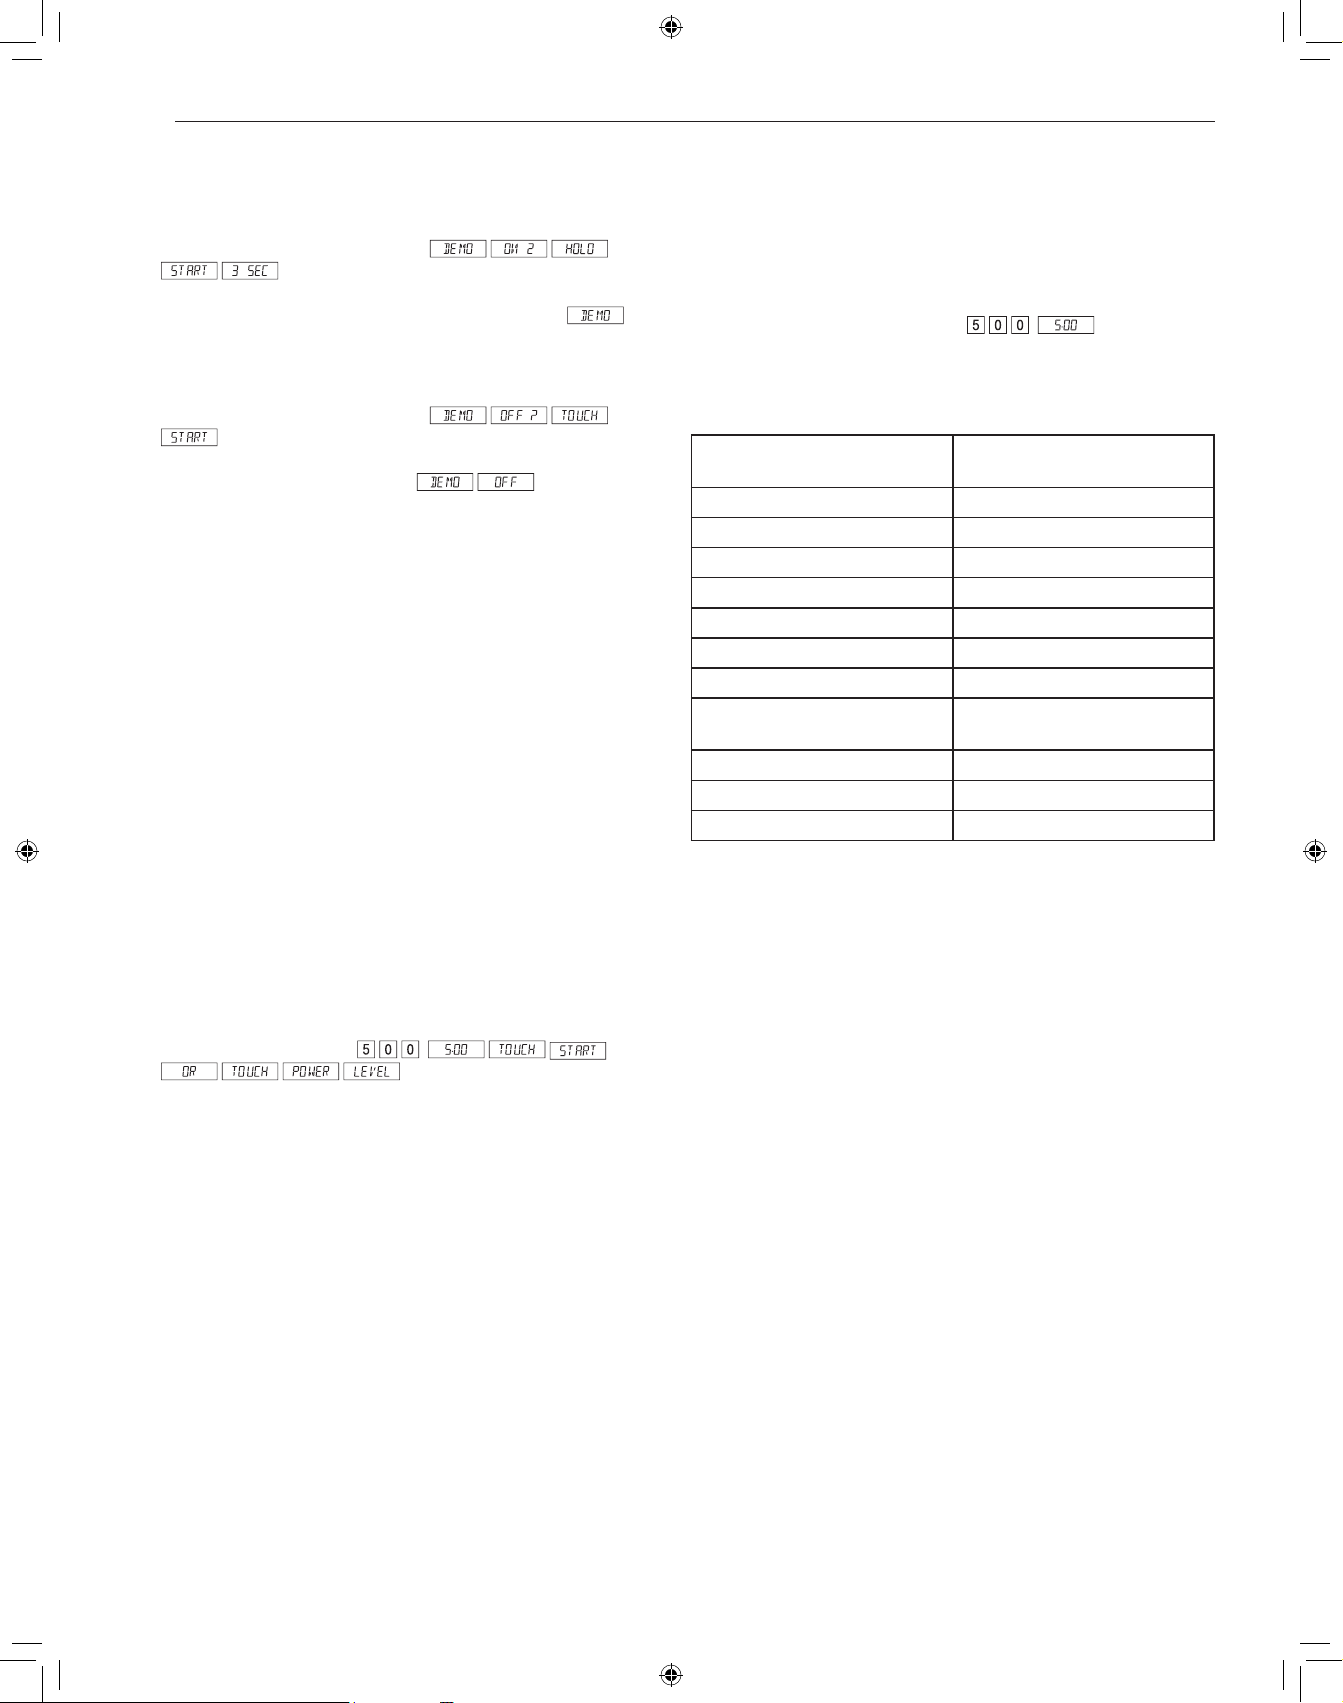
12
FONCTIONNEMENT
Mode de démonstration
Pour choisir le mode de démonstration
1
Appuyer sept fois sur Timer/Setting.
s’affichera.
2
Appuyer sur START/+30 seconds pendant 3 secondes.
s’affichera.
Pour annuler le mode de démonstration
1
Appuyer sept fois sur Timer/Setting.
s’affichera.
2
Appuyer sur START/+30 seconds. s’affichera.
REMARQUE
• Le Drawer Microwave ne chauffe pas en mode démo.
• Le compte à rebours s’affiche rapidement.
Économie d’énergie
Ce micro-ondes se met en mode veille après une période d'inactivité.
L'intensité du rétro-éclairage baisse automatiquement après 3 minutes
si l'appareil n'a pas fonctionné pendant ce temps. Si l'affichage est en
mode veille, il suffit de toucher le panneau de commande ou ouvrir /
fermer la porte pour remettre le rétro-éclairage à luminosité maximale.
Réglage manuel des temps de cuisson
Cuisson minutée
Votre Drawer Microwave peut être programmé pour 99 minutes 99
secondes (99.99). Toujours entrer les secondes après les minutes même
si les deux sont égales à zéro.
Cuisson pendant 5 minutes à 100 % de la
puissance.
1
Entrer le temps de cuisson .
2
Pour cuire à la puissance 100 % (élevée), appuyer sur la touche
START/+30 seconds.
REMARQUE
• Si aucun niveau de puissance de cuisson n’est sélectionné, le four est
réglé par défaut à la puissance maximum.
Niveaux de puissance du four à micro-ondes
Ce four à micro-ondes compte 11 niveaux de puissance pour vous offrir
une flexibilité maximale et un meilleur contrôle de la cuisson.
Décongélation pendant 5 minutes à 30 % de la
puissance.
1
Entrer le temps de décongélation .
2
Appuyer 8 fois sur la touche Power Level.
3
Appuyer sur START/+30 seconds.
Appuyez sur « Power Level »
(niveau de puissance) x fois
Niveau de puissance
1 100 % (élevé)
2 90%
3 80%
4 70 % (moyen-élevé)
5 60%
6 50 % (moyen)
7 40%
8
30 % (moyen-faible/
décongélation)
9 20%
10 10 % (faible)
11 0%
Aide
Il y a un conseil de cuisson pour chaque réglage dePopcorn, Reheat,
Cook, Defrost et Beverage. Si vous êtes intéressé, appuyer sur
Timer/Setting quand HELP est allumé sur l’afficheur interactif, pour lire
les conseils de cuisson et ceux de fonctionnement des autres manuels.

13
FONCTIONNEMENT
FRANÇAIS
+30 seconds (+30 secondes)
+30 seconds vous permet de faire cuire les aliments pendant 30
secondes à 100% en touchant simplement la touche +30 seconds. Vous
pouvez aussi prolonger la durée de cuisson en multiples de 30 secondes
en appuyant sur la touche +30 seconds le nombre de fois désiré en
mode de cuisson manuelle.
REMARQUE
• Pour utiliser +30 seconds, appuyez sur la touche à l’intérieur des trois
premières minutes de cuisson, après avoir fermé le tiroir ou appuyé
sur la touche STOP/Clear.
• +30 seconds ne peut pas être utilisé avec les modes de cuisson par
capteur, de réchauffage et de décongélation.
Réglage de durée en plus ou en moins
Si vous trouvez que vous préférez les réglages de Sensor, Reheat or
Defrost un peu plus forts, appuyer une fois sur la touche Power Level
après avoir appuyé sur les touches de votre choix. s’affichera.
Pour des réglages un peu moins forts, appuyer deux fois sur la touche
Power Level après avoir appuyé sur les touches de votre choix.
s’affichera.
Cuisson à séquences multiples
Votre Drawer Microwave peut être programmé pour 4 séquences
automatiques de cuisson, passant d’un réglage de puissance à l’autre
automatiquement.
Parfois, les conseils de cuisson suggèrent de commencer à un certain
niveau de puissance et de poursuivre à un autre niveau. Votre Drawer
Microwave peut le faire automatiquement.
1
Saisissez d’abord le temps de cuisson. Appuyez ensuite sur la
touche Power Level pour une cuisson à 100 % de la puissance, ou
appuyez plutôt sur la touche Power Level à plusieurs reprises pour
sélectionner un niveau de puissance plus faible.
2
Saisissez le second temps de cuisson. Appuyez sur la touche
Power Level à plusieurs reprises pour sélectionner le niveau de
puissance désiré. Ces instructions peuvent être répétées jusqu’à
quatre fois.
3
Appuyer sur START/+30 seconds.
REMARQUE
• sera affiché si on appuie une fois sur la touche Power Level.
• Si le niveau 100 % doit être utilisé au cours de la dernière séquence, il
n’est pas nécessaire d’appuyer sur la touche Power Level.
• Si vous voulez savoir le niveau de puissance, appuyer simplement sur
la touche Power Level. Aussi longtemps que votre doigt appuie sur la
touche Power Level le niveau de puissance sera affiché.
Utilisation des opérations de cuisson
par capteur
Utilisation des fonctionnalités de cuisson par
capteur
Les fonctionnalités de cuisson par capteur permettent de facilement
et automatiquement cuisiner ou réchauffer des aliments populaires à
l’aide de réglages préprogrammés. Les capteurs détectent la vapeur
accumulée, de sorte qu’il n’est pas nécessaire de régler les temps de
cuisson ou les niveaux de puissance.
• Assurez-vous de ne pas ouvrir la porte pendant la détection.
• Le fait d’ouvrir la porte ou d’appuyer sur la touche STOP/Clear avant
que la vapeur soit détectée met fin au processus et arrête le four.
• L’utilisation de contenants et d’emballages adéquats permet d’assurer
de bons résultats de cuisson par capteur.
− Utilisez toujours des contenants allant au micro-ondes et couvrez-
les avec un couvercle ou une pellicule de plastique perforée.
− N’utilisez jamais de couvercles en plastique hermétiquement
fermés. Ils peuvent empêcher la vapeur de s’échapper, ce qui fera
trop cuire les aliments.
− La quantité d’aliments doit correspondre à la taille du contenant.
− Remplissez les contenants au moins à moitié pour de meilleurs
résultats.
− Assurez-vous que l’extérieur du contenant de cuisson et l’intérieur
du four à micro-ondes sont secs avant de placer des aliments dans
le four. Des gouttes d’humidité se transformant en vapeur peuvent
induire le capteur en erreur.
− Papier ciré : Couvrir entièrement le plat et replier le papier sous le
plat de manière à ce qu’il ne bouge pas. Si le plat est plus large que
le papier, utiliser deux morceaux de papier se chevauchant d’au
moins 2,5 cm (1 po).
− Faire attention en retirant l’élément couvrant les aliments de laisser
la vapeur échapper loin de vous.
Utilisation des réglages du capteur
1
Après le branchement du Drawer Microwave, attendre 2 minutes
avant d’utiliser un réglage du capteur.
2
S’assurer que l’extérieur du récipient de cuisson et l’intérieur du
Drawer Microwave sont secs. Essuyer toute trace d’humidité avec
un chiffon sec ou un essuie-tout.
3
Le capteur fonctionne pour les aliments conservés à la température
de rangement normale. Par exemple, le maïs soufflé devrait être à
la température de la pièce.
4
Toute sélection du capteur peut être programmée avec réglage de
durée en plus ou en moins (More or Less Time Adjustment).
5
Si la quantité d’aliments est inférieure ou supérieure à celle des
tableaux, il faut cuire selon les directives d’un livre de cuisine aux
micro-ondes.
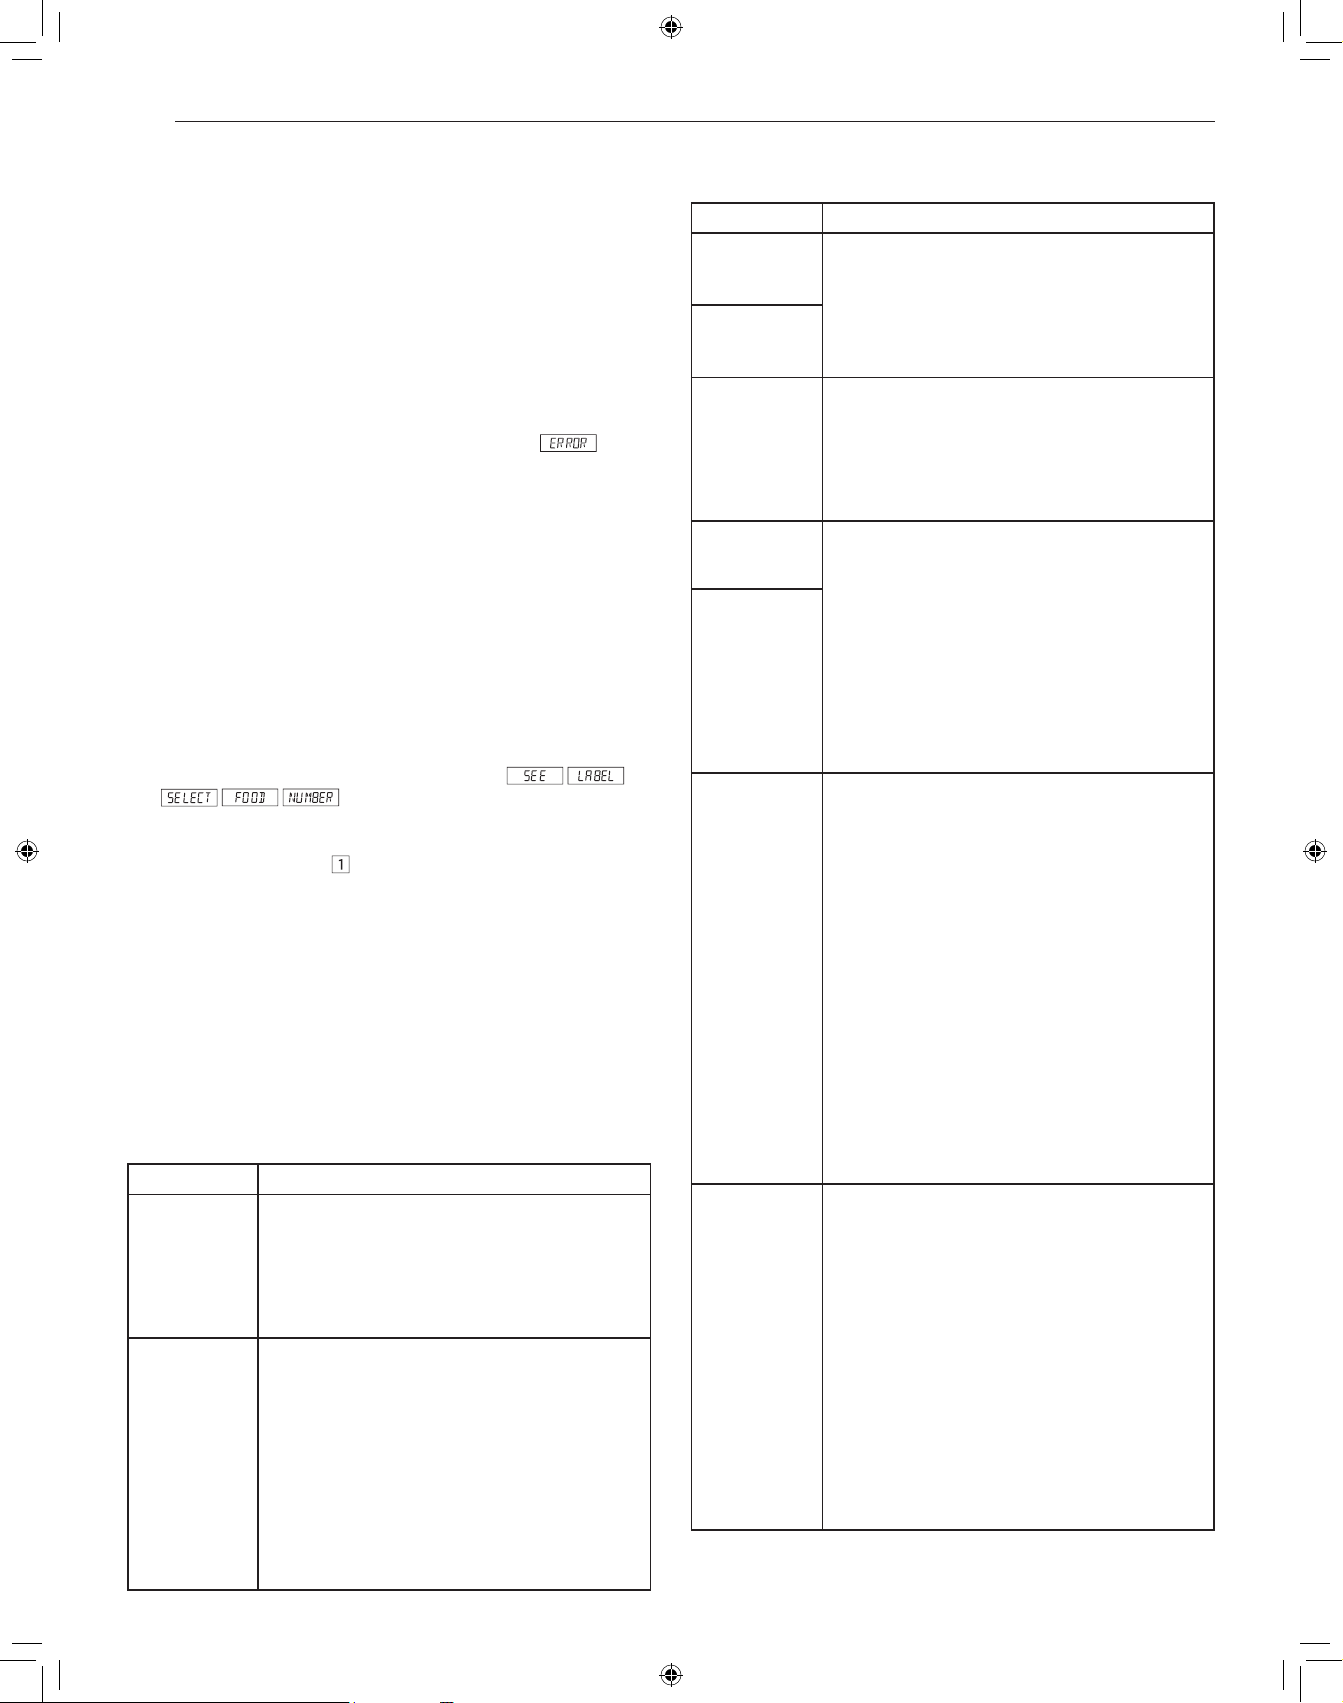
14
FONCTIONNEMENT
6
Au cours de la première période d’utilisation du capteur, le nom de
l’aliment s’affichera. Ne pas ouvrir la porte du Drawer Microwave, ni
appuyer sur la touche STOP/Clear au cours de cette période, car
cela provoquerait l’interruption de la mesure du degré d’humidité.
Dans un tel cas, un message d’erreur s’affichera. Pour poursuivre
la cuisson, appuyer sur la touche STOP/Clear et cuire en mode
manuel. Quand le capteur détectera la vapeur émise par les
aliments, le temps de cuisson/réchauffage restant s’affichera.
On peut ouvrir le Drawer Microwave lorsque le temps de cuisson
restant s’affiche à l’écran. À ce moment-là, on peut aussi remuer les
aliments et les assaisonner, au goût.
7
À part le maïs soufflé, si le capteur ne détecte pas la vapeur
de manière adéquate à la cuisson d’autres aliments,
s’affichera et le four à micro-ondes se mettra hors tension.
8
Vérifier la température des aliments après cuisson. S’il faut plus de
temps, continuer à cuire en mode manuel.
9
Il existe un conseil de cuisson pour chaque aliment. Appuyer sur
la touche Timer/Setting quand l’indicateur HELP est allumé sur
l’afficheur.
Mode de cuisson par capteur
La cuisson par capteur vous permet de cuire vos aliments préférés sans
avoir à sélectionner une durée de cuisson et un niveau de puissance. Le four
ajuste automatiquement la durée de la cuisson pour de nombreux aliments.
1
Appuyez une fois sur la touche Cook (cuisson).
.
2
Voir l'aide-mémoire. Sélectionner l'aliment voulu en appuyant sur un
chiffre. Ex: appuyer sur
pour les pommes de terre cuites au four.
3
Appuyer sur START/+30 seconds.
REMARQUE
• Pour réchauffer ou cuire des aliments ou d'autres aliments ci-dessus
ou en dessous de la quantité sur la charte, cuire manuellement.
• N’utiliser que du maïs soufflé emballé pour micro-ondes. Essayer
plusieurs marques et choisir celle qui vous plait. Ne pas tenter de
souffler les grains qui n’ont pas éclaté.
• 1 paquet à la fois.
Tableau de réchauffage : maïs soufflé
Menu Directives
Éclater • Quantité : 2,85 à 3,50 oz (régulier/régulier-léger)
– Appuyez une fois sur la touche « Popcorn »
(maïs soufflé).
• Quantité : 1,20 à 1,75 oz (petite portion) –
Appuyez deux fois sur la touche « Popcorn »
(maïs soufflé).
Réchauffage • Quantité : 4 à 36 oz
• Mettre dans un plat ou une casserole un peu plus
grande que la quantité à réchauffer. Aplatir si
possible. Couvrir avec un couvercle, film plastique ou
un papier ciré. Couvrir avec du film plastique ou des
couvercles pour de plus grandes quantités d’aliments
plus denses comme les ragoûts Si possible, bien
remuer après réchauffage. Couvrir à nouveau et
laisser reposer 2 à 3 minutes. Les aliments devraient
être très chauds. Dans le cas contraire, continuer à
chauffer avec une puissance et une durée variables.
Tableau de cuisson
Menu Directives
1 Baked
Potatoes
• Quantité : 1 à 6 (moyen)
• Piquez, puis placez sur un essuie-tout au fond du
Drawer Microwave. Après la cuisson, retirez du
four, enveloppez dans du papier d’aluminium et
laissez reposer pendant 5 à 10 minutes.
2 Sweet
Potatoes
3 Fish/Seafood • Quantité : 0,25 à 2,00 lb
• Disposer en anneau autour d’un plat en verre peu
profond (rouler le filet en mettant les bords en
dessous). Couvrir avec du film plastique ventilé.
Après la cuisson, laisser reposer, à couvert, 3
minutes.
4 Brown Rice • Quantité : 0,5 à 2,0 tasses
• Placer le riz dans une cocotte profonde et ajouter
le double d’eau. Couvrir avec un couvercle ou un
film plastique. Après la cuisson, remuer, couvrir
et laisser reposer de 3 à 5 minutes ou jusqu’à ce
que tout le liquide ait été absorbé.
Riz Eau Taille de la casserole
0,5 tasse..... 1 tasse..... 1,5 pinte
1 tasse........ 2 tasses... 2 pinte
1,5 tasses... 3 tasses... 2,5 ou 3 pinte
2 tasses...... 4 tasses... 3 pinte ou plus
5 White Rice
6 Quick Fresh
Vegetables
Quantité
• Brocoli : 0,25 à 2,00 lb
• Choux de Bruxelles : 0,25 à 2,00 lb
• Chou : 0,25 à 2,00 lb
• Chou-fleur (morceaux) : 0,25 à 2,00 lb
• Chou-fleur (complet) : 1 (moyen)
• Épinards : 0,25 à 2,00 lb
• Courgettes : 0,25 à 2,00 lb
• Pommes au four : 2 à 4 (moyennes)
• Laver et mettre dans une casserole. Ne pas
ajouter d’eau si les légumes viennent d’être
rincés. Couvrir avec un couvercle pour obtenir des
légumes tendres. Utiliser un film plastique pour
obtenir des légumes tendres mais croustillants.
Après la cuisson, remuer si possible, Laisser
reposer, à couvert, 2 à 5 minutes.
7 Longer Fresh
Vegetables
Quantité
• Carottes en tranches : 0,25 à 1,00 lb
• Maïs en épi : 2 à 4
• Haricots verts : 0,25 à 1,00 lb
• Courge d’hiver
− en dés : 0,25 à 1,00 lb
− en moitié 1 - 2
• Mettre dans une casserole. Ajouter 1 à 4 c. à
soupe d’eau. Couvrir avec un couvercle pour
obtenir des légumes tendres. Utiliser un film
plastique pour obtenir des légumes tendres mais
croustillants. Après la cuisson, remuer si possible,
Laisser reposer, à couvert, 2 à 5 minutes.
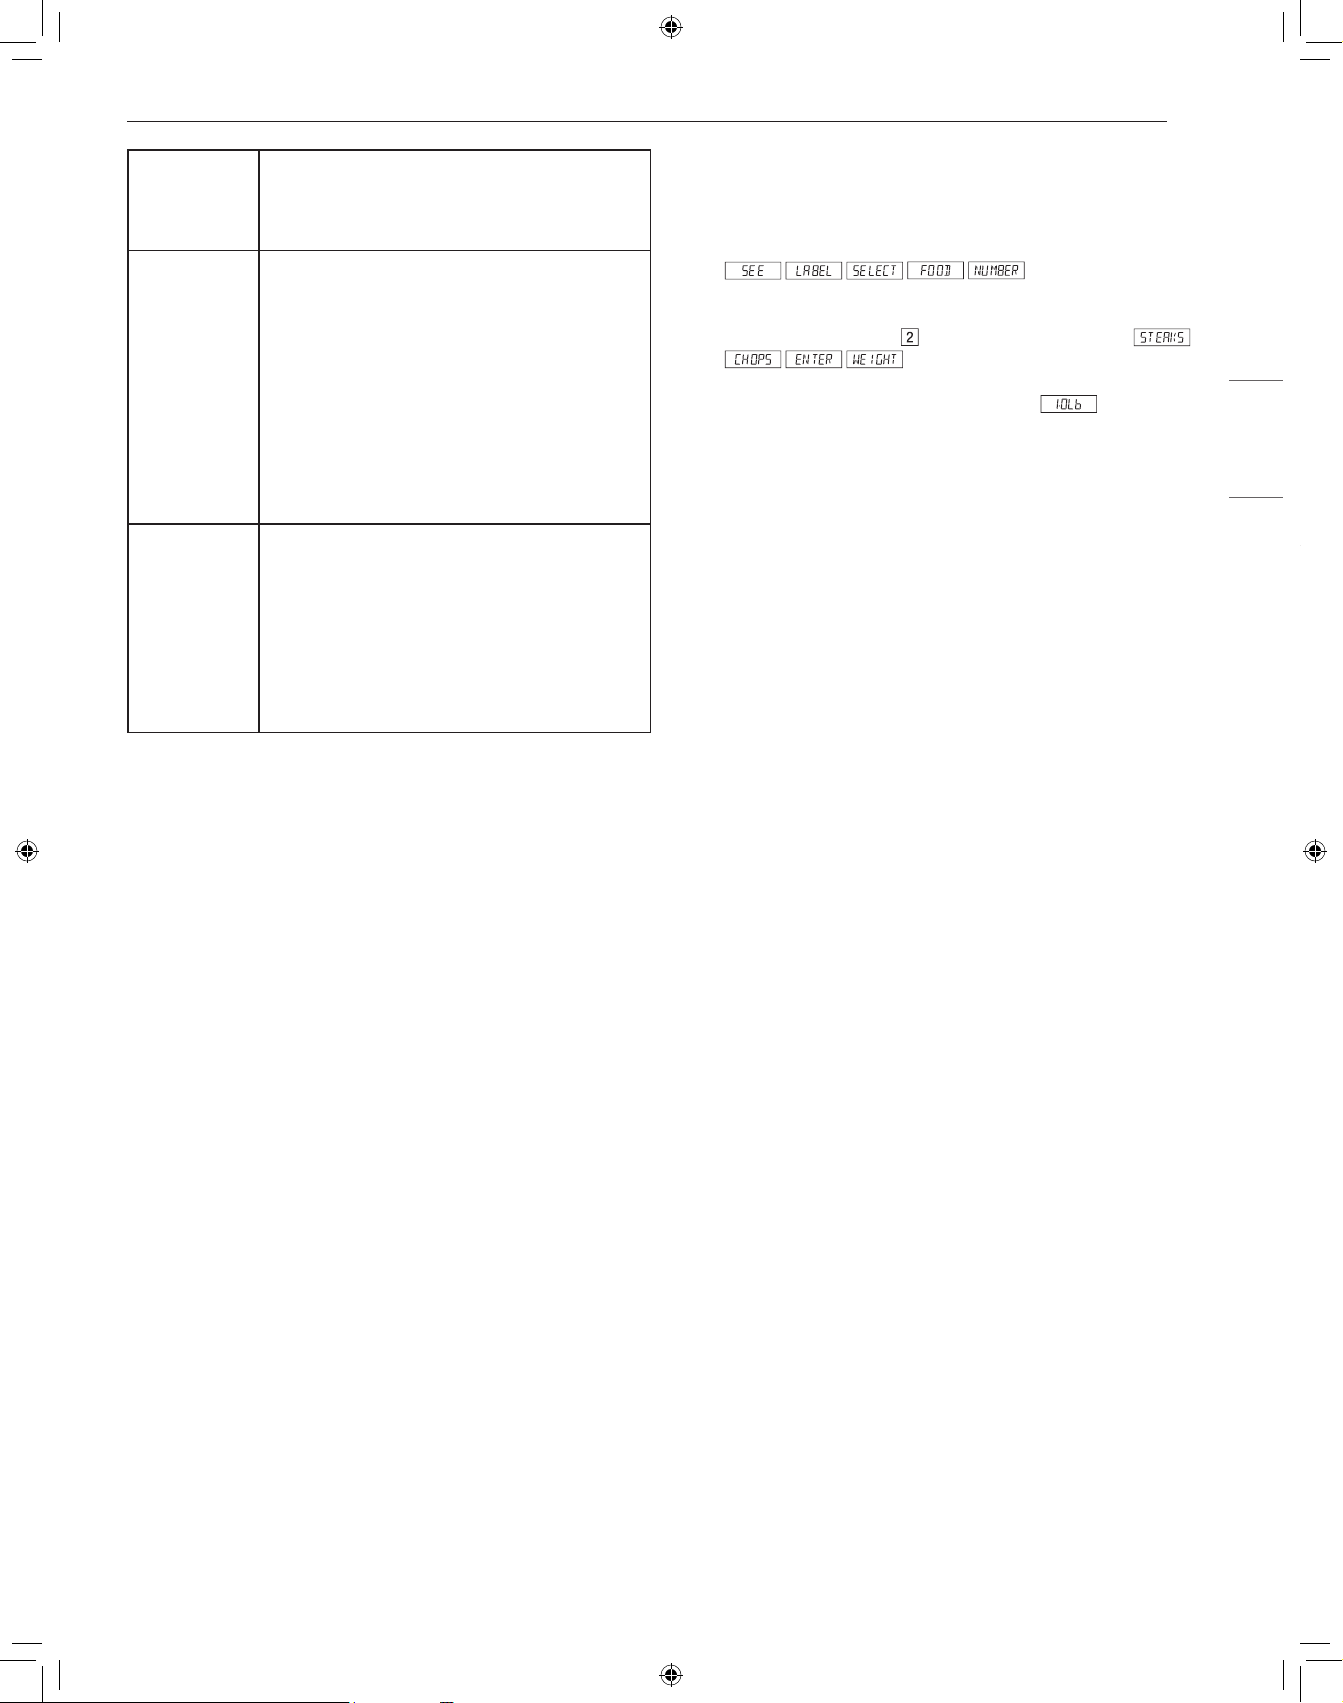
15
FONCTIONNEMENT
FRANÇAIS
8 Frozen
Vegetables
• Quantité : 0,25 à 1,25 lb
• Ne pas ajouter d’eau. Couvrir avec un couvercle.
Après la cuisson, remuer et laisser reposer, à
couvert, 3 minutes.
9 Ground Meat • Quantité : 0,25 à 2,00 lb
• Utiliser ce réglage pour cuire du boeuf ou de la
dinde hachés en fricadelles ou en cocotte avec
d’autres ingrédients. Placer les fricadelles sur une
grille transparente aux micro-ondes et couvrir de
papier ciré. Placer la viande hachée dans une
cocotte et couvrir avec du papier ciré ou du film
plastique. Quand le four s’arrête, retourner les
fricadelles ou mélanger la viande dans la cocotte
pour séparer les gros morceaux. Recouvrir et
appuyer sur START/+30 seconds. Après la
cuisson, laisser reposer, à couvert, 2 à 3 minutes.
10 Frozen
Entrees
• Quantité : 6 à 17 oz
• Utiliser cette touche pour les plats prêt-à-servir
congelés. Cela donnera des résultats satisfaisants
avec la plupart des marques. Peut-être voudrez-
vous en essayer plusieurs et choisir votre préféré.
Retirer le plat de l’emballage extérieur et suivre
les indications pour le recouvrement du plat.
Après la cuisson, laisser reposer, à couvert, 1 à 3
minutes.
Mode Décongélation
Utilisez cette fonctionnalité pour décongeler les aliments indiqués dans
le tableau de décongélation.
1
Appuyer sur DEFROST.
2
Voir l’aide-mémoire. Choisir l’aliment désirée en appuyant sur un
chiffre. Ex : Appuyer sur
les biftecks ou les côtelettes.
3
Entrer le poids en appuyant sur les chiffres.
4
Appuyer sur START/+30 seconds.
Le four d’arrête pour que vous puissiez inspecter l’aliment.
5
Après la première étape, ouvrir le Drawer Microwave. Retourner le
bifteck et masquer les parties chaudes. Fermer le tiroir. Appuyer sur
START/+30 seconds.
6
Après la deuxième étape, ouvrir le Drawer Microwave. Masquer
tout les parties chaudes. Fermer le Drawer Microwave. Appuyer sur
START/+30 seconds.
7
À la fin du cycle de décongélation, masquer et laisser reposer
comme indiqué dans le tableau ci-dessous.
Remarque :
• Defrost peut être programmé avec réglage de durée en plus ou en
moins.
• Pour décongeler d’autres aliments ou des aliments dont le
poids est supérieur ou inférieur à celui indiqué dans le tableau
de décongélation, veuillez consulter la section « Décongélation
manuelle ».
• Inspecter les aliments au signal du four. Après l’étape finale, de
petites sections peuvent être encore gelées. Laisser reposer pour que
le dégel se poursuive. Ne pas décongeler avant que tous les cristaux
de glace soient fondus.
• Le masquage empêche que la cuisson ait lieu avant que le centre de
l’aliment ne soit dégelé. Utiliser de petites bandes souples de papier
d’aluminium pour couvrir les bords et les parties les moins épaisses
de l’aliment.
Décongélation manuelle
Si les aliments que vous voulez décongeler ne sont pas dans le tableau
de décongélation ou sont en quantité supérieure ou inférieure à celle
de la colonne QUANTITÉ du tableau de décongélation, vous devrez les
décongeler en mode manuel.
Vous pouvez décongeler tout aliment, cru ou déjà cuit, en réglant le
niveau de puissance à 30 %. Veuillez suivre les instructions de la section
« Niveaux de puissance du four à micro-ondes ». Estimez la durée de
décongélation et appuyez huit fois sur la touche « POWER LEVEL »
(niveau de puissance) pour une puissance de 30 %.
Pour des aliments crus ou déjà cuits, la règle d’or est d’environ 4 minutes
par livre. Par exemple, 1 livre de spaghetti dégèlera en 4 minutes.
Veiller à arrêter le four périodiquement pour séparer et retirer les portions
dégelées. Si les aliments ne sont pas complètement dégelés à a fin
du temps de décongélation estimé, programmer le four en incréments
d’1 minute, au niveau de puissance de 30 % jusqu’à décongélation
complète.
Quand vous utilisez des récipients en plastique sortant du congélateur,
décongeler seulement assez longtemps pour retirer les aliments du
plastique et les mettre dans un plat pour micro-ondes.
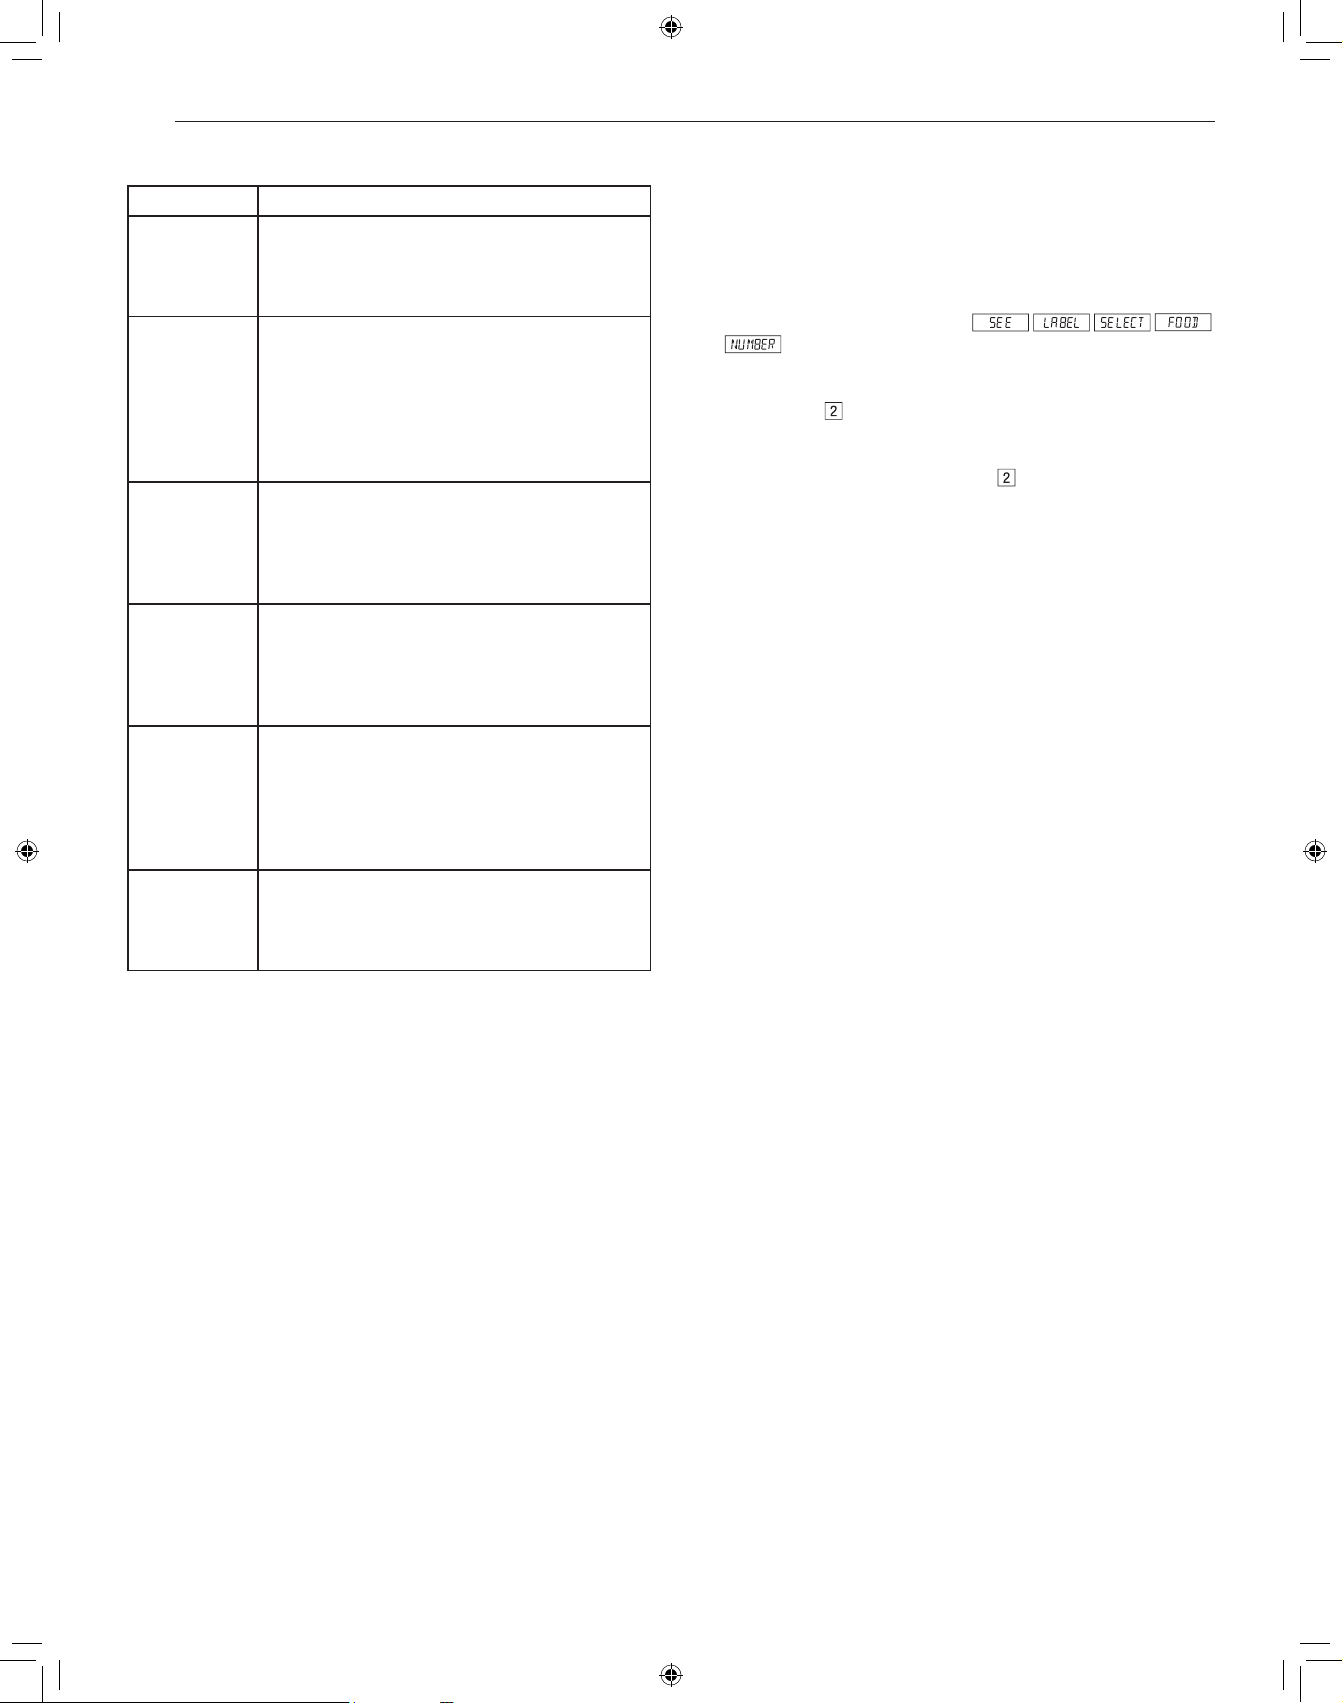
16
FONCTIONNEMENT
Tableau de décongélation
Menu Directives
1 Ground Meat • Quantité : 0,5 à 2,0 lb
• Retirer les parties dégelées après chaque
signal sonore. Laisser reposer, à couvert, 5 à 10
minutes.
2 Chops • Quantité : 0,5 à 3,0 lb
• Après chaque signal sonore, changer la
disposition des aliments et masquer les parties
chaudes ou dégelées au moyen de bandes
de papier d’aluminium. Retirer la viande ou le
poisson presque entièrement dégelés. Laisser
reposer, à couvert, 10 à 20 minutes.
3 Boneless
Poultry
• Quantité : 0,5 à 2,0 lb
• Après chaque signal sonore, s’il y a des morceaux
chauds ou dégelés, changer la disposition
ou retirer. Laisser reposer, à couvert, 10 à 20
minutes.
4 Bone-in
Poultry
• Quantité : 0,5 à 3,0 lb
• Après chaque signal sonore, changer la
disposition ou retirer les morceaux. s’il sont
chauds ou dégelés Laisser reposer, à couvert, 10
à 20 minutes.
5 Roast • Quantité : 2,0 à 4,0 lb
• Commencer par dégivrer, avec les parties grasses
en dessous. Après chaque étape, retourner le rôti
et recouvrir les parties chaudes de morceaux de
feuille d’aluminium. Laisser reposer, à couvert,
pour 30 à 60 minutes.
6 Casserole
Soup
• Quantité : 2 à 6 tasses / 1 à 6 tasses
• Après chaque signal sonore, briser en morceaux
et retirer ce qui est dégelé. À la fin, bien remuer et
laisser reposer, couvert, pendant 5 à 10 minutes.
More Menu (plus d’options)
Fondre/Ramollir/Chauffer
Ces caractéristiques calculent automatiquement le temps de
réchauffement approprié et la puissance du four à micro-ondes pour faire
fondre, ramollir et réchauffer les aliments du tableau suivant.
1
Appuyer une fois sur More Menu.
2
Voir aide-Mémoie. Choisir un aliment en appuyant sur un chiffre. Ex
: Appuyer sur
pour chocolat.
3
Appuyez à plusieurs reprises sur la même touche numérique pour
choisir la quantité (p. ex. appuyez sur
deux fois de plus pour un
carré).
4
Appuyer sur START/+30 seconds.
REMARQUE
• Melt, Soften et Warm peut être programmé avec réglage de durée en
plus ou en moins.
• Pour faire fondre, ramollir ou chauffer doucement d’autres aliments
que ceux mentionnés ci-avant, ou pour des quantités supérieures ou
inférieures à la quantité indiquée au tableau fondre/ramollir/chauffer,
faites fonctionner manuellement l’appareil.
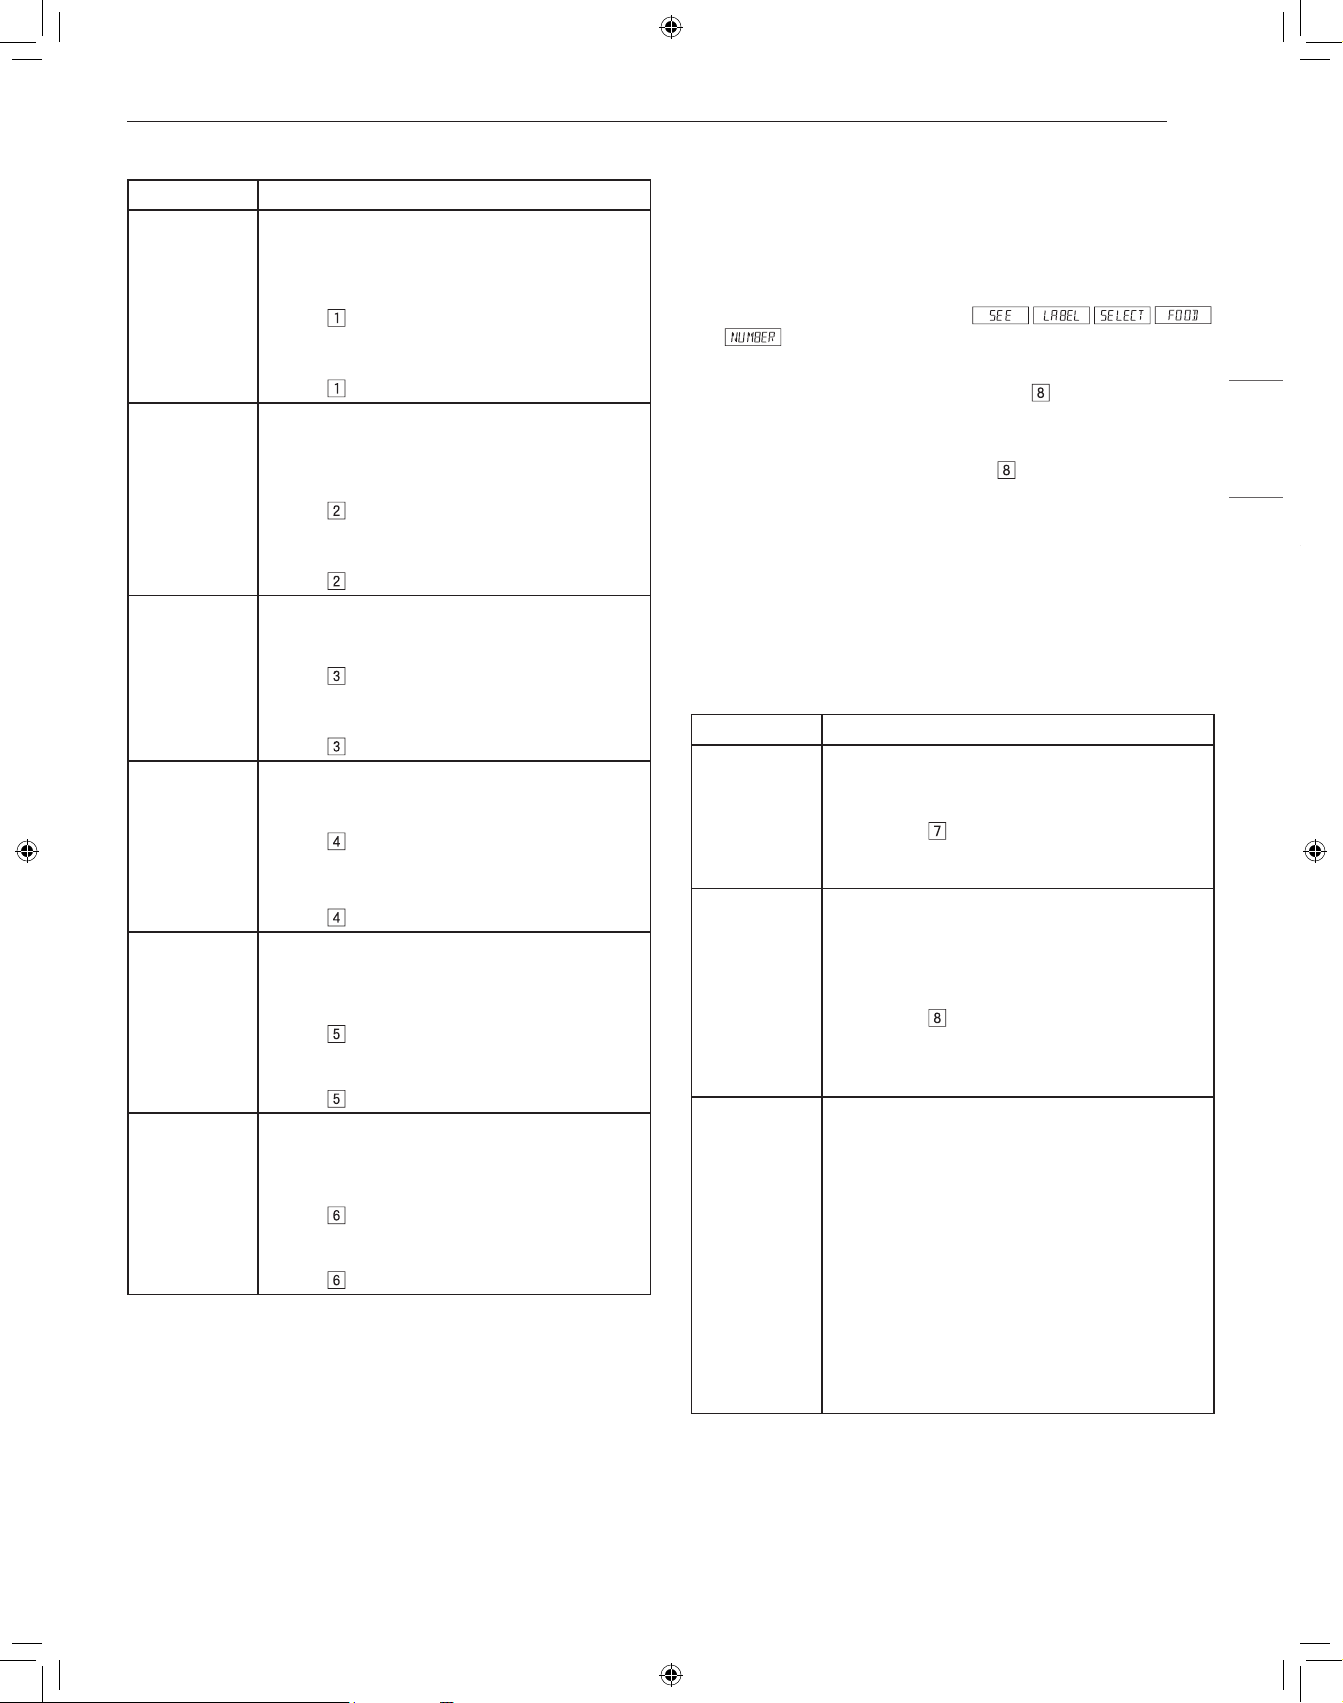
17
FONCTIONNEMENT
FRANÇAIS
Tableau fondre/ramollir/chauffer
Menu Directives
Melt (Fondre)
1 Butter
• Utiliser une tasse à mesurer en pyrex. Couvrir
avec du film plastique ventilé.
• Quantité : 2 c. à table
− Après une pression sur More Menu, appuyer
sur
deux fois pour 2 c. à soupe.
• Quantité : 0,5 tasse
− Après une pression sur More Menu, appuyer
sur
trois fois pour 1/2 tasse.
2 Chocolate • Utiliser une tasse à mesurer en pyrex. Couvrir
avec du film plastique ventilé.
• Quantité : 1 tasse de brisures
− Après une pression sur More Menu, appuyer
sur
deux fois pour 1 tasse de brisures.
• Quantité : 1 carré (1 oz)
− Après une pression sur More Menu, appuyer
sur
trois fois pour 1 carré.
Soften
(Ramollir)
3 Ice cream
• Ne couvrez pas.
• Quantité : 1 chopine
− Après une pression sur More Menu, appuyer
sur
deux fois pour 1 chopine.
• Quantité : 1,5 pinte
− Après une pression sur More Menu, appuyer
sur
trois fois pour 1/2 litres.
4 Cream
cheese
• Ne couvrez pas.
• Quantité : 3 oz
− Après une pression sur More Menu, appuyer
sur
deux fois pour 84 g.
• Quantité : 8 oz
− Après une pression sur More Menu, appuyer
sur
trois fois pour 184 g.
Warm
(Chauffer)
5 Syrup
• Utiliser une tasse à mesurer en pyrex. NE
COUVREZ PAS.
• Quantité : 0,25 tasse
− Après une pression sur More Menu, appuyer
sur
deux fois pour 1/4 tasse.
• Quantité : 0,5 tasse
− Après une pression sur More Menu, appuyer
sur trois fois pour 1/2 tasse.
6 Dessert
Toppings
• Utiliser une tasse à mesurer en pyrex. NE
COUVREZ PAS.
• Quantité : 0,25 tasse
− Après une pression sur More Menu, appuyer
sur
deux fois pour 1/4 tasse.
• Quantité : 0,5 tasse
− Après une pression sur More Menu, appuyer
sur trois fois pour 1/2 tasse.
Beverage Reheat(Boissons réchauffage)
Ces fonctionnalités vous permettent de réchauffer le café ou le thé pour
réaliser une température plus convenable à la consommation, ou pour
préparer du café ou du thé instantané
Pour faire réchauffer deux tasses de café
1
Appuyer une fois sur More Menu.
2
Consultez l’aide-mémoire. Choisissez le menu voulu en appuyant
sur le pavé numérique (p. ex. appuyez sur
pour préparer du
café).
3
Appuyez à plusieurs reprises sur la même touche numérique pour
choisir la quantité (p. ex. appuyez sur
deux fois de plus pour
deux tasses de café).
4
Appuyer sur START/+30 seconds.
REMARQUE
• Le réchauffage des boissons peut être programmé avec le réglage de
la durée en plus ou en moins.
• Si vous essayez de saisir un chiffre en dessous ou en dessus de la
quantité permise, un message d’erreur s’affichera.
Tableau de réchauffage des boissons
Menu Directives
7 Beverage
Reheat
• Quantité : 0,5 à 2 tasses
• Utilisez ce réglage pour réchauffer des boissons
chaudes qui ont refroidi. Appuyez sur la touche
numérique
pour augmenter de 0,5 tasse
par pression. Lorsque le liquide est réchauffé,
mélangez-le bien.
8 Hot Water • Quantité : 1 à 6 tasses
• Utilisez ce réglage pour faire chauffer de L’EAU
FROIDE DU ROBINET à une température juste
sous le point d’ébullition pour préparer du café
ou du thé instantané. Appuyez sur la touche
numérique
pour augmenter de 1 tasse
par pression. Remuez bien le liquide après le
réchauffage pour éviter tout débordement par
bouillonnement.
9 Hot Cereal • Quantité : 1 à 6 portions
• Sélectionnez votre variété préférée de céréales
en sachets individuels ou en vrac : gruau, son
d’avoine, semoule, etc. Suivez les directives sur
l’emballage afin d’utiliser la bonne quantité d’eau
ou de lait. Pour éviter tout débordement par
bouillonnement, il est très important de choisir un
grand contenant, car les céréales cuites au four à
micro-ondes bouillent fortement. Appuyez sur la
touche numérique 9 pour augmenter d’une portion
par pression. À l’arrêt du four, remuez, puis
appuyez sur START/+30 seconds. Après la
cuisson, remuez, couvrez et laissez reposer
pendant deux minutes.
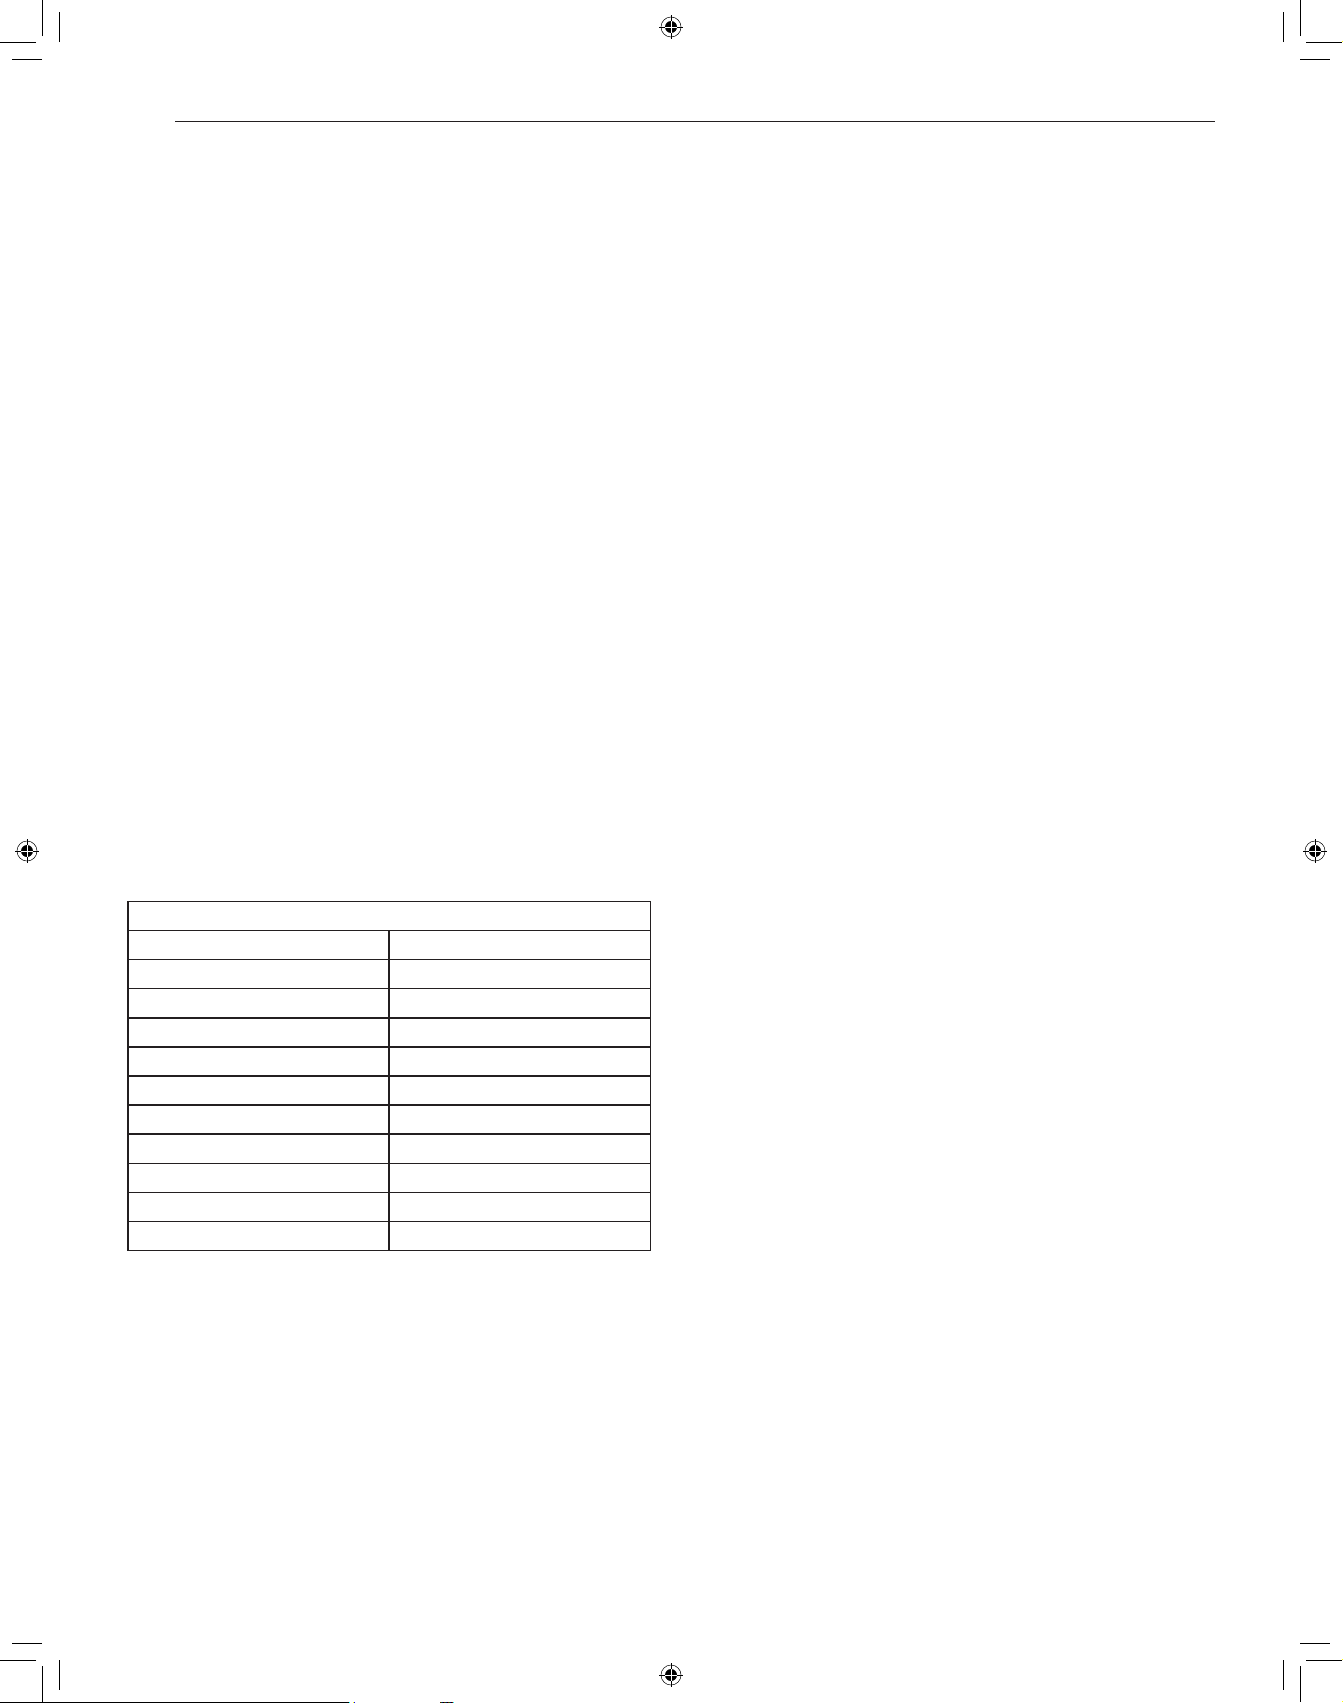
18
FONCTIONNEMENT
Conseils de décongélation
• Enlevez le poisson, les fruits de mer, la viande et la volaille de
l’emballage d’origine ou de l’emballage en plastique. Sinon,
l’emballage retiendra la vapeur et le jus près des aliments, et la
surface extérieure des aliments pourrait cuire.
• Retirez toute attache métallique.
• Faites toujours une entaille dans les pochettes ou les emballages en
plastique.
• Ouvrez les contenants comme les boîtes en carton avant de les
placer dans le four.
• Si les aliments sont emballés dans du papier d’aluminium, enlevez
le papier d’aluminium et placez les aliments dans un contenant
approprié.
• Le temps de décongélation varie selon la forme des aliments et le
degré de congélation de ceux-ci.
• Lorsque les aliments commencent à dégeler, séparez-les en
morceaux pour qu’ils puissent décongeler plus facilement.
• Retournez les aliments pendant la décongélation ou le temps de
repos. Défaites les aliments en morceaux et retirez-les, au besoin.
• Laissez les aliments reposer après la décongélation. Les aliments
doivent être encore légèrement gelés au centre lorsqu’ils sont retirés
du four.
Tableau de conversion de poids
La plupart du temps, le poids des aliments est donné en livres et en
onces. Si vous utilisez des livres, le poids des aliments doit être saisi
dans le mode Auto Defrost (décongélation automatique) en livres et en
dixièmes de livres (décimales).
Utilisez le tableau suivant au besoin pour convertir le poids des aliments
en décimales.
Poids équivalent
ONCES POIDS EN DÉCIMALES
1,6 0,10
3,2 0,20
4,8 0,30
6,4 0,40
8,0 0,50 Une demi-livre
9,6 0,60
11,2 0,70
12,8 0,80
14,4 0,90
16,0 1.00 Une livre

19
ENTRETIEN
FRANÇAIS
ENTRETIEN
Nettoyage
Maintenez le four propre à l’intérieur comme à l’extérieur. Apportez un
soin particulier au panneau de la porte intérieure et au cadre avant du
four pour éliminer les accumulations d’aliments ou de graisse. Nettoyez
votre four chaque semaine ou plus souvent, au besoin.
REMARQUE
• Les nettoyants abrasifs, les tampons en laine d’acier, les chiffons
rugueux, les essuie-tout, etc., peuvent endommager le panneau de
contrôle ainsi que les surfaces intérieures et extérieures du four.
Extérieur
La surface extérieure est en métal peint et en plastique. Nettoyer la
surface extérieure à l’eau et au savon doux; rincer et sécher au moyen
d’un chiffon doux. Ne pas utiliser de produits de nettoyage ménagers ou
abrasifs.
Surface en acier inoxydable
Il faut essuyer souvent l’extérieur avec un chiffon doux et humide et
le frotter avec un chiffon doux sec pour lui garder son lustre. Toujours
essuyer dans le sens du grain. Il existe aussi de nombreux produits
conçus spécialement pour nettoyer et faire briller l’extérieur en inox du
four. Nous recommandons d’appliquer le nettoyant sur un chiffon doux
et de s’en servir ensuite sur l’inox plutôt que de le vaporiser directement
dessus. Suivre à la lettre les instructions de l’emballage.
Avant du tiroir
Essuyer les deux surfaces du hublot à l’aide d’un chiffon humide pour
enlever les éclaboussures. ll est plus facile de nettoyer les parties
métalliques si on les essuie fréquemment avec un chiffon humide. Éviter
tout emploi de produits nettoyants vaporisés ou abrasifs car ils peuvent
tacher, strier ou ternir la surface de la porte.
Panneau de commande tactile
Si désiré, les touches peuvent être désactivées avant le nettoyage.
Veuillez consulter les renseignements sur le verrouillage de sécurité.
Essuyez le panneau de commande avec un chiffon humecté d’eau.
Séchez avec un chiffon doux. N’utilisez ni poudre à récurer ni produits
chimiques de nettoyage. Refermez le tiroir et suivez les instructions pour
déverrouiller les commandes. Appuyez sur STOP/Clear.
Intérieur
Avant de nettoyer le Drawer Microwave, appuyez sur la touche
STOP/Clear pendant trois secondes pour verrouiller le panneau de
commande et le mécanisme de porte automatique. On peut fixer le tiroir
en position ouverte ou fermée. L’écran affichera . Ceci évitera
que le tiroir s’ouvre ou se ferme par accident durant le nettoyage. Une
fois le nettoyage fini, appuyez pendant trois secondes sur la touche
STOP/Clear pour désactiver le verrouillage. L’écran affichera
.
Le nettoyage est facile car les parois intérieures n’absorbent pas de
chaleur de telle sorte que les éclaboussures ne cuisent pas. Pour
nettoyer les parois intérieures, y compris les surfaces d ‘étanchéité du
tiroir, essuyer avec un chiffon doux humide. NE PAS UTILISER DE
PRODUITS ABRASIFS OU DE TAMPONS À RÉCURER. Pour les
taches tenaces, utiliser du savon doux et nettoyer avec un chiffon doux
humide Ne pas utiliser de nettoyants chimiques pour les fours.
Glissières du Drawer Microwave
Nettoyer les glissières du tiroir des miettes de nourriture. Les essuyer
avec un chiffon doux et sec pour que le tiroir s’ouvre et se ferme en
douceur.
Couvercle du guide d’ondes
Tenir propre le couvercle du guide d’ondes pour assurer un bon
fonctionnement du four. Essuyer immédiatement et délicatement
avec un chiffon humide toute éclaboussure d’aliments sur la
surface du couvercle. Une accumulation d’éclaboussures peut
surchauffer et causer de la fumée ou même s’enflammer. Ne pas
retirer le couvercle du guide d’ondes.
Élimination des odeurs
Il peut arriver qu’une odeur de cuisson persiste dans le tiroir. Pour
l’éliminer, mettre dans un récipient pouvant contenir 2 tasses, 1 tasse
d’eau, le zeste et le jus d’un citron, et plusieurs clous de girofle entiers.
Faire bouillir pendant plusieurs minutes à 100 %. Laisser reposer dans le
Drawer Microwave jusqu’à ce qu’il soit froid. Essuyer l’intérieur avec un
chiffon doux.
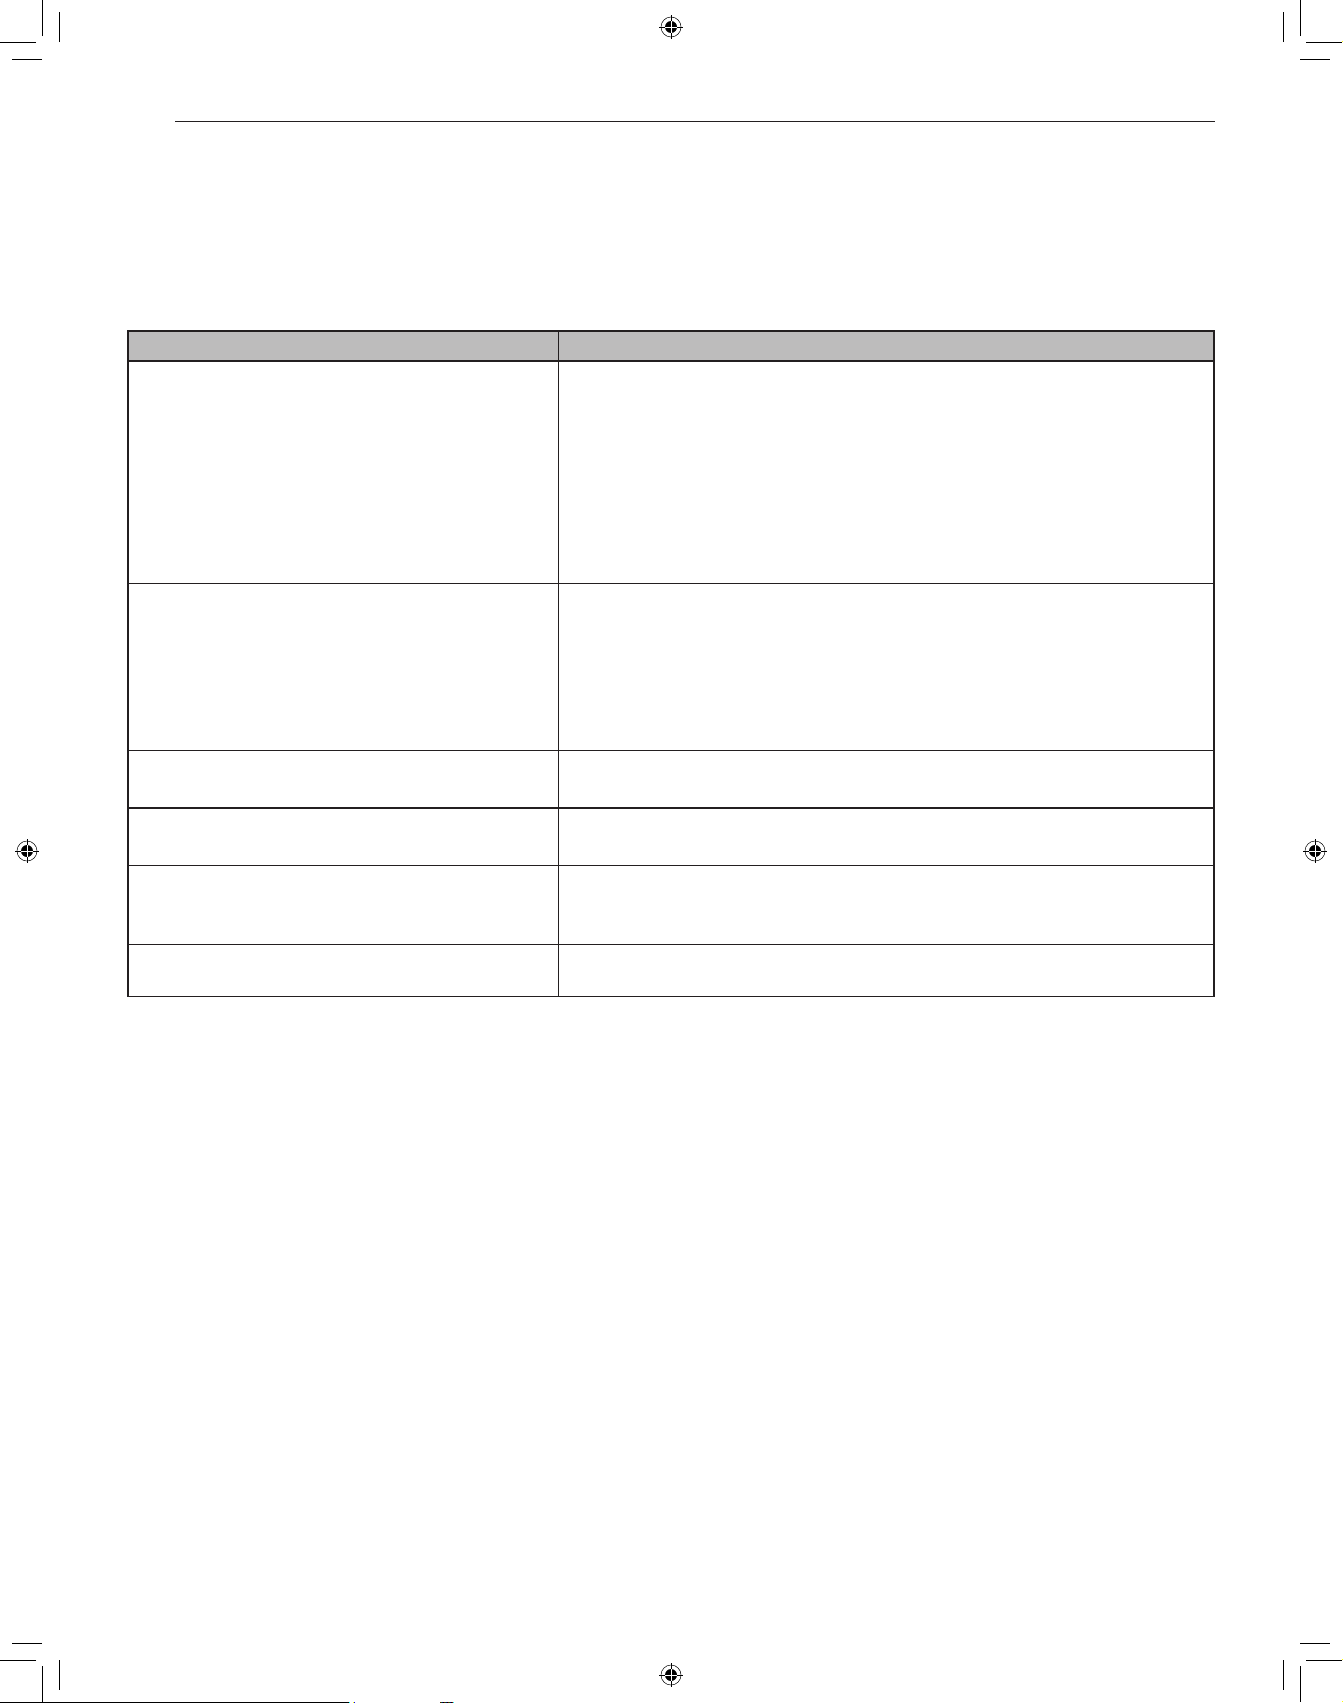
20
GUIDE DE DÉPANNAGE
GUIDE DE DÉPANNAGE
Avant d’appeler le réparateur
Fonctionnement
Économisez temps et argent en consultant ce qui suit avant d’appeler le service.
Symptômes Causes possibles & Solutions
Une pièce ou tout le Drawer Microwave ne fonctionne pas. Le cordon du Drawer Microwave n’est pas complètement branché à la prise.
• Vérifier que le cordon est bien branché dans la prise.
Coupure de courant.
• Vérifier les lumières de la maison pour vous en assurer. Appeler le service d’électricité.
Le fusible ou le disjoncteur de la maison ne fonctionne pas.
• Remplacer le fusible ou réenclencher le disjoncteur.
Le Drawer Microwave est en mode démo.
• Reportez-vous à la section « Mode de démonstration ».
Le four à micro-ondes ne chauffe pas les aliments. Pas de courant à l’appareil.
• Branchez le cordon d’alimentation.
Les commandes du tiroir sont mal réglées.
• Vérifier les réglages de commandes.
Le Drawer Microwave est en mode démo.
• Reportez-vous à la section « Mode de démonstration ».
La lumière du Drawer Microwave ne fonctionne pas. L’ampoule est desserrée ou brûlée.
• Appeler un réparateur.
Les touches de commande ne fonctionnent pas. La fonctionnalité de verrouillage de sécurité est activée.
• Reportez-vous à la section Verrouillage de sécurité.
L’afficheur clignote. Panne de courant.
• Appuyez sur Clear (effacer) et remettez l’horloge à l’heure. Si le Drawer Microwave
était en marche, vous devez redémarrer la fonction de cuisson.
Vapeur sortant de l’évent Pendant la cuisson aux micro-ondes, de la vapeur peut s’échapper par le côté droit
de l’évent.

21
GARANTIE LIMITÉE
FRANÇAIS
GARANTIE LIMITÉE
CANADA
CONDITIONS
AVIS D’ARBITRAGE : LA PRÉSENTE GARANTIE LIMITÉE CONTIENT UNE DISPOSITION SUR L’ARBITRAGE QUI EXIGE QUE LE RÈGLEMENT
DES DIFFÉRENDS ENTRE VOUS ET SIGNATURE KITCHEN SUITE, UNE DIVISION DE LG ELECTRONICS, EFFECTUE PAR ARBITRAGE
EXÉCUTOIRE PLUTÔT QUE DEVANT UN TRIBUNAL, À MOINS QUE LES LOIS DE VOTRE PROVINCE OU TERRITOIRE L’INTERDISENT OU
QUE, DANS UN AUTRE TERRITOIRE DE COMPÉTENCE, VOUS VOUS PRÉVALIEZ D’UNE OPTION DE RETRAIT. LES RECOURS COLLECTIFS
ET LES PROCÈS DEVANT JURY NE SONT PAS AUTORISÉS PAR LE PROCESSUS D’ARBITRAGE. VEUILLEZ VOUS RÉFÉRER CI- DESSOUS À
L’ARTICLE « PROCÉDURE DE RÈGLEMENT DE DIFFÉREND ».
Si votre produit SIGNATURE KITCHEN SUITE («Produit») a tombé en panne en raison d’un défaut de matériaux ou de fabrication sous une utilisation
normale et appropriée, pendant la période de garantie indiquée ci-dessous, Signature Kitchen Suite, une division de LG Electronics Canada Inc., à son
gré, réparera ou remplacera le «Produit» après réception de la preuve d’achat originale au détail. Cette garantie limitée est valable uniquement qu’à
l’acheteur original du «Produit» du détaillant et s’applique uniquement à un produit distribué, acheté et utilisé au Canada, tel que déterminé à la seule
discrétion de SIGNATURE KITCHEN SUITE.
PÉRIODE DE GARANTIE : (Remarque : Si la date d’achat originale ne peut être vériée, la garantie débutera soixante (60) jours suivant la
date de fabrication.)
Four-hotte / micro-ondes à convection / micro-
ondes encastré / tout four à micro-ondes
Garantie prolongée sur les piéces seulement
Trois (3) ans après la date d’achat original de
l’appareil.
Cinq (5) an à compter de la date d’achat initiale Dix (10) an à compter de la date d’achat initiale
Pièces et main-d'oeuvre (service à domicile;
four- hotte et micro-ondes à convection) (pièces
internes fonctionnelles seulement)
Magnétron seulement Onduleur du magnétron seulement
• Les produits et pièces de remplacement sont garantis pour la portion restante de la période de garantie originale ou quatre-vingt-dix (90) jours, selon
la période la plus longue.
• Les produits et pièces de rechange peuvent être neufs, reconditionnés, remis à neuf ou autrement fabriqués en usine, tous à la seule discrétion de
SIGNATURE KITCHEN SUITE.
• La preuve de l’achat de détail original spécifiant le modèle du produit et la date d’achat est requise pour obtenir un service sous garantie en vertu de
la présente garantie limitée.
LA RESPONSABILITÉ DE SIGNATURE KITCHEN SUITE EST LIMITÉE à LA gARANTIE LIMITÉE EXPRIMÉE CI-DESSUS. SAUf TEL
QU’EXPRESSÉMENT fOURNI CI-DESSUS, SIGNATURE KITCHEN SUITE DÉCLINE TOUTE AUTRE gARANTIE ET CONDITION CONCERNANT
LE PRODUIT, EXPLICITE OU IMPLICITE, Y COMPRIS, MAIS SANS S’Y LIMITER, TOUTE gARANTIE IMPLICITE OU CONDITION DE QUALITÉ
MARCHANDE OU D’ADAPTATION à UN USAgE PARTICULIER, ET AUCUNE REPRÉSENTATION NE SERA LIÉE à SIGNATURE KITCHEN SUITE.
SIGNATURE KITCHEN SUITE N’AUTORISE AUCUNE PERSONNE à CRÉER OU ENSOSSER à SA PLACE QUELCONQUE AUTRE OBLIgATION
DE gARANTIE OU RESPONSABILITÉ RELATIVE AU PRODUIT. DANS LA MESURE OÙ TOUTE gARANTIE OU CONDITION EST IMPLICITE
PAR LA LOI, ELLE EST LIMITÉE à LA PERIODE DE gARANTIE DÉCLARÉE CI-DESSUS. EN AUCUN CAS, SIGNATURE KITCHEN SUITE,
LE fABRICANT OU LE DISTRIBUTEUR DU PRODUIT, NE SERA TENU RESPONSABLE DE TOUT DOMMAgE ACCESSOIRE, CONSÉCUTIf,
SPÉCIAL, DIRECT, INDIRECT, PUNITIf OU EXEMPLAIRE, Y COMPRIS, SANS LIMITATION, LA PERTE DE COTE D’ESTIME, PERTE DE PROfITS,
PERTE DE PROfITS ANTICIPÉS, PERTE DE REVENUS, PERTE D’UTILISATION OU DE TOUT AUTRE DOMMAgE, QU’IL SOIT PROVENU
DIRECTEMENT OU INDIRECTEMENT DE TOUTE INfRACTION CONTRACTUELLE, VIOLATION fONDAMENTALE, DÉLICTUELLE OU AUTRE,
OU DE TOUT ACTE OU OMISSION. LA RESPONSABILITÉ TOTALE DE SIGNATURE KITCHEN SUITE, S’IL EN EST, N’OUTREPASSERA PAS LE
PRIX D’ACHAT PAYÉ PAR VOUS POUR LE PRODUIT.
Cette garantie limitée vous donne des droits légaux spécifiques. Vous pouvez également avoir d’autres droits qui varient d’une province à l’autre selon
les lois provinciales applicables. Tout terme de cette Garantie limitée qui nie ou modifie toute condition ou garantie implicite en vertu de la loi provinciale
est divisible lorsqu’elle est en conflit avec cette loi provinciale sans affecter le reste des termes de cette garantie.
LA PRÉSENTE GARANTIE LIMITÉE NE COUVRE PAS CE QUI SUIT :
• Tout déplacement du technicien pour : i) livrer, reprendre, installer ou; éduquer comment utiliser le Produit; ii) corriger le câblage ou plomberie; ou iii)
rectifier toute réparation ou installation non-autorisée du Produit;
• Dommage ou panne du Produit à performer lors de panne de courant et service électrique inadéquat ou interrompu;
• Dommage ou panne résultant de l’utilisation du Produit dans un environnement corrosif ou contraire aux instructions détaillées dans le manuel
d’utilisation du Produit;
• Dommage ou panne du Produit en raison d’accidents, ravageurs et parasites, foudre, vent, feu, inondations, actes de Dieu ou toute autre raison hors
du contrôle de SIGNATURE KITCHEN SUITE ou du fabricant;
• Dommage ou panne résultant d’utilisation inappropriée ou abusive ou d’installation, réparation ou entretien imparfait du Produit. Réparation
imparfaite inclut l’utilisation de pièces non autorisées ou spécifiées par SIGNATURE KITCHEN SUITE. Installation ou entretien imparfait inclut toute
installation ou entretien contraire aux instructions détaillées au manuel d’utilisation du Produit’;

22
GARANTIE LIMITÉE
• Dommage ou panne en raison de modification ou altération non autorisée du Produit, ou si utilisé pour fins autres que celle d’appareil ménager
domestique, ou dommage ou panne résultant de toute fuite d’eau due à une mauvaise installation du produit;
• Dommage ou panne en raison de courant électrique, tension ou codes de plomberie incorrects;
• Dommage ou panne en raison d’utilisation autre que celle d’appareil ménager domestique normale, incluant, sans limite, l’utilisation commerciale ou
industrielle, incluant l’utilisation au bureau commercial ou centre récréatif, ou détaillée autrement au manuel d’utilisation du Produit;
• Dommage ou panne provoqué par le transport et manipulation, incluant rayures, bosses, écaillage et/ou autre endommagement à la finition du
Produit, à moins que tel dommage ait résulté de fabrication ou matériaux défectueux et rapporter à SIGNATURE KITCHEN SUITE dans la (1)
semaine suivant livraison du Produit;
• Dommage or articles absents de tout Produit démonstrateur, boîte ouverte, réusiné ou escompté;
• Produit réusiné ou tout Produit vendu “Tel quel”, “Où est”, “Avec tous défauts”, ou toute mise en garde similaire;
• Produit dont le numéro de série original ait été retiré, altéré ou ne peut être facilement déterminé à la discrétion de SIGNATURE KITCHEN SUITE;
• Augmentation de la facture d’électricité et dépenses additionnelles d’utilité de quelque manière associée au Produit;
• Tout bruit associé au fonctionnement normal du Produit;
• Remplacement des ampoules, filtres, fusibles ou tout autre élément consommable;
• Remplacement de toute pièce n’étant pas originalement inclue avec le Produit;
• Coûts associés ai retrait et/ou réinstallation du Produit pour fins de réparation; et
• Les clayettes, tiroirs, poignées et accessoires du Produit, sauf les pièces internes / fonctionnelles couvertes par cette garantie limitée.
• Couverture pour réparations à domicile, pour produit sous garantie, sera fournie si le Produit se trouve dans un rayon de 150 km du centre de
service autorisé (ASC) le plus près, tel que déterminé par SIGNATURE KITCHEN SUITE. Si votre Produit est situé à l’extérieur du rayon de 150 km
d’un centre de service autorisé, tel que déterminé par SIGNATURE KITCHEN SUITE, il en ira de votre responsabilité d’apporter votre Produit, à vos
frais, au centre de service (ASC) pour réparation sous garantie.
Tous coûts et dépenses associés aux circonstances exclues ci-dessus, énumérés sous la rubrique “Cette garantie limitée ne couvre pas”
sont à la charge du consommateur.
AFIN D’OBTENIR SOUTIEN DE GARANTIE ET INFORMATIONS SUPPLÉMENTAIRES VEUILLEZ NOUS APPELER OU VISITER NOTRE SITE
WEB: Sans frais : 1-888-289-2802 (7h à minuit – l’année longue) et sélectionnez l’option appropriée au menu, ou; Visitez le site web à : https://www.
signaturekitchensuite.com/ca
PROCÉDURE DE RÈGLEMENT DE DIFFÉREND :
SAUF LA OÙ LA LOI L’INTERDIT, TOUT DIFFÉREND ENTRE VOUS ET SIGNATURE KITCHEN SUITE ASSOCIÉ DE QUELQUE FAÇON QUE CE
SOIT À LA PRÉSENTE GARANTIE LIMITÉE SE RÈGLE EXCLUSIVEMENT PAR ARBITRAGE EXÉCUTOIRE PLUTÔT QUE DEVANT UN TRIBUNAL
DE DROIT COMMUN. SAUF LA OÙ LA LOI L’INTERDIT, VOUS ET SIGNATURE KITCHEN SUITE RENONCEZ IRRÉVOCABLEMENT À TOUT DROIT
À UN PROCÈS DEVANT JURY, AINSI QU’À EXERCER UN RECOURS COLLECTIF OU À Y PARTICIPER.
Définitions. Aux fins du présent article, «SIGNATURE KITCHEN SUITE» désigne Signature Kitchen Suite, une division de LG Electronics Canada Inc.,
ses sociétés mères, ses filiales et ses sociétés affiliées et tous leurs dirigeants, administrateurs, employés, agents, bénéficiaires, détenteurs précédents
des mêmes droits, successeurs, cessionnaires et fournisseurs; « différend » et « réclamation » englobent tout différend, réclamation ou litige de
quelque sorte que ce soit (fondés sur une responsabilité contractuelle, délictuelle, légale, réglementaire ou découlant d’une ordonnance, par fraude,
fausse représentation ou sous quelque régime de responsabilité que ce soit) découlant de quelque façon que ce soit de la vente, des conditions ou de
l’exécution du produit ou de la présente Garantie limitée.
Avis de différend. Si vous prévoyez engager une procédure d’arbitrage, vous devez d’abord envoyer à SIGNATURE KITCHEN SUITE un préavis
écrit d’au moins 30 jours à l’adresse suivante : Équipe juridique SIGNATURE KITCHEN SUITE, Norelco Drive, North York, Ontario, Canada M9L 2X6
(l’ « avis de différend »). Vous et SIGNATURE KITCHEN SUITE convenez de discuter en toute bonne foi pour tenter de régler le différend à l’amiable.
L’avis doit mentionner votre nom, votre adresse, votre numéro de téléphone, le produit faisant l’objet de la réclamation, la nature de la réclamation et la
réparation demandée. Si vous et SIGNATURE KITCHEN SUITE ne parvenez pas à régler le différend dans les 30 jours suivant la réception de l’avis de
différend par SIGNATURE KITCHEN SUITE, le différend doit être réglé par arbitrage exécutoire conformément à la procédure établie aux présentes.
Vous et SIGNATURE KITCHEN SUITE convenez que, tout au long du processus d’arbitrage, les modalités (y compris les montants) de toute offre de
règlement formulée par vous ou par SIGNATURE KITCHEN SUITE ne seront pas divulguées à l’arbitre et resteront confidentielles à moins d’accord
contraire entre les deux parties ou que l’arbitre règle le différend.
Entente d’arbitrage exécutoire et renonciation à un recours collectif. Si la réclamation n’a pu être réglée dans les 30 jours suivant la réception de
l’avis de différend par SIGNATURE KITCHEN SUITE, vous et SIGNATURE KITCHEN SUITE convenez de ne régler les réclamations vous opposant
que par arbitrage exécutoire au cas par cas, à moins que vous vous prévaliez de l’option de retrait évoquée plus haut ou que vous résidiez dans un
territoire de compétences qui interdit la pleine application de cette clause dans le cas de réclamations de ce type (Dans lequel cas, si vous êtes un
consommateur, cette clause ne s’appliquera que si vous acceptez expressément l’arbitrage). Dans la mesure où la loi en vigueur le permet, aucun
différend entre vous et SIGNATURE KITCHEN SUITE ne peut être combiné ou regroupé avec un différend faisant intervenir le produit ou la réclamation
d’une personne ou entité tierce. Plus précisément et sans limiter la portée de ce qui précède, sauf dans la mesure où une telle interdiction n’est pas
autorisée en droit, en aucun cas un différend entre vous et SIGNATURE KITCHEN SUITE ne peut être traité dans le cadre d’un recours collectif. Au
lieu de l’arbitrage, les parties peuvent intenter une action individuelle devant une cour des petites créances, mais cette action ne peut pas être intentée
dans le cadre d’un recours collectif, sauf dans la mesure où une telle interdiction n’est pas autorisée en droit dans votre province ou territoire de
compétences pour une réclamation en cause qui nous oppose.

23
GARANTIE LIMITÉE
FRANÇAIS
Règles et procédures d’arbitrage. Pour soumettre une réclamation à un arbitrage, l’une des deux parties, soit vous ou SIGNATURE KITCHEN
SUITE, doit déposer une demande écrite à cet effet. L’arbitrage est privé et confidentiel et s’effectue selon une procédure simplifiée et accélérée devant
un arbitre unique choisi par les parties conformément aux lois et règlements en vigueur portant sur l’arbitrage commercial de votre province ou territoire
de résidence. Vous devez également envoyer une copie de votre demande écrite à Signature Kitchen Suite, une division de LG Electronics Canada
Inc., Legal Department - Arbitration, 20 Norelco Drive, North York, Ontario M9L 2X6. La présente disposition sur l’arbitrage est régie par les lois et
règlements sur l’arbitrage commercial applicables de votre province ou territoire. La sentence arbitrale peut donner lieu à un jugement de n’importe quel
tribunal compétent. Toutes les décisions relèvent de l’arbitre, à l’exception des questions associées à la portée et à l’applicabilité de la disposition sur
l’arbitrage et à l’arbitrabilité du différend, qui sont du ressort du tribunal. L’arbitre est tenu de respecter les modalités de la présente disposition.
Droit applicable. Les lois de votre province ou territoire de’achat régissent la présente Garantie limitée et tout différend entre nous, sauf dans la
mesure où de telles lois sont supplantées par des lois fédérales, provinciales ou territoriales applicables ou sont incompatibles avec ces dernières.
Si l’arbitrage n’est pas autorisé pour régler une réclamation, une poursuite, un différend ou un litige nous opposant, nous nous en remettrons à la
compétence exclusive des tribunaux de votre province ou territoire de’achat compétence pour le règlement de la réclamation, de la poursuite, du
différend ou du litige nous opposant.
Frais et coûts. Aucuns frais ne sont exigibles pour entamer une procédure d’arbitrage. À la réception de votre demande d’arbitrage écrite, SIGNATURE
KITCHEN SUITE réglera rapidement la totalité des frais de dépôt de la demande d’arbitrage, sauf si vous réclamez des dommages-intérêts
supérieurs à 25 000 $. Dans ce cas, le paiement de ces frais sera régi par les règles d’arbitrage applicables. Sauf disposition contraire aux présentes,
SIGNATURE KITCHEN SUITE paiera tous les frais de dépôt de demande et d’administration ainsi que les honoraires de l’arbitre conformément aux
règles d’arbitrage applicables et à la présente disposition sur l’arbitrage. Si vous remportez l’arbitrage, SIGNATURE KITCHEN SUITE règlera vos
frais et honoraires juridiques après avoir déterminé s’ils sont raisonnables en se fondant sur des facteurs comme, entre autres, le montant de l’achat
et le montant de la réclamation. Si l’arbitre juge que le motif de la réclamation ou les réparations demandées sont futiles ou se fondent sur des motifs
déplacés (au regard des lois applicables), le paiement de tous les frais d’arbitrage sera régi par les règles d’arbitrage applicables. Dans un tel cas, vous
acceptez de rembourser à SIGNATURE KITCHEN SUITE la totalité des montants versés qu’il vous revient autrement de payer en vertu des règles
d’arbitrage applicables. Sauf disposition contraire et si elle remporte l’arbitrage, SIGNATURE KITCHEN SUITE renonce à tous ses droits de vous
réclamer des frais et horaires juridiques.
Audience et lieu de l’arbitrage. Si votre réclamation est égale ou inférieure à 25 000 $, vous pouvez opter pour un arbitrage conduit selon l’une des
modalités suivantes uniquement : 1) sur examen des documents remis à l’arbitre, 2) par audience téléphonique ou 3) par audience en personne selon
les dispositions des règles d’arbitrage applicables. Si votre réclamation dépasse 25 000 $, le droit à une audience sera défini par les règles d’arbitrage
applicables. Les audiences arbitrales en personne se tiendront à l’endroit le plus proche et le plus pratique pour les deux parties situé dans votre
province ou votre territoire de résidence, sauf si nous convenons mutuellement d’un autre lieu ou d’un arbitrage par téléphone.
Dissociabilité et renonciation. Si une partie de la présente Garantie limitée (y compris les présentes procédures d’arbitrage) n’est pas applicable, les
dispositions restantes demeurent en vigueur dans la mesure permise par la loi applicable. Le fait de ne pas exiger la stricte exécution d’une disposition
de la présente Garantie limitée (y compris les présentes procédures d’arbitrage) ne signifie pas que nous ayons renoncé ni que nous ayons l’intention
de renoncer à toute disposition ou partie de la présente Garantie limitée.
Option de retrait. Vous pouvez vous retirer de la présente procédure de règlement de différend. Dans ce cas, ni vous ni SIGNATURE KITCHEN SUITE
ne pouvez imposer à l’autre partie de participer à une procédure d’arbitrage. Pour vous prévaloir de l’option de retrait, vous devez envoyer un préavis
à SIGNATURE KITCHEN SUITE dans les trente (30) jours civils à compter de la date de l’achat du produit par le premier acheteur i) dans un courriel
adressé à [email protected] et dont la ligne d’objet porte la mention « Retrait de l’arbitrage » ou ii) en composant le 1-888-289-2802. Que ce soit par
courriel ou par téléphone, vous devrez donner a) votre nom et votre adresse; b) la date d’achat du produit; c) le nom ou le numéro de modèle du produit
et d) le numéro de série [qu’il est possible de trouver i) sur le produit ou ii) en liqne au https://www.signaturekitchensuite.com/ca/support/repair-service/
schedule-repair, Trouver mes numéros de modèle et de série].
Si vous vous prévalez de l’option de retrait, les lois de votre province ou territoire de résidence régissent la présente Garantie limitée et tout différend
entre nous, sauf dans la mesure où de telles lois sont supplantées par des lois fédérales, provinciales ou territoriales applicables ou sont incompatibles
avec ces dernières. Si l’arbitrage n’est pas autorisé pour régler une réclamation, une poursuite, un différend ou un litige nous opposant, nous nous en
remettrons à la compétence exclusive des tribunaux de votre province ou territoire de compétence pour le règlement de la réclamation, de la poursuite,
du différend ou du litige nous opposant.
Vous ne pouvez vous prévaloir de l’option de retrait que de la manière décrite plus haut (c’est-à-dire par courriel ou par téléphone). Aucun autre
type d’avis ne sera pris en compte pour le retrait de la présente procédure de règlement de différend. Le fait de se retirer de la présente procédure
de règlement de différend ne compromet d’aucune façon la protection accordée en vertu de la Garantie limitée, et vous continuerez à jouir de tous
les avantages prévus par la Garantie limitée. Si vous conservez ce produit sans vous prévaloir de l’option de retrait, vous acceptez les conditions
générales de la disposition sur l’arbitrage énoncée ci-dessus.
Conflit de modalités. En cas de conflit ou d’incompatibilité entre les modalités de la présente garantie limitée et le contrat de licence d’utilisation (CLU)
en ce qui concerne le règlement des différends, les modalités de la présente garantie limitée contrôlent et régissent les droits et obligations des parties
et ont préséance sur le CLU.