Loading ...
Loading ...
Loading ...
15
INSTALLATION CONTINUED
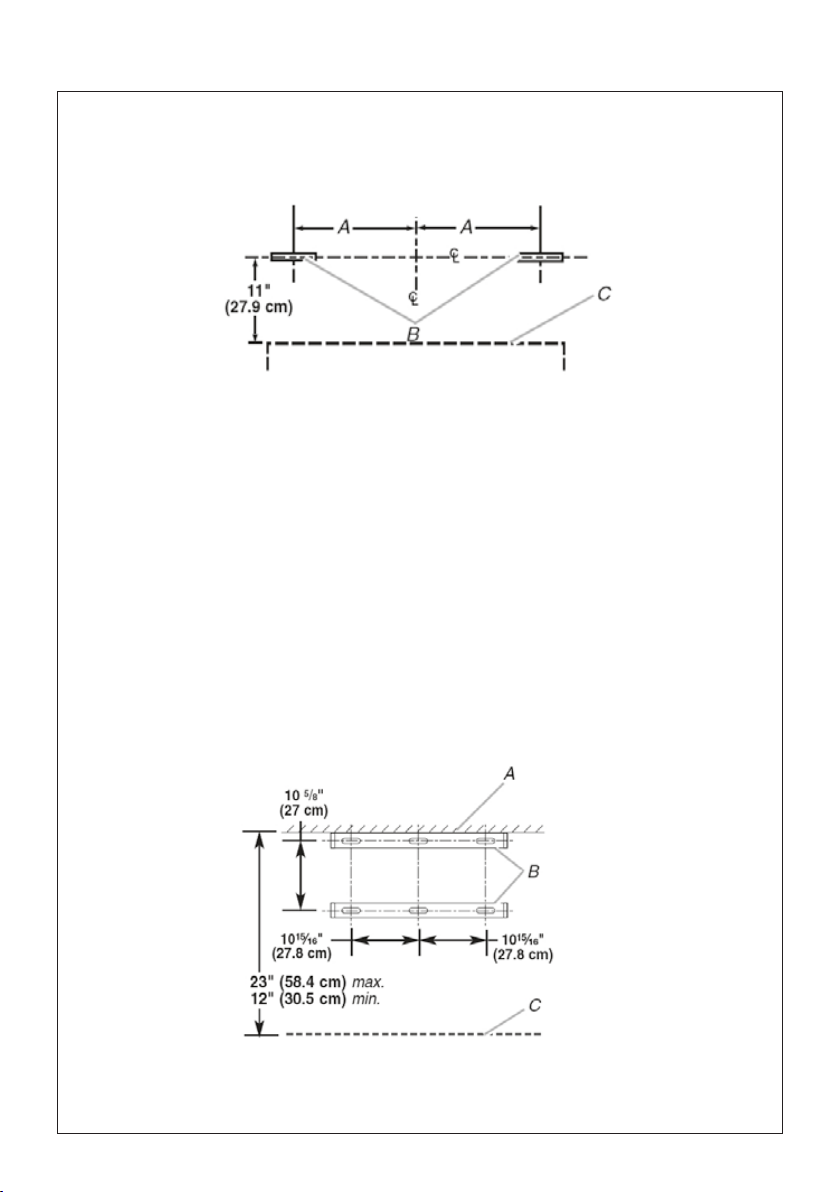
Optional Duct Cover Installation
1. Attach the full-width duct cover to the top of the range hood
with the screws provided. The duct cover must be attached
to the top of the range hood before mounting the range hood
to the wall.
A: Distance from center of mounting bracket to centerline:
30" hood: 13 15/32" / 36" hood: 16 15/32" /
42" hood: 19 15/32" / 48" hood: 22 15/32"
B: Mounting brackets
C: Top of hood
2. Install each bracket on the wall as shown. Make sure the
screws and brackets are securely fastened to the wall.
IMPORTANT: Install only the brackets. Do not install the
hood.
Optional Telescopic Chimney Extension Installation
1. If a chimney extension is used, attach the extension brackets
as shown. Make sure that the screws are securely fastened to
the wall.
A: Ceiling
B: Brackets
C. Top of hood
INSTALLATION CONTINUED
1. Attach the full-width duct cover to the top of the range hood with the screws provided. The duct
cover must be attached to the top of the range hood before mounting the range hood to the wall.
A: Distance from center of mounting bracket to centerline:
30" hood: 13 15/32"
36" hood: 16 15/32"
42" hood: 19 15/32"
B: Mounting brackets
C: Top of hood
2. Install each bracket on the wall as shown. Make sure the screws and brackets are securely
fastened to the wall. IMPORTANT: Install only the brackets. Do not install the hood.
Optional Duct Cover Installation
INSTALLATION CONTINUED
Optional Duct Cover Installation
1. Attach the full-width duct cover to the top of the range hood
with the screws provided. The duct cover must be attached
to the top of the range hood before mounting the range hood
to the wall.
A: Distance from center of mounting bracket to centerline:
30" hood: 13 15/32" / 36" hood: 16 15/32" /
42" hood: 19 15/32" / 48" hood: 22 15/32"
B: Mounting brackets
C: Top of hood
2. Install each bracket on the wall as shown. Make sure the
screws and brackets are securely fastened to the wall.
IMPORTANT: Install only the brackets. Do not install the
hood.
Optional Telescopic Chimney Extension Installation
1. If a chimney extension is used, attach the extension brackets
as shown. Make sure that the screws are securely fastened to
the wall.
A: Ceiling
B: Brackets
C. Top of hood
Optional Telescopic Chimney Extension Installation
1. If a chimney extension is used, attach the extension brackets as shown. Make sure that the
screws are securely fastened to the wall.
A: Ceiling
B: Brackets
C: Top of hood
Loading ...
Loading ...
Loading ...