Loading ...
Loading ...
Loading ...
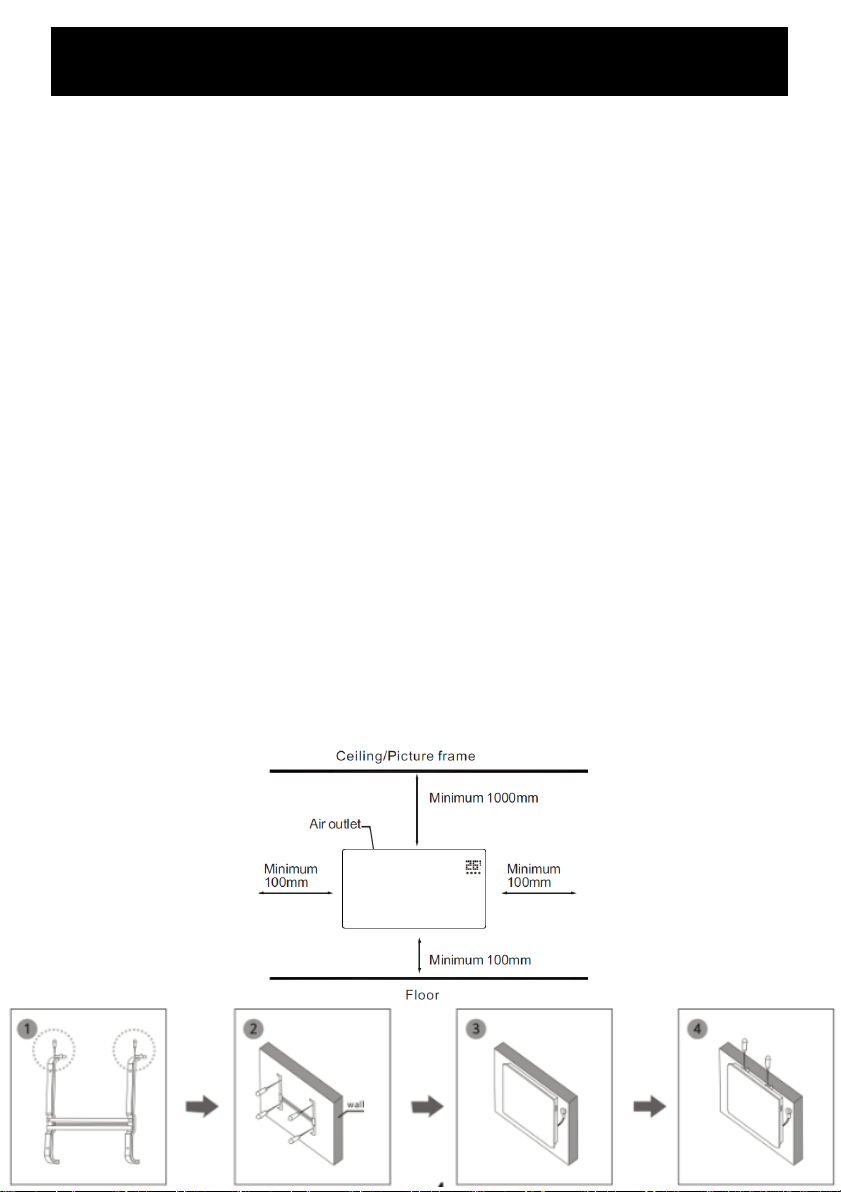
WALL MOUNTED
1. Make sure the appliance is unplugged and power switches are off.
2. Position the panel appliance within one metre of a wall socket. Do not mount in
front of or below the wall socket. Ensure there is at least 100mm clearance on all
sides of the appliance.
3. Assemble the bracket with the screws provided – see image 1.
4. Position the mounting screws on the wall per below mounting guide and check
they are
horizontal with a spirit level. Ensure the bottom of the heater is at least 100mm
from the floor and drill holes as required. Fix the bracket to the wall.
5. Slot the back of the appliance onto the mounting screws. The bottom mount is on
there to keep the heater at the correct distance from the wall. You do not need to
put a screw in the bottom mount.
6. Plug appliance into a standard 240 volt AC electrical outlet.
Assembly and Installation
NOTE: Your Goldair Panel Heater should be installed with at least 100mm clearance from the
floor and any other surrounding parts including other appliances, side walls and soft
furnishings. There must be at least 1m clearance from the top of the heater to ceilings or
shelves.
WARNING: Do not run the power cord behind the heater.
WALL MOUNTED HEATERS ARE ONLY TO BE MOUNTED ON WALLS THAT
COMPLY WITH CURRENT AS/NZS SPECIFICATIONS & BUILDING REGULATIONS
Loading ...
Loading ...
Loading ...