Loading ...
Loading ...
Loading ...
10 11
PRE-INSTALLATION
• Your venting system must vent to the outdoors either horizontally through the
back wall (13) or vertically through the roof (14). (refer to Fig. 5/Fig. 6/Fig. 7).
• For this range hood, use 5 in. round metal ductwork for the top -OR- use
rectangular adapter / ductwork for the back. Connect to damper using
HVAC aluminum tape.
• The total duct length should not be more than 35 ft. Calculate the total
effective length of the ductwork by using the table below. For each fit-
ting use the table to see its straight duct equivalent.
• Fasten all ductwork with sheet metal screws and tape all joints with
certified HVAC tape.
• If you must turn the path of the ductwork using elbows, keep the number of elbows to
a minimum for best performance. Use no more than three 90 degree elbows. En-
sure that there is a minimum of 25.6 in. of straight vent between each elbow. Use el-
bows as far away from the range hoods exhaust opening as possible.
• Cap the exterior of the duct with a wall cap (15) or roof cap (16). Never use (4 in.)
laundry-type wall caps. Use caulking to seal exterior wall or roof opening around
the cap.
• The venting system must have a damper. If the roof or wall cap has a damper, do
not use the damper supplied with the range hood.
If using recirculating mode, ignore this section.
For recirculating mode, air will vent out of the front vent
holes. (17 in Fig. 8)
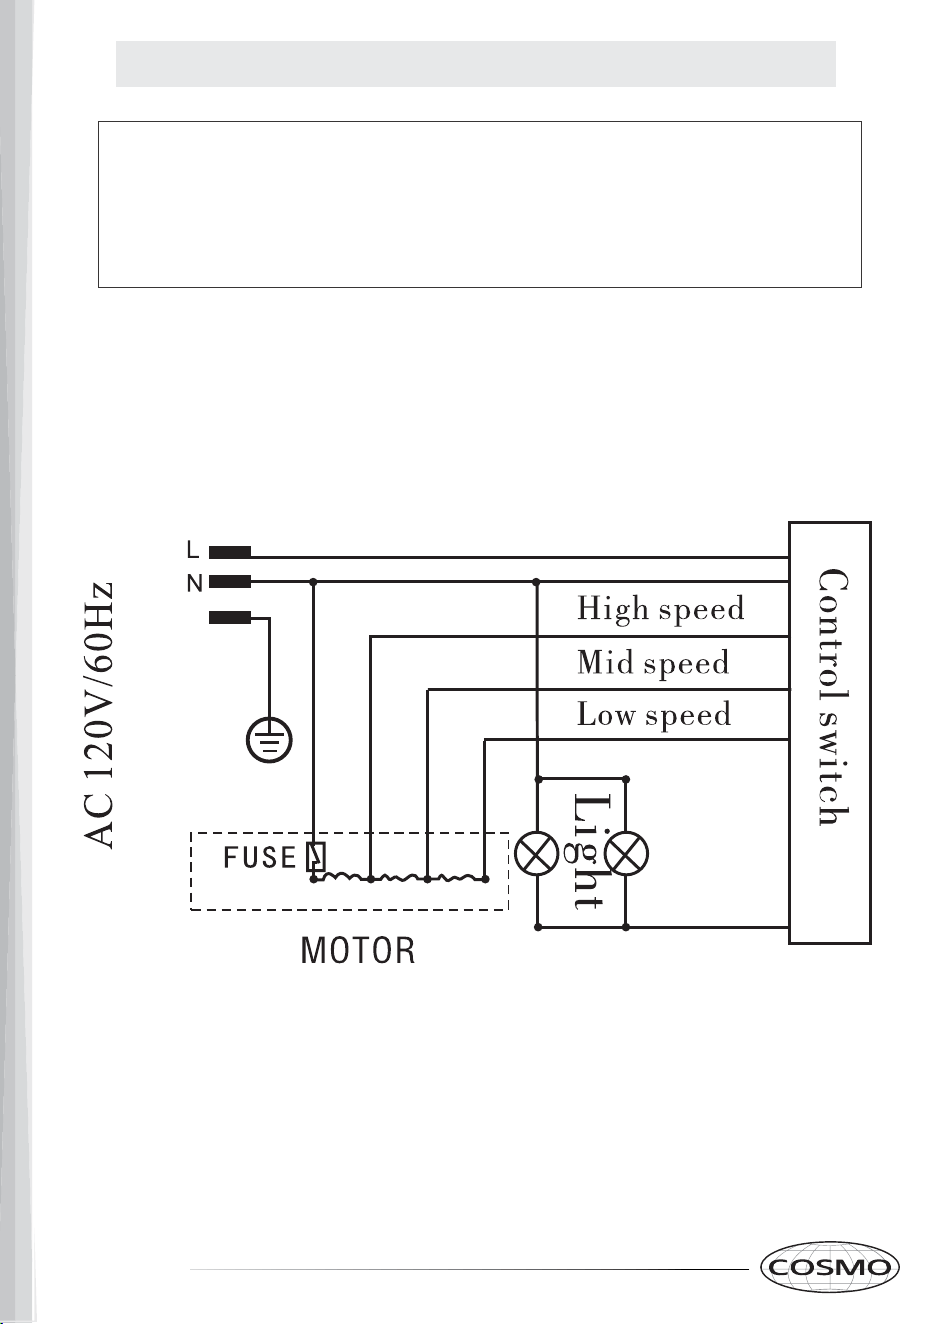
WIRING DIAGRAM
CAUTION: SHUT-OFF POWER SUPPLY BEFORE INSTALLING. IN-
STALLATION WORK AND ELECTRICAL WIRING MUST BE DONE BY
QUALIFIED PERSON(S) IN ACCORDANCE WITH ALL APPLICABLE
CODES & STANDARDS, INCLUDING FIRE-RATED CONSTRUCTION.
E
Loading ...
Loading ...
Loading ...