Loading ...
Loading ...
Loading ...
6
To Clean the Ice Dispenser Chute:
Humidity causes ice to naturally clump together. Ice particles can build
up until the ice dispenser chute becomes blocked.
If ice is not dispensed regularly, it may be necessary to empty the ice
storage bin and clean the ice delivery chute, the ice storage bin and
the area beneath the storage bin every 2 weeks.
J Remove the ice clogging the storage bin and delivery chute, using
a plastic utensil if necessary.
J Clean the ice delivery chute and the bottom of the ice storage bin
using a warm, damp cloth, then dry thoroughly.
The Dispenser Light
Press LIGHT to toggle through the
following choices in a continuous loop:
OFF, ON and DIM.
The dispenser lights are LEDs that
cannot be changed. If it appears that
your dispenser lights are not working, see
“Problem Solver” for more information.
The Dispenser Lock
Lock feature deactivates the controls and
dispenser pads.
J Press and hold LOCK for 3 seconds
to Lock/Unlock the dispenser.
Ice Maker and Ice Storage Bin
(on some models)
IMPORTANT: To avoid low ice production and poor quality ice,
ush the water system before turning on the ice maker. See “Water
Dispenser.”
J Allow 24 hours to produce the rst batch of ice. Discard the rst
three batches of ice produced. Allow 2 to 3 days for the storage
bin to ll completely following installation.
J The quality of your ice will be only as good as the quality of the
water supplied to your ice maker. Avoid connecting the ice maker
to a softened water supply. Water softener chemicals (such as salt)
can damage parts of the ice maker and lead to poor quality ice. If
a softened water supply cannot be avoided, make sure the water
softener is operating properly and is well maintained.
J Do not use anything sharp to break up the ice. This can cause
damage to the ice bin and the dispenser mechanism.
J Do not store anything on top of or in the ice maker or ice storage
bin.
Ice Production Rate
J The ice maker should produce approximately 3 lbs (1.4 kg) of ice
per day under normal operation.
J To increase ice production, select the increased ice production
feature from the Options menu on the control panel. See “Using
the Controls.”
Ice Maker
The ice maker is located on the left-hand side of the refrigerator
compartment ceiling. Ice cubes are ejected into the ice storage bin,
located on the left-hand refrigerator door.
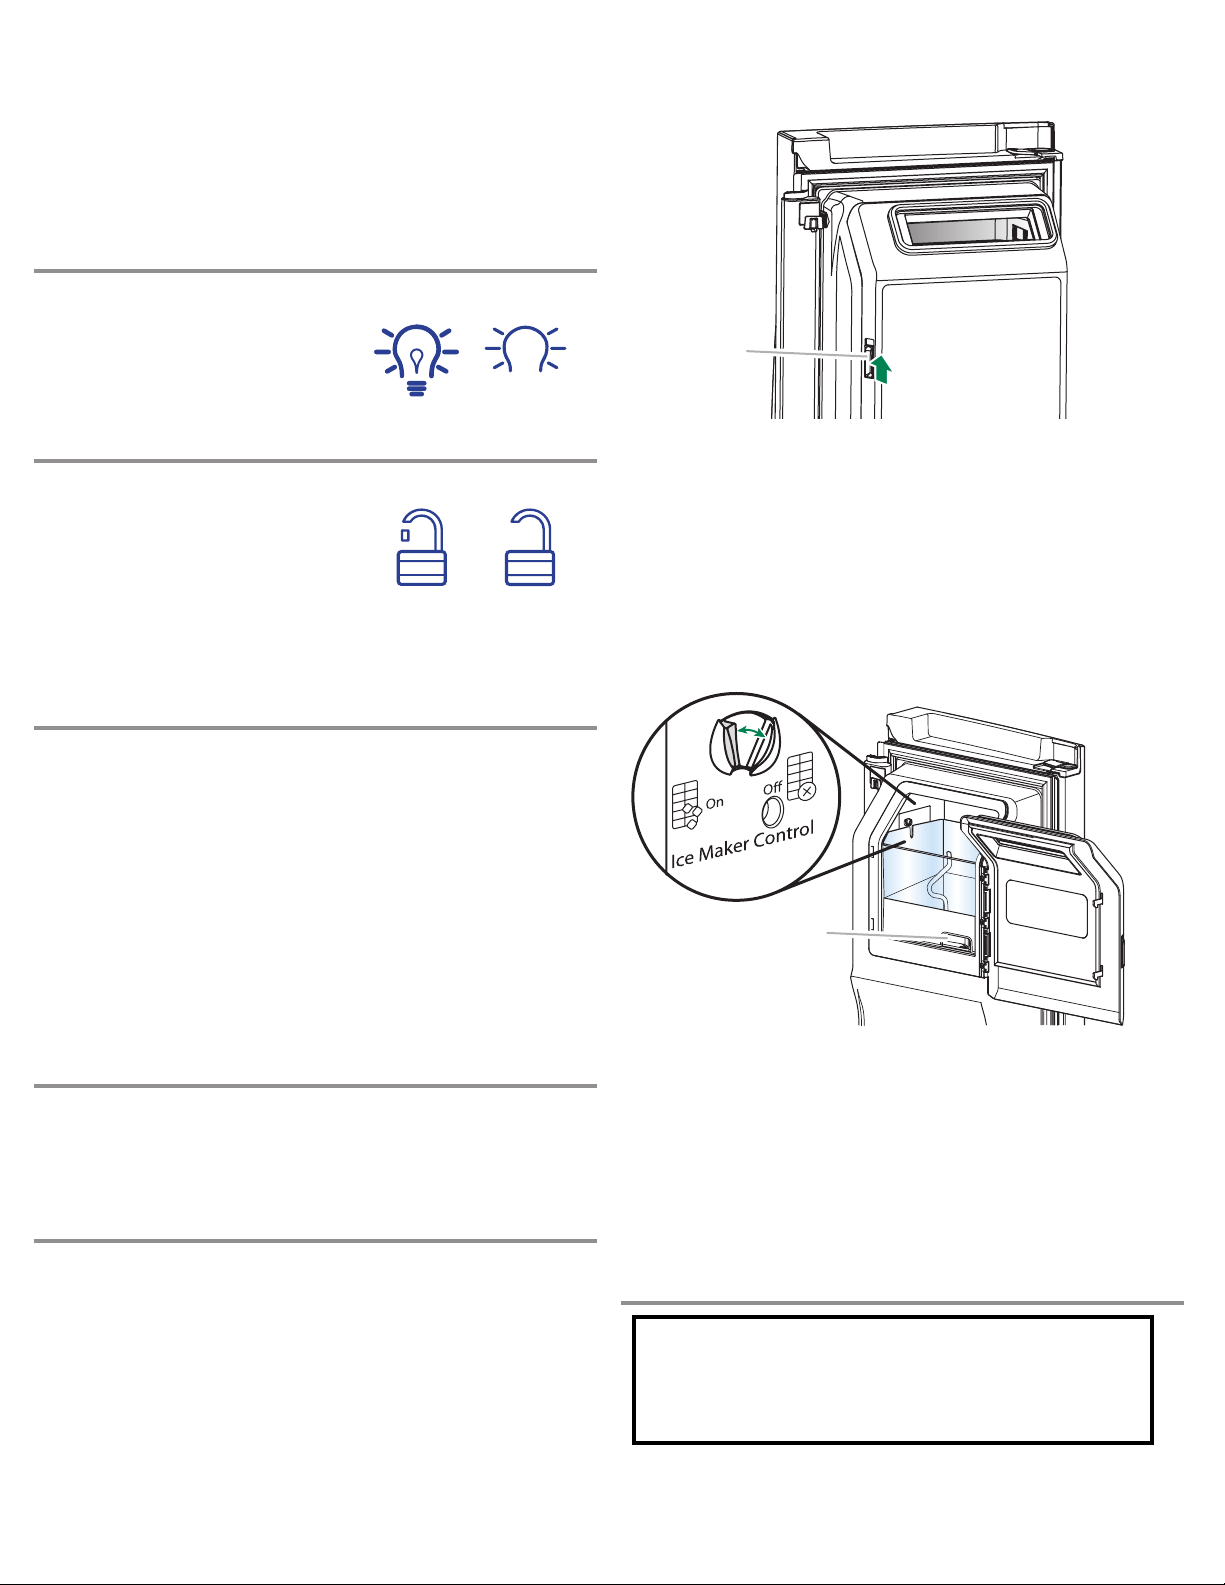
Turn the Ice Maker On/Off
1. Push up on the latch on the left-hand side of the ice compartment
to open the door.
2. Turn on the ice maker by moving the switch to the (left) ON
position.
NOTES:
J To manually turn off the ice maker, move the control to the OFF
(right) position.
J Your ice maker has an automatic shutoff. The sensor will
automatically stop ice production if the storage bin is full, if the
door is open or the storage bin is removed. The control will remain
in the ON (left) position.
3. Close the ice compartment door.
Remove and Replace the Ice Storage Bin
J Remove the ice storage bin by inserting your ngers into the hole
at the base of the bin and squeezing the latch to release the bin
from the compartment. Lift the storage bin up and pull it straight
out.
J Replace the storage bin inside the ice compartment and push
down to make sure it is rmly in place.
Water Filtration System
A
A. Ice compartment door latch
A
Do not use with water that is microbiologically unsafe or
of unknown quality without adequate disinfection before
or after the system. Systems certified for cyst reduction
may be used on disinfected waters that may contain
filterable cysts.
LOCKED UNLOCKED
A. Ice storage bin release latch
ON DIM
Loading ...
Loading ...
Loading ...