Loading ...
Loading ...
Loading ...

10
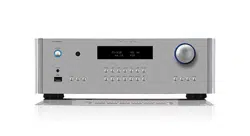
RC‑1590MKII Stereo Control Amplier
The main functions of the RC-1590MKII are easy to install and use. If you
have experience with other stereo systems, you shouldn’t nd anything
perplexing. Simply plug in the associated components and enjoy.
A Few Precautions
WARNING: To avoid potential damage to your system, turn off ALL
the components in the system when connecting or disconnecting the
loudspeakers or any associated components. Do not turn the system
components back on until you are sure all the connections are correct
and secure. Pay particular attention to the speaker wires. There must
be no loose strands that could contact the other speaker wires, or the
chassis of the amplier.
Please read this manual carefully. In addition to basic installation and operating
instructions, it provides valuable information on various RC-1590MKII system
congurations as well as general information that will help you get optimum
performance from your system. Please contact your authorized Rotel dealer
for answers to any questions you might have. In addition, all of us at Rotel
welcome your questions and comments.
Save the RC-1590MKII shipping carton and all enclosed packing material
for future use. Shipping or moving the RC-1590MKII in anything other than
the original packing material may result in severe damage to your amplier.
If included in the box please ll out and send in the owner’s registration
card. Also be sure to keep the original sales receipt. It is your best record
of the date of purchase, which you will need in the event warranty service
is ever required.
Placement
Like all audio components that handle low-level signals, the RC-1590MKII
can be affected by its environment. Avoid placing the RC-1590MKII on top
of other components. Also avoid routing audio signal cables near power
cords. This will minimize the chance it will pick up hum or interference.
The RC-1590MKII is supplied with an RR-AX100 remote control and must
be placed where the infrared signal from the remote can reach the front
panel Remote Sensor.
Cables
Be sure to keep the power cords, digital signal cables and regular audio
signal cables in your installation away from each other. This will minimize
the chance of the regular audio signal cables picking up noise or interference
from the power cords or digital cables. Using only high quality, shielded
cables will also help to prevent noise or interference from degrading the
sound quality of your system. If you have any questions see your authorized
Rotel dealer for advice about the best cable to use with your system.
The RR‑AX100 Remote Control
Some functions can be done with either the front panel controls, or the
supplied RR-AX100 remote control. When these operations are described,
the square call out numbers refer to the main unit, while the encircled letters
refer to the remote control.
Remote Control Batteries
Two AA size batteries (supplied) must be installed before the remote control
can be used. To install the batteries, remove the cover on the back of the
RR-AX100. Install the batteries as shown in the illustration in the battery
well. Test the control for proper operation, then replace the cover. When the
batteries become weak the remote control won’t operate the RC-1590MKII
consistently. Installing fresh batteries should eliminate the problem.
AC Power and Control
AC Power Input
s
Your RC-1590MKII is congured at the factory for the proper AC line voltage
in the country where you purchased it (either 120 volts AC or 230 volts AC
with a line frequency of either 50 Hz or 60 Hz). The AC line conguration
is noted on a decal on the back panel.
NOTE: Should you move your unit to another country, it may be possible
to recongure it for use on a different line voltage. Do not attempt to
perform this conversion yourself. Opening the enclosure of the unit
exposes you to dangerous voltages. Consult a qualied service person
or the Rotel factory service department for information.
NOTE: Some products are intended for sale in more than one country
and as such are supplied with more than one AC cord. Please only use
the one appropriate for your country/region.
The RC-1590MKII should be plugged directly into a 2-pin polarized wall
outlet. Do not use an extension cord. A heavy duty multi-tap power outlet
strip may be used if it (and the wall outlet) is rated to handle the current
demanded by the RC-1590MKII and all the other components connected to it.
If you are going to be away from home for an extended period of time
such as a month long vacation, it is a sensible precaution to unplug the
RC-1590MKII (as well as other audio and video components) while you
are away.
POWER Switch and Power Indicator
1
Press the front panel Power Switch button to turn the unit on. The Power
Indicator light is illuminated when the unit is on. Press the Power Switch
button again to turn the unit off.
When the power switch is in the ON position, the remote control ON and
OFF buttons may be used to activate the RC-1590MKII. In Standby mode
the power LED remains illuminated, but the display is turned OFF.
NOTE: Place the self adhesive ring over the light surrounding the power
switch if the blue light is too bright.
12V TRIGGER Connection
t
See Figure 5
Some audio components can be turned on automatically when they receive
a 12V turn on “signal”. The two12V Trigger Outputs on the RC-1590MKII
provide the required signal. Connect compatible components to the RC-
1590MKII with a conventional 3.5mm mini mono plug cable. When the
RC-1590MKII is in standby mode, the trigger signal is disabled, so the
components controlled by it will be turned off.
Input Signal Connections
NOTE: To prevent loud noises that neither you nor your speakers will
appreciate, make sure the system is turned off when you make any
signal connections.
Loading ...
Loading ...
Loading ...