Loading ...
Loading ...
Loading ...
The parked video recording feature allows the camera to record
video automatically while your vehicle is parked. When you turn
off your vehicle, the camera enters parked recording mode and
automatically records video each time the camera sensor
detects motion.
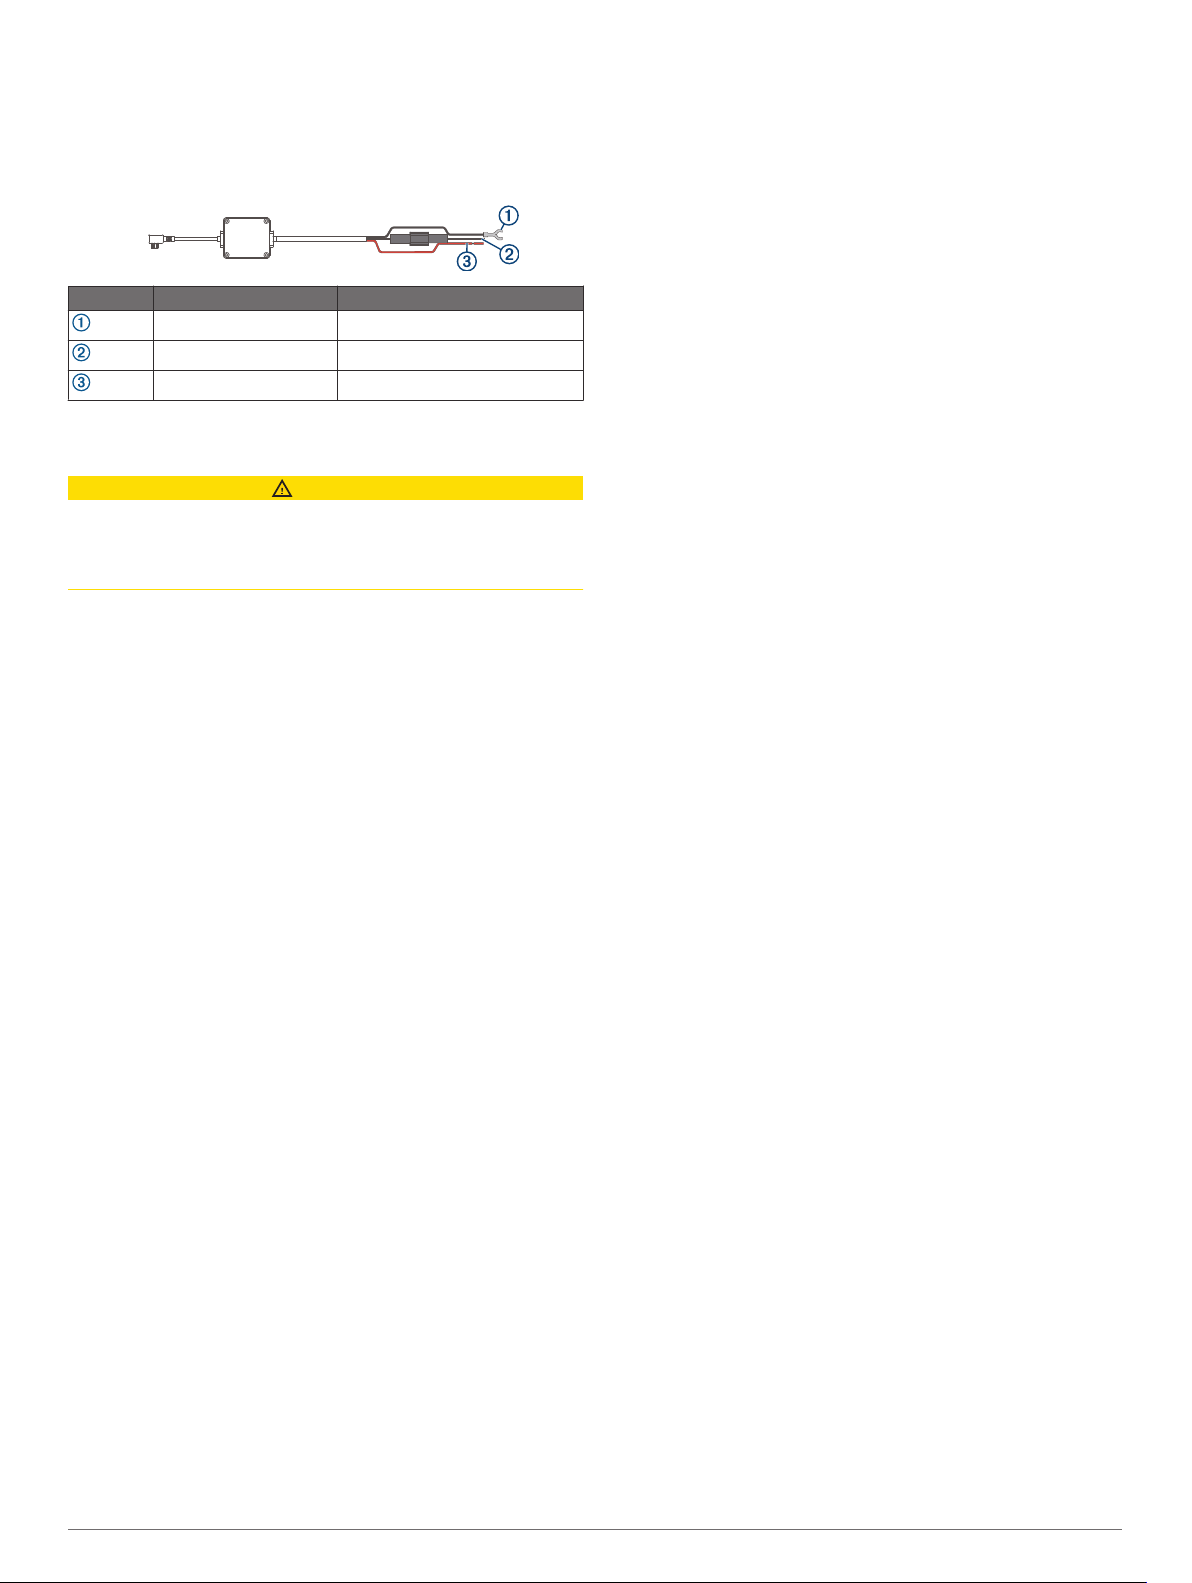
Parking Mode Cable Wiring Diagram
Item Wire Color Wire Function
Black Ground
Yellow Battery 12 V
Red Accessory 12 V
Connecting the Parking Mode Cable Accessory to
Power
CAUTION
Garmin strongly recommends having an experienced installer
with the proper knowledge of electrical systems install the
device. Incorrectly wiring the power cable can result in damage
to the vehicle or the battery and can cause bodily injury.
1
Route the parking mode cable accessory to a location in the
vehicle with constant power, switched power, and a ground
connection.
2
Connect the BATT wire to a constant power source.
3
Connect the ACC wire to a switched power source.
4
Connect the GND wire to the bare metal of the vehicle's
chassis using an existing bolt or screw.
5
Plug the parking mode cable accessory into the USB port on
the camera.
Troubleshooting
My camera feels warm while it is operating
It is normal for the camera to feel warm during typical use,
especially while it is recording high-resolution video or
transmitting a Wi‑Fi signal.
My memory card has degraded and needs to
be replaced
All microSD
®
memory cards wear out after they are overwritten a
large number of times. Periodically formatting the card can
extend the useful life and improve performance. Because the
dash camera records continuously, you may need to replace the
memory card periodically (Installing a Memory Card, page 1).
Your device detects memory card errors automatically and alerts
you when it is time to format or replace your memory card.
You can take these actions to help extend the useful life of the
memory card.
• Format the memory card at least one time every six months
(Formatting the Memory Card, page 2).
• If the device displays a memory card error alert, first try
formatting the memory card (Formatting the Memory Card,
page 2) and then, if necessary, replace the memory card
(Installing a Memory Card, page 1).
• Turn off the device when your vehicle is not in use.
If your device is not connected to an ignition-switched vehicle
power outlet, you should turn off the device when your
vehicle is not in use to prevent the dash camera from
recording unneeded footage.
• Transfer saved video footage to a computer.
The memory card lasts longer when more free space is
available on the card.
• Use a memory card with a higher storage capacity.
Because higher-capacity memory cards are overwritten less
frequently, they usually last longer.
• Use a high-quality memory card with a speed rating of class
10 or higher.
• Purchase your replacement memory card from a high-quality
manufacturer and a reputable vendor.
My video recordings are blurry
• Clean the camera lens (Cleaning the Camera Lens, page 4).
• Clean the windshield in front of the camera.
• Verify the area of the windshield in front of the camera is
cleared by the windshield wipers, and move the device, if
necessary.
My video recordings are choppy or
incomplete
• For the best camera and video results, use a high-quality
memory card with a speed rating of class 10 or higher.
A slower memory card may not record video quickly enough.
• If you are viewing videos on your smartphone using a
wireless connection to the camera, try viewing them in
another location with less wireless interference, or try
transferring videos to the smartphone (Trimming and
Exporting a Video, page 3).
• Transfer important recordings to a computer or smartphone,
and format the memory card (Formatting the Memory Card,
page 2).
• If the device displays a memory card error alert, first try
formatting the memory card (Formatting the Memory Card,
page 2) and then, if necessary, replace the memory card
(Installing a Memory Card, page 1).
• Update your device to the latest software (Product Updates,
page 4).
Troubleshooting 5
Loading ...
Loading ...
Loading ...