Loading ...
Loading ...
Loading ...
Basic settings en
17
2.
Press the button.
a appears in the display and the arrows are filled
from the bottom to the top.
a Rapid heating starts after a few seconds.
a Once rapid heating has ended, an audible signal
sounds and the symbol goes out in the display.
3.
Place the food in the cooking compartment.
13 Basic settings
You can configure the appliance to meet your needs.
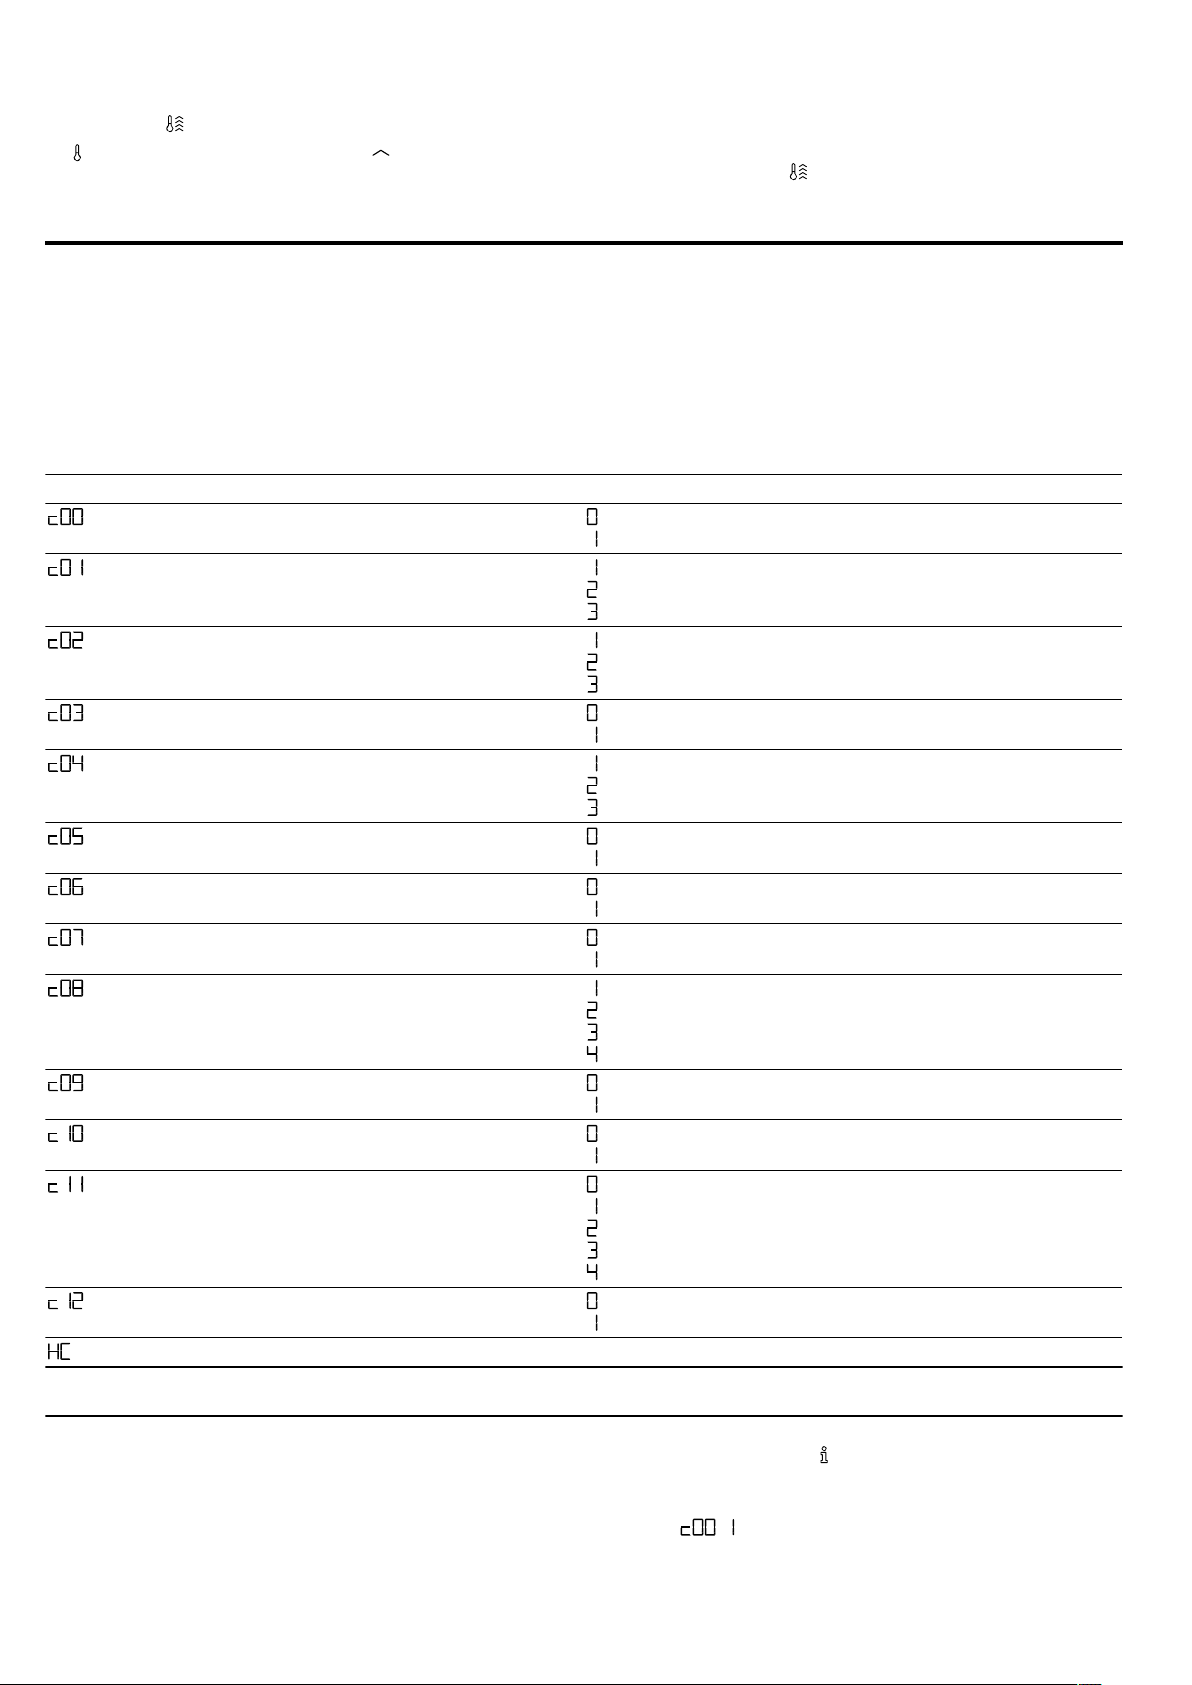
13.1 Overview of the basic settings
Here you can find an overview of the basic settings and factory settings. The basic settings depend on the features
of your appliance.
Display Basic setting Selection
Automatic childproof lock = no
1
= yes
Signal duration upon completion of a cook-
ing time or timer period
= 10 seconds
= 30 seconds
1
= 2 minutes
Waiting time until a setting is adopted = 3 seconds
1
= 6 seconds
= 10 seconds
Button tone when pressing a button = off
= on
1
Brightness of the display illumination = dark
= medium
1
= bright
Time display = hide the time
= display the time
1
Childproof lock can be adjusted = no
= yes
1
Interior lighting during operation = no
= yes
1
Cooling fan run-on time = short
= medium
1
= long
= extra long
Telescopic shelves retrofitted
2
= no
1
(for rails and 1-level pull-out)
= yes (for 2- and 3-level pull-out)
Sabbath mode available = no
1
= yes
Water hardness
→"Setting the water hardness", Page18
= softened
= soft (up to 1.5mmol/l)
= medium (1.5–2.5mmol/l)
= hard (2.5–3.8mmol/l)
1
= very hard (above 3.8mmol/l)
Reset all values to factory settings = no
1
= yes
.. HomeConnect Settings
→"HomeConnect ", Page18
1
Factory setting (may vary according to model)
2
Depending on the appliance specifications
13.2 Changing basic settings
Requirement:The appliance is switched off.
1.
Press and hold the button for approximately
fourseconds.
a The first basic setting appears in the display,
e.g. .
2.
Use the temperature selector to change the setting.
Loading ...
Loading ...
Loading ...