Loading ...
Loading ...
Loading ...
ASSEMBLY AND USAGE
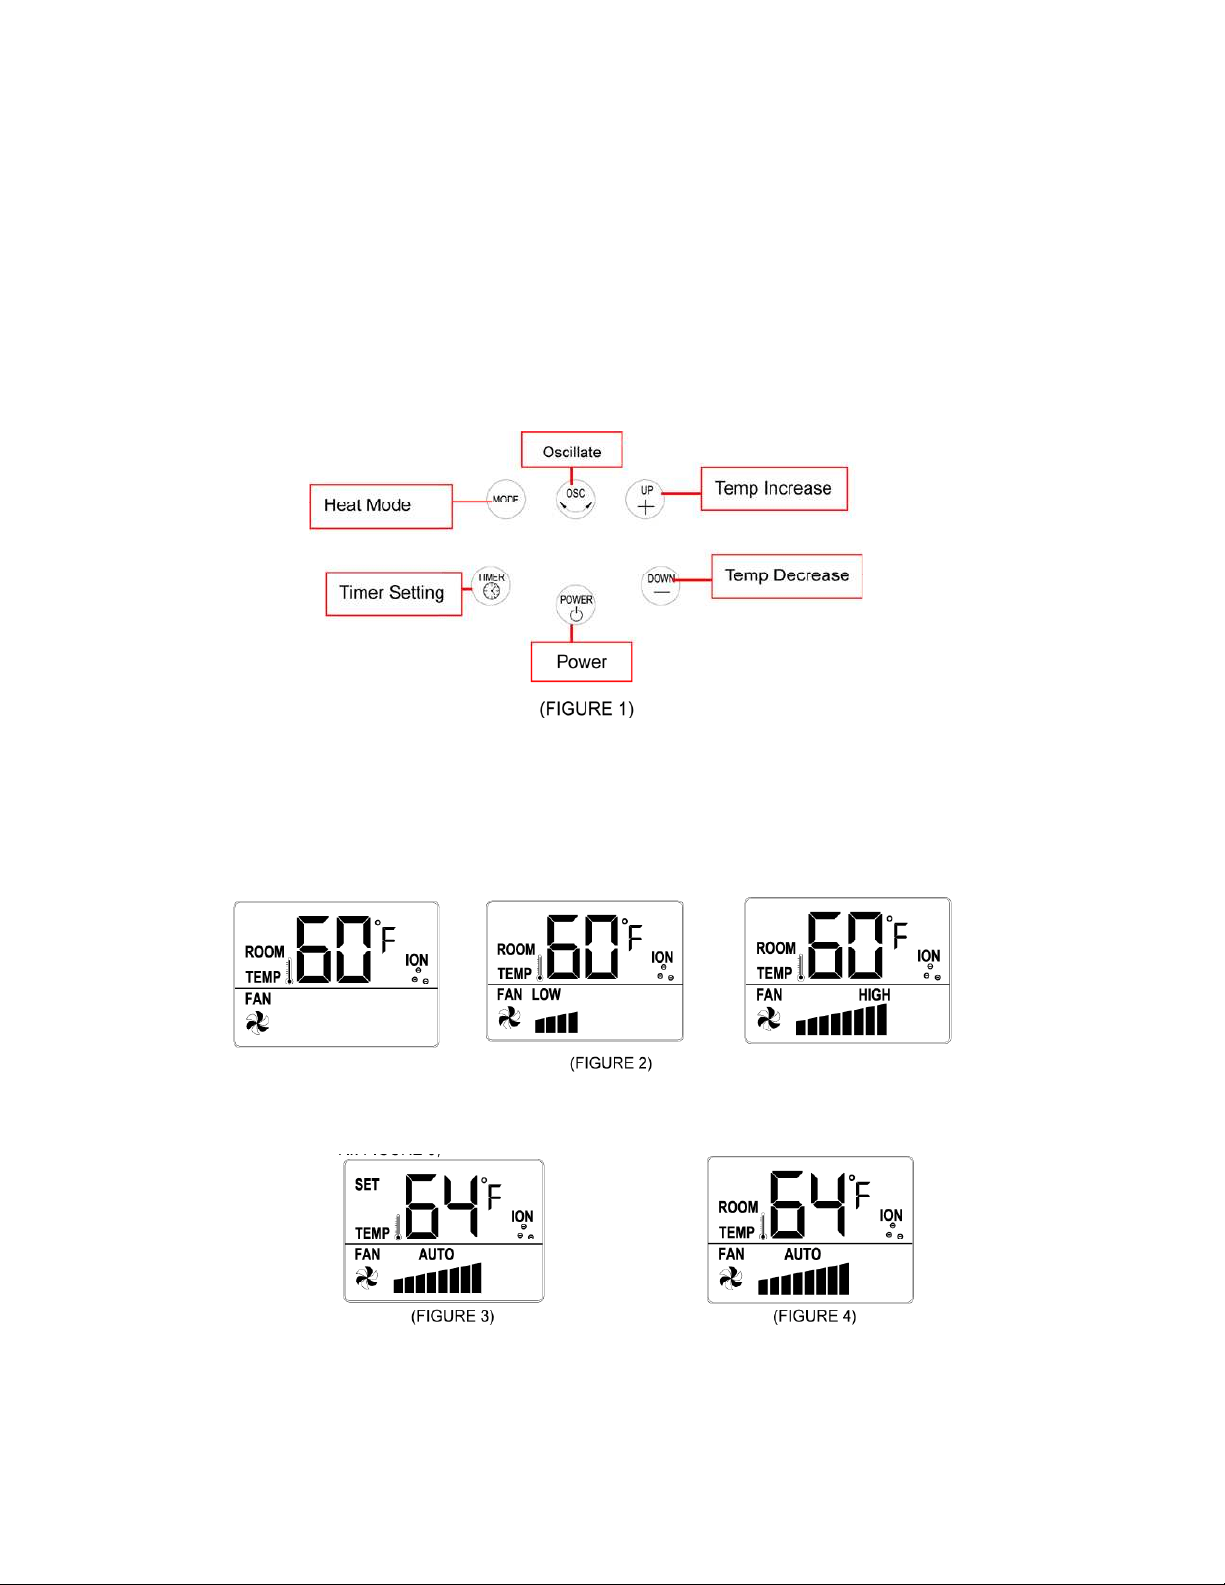
The heater may be operated by the manual controls located on the heater (as shown in FIGURE
2) or by your remote control (shown in FIGURE 8).
1. Carefully remove the heater from the plastic bag and the carton.
2. Assemble the two detached half pans and fasten the screws on the bottom of the pan (as
shown in FIGURE 1). Place the heater on a stable flat surface.
3. Plug the power cord into a power socket. Turn on the Main Power Foot Switch on, a “Beep”
will sound and the red indicator light will appear above the LCD Display. The heater is ready
to use. The red light will remain lit until the POWER switch is turned OFF and the heater is
unplugged from the electrical outlet.
4.
Power: Connect plug to power source and LCD backlight will illuminate. Push POWER button to
turn unit ON and begin fan operation. LCD backlight will fade 15 seconds after setting. Push
POWER button again to turn unit OFF.
5. MODE: Pressing the ‘mode’ button will set the heater into a different MODE: COOL FAN,
LOW HEAT, HIGH HEAT and AUTO. (As shown in FIGURE 2)
6. UP and DOWN: When the unit is in AUTO MODE only, the LCD will displaying a ‘SET
TEMP’ indicator, (As SHOWN IN FIGURE 3)
1) To adjust “SET TEMP”, press the ‘UP’ button to increase the desired temperature and the
‘DOWN’ button to decrease the desired temperature. The LCD will display the current ROOM
temperature about 10 seconds after setting is complete.
2) When the air temperature reaches 1 degree above the SET TEMP, the heater will cut off.
3) When the air temperature drops 1 degree below the SET TEMP, the unit will come back on.
4) Note: it is normal for the heater to cycle ON and OFF as it maintains the SET TEMP.
3
Loading ...
Loading ...
Loading ...