Loading ...
Loading ...
Loading ...
Refrigerant Piping
ENGLISH
Installation Manual 23
To Outdoor Unit
Sealed Piping
A
A
B
A
B
6. If the diameters of the branch piping of the designated refrigerant piping differs, use a pipe cutter to cut
the connecting section and then use an adapter for connecting different diameters to connect the piping.
7. Always observe the restrictions on the refrigerant piping (such as rated length, difference in height, and
piping diameter).
Failure to do so can result in equipment failure or a decline in heating/cooling performance.
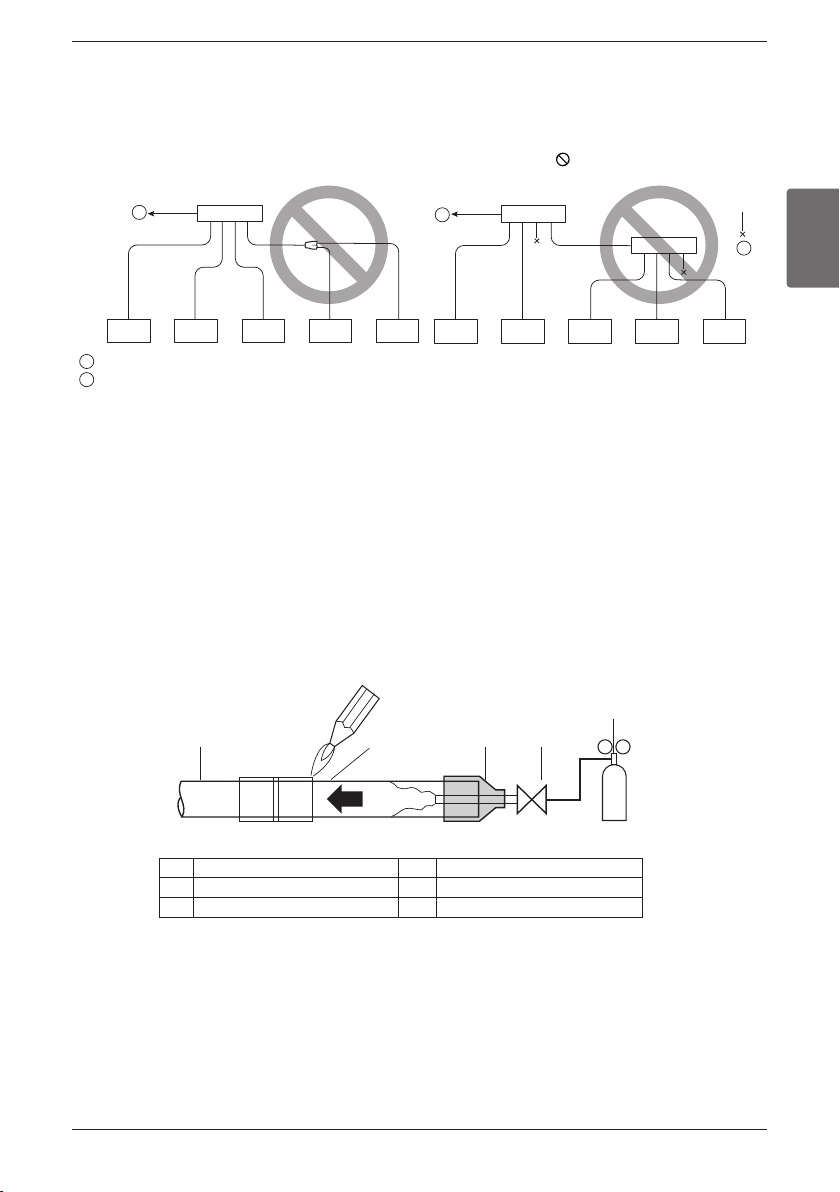
8. A second branch cannot be made after a header. (These are shown by .)
9. The Multi V will stop due to an abnormality like excessive or insufficient refrigerant. At such a time, always
properly charge the unit. When servicing, always check the notes concerning both the piping length and
the amount of additional refrigerant.
10. Never use refrigerant to perform an air purge. Always evacuate using a vacuum pump.
11. Always insulate the piping properly. Insufficient insulation will result in a decline in heating/cooling perfor-
mance, drip of condensate and other such problems.
12. When connecting the refrigerant piping, make sure the service valves of the Outdoor Unit is completely
closed (the factory setting) and do not operate it until the refrigerant piping for the Outdoor and Indoor
Units has been connected, a refrigerant leakage test has been performed and the evacuation process
has been completed.
13. Always blow nitrogen into pipe which is brazed. Always use a non-oxidizing brazing material for brazing
the parts and do not use flux. If not, oxidized film can cause clogging or damage to the compressor unit
and flux can harm the copper piping or refrigerant oil.
3
2
1
45
6
1 Refrigerant piping 4 Taping
2 Pipe to be brazed 5 Valve
3 Nitrogen 6 Pressure-reducing valve
Loading ...
Loading ...
Loading ...