
Loading ...
Loading ...
Loading ...
6
English (Original Instructions)
EN
DE ES IT FR PT NL RU FI SV NO DA PL CS SK SL HR HU RO BG EL AR TR HE LT LV ET
2924107
1
2
3
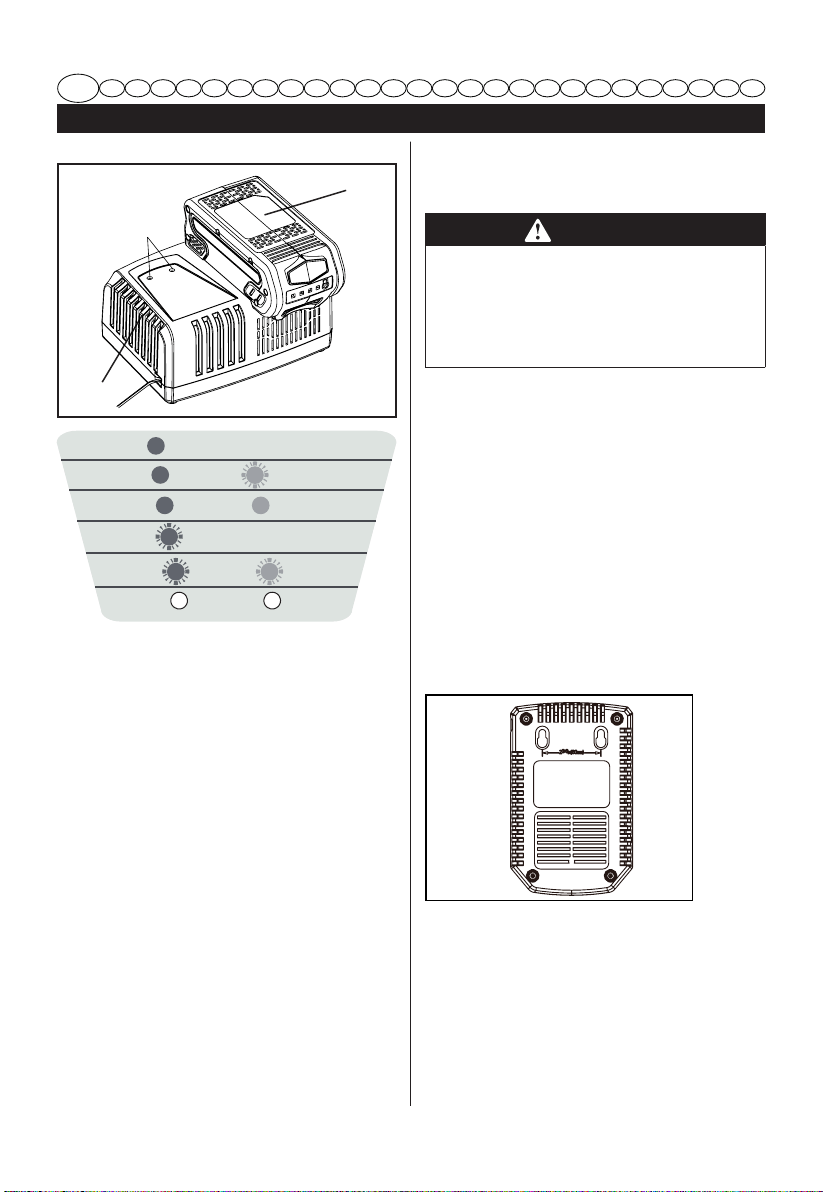
OFF
RED
LED 1
LED 2
BLINKING
RED
BLINKING
GREEN
BLINKING
GREEN
BLINKING
RED
CHARGING
FULLY CHARGED
HIGH TEMP.
ERROR
GREEN
RED
OFF
STAND BY
RED
False Defect Note:
When the battery is inserted into the charger,
Green, remove the battery from the charger
for 1 minute, then reinsert. If the status LEDs
indicate normal, then the battery pack is
good. If the status LED 1 and LED 2 are still
blinking, remove the battery pack and unplug
the charger. Wait 1 minute and plug the
charger back in and reinsert the battery pack.
If the status LEDs indicate normal than the
battery pack is good. If the status LED 1 and
LED 2 are still blinking then the battery pack
is defective and needs to be replaced.
CHECKING THE CHARGER
If the battery pack does not charge properly:
Check the current at the power outlet with
another tool. Make sure that the outlet is
not turned off.
Check that the charger contacts have not
been shorted by debris or foreign material.
If the surrounding air temperature is not
normal room temperature, move the
charger and battery pack to a location
WARNING
If the battery is inserted into the charger
when warm or hot, the CHARGING LED
indicator light on the charger may switch
on and illuminate ORANGE. If this occurs
allow the battery to cool outside of the
charger for approximately 30 minutes.
CHARGER MOUNTING
1. This charger can be installed hanging on a
wall using two screws (not supplied)
2. Locate the placement for the charger to be
wall mounted.
3. If fastening to wood studs use 2 wood
screws.
4. For charger 2910907/29417/29447:
Drill two holes 2 3/8” (6 cm) on
center ensuring they are level.
For charger 2924107: Drill two holes 5 3/4”
(14.5cm)on center ensuring they are level.
5. If fastening to drywall use wall anchors and
screws to secure the charger to the wall.
2910907/29417/29447
Loading ...
Loading ...
Loading ...