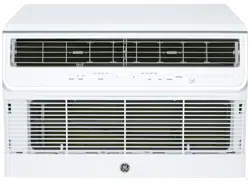
Lights below the touch pads on the control panel indicate the selected settings
1. POWER
Turns air conditioner on and off.
2. Display
Displays the temperature setting. Displays hours when setting the timer.
3. Mode
Use to set COOL, HEAT (on some models), DRY, AUTO or FAN modes. Indicator lights on the controls will show the mode selected.
4. Temp Increase + / Decrease - Pads
Use to set temperature when in Auto, Cool, Dry or Heat (on some models) mode.
5. Fan Speed
Use to set the fan speed at LOW, MEDIUM, HIGH, OR AUTO. Indicator lights will show the speed selected.
6. Timer
ON - Use to set the air conditioner to automatically turn ON from .5 to 24 hours later.
OFF - Use to automatically turn the air conditioner OFF from .5 to 24 hours later.
7. Filter
Monitors accumulated fan run time as a reminder to clean the filter.
8. Eco
ON: Use to cycle the fan off when the compressor cycles off.
OFF: Use to run the fan continuously when in cooling or heating (on some models) mode.
9. Sleep
Allows room temperature to increase (Cool mode) or decrease (Heat mode) during sleeping hours.
To ensure proper operation, aim the remote control at the signal receiver on the air conditioner.
The remote control signal has a range up to 21 feet.
Make sure nothing is between the air conditioner and the remote control that could block the signal.
Make sure the battery is fresh and installed correctly— see the Care and Cleaning section.
Features
To Adjust Fan Speeds
Press the Fan Speed button to select the FAN Speed in four steps - Auto, Low, Med, or High. Each time the button is pressed, the fan speed mode is shifted.
For some models, the fan speed can not be adjusted under HEAT mode. In DRY mode, the fan speed is controlled at low automatically.
Sleep
Press the Sleep button to initiate the sleep mode. In this mode the selected temperature will increase (cooling) or decrease (heating) by 2°F / 1°C 30 minutes after the mode is selected. The temperature will then increase (cooling) or decrease (heating) by another 2°F / 1°C after an additional 30 minutes.
This new temperature will be maintained for 7 hours before it returns to the originally selected temperature. This ends the Sleep mode and the unit will continue to operate as originally programmed. The Sleep mode program can be cancelled at any time during operation by pressing the Sleep button again.
Check Filter
Press the Filter button to initiate this feature. This feature is a reminder to clean the air filter for more efficient operation.
The LED (light) will illuminate after 250 hours of operation. To reset after cleaning the filter, press the Filter button and the light will go off.
Eco - Energy Saver
Press the Eco button to initiate this feature. This feature is available on COOL, DRY, AUTO, (only AUTO-COOLING and AUTO-FAN) modes. The fan will continue to run for 3 minutes after the compressor shuts off.
The fan then cycles on for 2 minutes at 10 minute intervals until the room temperature is above the set temperature, at which time the compressor turns back on and Cooling starts.
To Select the Operating Mode
To choose operating mode, press the Mode button. Each time you press the button, a mode is selected in a sequence that goes from Auto, Cool, Dry, Heat (on some models) and Fan only. The indicator light above will be illuminated and remain on once the mode is selected.
The unit will initiate the Energy Saver function under Cool, Dry, Auto (only Auto-Cooling and Auto-Fan) modes.
To Operate on Auto Feature:
■ When you set the air conditioner in AUTO mode, it will automatically select cooling, heating (on some models) or fan only operation depending on what temperature you have selected and the room temperature.
■ The air conditioner will control room temperature automatically to the temperature set point.
■ In this mode, the fan speed cannot be adjusted, it starts automatically at a speed according to the room temperature.
To Operate on Fan Only:
■ Use this function only when cooling is not desired. You can choose any fan speed you prefer.
■ During this function, the display will show the actual room temperature, not the set temperature in the cooling mode.
■ In Fan only mode, the temperature is not adjustable.
To Operate on Dry Mode:
■ In this mode, the air conditioner will generally operate in the form of a dehumidifier. Since the conditioned space is a closed or sealed area, some degree of cooling will continue.
Timer: Auto Start / Stop
■ When the unit is on or off, first press the Timer button, the TIMER ON indicator light illuminates. It indicates the Auto Start program is initiated.
■ When the time of TIMER ON is displayed, press the Timer button again, the TIMER OFF indicator light illuminates. It indicates the Auto Stop program is initiated.
■ Press or hold the UP or DOWN button to change the Auto time by 0.5 hour increments, up to 10 hours, then at 1 hour increments up to 24 hours. The control will count down the time remaining until start.
■ The selected time will register in 5 seconds, and the system will automatically revert back to display the previous temperature setting or room temperature when the unit is on. (When the unit is off, there is no display.)
■ Turning the unit ON or OFF at any time or adjusting the timer setting to 0.0 will cancel the Auto Start/Stop timed program.
Additional Features
The “Cool” circuit has an automatic 3 minute delayed start if the unit is turned off and on quickly. This prevents overheating of the compressor and possible circuit breaker tripping. The fan will continue to run during this time.
There is a 2 second delay for the compressor to stop when selecting FAN ONLY/HEAT. This is to cover the possibility of having to roll through to select another mode.
The control will maintain the set temperature within 1°F between 62°F and 86°F in cool or heat mode (on some models).
After a power outage, the unit will remember last setting and return the unit to that setting when power is restore.
Air Direction
Air directional louvers control air flow direction.
The louvers will allow you to direct the air flow up or down and left or right throughout the room as needed until the desired left/right direction is obtained. Pivot horizontal louvers until the desired up/down direction is obtained.
Ventilation
To open the ventilation port, remove the adjustable air discharge louvers by gently pulling forward the right end until it is released from the pivot point. Shift the louvers to the right to release the left end from its pivot point. To open the ventilation port, pull the lever forward. The lever will lock in place. To replace the air discharge louvers, reverse the above procedure
Remote Wall Thermostat (Heat/Cool models only)
All heat/cool models are capable of being controlled by a 24 VAC remote wall thermostat. The thermostat control connection board is located behind a metal cover on the right side of the metal chassis cover. To open the cover, remove the Phillips head screw and lift from the slots at the bottom. To properly connect the wiring from a remote wall thermostat, follow these steps:
Order the 8-pin connector from GE Appliances Service. Call 1-800-626-2002 and order WP26X24981. A connector is required for each unit being controlled by a wall thermostat
Install the remote thermostat according to the directions included with it.
Using wire nuts included with the 8-pin connector, connect the wiring from the wall thermostat per the following; (Proper connection of the wiring is critical. Improper hookups could result in damage to the air conditioner components and may not be covered by the product warranty) After properly making the wire nut connections, wrap the 7 connectors together with electrical tape and push them into the lower right corner of the control box opening to keep them out of the way.
CARE AND CLEANING
Air filter
To access the filter, grasp the front grille louvers on both sides at the recess and pull forward. Remove the filter by lifting up and out. Note the filter direction when re-installing.
Wash the filter using liquid dishwashing detergent and warm water. Rinse the filter thoroughly. Gently shake excess water from the filter.
Be sure the filter is thoroughly dry before replacing. Or, instead of washing, you may vacuum the filter until clean.
NOTE: Never use hot water over 104°F (40°C) to clean the air filter. Never attempt to operate the unit without the air filter.
Energy Saving Note
In order to reach maximum energy saving and comfort, it is recommended to use a cover to insulate the unit when the unit is not in use. The recommended cover size for the unit is 26” x17”x 5” (WxHx D).
NOTE: Unplug the unit before installing a cover.
Cabinet
• Be sure to unplug the air conditioner to prevent shock or fire hazard. The cabinet and front may be dusted with an oil-free cloth or washed with a cloth dampened in a solution of warm water and mild liquid dishwashing detergent. Rinse thoroughly with a damp cloth and wipe dry.
• Never use harsh cleaners, wax, or polish on the cabinetfront.
• Be sure to wring excess water from the cloth before wiping around the controls. Excess water in or around the controls may cause damage to the air conditioner.
• Plug in the air conditioner.
Outdoor Coils
• The coils on the outdoor side of the air conditioner should be checked regularly.
• If they are clogged with dirt or soot, they may need to be professionally cleaned, a service available through GE Appliances service or other service companies.
How to Insert the Batteries in the Remote Control
Remove the battery cover by rotating it to the unlock position.
Insert a new battery, making sure that the (+) and (-) of the battery are installed correctly, (+) side up.
Reattach the cover by rotating it back into the lock position.
NOTES:
• Use 1 CR2025 (3 VDC) battery. Do not use rechargeable batteries.
• Remove the battery from the remote control if the system is not going to be used for an extended period of time.
Front Grille Removal
The front grille can be removed for a more thorough cleaning.
To remove:
Grasp the front grille louvers on both sides at the recess and pull forward
Remove the filter by pulling forward and out.
Grasp the bottom of the grille and carefully pull forward about 1” or until the security brackets limit the travel forward.
Remove the two Phillips head screws located in the upper corners of the grille louver opening.
Grasp the left and right rear edges of the grille about 6” from the top and pull outward to release the tabs on the inside of the grille from the slots in each side of the metal chassis cover. When released pull out both bottom corners of the grill while carefully lifting up to release the 4 tabs on the inside top of the grille from the slots in the metal chassis cover
To release the multi-pin low-voltage electrical connector from the user interface, press the rear of the tab and gently pull apart.
Front Grille Re-installation:
Reconnect the multi-pin low voltage connector.
Before engaging the 4 tabs on the inside top of the grille, align the ventilation lever on the chassis into the mating slot on the inside of the discharge opening in the grille. After ensuring proper alignment of the ventilation lever, push the grille toward the chassis and the tabs should snap into the slots on the metal chassis cover.
TROUBLESHOOTING TIPS
Problem
Solution
Air conditioner does not start
Wall plug disconnected. Push plug firmly into wall outlet.
House fuse blown or circuit breaker tripped. Replace fuse with time delay type or reset circuit breaker.
Plug current device tripped. Press the RESET button.
Power is OFF. Turn power ON.
Air from the unit does not feel cold enough
Room temperature below 62°F (17°C). Cooling may not occur until room temperature rises above 62°F (17°C).
Temperature sensor behind air filter may be touching cold coil. Keep it from the cold coil.
Set to a lower temperature.
Compressor stopped when changing modes. Wait for 3 minutes after set to the COOL mode.
Air conditioner cooling, but room is too warm. Ice is forming on cooling coil behind decorative front.
Outdoor temperature below 64°F (18°C). To defrost the coil, set FAN ONLY mode.
Air filter may be dirty. Clean the filter. Refer to Care and Cleaning section. To defrost, set to FAN ONLY mode.
Thermostat set to cold for night-time cooling. To defrost the coil, set to FAN ONLY mode. Then, set temperature to a higher setting.
Dirty air filter, or the air is restricted. Clean the air filter. Refer to Care and Cleaning section.
Temperature is set too high. Set the temperature to a lower setting.
Air directional louvers positioned improperly. Position louvers for better air distribution.
Front of unit is blocked by drapes, blinds, furniture, etc, which restricts air distribution. Clear blockage in front of unit.
Doors, windows, registers, etc, may be open. Close doors, windows, registers.
Unit recently turned on in hot room. Allow additional time to remove “stored heat” from walls, ceiling, floor, and furniture.
Air conditioner turns on and off rapidly
Dirty air filter, the air is restricted. Clean air filter.
Outside temperature extremely hot. Set FAN speed to a higher setting to cool outdoor cooling coil.
Noise when unit is cooling
Air movement sound. This is normal. If too loud, set to a slower FAN setting.
Improper installation. Refer to installation instructions or check with installer.
Water dripping INSIDE when unit is cooling
Improper installation. Tilt air conditioner slightly to the outside to allow water drainage. Refer to installation instructions, and check with installer.
Water dripping OUTSIDE when unit is cooling
Unit removing large quantity of moisture from humid room. This is normal during excessively humid days.
Room too cold
Set temperature to low. Increase set temperature.
Error code “AS” in the display
Room temperature sensor error. Unplug the unit and plug it back in. If error repeats, call for service. NOTE: In Fan only mode, it will display “LO” or “HI”.
Error code “HS” in the display
Electric heating sensor error. Unplug the unit and plug it back in. If error repeats, call for service.
Error code “•” in the display
Evaporator temperature sensor error. Unplug the unit and plug it back in. If error repeats, call for service.
#1 I have an old AJCQ08ACDM1 and an AJCQ12ACDW1 through wall in sleeves. Can a new GE AJCQ12ACH and AJCQ08ACH fit in the existing sleeves in wall ?. Please let me know. Thank you
Greetings! Thank for connecting with us. This is a great question, and we are happy to help! Models AJCQ12ACH and AJCQ08ACH will be a perfect fit for your existing sleeve in your wall. Thank you for checking with us. We hope this helps! -
#2 My [ AJCQ12ACH ] remote control does not work? And I can not see the IR sensor on the front of the new electronic display to aim it at ? { as instructions on p.4 of the manual ] is anybody else having this problem? Or is my remote not working?
Hello CLaBella,Thanks so much for reaching out. We're sorry to hear that your remote control is no longer working. We can understand how that would be frustrating. Try changing the batteries. This remote requires 1 CR2025 (3 VDC) battery. Do not use rechargeable . Pointing the remote towards the control panel will work fine.We hope this helps. Best wishes!