Loading ...
Loading ...
Loading ...
5
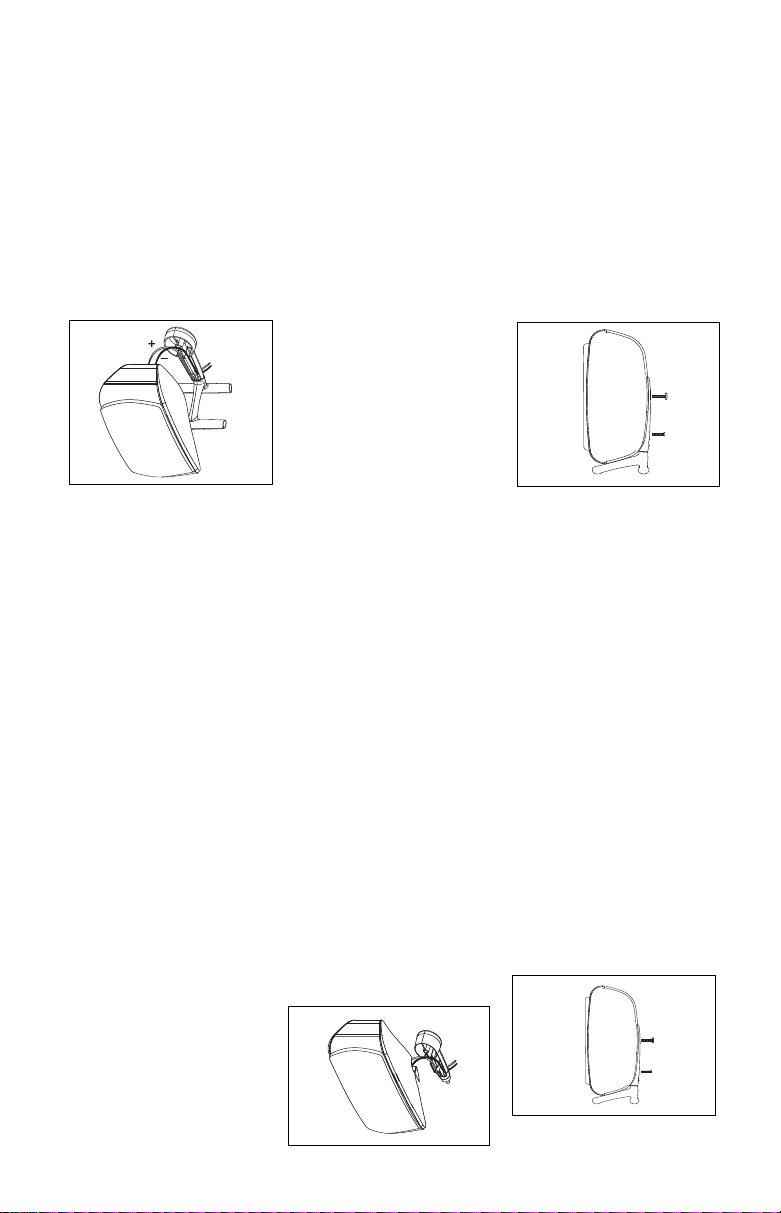
Prepare the speaker wire as
described on page 7. Thread
the two conductors through
the two holes in the stand
bracket. Make sure to pre-
serve the proper polarity
(+ and – connections) by
threading the positive con-
ductor through the hole on
the left, and the negative
conductor through the hole
on the right, looking at the
front of the stand. Push
down on the red speaker
terminal and insert the bare
end of the positive wire into
the hole under the red cap.
Release the cap, and tug
gently on the wire to make
sure that the connection is
snug. Follow the same pro-
cedure to connect the nega-
tive wire to its terminal. Use
the larger screw (Hardware
Bag A) in the upper screw
hole, and the smaller screw
(Hardware Bag A) in the
lower screw hole.
ATTACHING THE SHELF STAND TO THE SPEAKER
Gently pull the slack out of
the wire and screw the shelf
stand onto the back of the
speaker in two places, as
shown.
MOUNTING THE SATELLITES ON OPTIONAL FLOOR STANDS
Important Safety Note: The
supplied floor stand adapters
facilitate installation with a
variety of general-purpose
floor stands available from
many manufacturers. Since
different stands will have
different weight capacities
and stability characteristics, it
is the customer’s responsibil-
ity to check with the stand
manufacturer or dealer to
determine whether that spe-
cific stand is capable of han-
dling the weight and propor-
tions of these loudspeakers in
a safe and stable manner. JBL
disclaims any liability for the
selection of suitable floor
stands and/or correct compat
-
ibility between the selected
stand and these loudspeakers.
The floor stand adapters are
compatible with floor stands
equipped with a 1/4"-20
threaded insert.
Prepare the speaker wire as
described on page 7. Thread
the two conductors through
the two holes in the floor stand
adapter. Make sure to preserve
the proper polarity (+ and –
connections) by threading the
positive conductor through the
hole on the left, and the nega-
tive conductor through the
hole on the right (looking at
the
front of the adapter). Push
down
on the red speaker ter-
minal and insert the bare end
of the positive wire into the
hole under the red cap. Release
the cap, and tug gently on the
wire to make sure that the
connection is snug. Follow the
same procedure to connect the
negative wire to its terminal.
Gently pull the slack out of the
wire and screw the adapter
onto the back of the speaker
in two places, as shown.
The floor stand adapter
screws may be found in
Hardware Bag B. Use the
larger screw in the upper
screw hole, and the smaller
screw in the lower screw hole.
Screw the floor stand adapter
into the floor stand’s threaded
insert until the speaker is
firmly attached to the stand.
Back off slightly from the fully
tightened position until the
speaker is oriented as desired,
then rotate the thumbwheel at
the bottom of the floor stand
adapter to secure the speaker
to the stand.
+
–
+
–
SCS200.5 OM 5/18/06 10:24 AM Page 5
Loading ...
Loading ...
Loading ...