Loading ...
Loading ...
Loading ...
7
OPERATING INSTRUCTIONS
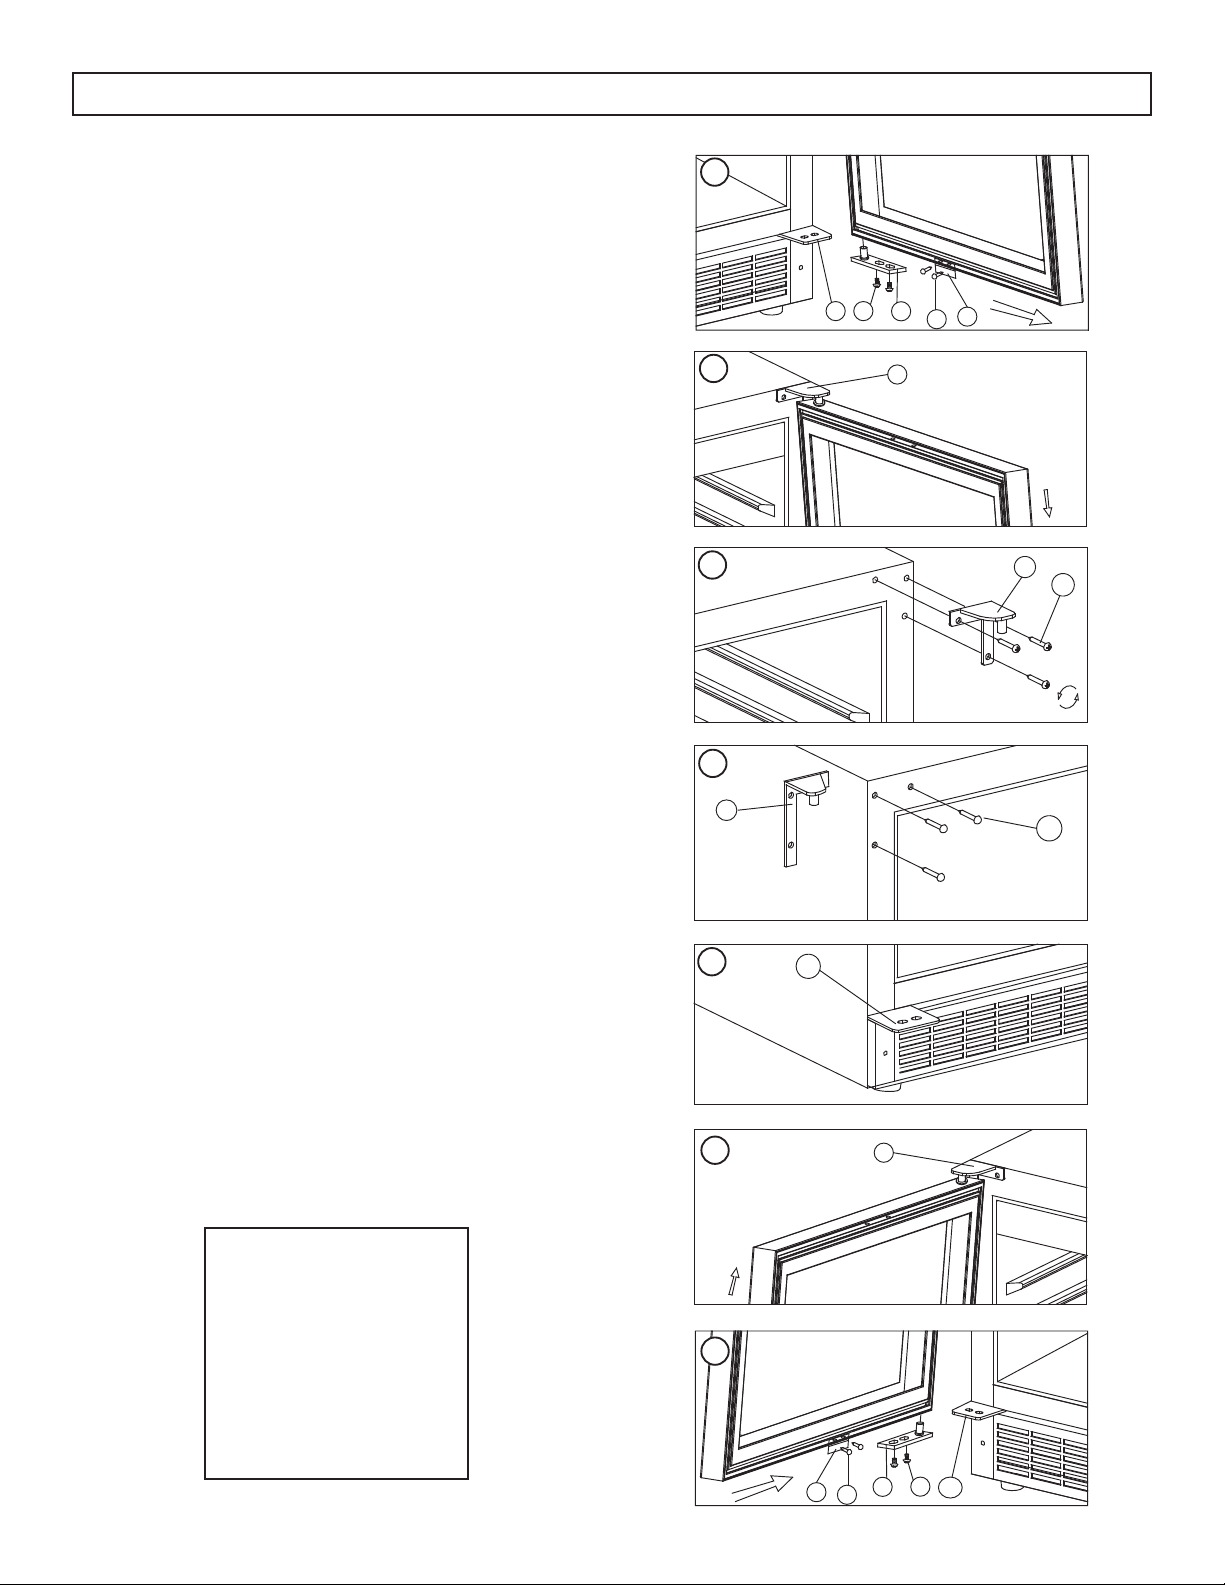
1. Bottom Right Hinge
2. Door Axis Screws
3. Door Axis
4. Actuator Screws
5. Actuator
6. Top Right Hinge
7. Hinge Screws
8. Top Left Hinge
9. Screw Hole Cover
10. Bottom Left Hinge
DOOR REVERSAL INSTRUCTIONS
If the appliance is placed on its back or side for any
length of time during this process, it must be allowed
to remain upright for 6 hours before plugging it in
to avoid damage to the internal components.
1. Open the door to a 90° angle and remove two
screws from the door axis. Slide the bottom of
the door outward to remove it from the chassis.
See fi gures A and B.
2. Remove two screws securing the actuator and
remove it from the door. Install the actuator at
the top of the door frame. Screw holes can be
found at the top of the door frame by gently
pulling back the rubber gasket. See fi gure A.
3. Remove three screws from the top right hinge
and remove the right top hinge. See fi gure C.
4. Remove the screw hole covers from the top left
of the cabinet and install the top left hinge at the
top left of the cabinet with three screws. Block
the holes at the top right of the cabinet with the
screw hole covers. See fi gure D.
5. The lower left hinge is pre-installed on the
cabinet. See fi gure E.
6. When reinstalling the door, it will need to be
fl ipped 180° from its original position to ensure
that the handle is on the correct side and that
the actuator is on the bottom. Install the door by
sliding it onto the top hinge pin, then replace
the door axis by placing the hinge pin in the
bottom of the door and securing it to the bottom
left hinge with two screws. Ensure the top of
the door is properly aligned with the top of the
cabinet, that the actuator is making contact with
the switch on the chassis and that the rubber
gasket makes a good seal with the cabinet all
the way around. See fi gures F and G.
A
B
C
D
E
1
23
4
5
6
6
7
8
9
10
8
23
4
10
5
G
F
Loading ...
Loading ...
Loading ...