
Loading ...
Loading ...
Loading ...
23
6. Regulatory Infomation
为了更好地关爱及保护地球,当用户不再
需要此产品或产品寿命终止时,请遵守国
家废弃电器电子产品回收处理相关法律法
规,将其交给当地具有国家认可的回收处
理资质的厂商进行回收处理。
Information for U.K. only
WARNING - THIS APPLIANCE MUST BE
EARTHED.
Important:
This apparatus is supplied with an approved
moulded 13A plug. To change a fuse in this type
of plug proceed as follows:
1. Remove fuse cover and fuse.
2. Fit new fuse which should be a BS 1362
5A,A.S.T.A. or BSI approved type.
3. Retit the fuse cover.
If the tted plug is not suitable for your socket
outlets, it should be cut off and an appropriate
3-pin plug tted in its place.
If the mains plug contains a fuse, this should
have a value of 5A. If a plug without a fuse is
used, the fuse at the distribution board should
not be greater than 5A.
NOTE: The severed plug must be destroyed
to avoid a possible shock hazard
should it be inserted into a 13A socket
elsewhere.
(A)
(B)
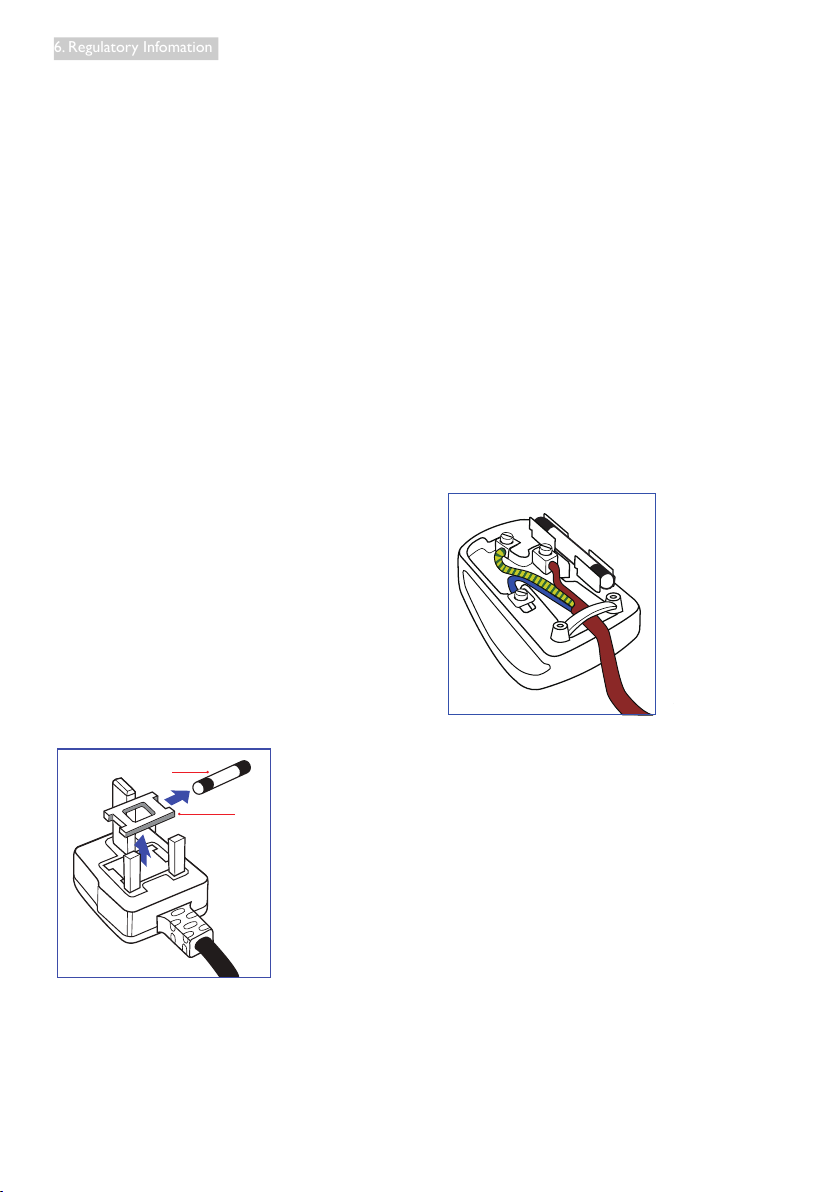
How to connect a plug
The wires in the mains lead are coloured in
accordance with the following code:
BLUE -“NEUTRAL”(“N”)
BROWN -“LIVE”(“L”)
GREEN&YELLOW -“EARTH”(“E”)
1. The GREEN&YELLOW wire must be
connected to the terminal in the plug
which is marked with the letter "E" or by
the Earth symbol or coloured GREEN or
GREEN&YELLOW.
2. The BLUE wire must be connected to the
terminal which is marked with the letter
"N" or coloured BLACK.
3. The BROWN wire must be connected
to the terminal which is marked with the
letter "L" or coloured RED.
Before replacing the plug cover, make certain
that the cord grip is clamped over the sheath of
the lead - not simply over the three wires.
-
Loading ...
Loading ...
Loading ...