Loading ...
Loading ...
Loading ...
INSTALLATION
MPORTANT: Before installation and usage read all the instructions and
make sure that the voltage (V) and the frequency (Hz) indicated on the
rating plate are exactly the same as the voltage and frequency in your
home. The rating plate can be found on the front left edge of the inside of
the Wine Cabinet.
The manufacturer declines all responsibility in the event of the installer
failing to observe all the accident prevention regulations in force, which
are necessary for normal use and the regular operation of the electric
system.
Electrical Connection
YOUR Wine Cabinet IS INTENDED FOR FITTED AND
PERMANENT INSTALLATION.
We recommend that the appliance is connected by a
qualied electrician, who is a member of the N.I.C.E.I.C.
and who will comply with the I.E.E. and local regulations.
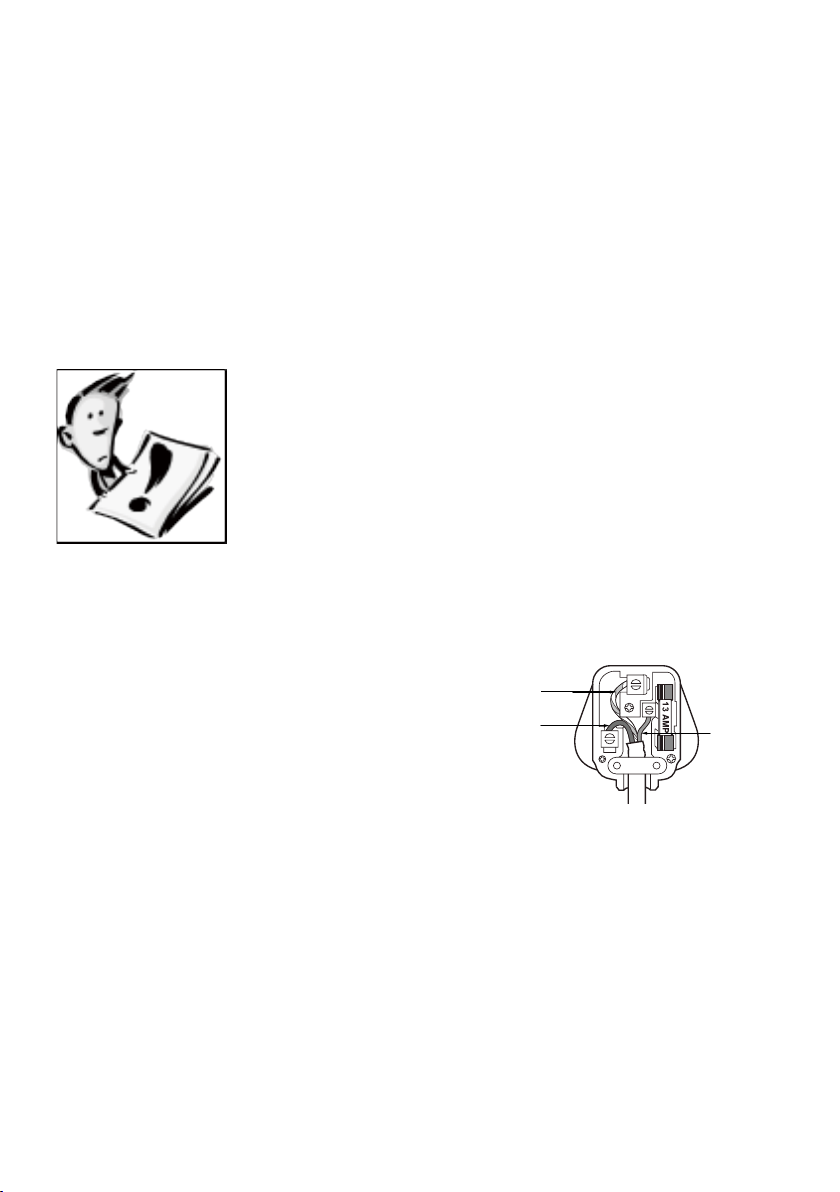
o Your wine cabinet comes supplied with a 13 amp plug tted. If in future you need to
change the fuse in this plug, then a 13 amp ASTA approved (BS 1362) fuse must be
used.
o The wiring in the mains lead is coloured as follows:
Brown.............................Live
Earth
(Green and Yellow)
Neutral
(Blue)
Live
(Brown)
Blue................................Neutral
Green and yellow.........Earth
o As the colours of the wires in the appliance’s mains lead may not correspond with
the coloured markings identifying the terminals in your spur box, please proceed as
follows:
The brown wire must be connected to the terminal marked “L” (live), or
coloured red.
The blue wire must be connected to the terminal marked “N” (neutral), or
coloured black.
The green and yellow wire must be connected to the terminal marked “E”
(earth), or by the earth symbol, or coloured green and yellow.
o When the connection is completed, no stray strands or cut wire should be present.
The cord clamp must be secured over the outer sheath.
Loading ...
Loading ...
Loading ...