Loading ...
Loading ...
Loading ...
08 GB
5
10
9
7
8
11
18
15
7
6
12
17
16
19
1
2
3
4
13
14
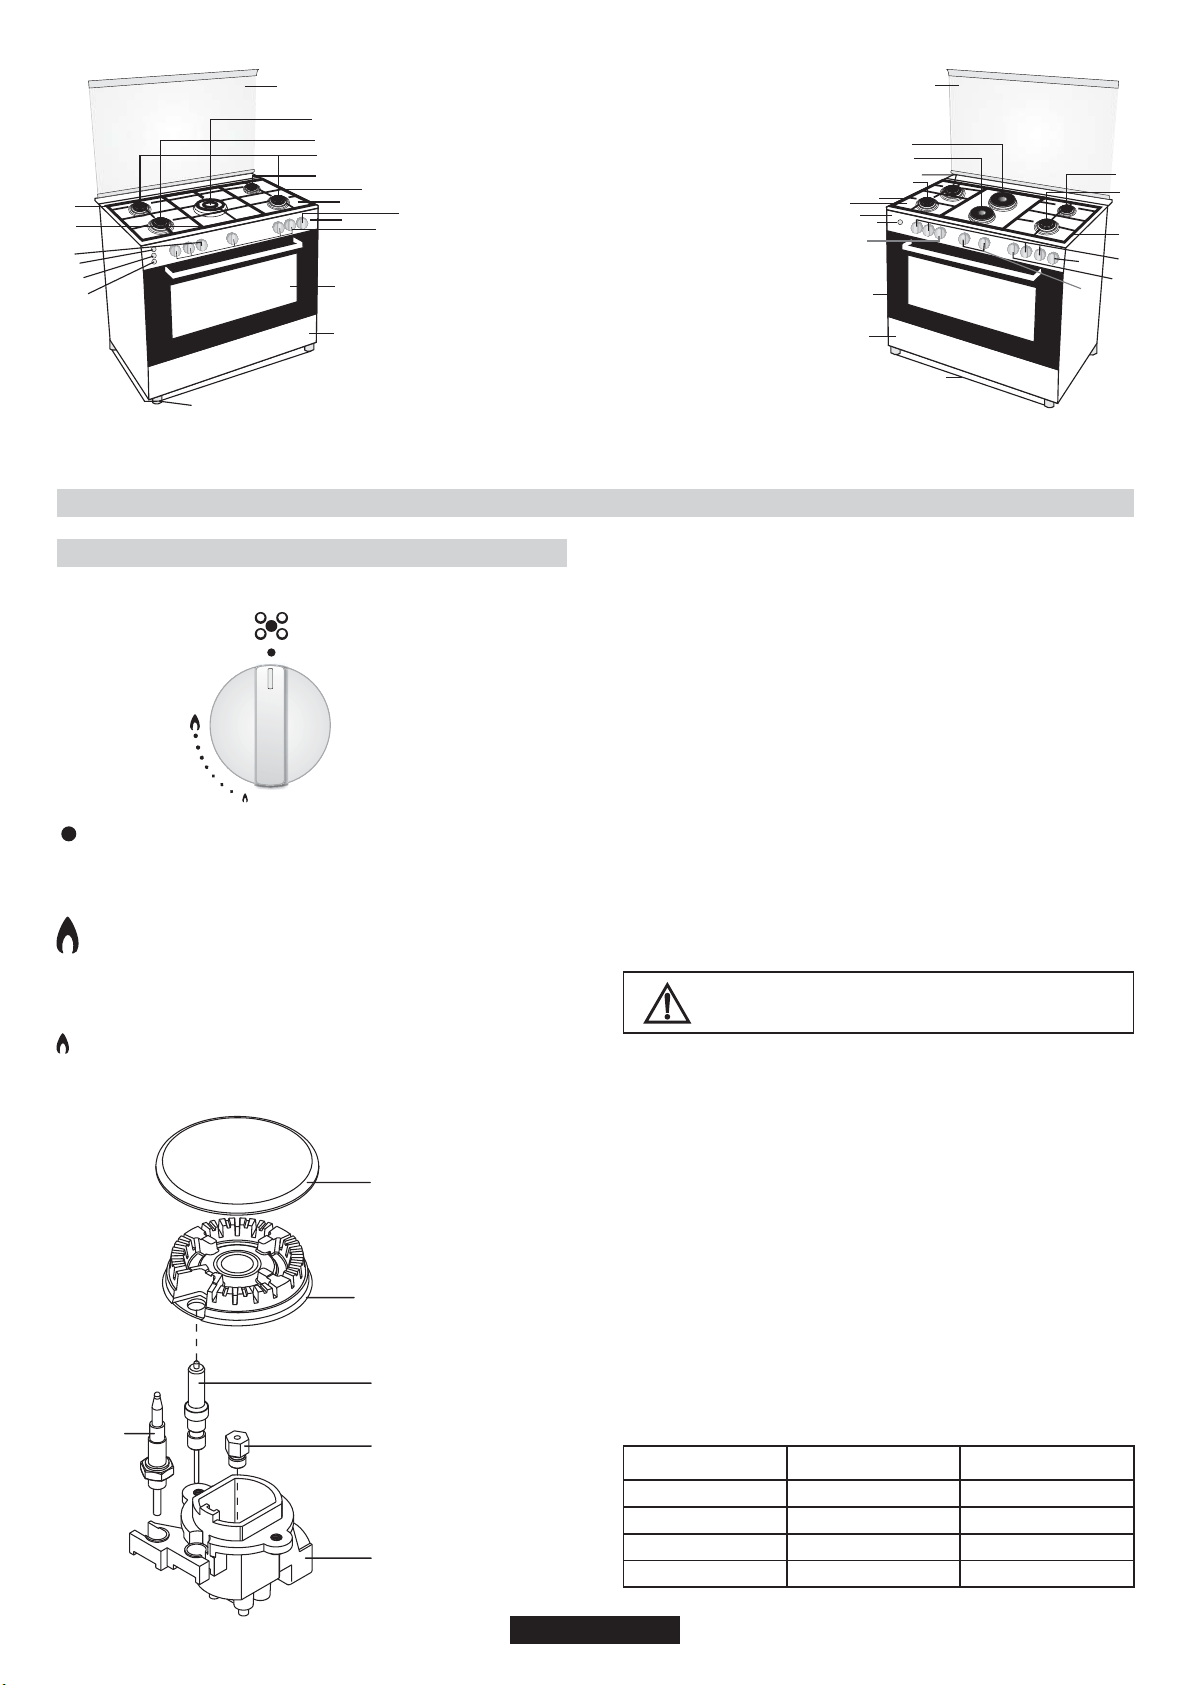
1- Cook top
2- Control panel
3- Drawer
4- Oven door (Front door)
5- Glass top lid or metallic top lid
6- Auxilary burner
7- Rapid burner
8- Semi rapid burner
9- Rapid HP 1500W
10- Rapid HP 2000W
11- Left grate
12- Right grate
13- Burners control knobs
14- Hot plate control knobs
15-Thermostat oven knob
16- Oven grilll
17- Timer knob
18- Ignition button
19- Bolt Foo t(Adjustable Feet)
5
2
1
7
6
4
3
8
9
10
11
12
13
14
15
16
17
18
19
1- Cook top
2- Control panel
3- Drawer
4- Oven door (Front door)
5- Glass top lid or metallic
top lid
6- Auxilary burner
7- Rapid burner
8- Semi rapid burner
9- QC
10- Left grate
11- Centre grate
12- Right grate
13- Burners control knobs
14- Oven knob
15- Timer knob
16- Ignition button
17- Lamp knob
18- Turn spit
19- Bolt Foot
(Adjustable Feet)
3. USE OF COOKTOP BURNERS
The knobs which control the burners are positioned on the control
panel.
3.1. USE OF COOKTOP GAS BURNERS
Figure 7
Off Position
When the knob is turned so that the 'dot' symbol faces towards
the panel, it is in the Off position and the gas valve is closed and
the flame will go out.
Maximum Gas Flow
Press the burner knob and turn it to the left till the 'dot' symbol
faces towards the large flame symbol.
The flame is on full at this position.
In this position, the gas valve is completely open.
Minimum Gas Flow
The flame can be decreased by turning the knob so that the 'dot'
symbol faces towards the small flame symbol. The valve will be
partially open and the burner will then be on low.
A - Burner Lid
B - Burner
C - Electrode
D - Injector ( Jet )
E - Burner body
F - Safety device
A
B
C
D
E
F
Figure 8
Ignition of the Burners
Cooktop Gas Burners
The burner must be ignited before a pan is placed over it.
For models with automatic ignition, the 'spark' button must be
pressed.
Press the knob controlling the burner you want to ignite and then turn it
left to the big flame symbol. Press the ignition button. On models with
ignition-thru knobs, press and turn the knob controlling the burner you
want to ignite as far as the star symbol; the electrode will be
automatically activated. All the electrodes will be activated
automatically and the burner to which gas is supplied (that relative to
the knob pressed) will ignite.
Oven Gas Burners
The button must not be kept pressed down for more than 15 sec. If the
burner has not ignited after 15 sec. release the button and open the
compartment door and/or wait at least 1min. before attempting again.
For other models the gas is ignited by means of the control knobs.
After ignition, adjust the flame to the size required.
Manual ignition (if the electricity supply is not available)
Hold a flame (a match or a lit taper or a hand-operated gas lighter),
near the burner.
WARNING! to wait 1 minute between two ignition tentative.
Press and turn the knob of the burner you want to ignite as far as the
large flame symbol. If the burner does not catch fire at the first attempt,
try again pressing the knob a little longer. When the burner is lit, adjust
the flame to the required level.
If the burner does not light after several attempts, check the correct
position of the burner and its cap.
Turn the knob clockwise to the “O” position in order to close the gas
flow. If the burner accidentally stops burning, wait at least one minute
before attempting to relight it.
Some cookers have a flame safety device (see the picture above,
safety device F). If the flame goes out, the gas supply is automatically
cut off.
Minimum and maximum diameters of the cooking pan bases :
Burner
Auxiliary Burner
Semi Rapid Burner
Rapid Burner
QC
Min. Diameter [mm]
Ø 60 mm
Ø 140 mm
Ø 220 mm
Ø 220 mm
Max. Diameter [mm]
Ø 200 mm
Ø 240 mm
Ø 280 mm
Ø 320 mm
Make sure that the gas is actually burning after this
step! If there is no flame, repeat the procedure
Loading ...
Loading ...
Loading ...