Loading ...
Loading ...
English 3
Important safety information
For your Safety
This appliance must be supplied with the proper voltage and frequency, and
connected to an individual, properly grounded branch circuit, protected by a 40A
circuit breaker or a time delay circuit breaker as noted on name plate.
We recommend you have the electrical wiring and hookup of your cooktop
connected by a qualied electrician. After installation, have the electrician show
you where your main cooktop disconnect is located.
The cooktop conduit wiring is approved for copper wire connection only, and if
you have aluminum house wiring, you must use special UL approved connectors
for joining copper to aluminum.
WARNING
If the information in this manual is not followed exactly, a re or electrical shock
may result causing property damage, personal injury, or death.
WARNING
Before beginning the installation, switch the power off at the service panel and
lock the service disconnecting switch to prevent power from being switched on
accidentally. When the service disconnecting switch cannot be locked, securely
fasten a prominent warning device, such as a tag, to the service panel.
WARNING
This appliance must be properly grounded.
Installation requirements
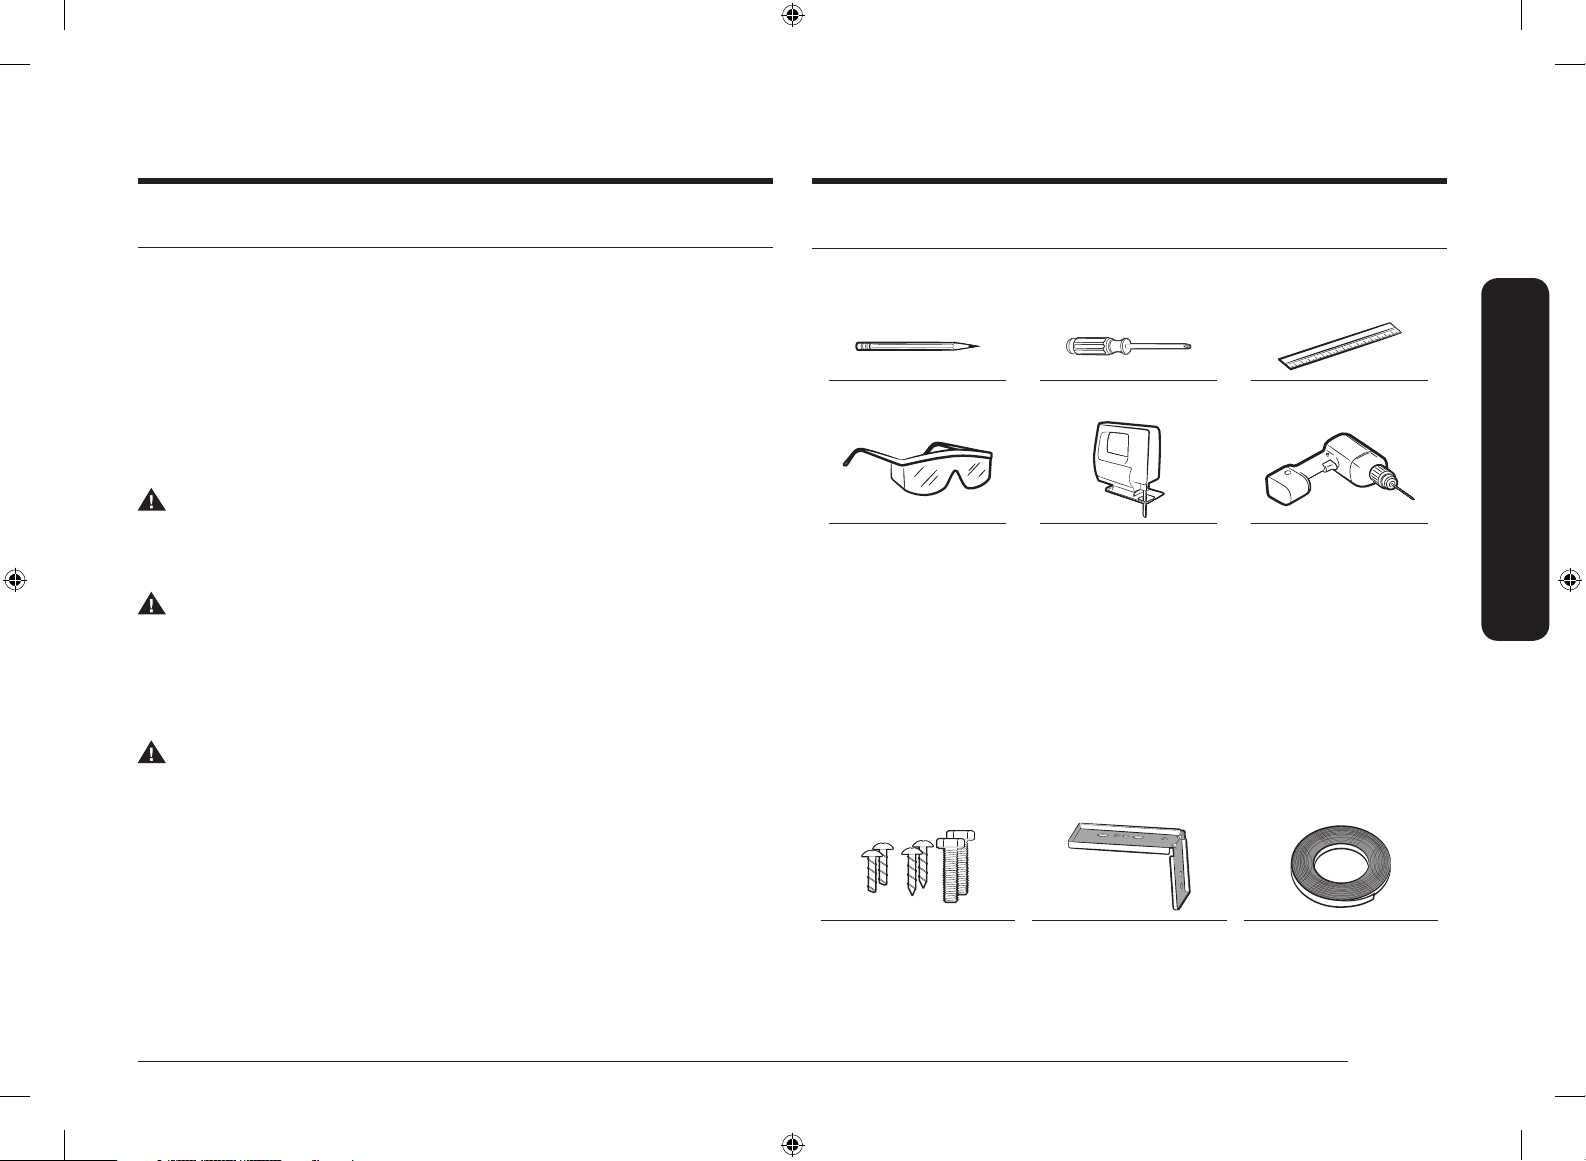
Tool and parts
Tools you will need
Pencil Phillips Head Screwdriver Ruler or Straightedge
Safety Glasses Saber Saw
1
/8” Drill Bit & Electric or
Hand Drill
Parts needed
• A UL listed or CSA approved connector for
1
/2” (1.3 cm) diameter conduit\
• UL listed wire connectors
Check local codes. Check existing electrical supply. See the “Electrical
requirements” section.
It is recommened that all electrical connections be mafe by a licensed, qualied
electrical installer.
Parts included
6 screw
(M4L10 2 ea,
M4 L16 2 ea,
UNC 24
3
/16 L75 2 ea)
Bracket Guide: 2ea
Foam Tape
Induction Install_NZ30K7880U_NZ36K7880U_DG68-00827A-02_EN+MES+CFR.indb 3 2016-09-30 12:05:56
Loading ...
Loading ...
Loading ...