Loading ...
Loading ...
Loading ...
8
1
2
1. Disconnect and move freestanding
range from cabinet opening to provide
easier access to upper cabinet and rear
wall. Put a thick, protective covering over
cooktop, set-in range or countertop to
protect from damage or dirt.
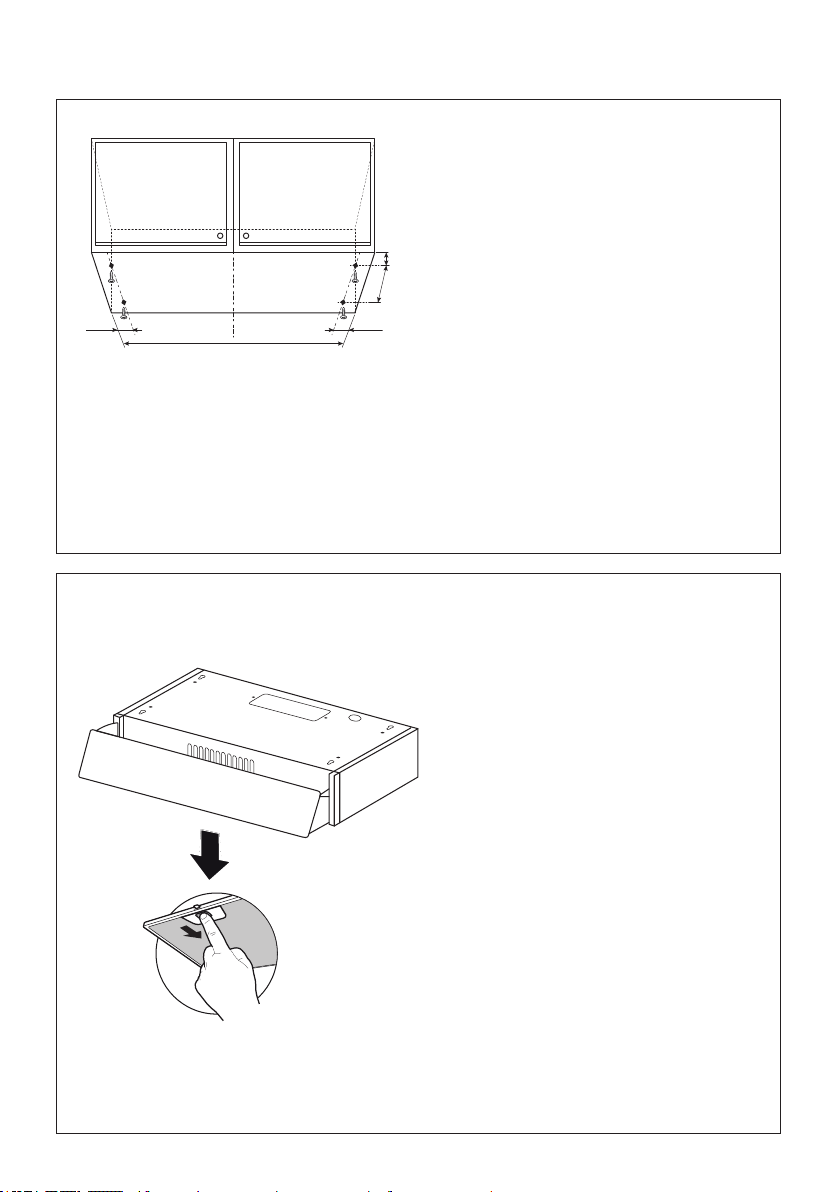
2. Determine and clearly mark with a pencil
the center line of the cabinet on the wall
and on the underside of the cabinet where
the rangehood will be installed.
1. Remove the unit from the carton and
place on a at surface for assembly. Make
sure to cover the surface to
prevent accidental damage. Remove all
parts including the Backdraft Damper,
Screws, and Literature Package before
discarding the carton.
2. Remove both grease lters from the
unit and set aside. The rangehood is
shipped from the factory with the backdraft
damper attached inside. Using a Phillips
head screwdriver, remove the backdraft
damper by loosening the screw marked
with a red dot on top of the rangehood.
3. Before installing, the rangehood must
be adjusted for venting. For ductless
installations, read the following section
which discusses special requirements
for these installations before continuing.
Installation Instructions
8 1/2
"
1"
1
"
23
5/8"
- 29
7/8"
2"
3. The Agio attaches to the cabinet by four black screws. Mark the cabinet and insert
the screws (12f) into the underside of the cabinet as shown in gure. Do not tighten
the screws.
4. Determine the proper cutouts for the ductwork. Make all necessary cuts in the walls
or cabinets for the ductwork. Install the ductwork before mounting the rangehood.
Loading ...
Loading ...
Loading ...