Register your product and get support at
www.philips.com/support
nualUser ma
Portable DVD Players
4000 Series
TAP4805
3 Get started
System setup
Language setup
Audio setup
Video setup
Digital setup
Auto standby
Picture
Volume
Option
System
Clock
4 Adjust settings 15
2 Your portable DVD player
Introduction
What’s in the box
Overview of the main unit
Overview of the monitor
Overview of the remote control
6
6
6
7
8
9
Charge the battery
Install remote control battery
Connecting the main unit to the
monitor
How to use the headrest mount
Use your player
Control photo play
Repeat play
Skip play
Divx videos
11
10
10
12
11
13
14
14
14
14
16
16
16
16
16
16
18
18
18
18
18
5 Software update 19
6 Specifications 19
7 Troubleshooting 20
1 Safety and important notice 3
1
Hearing safety
Listen at a moderate volume.
Using headphones at a high volume can
impair your hearing. This product can
produce sounds in decibel ranges that may
cause hearing loss for a normal person,
even for exposure less than a minute. The
higher decibel ranges are offered for those
that may have already experienced some
hearing loss.
•
Sound can be deceiving. Over time your
hearing ‘comfort level’ adapts to higher
volumes of sound. So after prolonged
listening, what sounds ‘normal’ can actually
be loud and harmful to your hearing. To
guard against this, set your volume to a safe
level before your hearing adapts and leave
it there.
•
To establish a safe volume level:
Set your volume control at a low setting.
•
Slowly increase the sound until you can
hear it comfortably and clearly, without
distortion.
•
Listen for reasonable periods of time:
Prolonged exposure to sound, even at
normally ‘safe’ levels, can also cause hearing
loss.
•
Be sure to use your equipment reasonably
and take appropriate breaks.
•
Be sure to observe the following guidelines
when using your headphones.
Listen at reasonable volumes for reasonable
periods of time.
•
Be careful not to adjust the volume as your
hearing adapts.
•
Do not turn up the volume so high that you
can’t hear what’s around you.
•
You should use caution or temporarily
discontinue use in potentially hazardous
situations. Do not use headphones while
operating a motorized vehicle, cycling,
skateboarding, etc.; it may create a traffi c
hazard and is illegal in many areas.
•
Risk of overheating!
Risk of contamination!
Never install his product in a confined
space. Always leave a space of at least 10 cm
around the product for ventilation. Ensure
newspapers, table-cloths, curtains or other
objects never cover the ventilation slots on
the product.
Never use the product in tropical climates.
Do not mix batteries. (old and new or
carbon and alkaline, etc.)
Danger of explosion if batteries are
incorrectly replaced. Replace only with the
same or equivalent type.
Remove batteries if they are exhausted or
if the remote control is not to be used for
a long time.
Batteries contain chemical substances, they
should be disposed of properly to protect
the environment.
Hereby, TP Vision Europe BV declares that this
product is in compliance with the essential
requirements and other relevant provisions of
Directives 2014/35/EU 2014/30/EU You can
find the Declaration of Conformity on
www.p4c.philips.com.
This symbol on a product means that the
product is covered by European Directive
2012/19/EU.
This symbol means that the product
contains batteries covered by European
Directive 2013/56/EU which cannot be
disposed of with normal household waste.
Inform yourself about the local separate
collection system for electrical and electronic
products and batteries. Follow local rules and
never dispose of the product and batteries with
normal household waste. Correct disposal of
old products and batteries helps prevent
negative consequences for the environment and
human health.

2 Your portable DVD player
Congratulations on your purchase, and welcome to Philips! To fully benefi t from the support that
Philips offers, register your product at www.philips. com/support.
Introduction
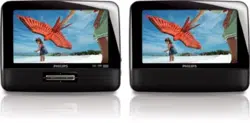
Your portable DVD player plays digital video discs that conform to the universal DVD Video standard.
With it, you can play movies with true cinema picture quality and stereo or multi-channel sound
(depending on disc and playback set-up). You can also select sound track, subtitle languages, and different
angle of view (again depending on DVD disc). Besides, you can restrict the play of discs that are not
suitable for children.You can play the following discs on the DVD player :
444A, TCD732, VCD/SVCD, DIVX, MP4, DVD-R/-RW, DVD+R/+RW, DVD-RW, CD-R/RW, MP3, JPG,
USB, Area code disc.
What’s in the box
Check and identify the contents of your package:
Portable DVD player x1
Remote control x1
AAA batteries x2
AC power adaptor x1
Car charger x1
AV cable x1
Headrest Mount straps (2pcs) x1
DC Power Cable for connecting the the main unit and monitor x1
Quick Start Guide x1
Warranty Card x1
Safety Sheet x1
•
•
•
•
•
•
•
•
•
•
•
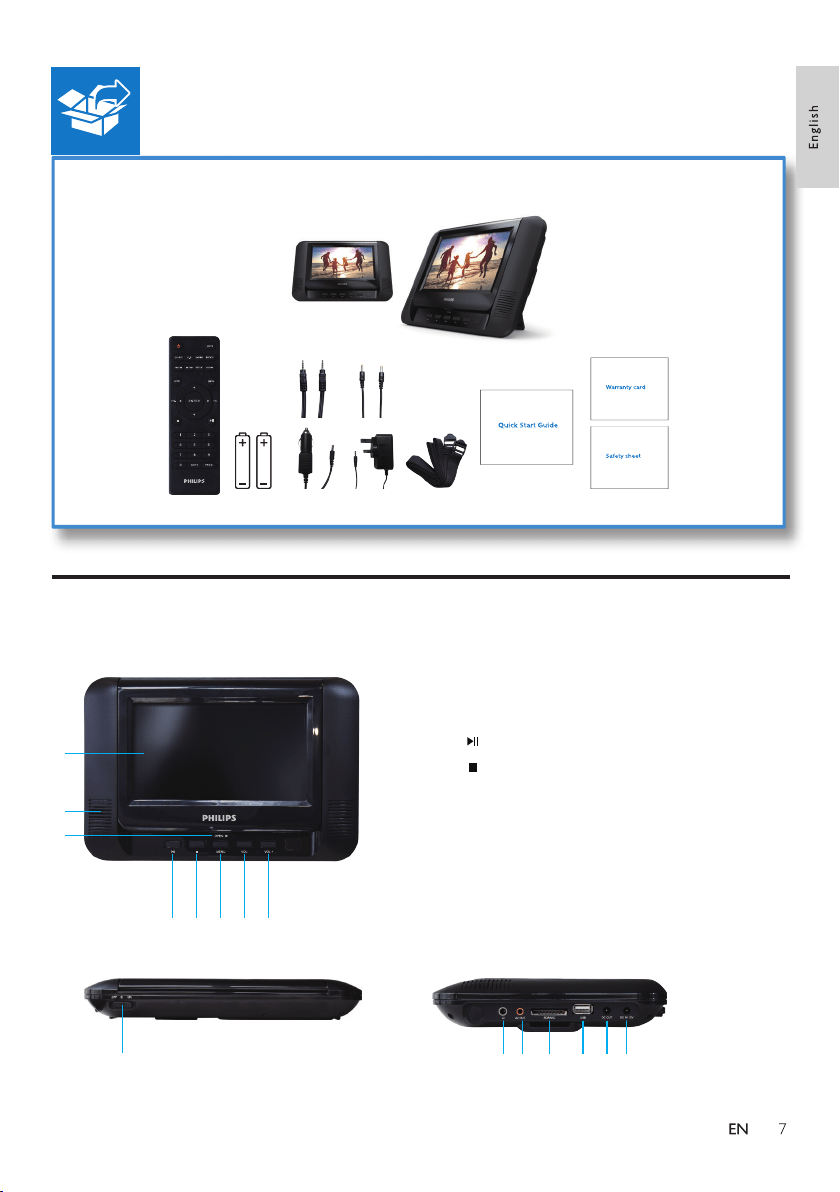
1.LED Display
2.Speakers
3.OPEN : Open the disc compartment.
4. : To Start, pause or resume play.
5. : Press to stop disc play.
6.MENU : Press to the main menu of the disc.
7.VOL- : Press to reduce the volume.
8.VOL+ : Press to increase the volume.
Overview of the main unit
4 5 6
1
2
3
7 8
10 11 12 13 14 15
9
9.OFF ON : Turn on/off the main unit.
10. : Headphone jack.
11.AV OUT : Connect the AV IN jack of monitor to supply AV signal to monitor.
12.SD/MMC : SD/MMC slot.
13.USB : USB port.
14.DC OUT: Connect the DC IN jack of monitor to supply power to monitor.
15.DC IN : Power supply socket.
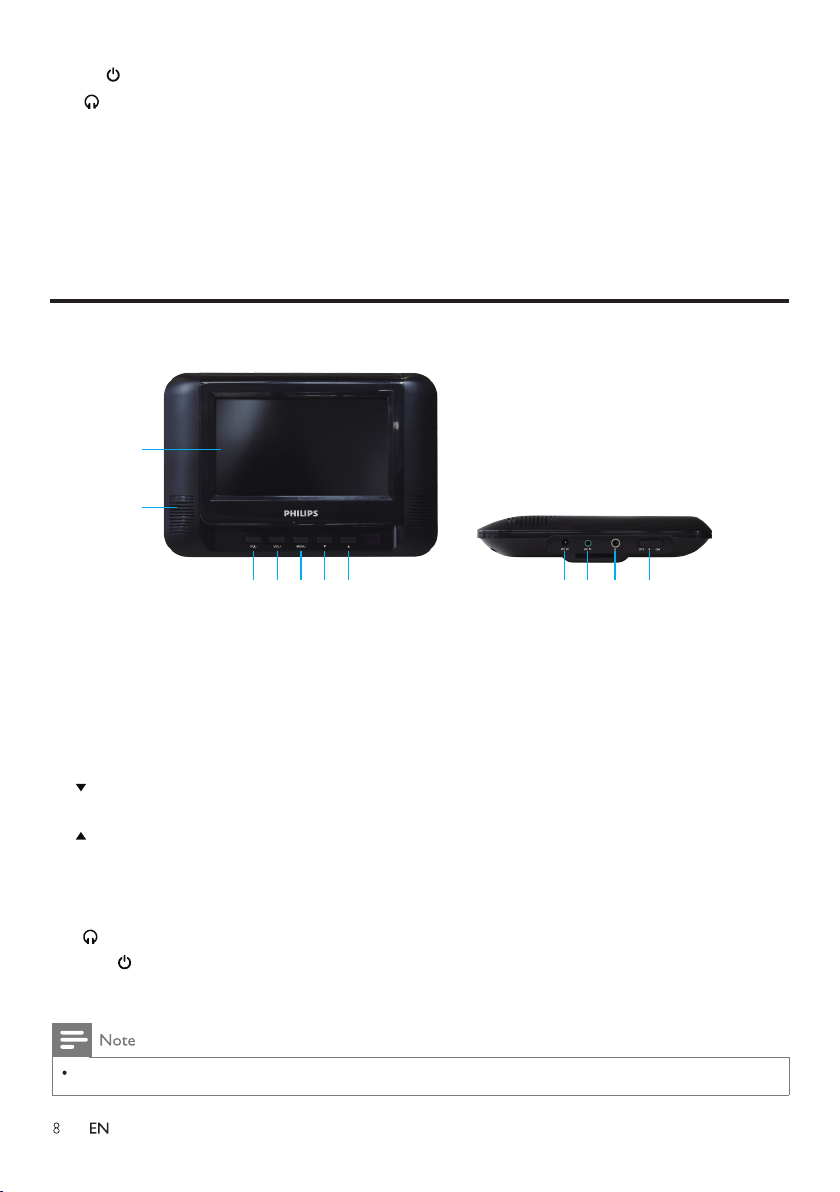
1.LED Display
2.Speakers
3.VOL- : Press to reduce the volume.
4.VOL+ : Press to increase the volume.
5.MENU : Short press MENU on the monitor to enter into the monitor setting; long press to
turn off the monitor.
6. : In normal condition, press to turn off the sound, press again to turn on.
In menu setting mode, press to scroll down.
7. : In normal condition, press to turn off the display information (The sound is still playing).
In menu setting mode, press to scroll up.
8.DC IN : Connect the DC OUT jack of the main unit to get power.
9.AV IN : Connect the AV OUT jack of the main unit to get signal.
10. : Headphone jack.
11.OFF ON : Turn on/off the monitor.
Overview of the monitor
1
2
3 4 5 6 7
8 9 10 11
The remote control operation does not support the monitor.
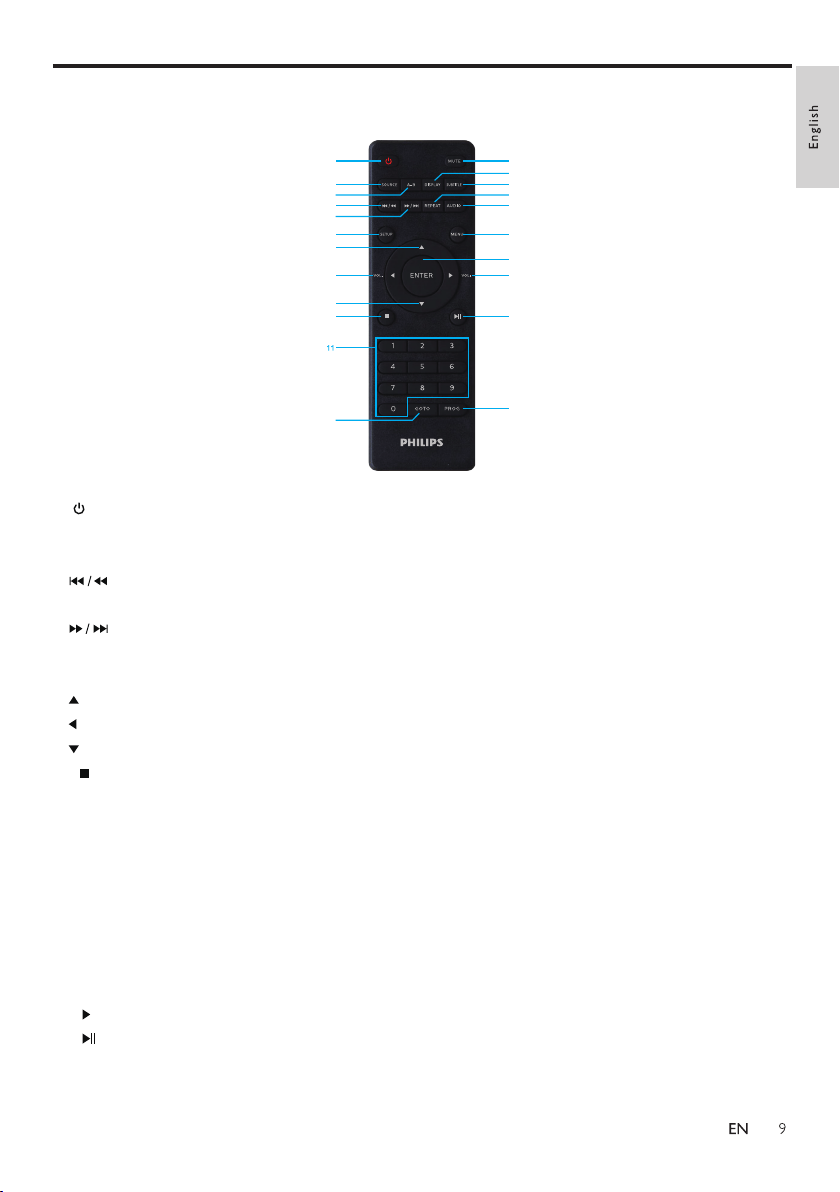
Overview of the remote control
1
2
3
4
6
5
7
8
9
10
12
13
15
17
14
16
18
20
22
19
21
1.
2.SOURCE
3.A-B
4.
5.
7.
8.
9.
10.
20.
6.SETUP
11.0-9
12.GOTO
13.MUTE
14.DISPLAY
15.SUBTITLE
16.REPEAT
17.AUDIO
18.MENU
19.ENTER
22.PROG
21.
Press to turn on the player, or switch the player to standby.
Switch between DVD/USB/SD card/AV IN mode.
Mark the section for repeat play.
Short press to skip to the previous title, chapter, or track; long press for fast
rewind play.
Short press to skip to the next title, chapter, or track; long press for fast forward
play.
Enter or exit the system setup menu.
Scroll up.
Short press to scroll left; long press to reduce volume.
Scroll down.
Stop play.
Number keys.
Skip to a title, a chapter or a track.
Press once to turn off the sound; press again to turn on the sound.
Display screen information.
Select a subtitle language.
Repeat a title, chapter, track or the whole disc.
Adjust the audio output fomat.
Return to the main memu of the disc.
Confirm an entry or selection.
If a disc contains 2 or more tracks, chapter or titles, set up the playing to your
preferred programming. Press this button to enter the programming menu.
Short press to scroll right; long press to increase volume.
Start, pause or resume play.
3 Get started
Caution
Use the controls only as stated in this user manual.
Always follow the instructions in this chapter in sequence.
If you contact Philips, you will be asked for the model and serial number of your player. The model
number and serial number are on the bottom of your player. Write the numbers here:
Model No. __________________________
Serial No. ___________________________
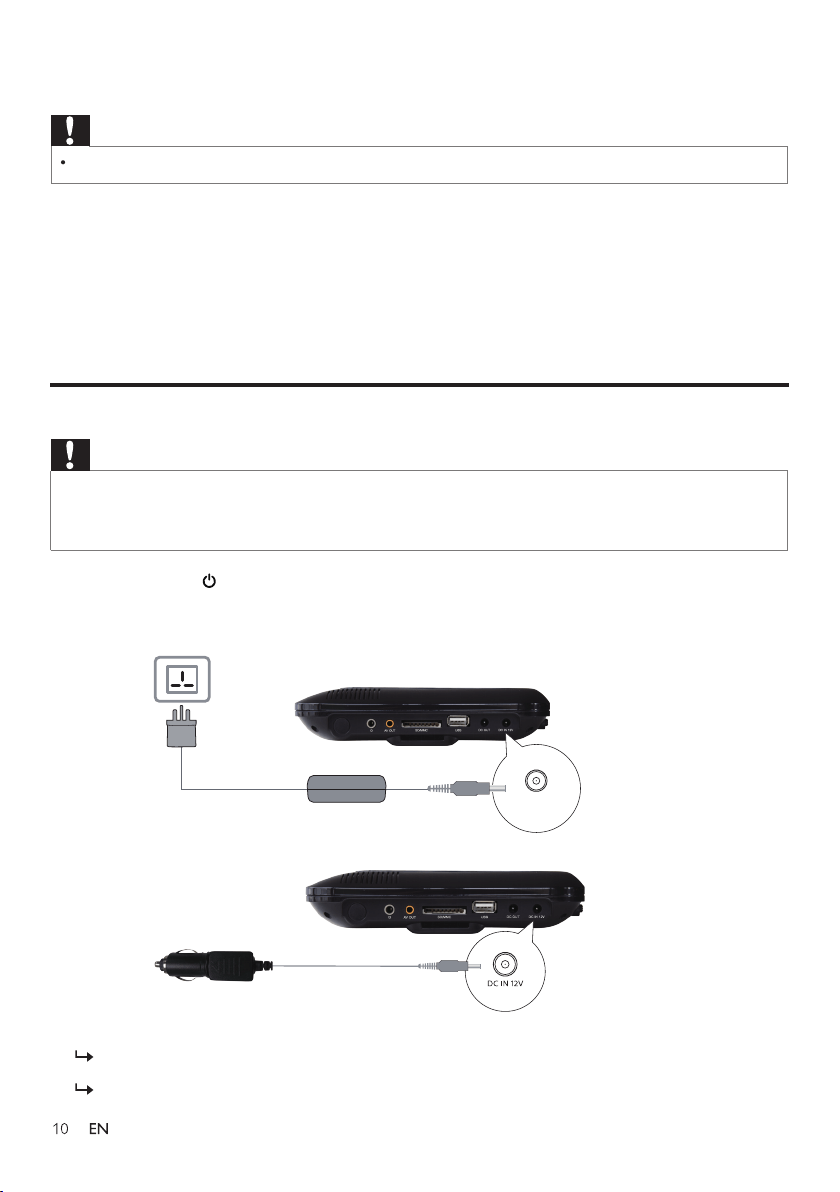
Charge the battery
Risk of product damage! Ensure that the power supply voltage corresponds to the voltage printed on the bottom of the
player.
•
Use only the supplied AC adaptor to charge the battery.
•
1
Slide the OFF ON switch to OFF position.
2
Connect the supplied AC adaptor to the player and to the AC outlet or connect to a car charger
to charge battery.
The charge indicator lights up and turns red. It takes about 3.5 hours to fully charge the battery.
When the battery is fully charged, the charge indicator turns yellow.
Caution
DC IN 12V
Install remote control battery
Risk of explosion! Keep batteries away from heat, sunshine or fi re. Never discard batteries in fi re.
Risk of decreased battery life! Never mix different brands or types of batteries.
Risk of product damage! When the remote control is not used for long periods, remove the batteries.
Perchlorate Material - special handling may apply. See www.dtsc.ca.gov/hazardouswaste/perchlorate.
•
•
•
•
Caution
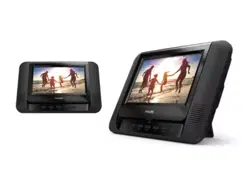
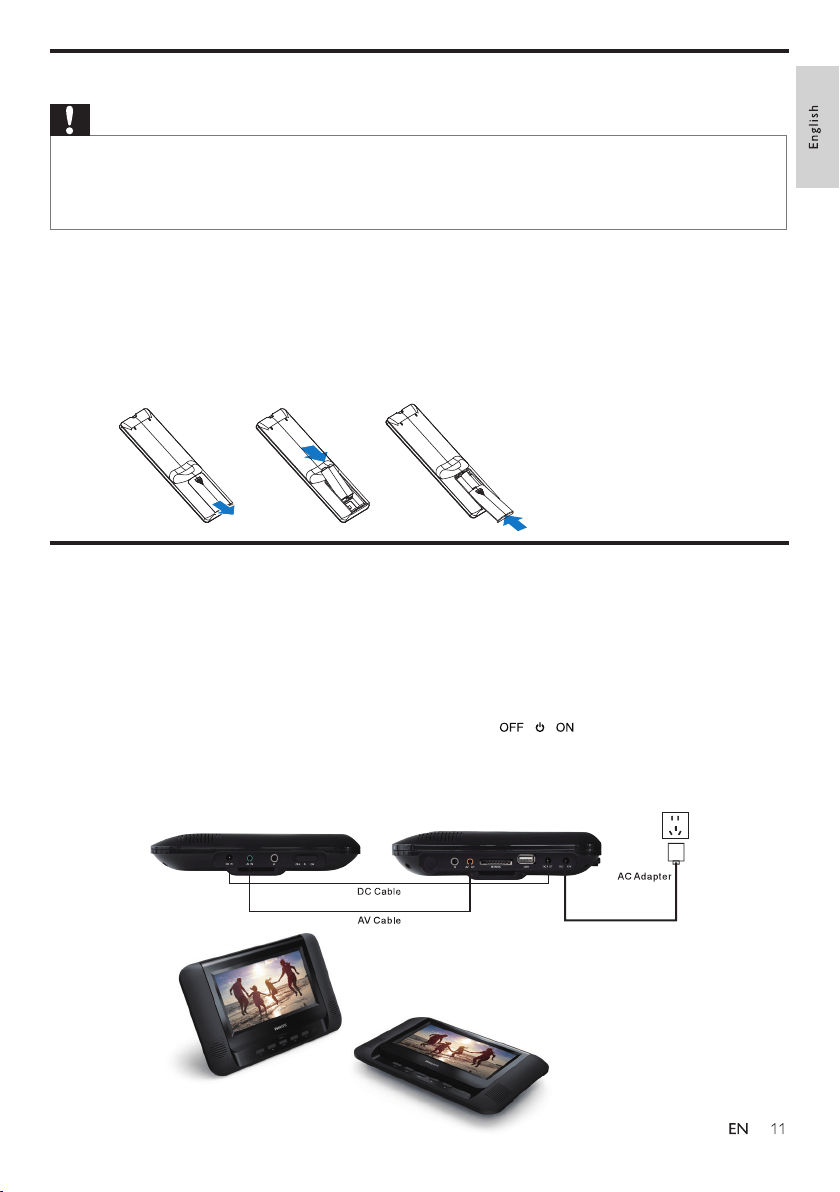
Connecting the main unit to the monitor
For fi rst-time use:
1
Remove the protective tab to activate the remote control battery.
To replace the remote control battery:
1
Open the battery compartment.
2
Insert two RO3 AAA CARBON ZINC batteries 1.5V.
3
Close the battery compartment.
1. Connect the supplied AV Cable to the AV Out jack on the main unit and the AV In jack on the
monitor unit.
2. Connect the supplied DC Cable to the DC Out jack on the main unit and the DC In jack on the
monitor unit.
3. Switch the main unit and the monitor on by switching the Button.
4. Audio and video played through the main unit will now be seen and heard on the connected
monitor.
Connect power through the AC adapter
monitor main unit
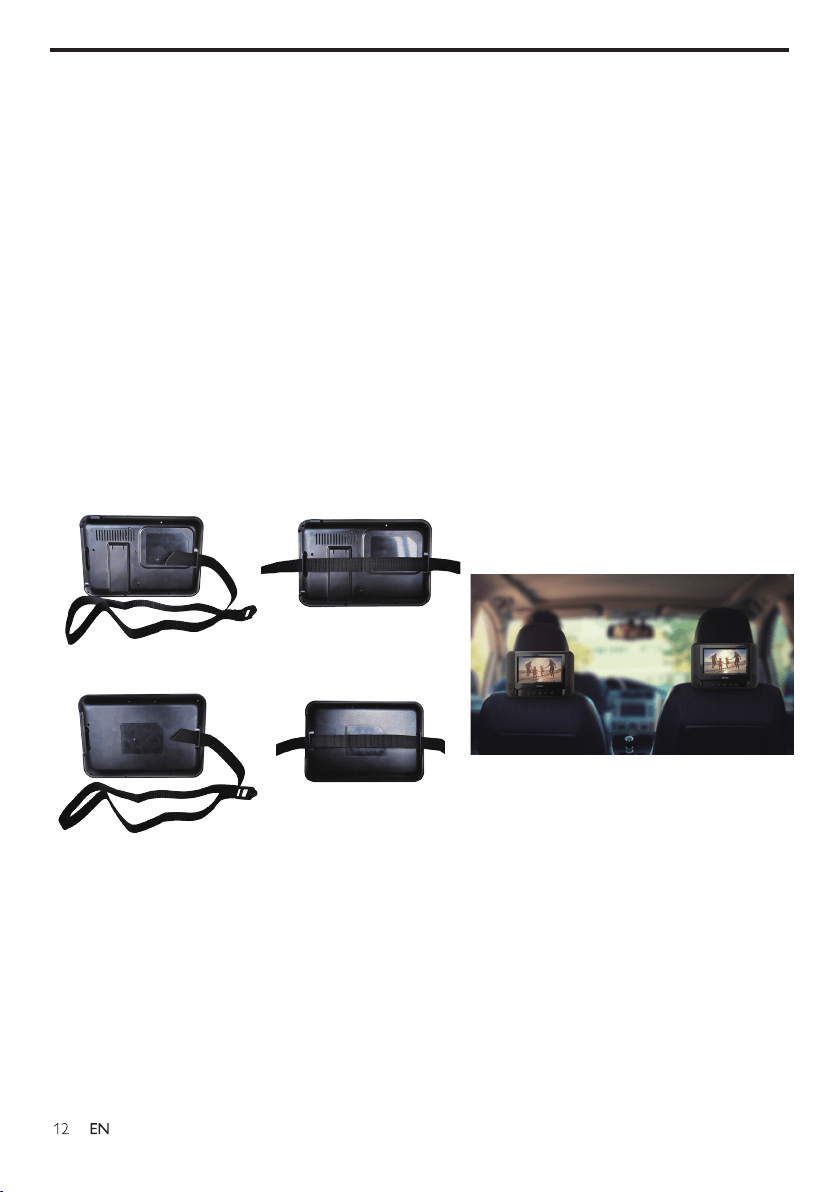
1. To use the player in a car, attach the main unit and the monitor to the back of the front seat
headrests.
(1) Pull the provided strap through the loops on the back of the main unit, and then attach the
buckle to the strap.
(2) Position the unit at the back of the headrest, and then fasten the buckle.
(3) Pull the strap to secure the main unit to the headrest.
(4) To attach the monitor , repeat the above steps.
2. And then connect the DC cable and AV connection.
3. The remote control could be used directly when the main unit is attached to the car headrest.
Point the remote control towards the remote sensor of the main unit when operating.
How to use the headrest mount
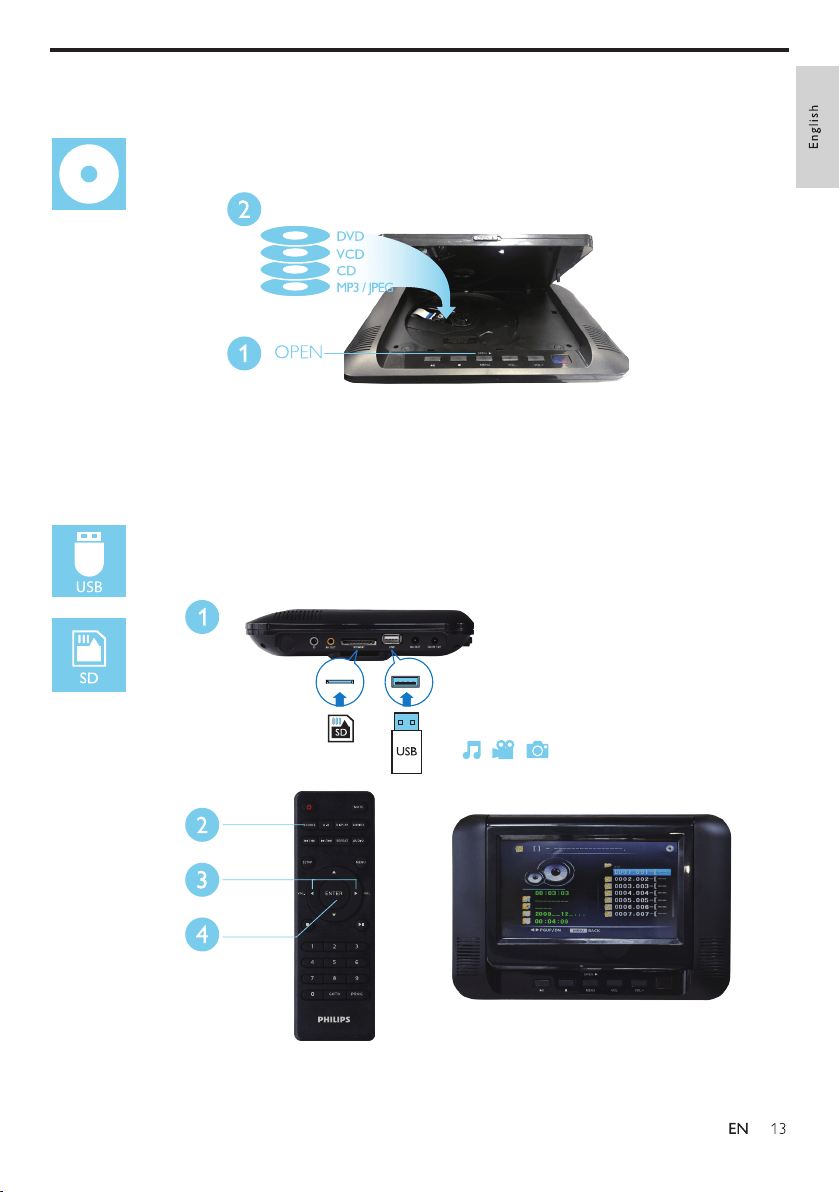
Use your player
Flip the photo up and down.
Press once to stop photo play and go
back to browse; press twice to go
back to menu setting.
Photos are played from beginning to
end one by one.
Rotate a photo anti-clockwise/
clockwise.
English English
To cancel repeat play, press and hold
REPEAT until [Off] is displayed.
Then press OK to proceed.
If subtitles are not displayed correctly,
change the character set that supports
DivX subtitles. Select a character set: press
SUBTITLE and switch between subtitles
until the desired character set are selected.
Press to go back to previous menu level. Press
SETUP to exit the menu.
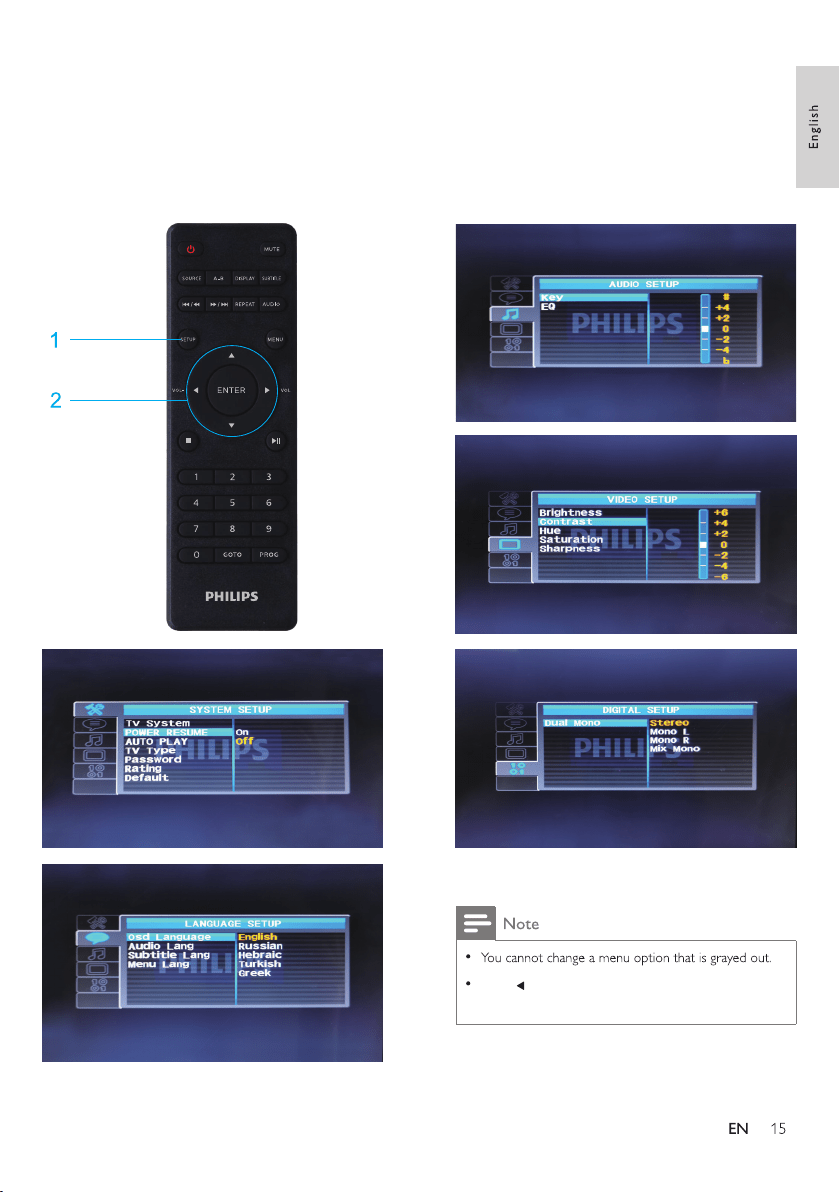
4 Adjust settings
This section helps you adjust the settings of
the main unit.
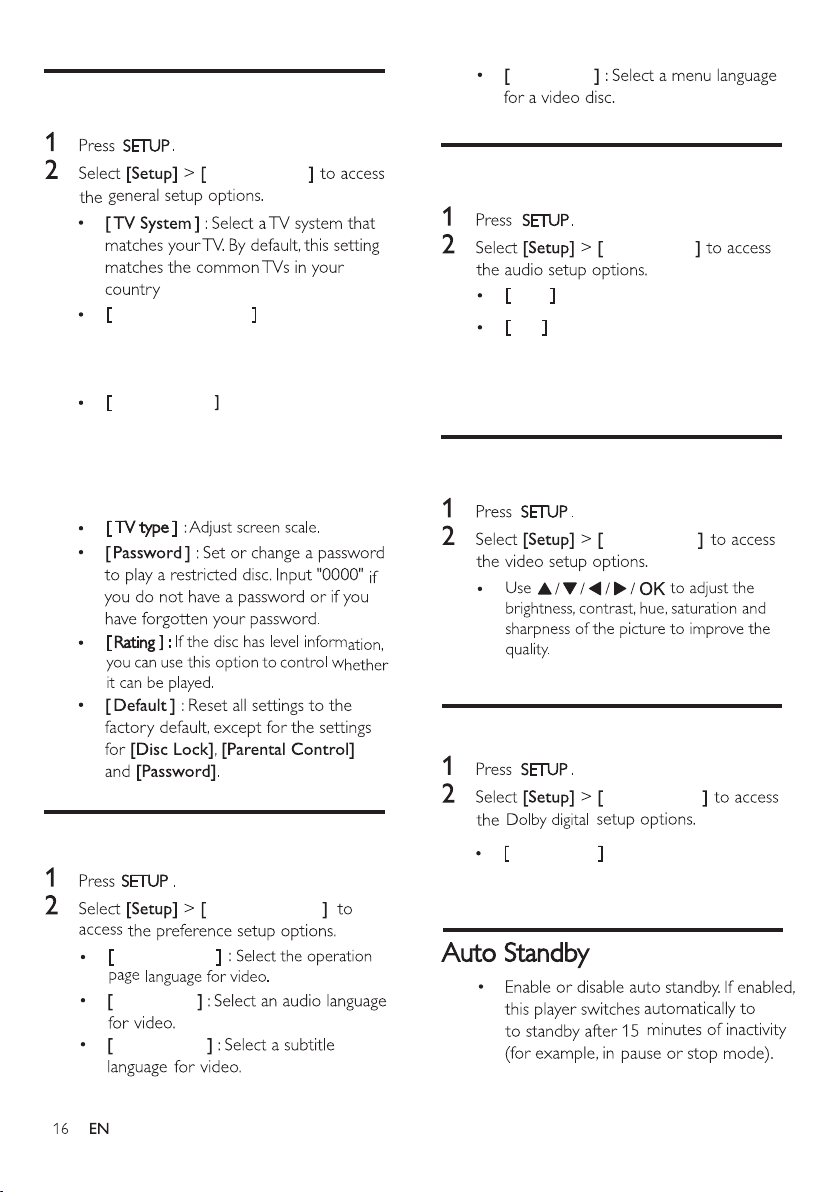
POWER RESUME : If enabled, the
player will resume the play at the
position it last stopped, after restarting
from a power-off.
AUTO PLAY : If enabled, after
reading the disc, the player will play the
contents of the disc directly. If disabled,
after reading the disc, you need to
choose the contents that you want to
play.
(when connected to a TV).
KEY : Adjustment of lifting and falling.
EQ : Equalizer of different music
styles: STANDARD, CLASSIC, ROCK,
JAZZ, POP.
Dual mono :Select Stereo, Mono L,
Mono R, Mix Mono
Osd language
System setup
Audio setup
Video setup
Digital setup
Digital setup
Video setup
Audio setup
System setup
Language setup
Language setup
Audio lang
Subtitle lang
Menu lang
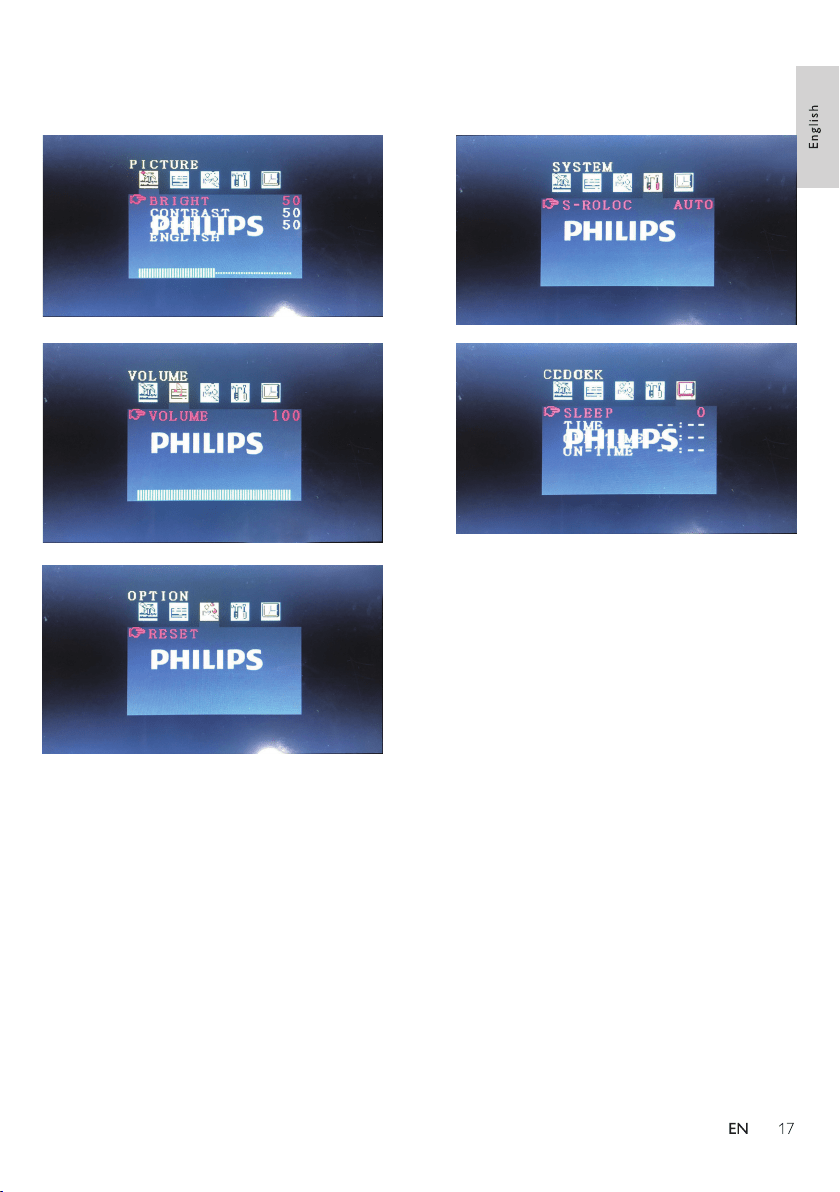
This section helps you adjust the settings of
the monitor.
18
BRIGHT : Adjust screen brightness.
CONTRAST : Adjust screen contrast.
COLOR : Adjust screen color.
PICTURE
PICTURE
Press MENU on the monitor.
Press MENU on the monitor.
MENU
Select [ MENU ] [ VOLUME ] to access
the preference setup options.
VOLUME
ENGLISH : Select a subtitle language.
Press VOL-/VOL+ to adjust the volume.
OPTION
Press MENU on the monitor.
Select [ MENU ] [ OPTION ] to access
the preference setup options.
[ RESET ]
SYSTEM
Press MENU on the monitor.
Select [ MENU ] [ SYSTEM ] to access
the preference setup options.
Select the video type to PAL/AUTO/
NTSC.
CLOCK
Press MENU on the monitor.
Select [ MENU ] [ CLOCK ] To set the
sleep and wake times.
19
248 x 168 x 40 mm
0.66
248 x 172 x 35 mm
0.35
Input: 100-240V~, 50/60Hz
Output: DC 12V, 2.0A
(nonsupport DIVX3.11)
EU
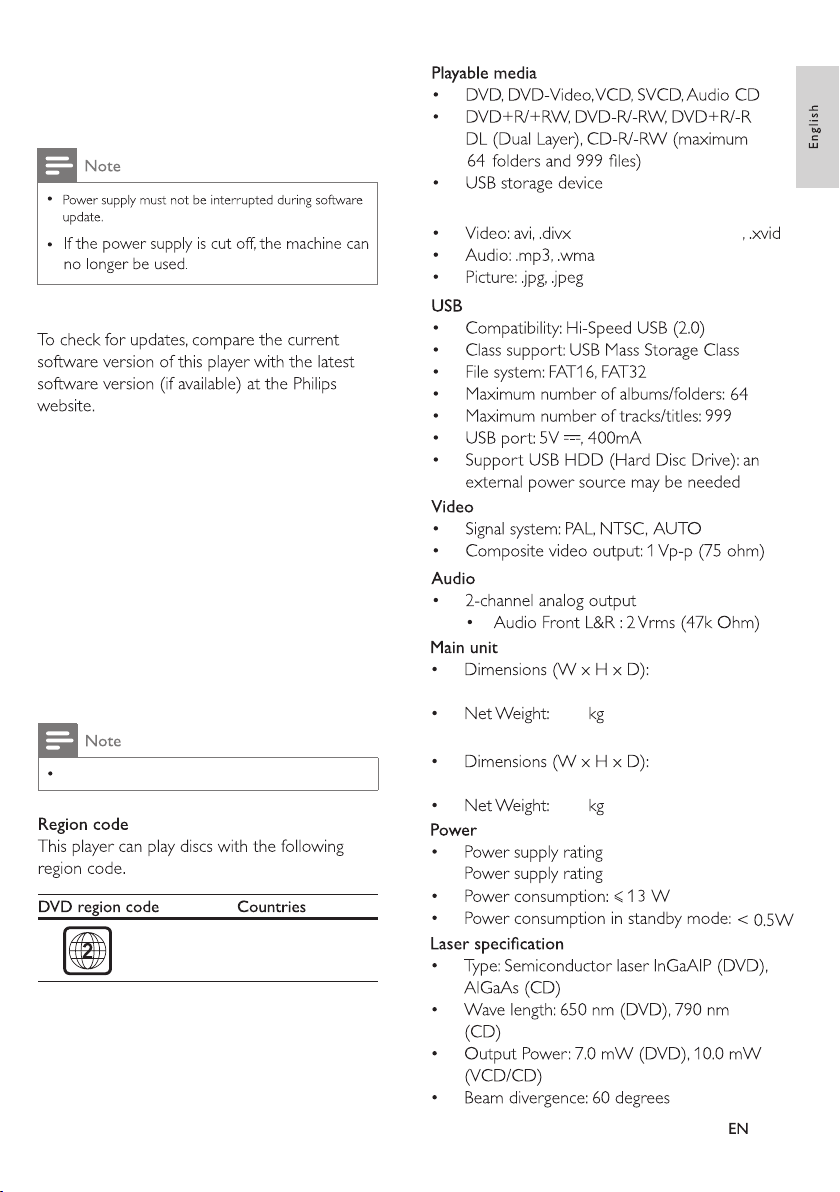
5 Software update
6 Specifications
Supported File Formats
Monitor
Specifications are subject to change without notice.
1. Download the software from website.
2. Name the software as 8202KD.BIN, and
then copy it to USB.
3. Remove the disc from the player, and turn it
on. Insert the USB with copied software into
the player's USB port, and the player will
upgrade automatically.
20
Supported File Formats
7 Troubleshooting
2020 © Philips and the Philips Shield Emblem are registered trademarks
of Koninklijke Philips N.V. and are used under license. This product has been
manufactured by and is sold under the responsibility of MMD Hong Kong
Limited is the warrantor in relation to this product.
TAP4805_05_UM_V1.0