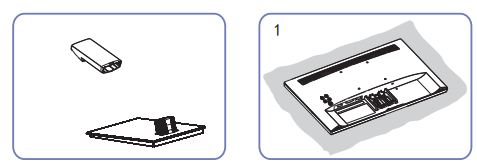
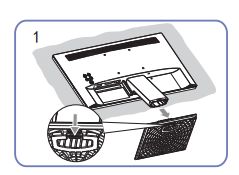
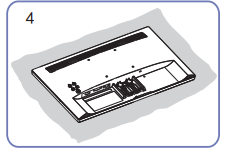
Place the protective Styrofoam Stand assembly is complete. (cushion) included in the package on the floor and place the product facing down on the Styrofoam, as shown in the image. If Styrofoam is unavailable, use a thick sitting mat
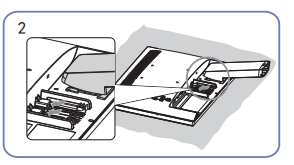
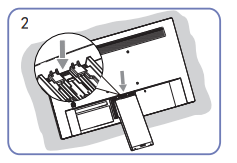
Push the stand neck into the main body in the direction of the arrow as shown in the figure.
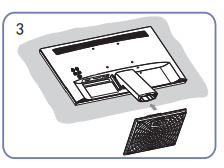
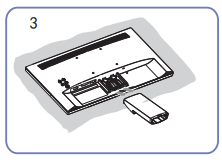
Put the stand base onto the stand neck as the direction shown in the figure. Check that the stand neck is firmly connected.
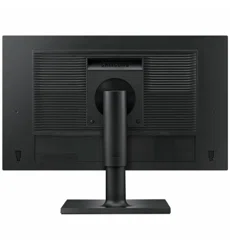
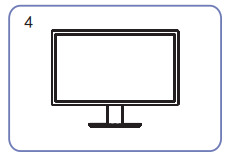
Stand assembly is complete.
Removing the Stand
Place the protective Styrofoam Stand disassembly is complete. (cushion) included in the package on the floor and place the product facing down on the Styrofoam, as shown in the image. If Styrofoam is unavailable, use a thick sitting mat
Push the key downward and hold. remove the stand base from the stand neck by pulling it in the arrow direction, as shown in the figure.
Push the key downward and hold.
Pull the stand neck from the main body in the direction of the arrow as shown in the figure.
Stand disassembly is complete.
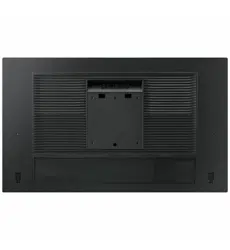
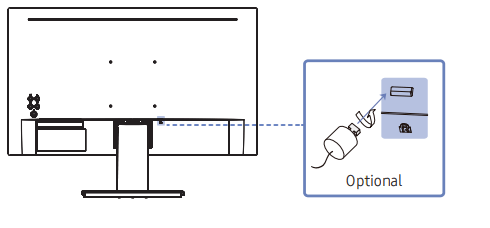
Anti-theft Lock
An anti-theft lock allows you to use the product securely even in public places.
The locking device shape and locking method depend on the manufacturer. Refer to the manuals provided with your anti-theft locking device for details.
To lock an anti-theft locking device:
Fix the cable of your anti-theft locking device to a heavy object such as a desk.
Put one end of the cable through the loop on the other end.
Insert the locking device into the anti-theft lock slot at the back of the product.
Lock the locking device.
An anti-theft locking device can be purchased separately.
Refer to the manuals provided with your anti-theft locking device for details.
Anti-theft locking devices can be purchased at electronics retailers or online.
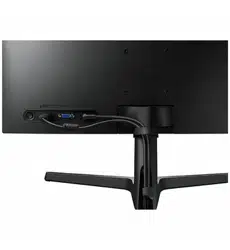
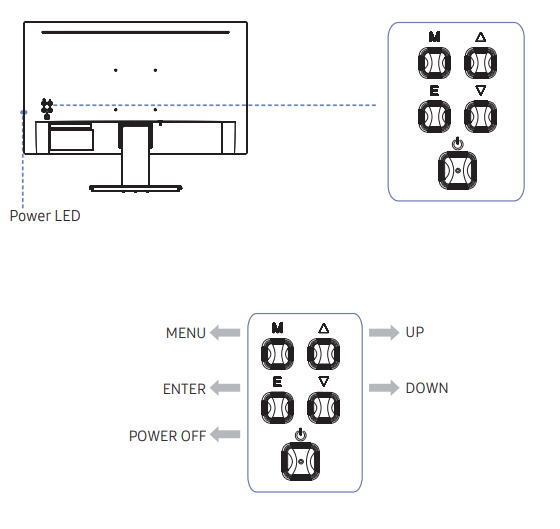
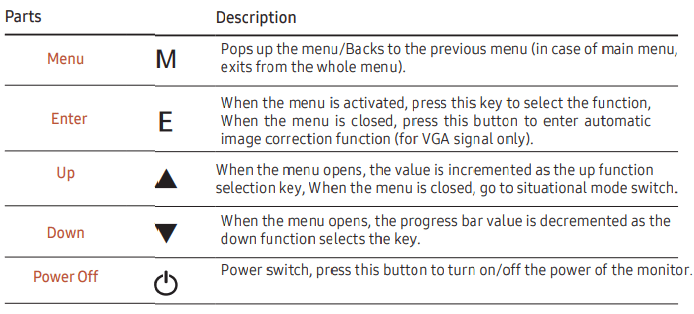
Control Panel
The colour and shape of parts may differ from what is shown. Specifications are subject to change without notice to improve quality
Connecting and Using a Source Device
Read below before connecting the product.
Before connecting the product, check the shapes of both ports of the supplied signal cables and the shapes and locations of the ports on the product and external device.
Before connecting the product, make sure you remove the power cables from both the product and the external device to prevent damage to the product due to a short circuit or over current.
After all signal cables have been properly connected, connect the power cables back to the product and the external device.
After connecting is completed, make sure you read the manuals to acquaint yourself with the product functions, precautions and other information required to use the product properly.
Connecting parts may differ in different products.
Provided ports may vary depending on the product.
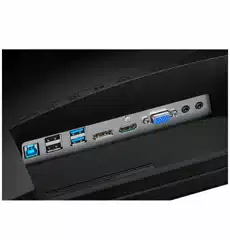
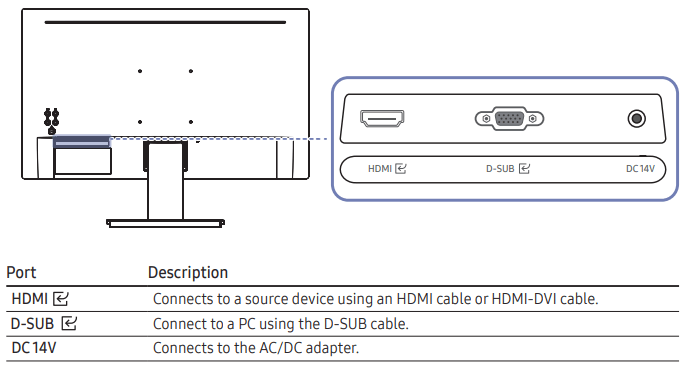
Ports
The functions available may vary depending on the product model. The colour and shape of parts may differ from what is shown. Specifications are subject to change without notice to improve quality. Refer to the actual product.
Connecting and Using a PC
Select a connection method suitable for your PC.
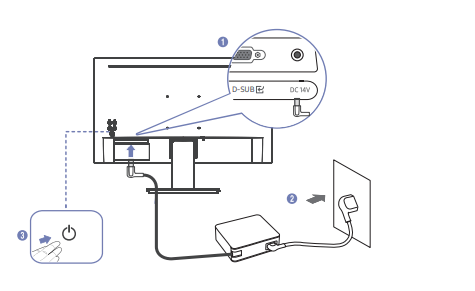
Connecting the Power
Connect the power cable to the AC/DC adapter. Then, connect the AC/DC adapter to the DC 14V port on the back of the product.
Next, connect the power cable to the power outlet.
Press the button on the back of the product to turn it on.
The input voltage is switched automatically
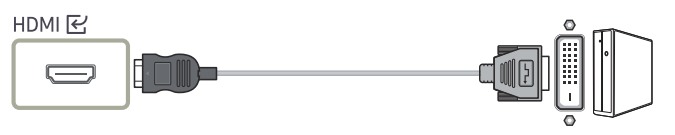
Connection Using an HDMI-DVI Cable
The optimum resolution may not be available with an HDMI-DVI cable.
Connection Using the HDMI Cable (Analogue Type)
Connection Using the HDMI Cable
When connecting an HDMI cable, use the cable that came with the components of the product. If you use an HDMI cable other than provided by Samsung, the image quality may be degraded.
Menu
The functions available may vary depending on the product model. The colour and shape of parts may differ from what is shown. Specifications are subject to change without notice to improve quality.
Brightness
2nd
3rd
Description
Brightness
You can adjust the general brightness of the picture. (Range: 0~100) A higher value will make the picture appear brighter.
— This menu is not available when Eye Saver Mode is enabled.
Contrast
2nd
3rd
Description
Contrast
Adjust the contrast between the objects and background. (Range: 0~100)
A higher value will increase the contrast to make the object appear clearer.
— This menu is not available when Picture Mode is set to Cinema or Dynamic Contrast mode.
DCR
2nd
3rd
Description
DCR
Activate dynamic contrast
Inactive dynamic contrast
Mode
2nd
Description
Standard
This menu provides an optimum picture quality suitable for the environment where the product will be used.
• Standard: Select this mode when the surroundings are bright.
Cinema
• Cinema: Select this mode when the surroundings are dark. This will save power and reduce eye fatigue.
FPS
• FPS: Increase the brightness of darker areas of the FPS (First-Person Shooter) game screen. This mode increases visibility of your enemies during a FPS (First-Person Shooter) game.
RTS
• RTS: Increase the colour temperature and contrast ratio to improve visibility of the RTS (Real-Time Strategy) screen and minimap.
Eye Saver
• Eye Saver : Set to an optimum picture quality suitable for eye relaxation.
Color
2nd
3rd
Description
Cool
_ When the external input is connected through HDMI and PC/AV Mode is set to AV (720P @ 60Hz and 1080P @ 60Hz).
Warm
Adjust the tint of the screen.
• Color Tone: Select a colour tone that best suits your viewing needs.
_ When the external input is connected through HDMI and PC/AV Mode is set to AV (720P @ 60Hz and 1080P @ 60Hz).
User
• Red: Adjust the red saturation level. Values closer to 100 mean greater intensity for the colour.
• Green: Adjust the green saturation level. Values closer to 100 mean greater intensity for the colour.
• Blue: Adjust the blue saturation level. Values closer to 100 mean greater intensity for the colour.
Aspect
2nd
3rd
Description
Aspect
Select the best screen size and ratio.
In PC mode
• Auto: Display the picture according to the aspect ratio of the input source.
• 16:9: Display the picture with an aspect ratio of 16:9.
• 4:3: Display the picture with an aspect ratio of 4:3. Suitable for videos and standard broadcasts.
Input
2nd
3rd
Description
Input
VGA (Analog) signal input.
HDMI (Digital) signal input.
Adjust
2nd
3rd
Description
Auto adjust
Automatically adjust the horizontal/vertical location, focusing and clock of pictures.
(only for vga signals.)
Auto color
Adjust the white balance of pictures.
(only for vga signals)
Gamma
Adjust the middle level of luminance.
— Gamma 1 / Gamma 2
Self Diagnosis
Review the test screen.
Other
2nd
Description
Language
Set the menu language.
— A change to the language setting will only be applied to the onscreen menu display.
— It will not be applied to other functions on your PC.
Off Timer
Activate the function of timed switch-off. Inactivate the function of timed switch-off.
— 4 hours automatic shutdown.
Reset
Return all the settings for the product to the default factory settings.
Coarse
Adjust the picture clock to reduce vertical line noise (only for VGA signals).
Fine
Adjust the picture phase to reduce horizontal noise (only for VGA signals).
OD
Activate OD function Iactivate OD function
Installing the Software
Easy Setting Box
Easy Setting Box enables users to use the product by partitioning multiple sections.
To install the latest version of Easy Setting Box, download it from the Samsung website
— The software may not work properly if you do not restart the PC after the installation.
— The Easy Setting Box icon may not appear depending on the PC system and the product specifications.
— If the shortcut icon does not appear, press the F5 key.
Restrictions and Problems with the Installation
The Easy Setting Box installation may be affected by the Graphics Card, Motherboard and the Networking Environment.
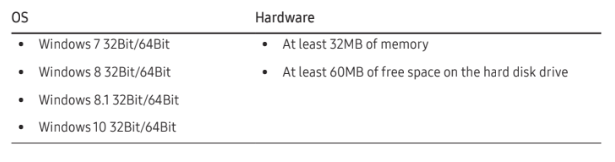
System Requirements
Driver Installation
To install the latest version of the product driver, download it from the Samsung website
— You can set the optimum resolution and frequency for this product by installing the corresponding drivers.
Troubleshooting Guide
Requirements Before Contacting Samsung Customer Service Centre
Before calling Samsung Customer Service Centre, test your product as follows. If the problem persists, contact Samsung Customer Service Centre.
Product diagnosis (Screen issue)
If a problem occurs with the product screen, run Self Diagnosis to check that the product is working properly.
Checking the Resolution and Frequency
If a resolution that is not supported (see the Standard Signal Mode Table) is selected, the Out Of Range message may appear for a short time or the screen may not be displayed properly.
The displayed resolution may vary, depending on the PC system settings and cables.
Check the following.
Installation issue
The screen keeps switching on and off.
Check the cable connection between the product and PC, and ensure the connectors are locked.
Blank spaces are found on all four sides of the screen when an HDMI or HDMI-DVI cable is connected to the product and PC.
The blank spaces found on the screen have nothing to do with the product.
Blank spaces on the screen are caused by the PC or graphics card. To resolve the problem, adjust the screen size in the HDMI or DVI settings for the graphics card.
If the graphics card settings menu does not have an option to adjust the screen size, update the graphics card driver to the latest version.
Please contact the graphics card or PC manufacturer for further details about how to adjust the screen settings.)
Screen issue
The power LED is off. The screen will not switch on.
Check that the power cable is connected properly.
If a problem occurs with the product screen, run Self Diagnosis to check that the product is working properly.
The message Check the cable connection and the settings of the source device. appears.
Check that the cable is properly connected to the product.
Check that the device connected to the product is powered on.
Out Of Range is displayed.
This message appears when the signal from the graphics card exceeds the maximum resolution or frequency for the product.
Change the maximum resolution and frequency to suit the product performance, referring to Standard Signal Mode Table
The images on the screen look distorted
Check the cable connection to the product.
The screen is not clear. The screen is blurry
Remove any accessories (video extension cable, etc.) and try again.
Set the resolution and frequency to the recommended level.
The screen appears unstable and shaky. There are shadows or ghost images left on the screen.
Check that the resolution and frequency for the PC are within the range of resolution and frequency compatible with the product. Next, if required, change the settings, referring to Standard Signal Mode Table (P.29) in this manual and the Information menu on the product.
The screen is too bright. The screen is too dark.
Adjust Brightness and Contrast
Screen colour is inconsistent.
Change the settings
The colours on the screen have a shadow and are distorted.
Change the settings
White does not really look white.
Change the settings
There is no image on the screen and the power LED blinks every 0.5 to 1 second
The product is operating in power-saving mode.
Press any key on the keyboard or move the mouse to return to normal operating mode.
Text is blurry
If using a Windows OS (e.g. Windows 7, Windows 8, Windows 8.1 or Windows 10): Go to Control Panel → Fonts → Adjust ClearType text and change Turn on ClearType.
Video playback is choppy.
Playback of high-definition large video files can be choppy. This may be because the video player is not optimised for the PC resource.
Try playing the file on another video player.
Source device issue
A beeping sound is heard when my PC is booting.
If a beeping sound is heard when your PC is booting, have your PC serviced.
Q & A
Refer to the user manual for your PC or graphics card for further instructions on adjustment.
How can I change the frequency?
Set the frequency on your graphics card.
Windows 7: Go to Control Panel → Appearance and Personalization → Display→Screen Resolution→Advanced settings→^ Monitor, and adjust Refresh rate under Monitor settings.
Windows 8(Windows 8.1): Go to Settings → Control Panel → Appearance and Personalization → Display →Screen Resolution → Advanced settings → Monitor, and adjust Refresh rate under Monitor settings.
Windows 10: Go to Settings →System → Display → Advanced display settings → Display adapter properties → Monitor, and adjust Screen refresh rate under Monitor settings.
How can I change the resolution?
Windows 7: Go to Control Panel → Appearance and Personalization → Display → Adjust Resolution, and adjust the resolution.
Windows 8(Windows 8.1): Go to Settings → Control Panel → Appearance and Personalization→ Display →Adjust Resolution, and adjust the resolution.
Windows 10: Go to Settings → System → Display → Advanced display settings, and adjust the resolution. *
How do I set power-saving mode?
Windows 7: Set power-saving mode in Control Panel → Appearance and Personalization→ Personalize →Screen Saver Settings → Power options or BIOS SETUP on the PC.
Windows 8(Windows 8.1): Set power-saving mode in Settings → Control Panel → Appearance and Personalization→ Personalize → Screen Saver Settings → Power options or BIOS SETUP on the PC.
Windows 10: Set power-saving mode in Settings → Personalization → Lock screen → Screen timeout settings → Power & sleep or BIOS SETUP on the PC.
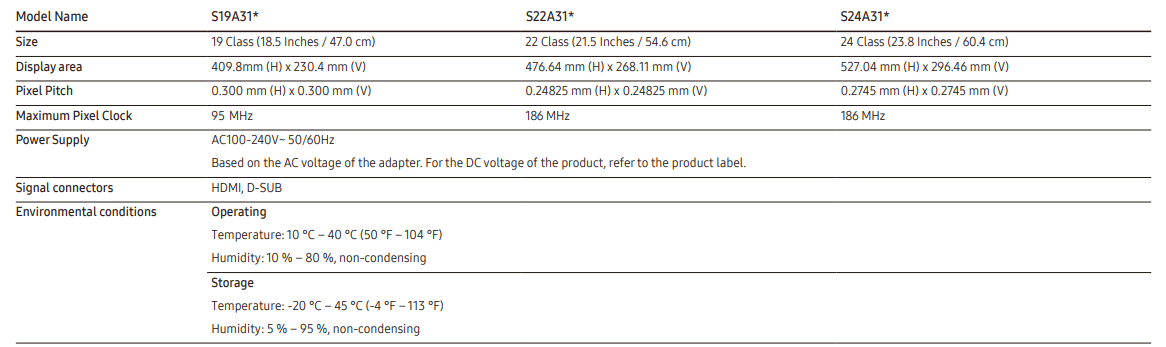
Specifications
Plug-and-Play This product can be installed and used with any Plug-and-Play compatible systems. Two-way data exchange between the product and PC system optimises the product settings. Product installation takes place automatically. However, you can customise the installation settings if desired.
Panel Dots (Pixels) Due to the nature of the manufacturing of this product, approximately1 pixel per million (1ppm) may be brighter or darker on the LCD panel. This does not affect product performance.
The specifications are subject to change without notice to improve quality.
For detailed device specifications, visit the Samsung website.
Flicker Free The device has no visible or invisible flicker within the range of 0-3000Hz.
 button on the back of the product to turn it on.