Loading ...
Loading ...
3
ASSEMBLY INSTRUCTIONS
Cabinet Use Requirements
■ Intended for use in a garage.
■ Maximum weight limit is 50 lbs (22.7 kg) for each shelf.
■ Maximum weight limit is 250 lbs (113.6 kg) for the cabinet.
Unpack Cabinet Parts
1. Remove and verify the contents. Contents include a hex key, a
key, and the parts and fasteners shown in “Parts.”
2. Dispose of/recycle all packaging materials.
Assemble Cabinet
Gather the required tools before starting installation.
Tools Needed:
Tools Supplied:
IMPORTANT:
■ Two people may be required to complete the assembly.
■ As you assemble the cabinet, make sure the edges with the
holes are facing up.
■ If you are assembling the cabinet on the floor, fasten the eight
front corner bolts, two at each corner, after you stand the cabinet
upright.
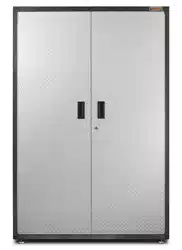
1. Place side panel (P1) on a flat, firm surface so that the edge with
the holes is facing up as shown.
2. Insert the cabinet top (P2) between the edges of side panel (P1).
NOTE: Make sure the edges with the holes are facing up.
3. Align the holes and attach the top (P2) to side panel (P1) using
six Hex-head bolts (F1) and two ⁵⁄₁₆"
flange nuts (F2) as shown.
Do not tighten completely.
4. Position the other side panel (P1) so that the top (P2) is between
the edges of side panel (P1).
5. Align the holes and attach the top (P2) to the side (P1) using six
Hex-head bolts (F1) and two ⁵⁄₁₆"
flange nuts (F2) as shown. Do
not tighten completely.
6. Insert the cabinet bottom (P3) between the edges of the side
panels (P1).
NOTE: Make sure the edges with the holes are facing up.
7. Align the holes and attach the bottom (P3) to the sides (P1) using
six Hex-head bolts (F1) and two ⁵⁄₁₆"
flange nuts (F2) for each side
as shown. Do not tighten completely.
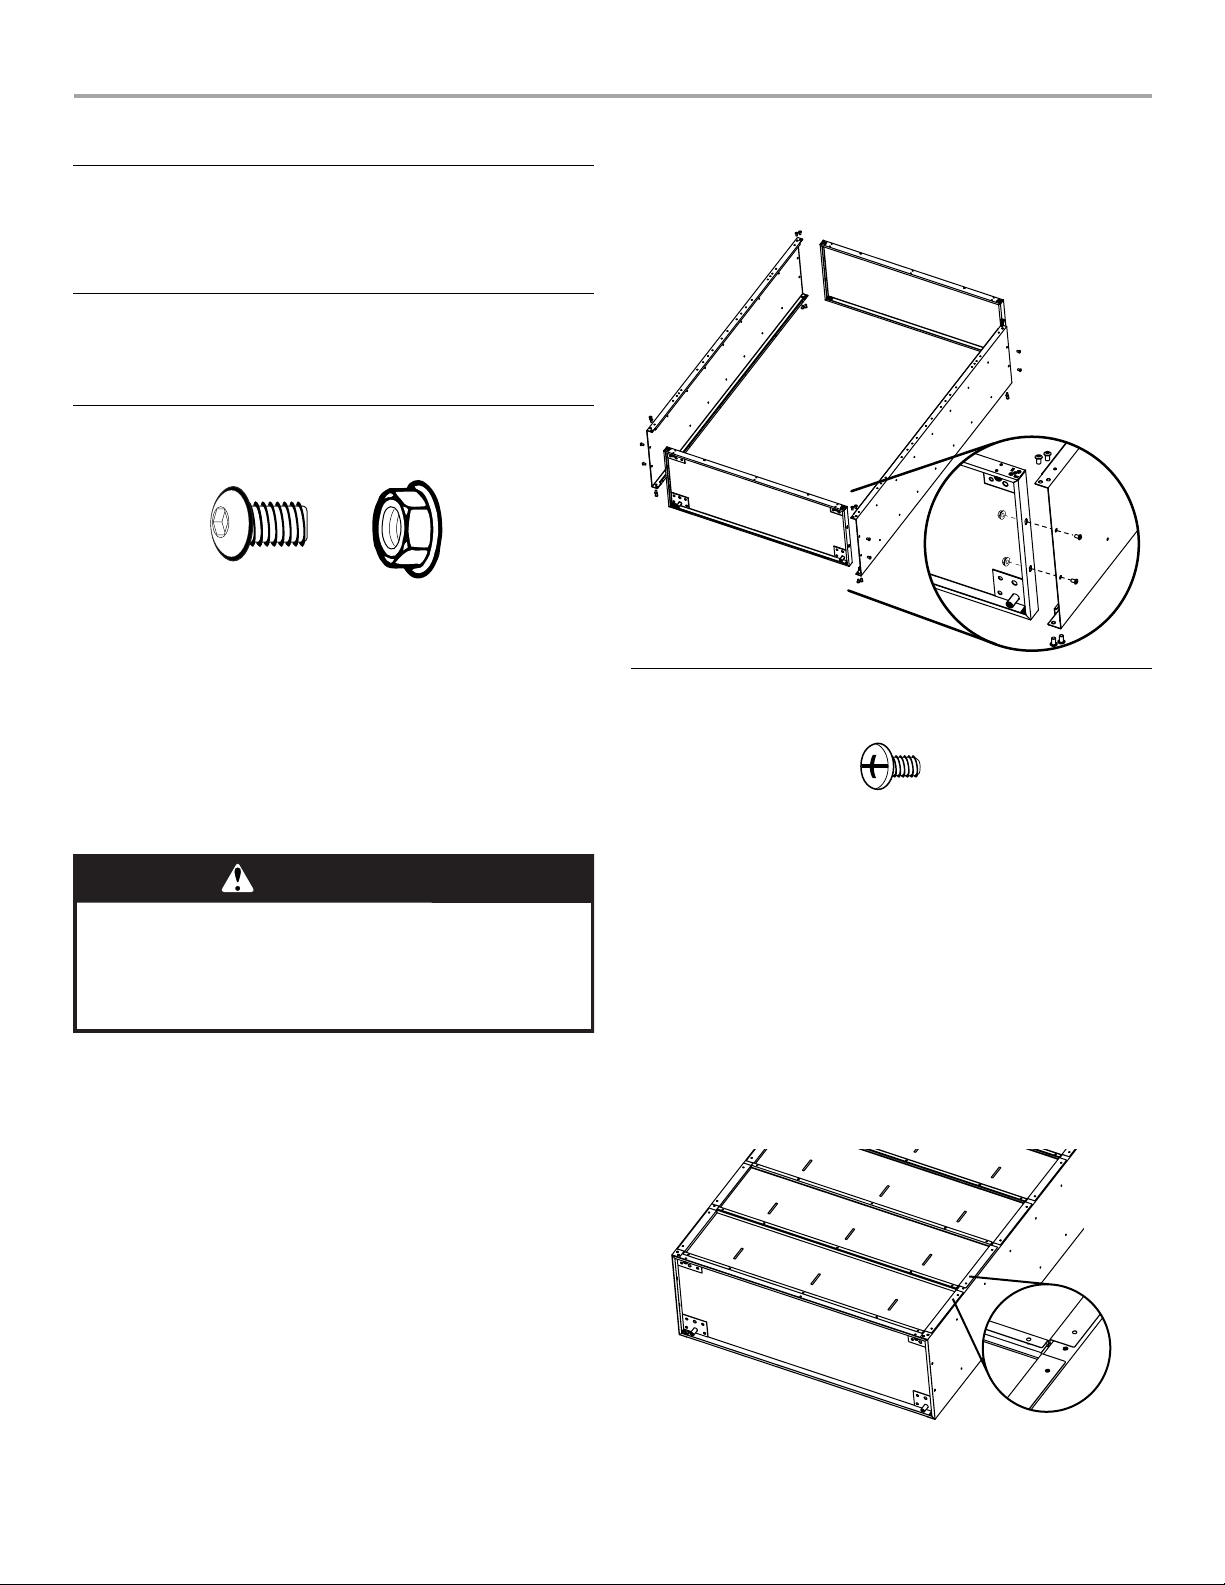
Attach Back Panels
IMPORTANT:
■ Attach the back panels (P8) starting at the top of the cabinet and
working down to the cabinet bottom. Each consecutive back
panel will overlap the panel above.
■ Do not completely tighten the screws until all back panels are in
place.
■ The back panels, top and bottom, may have additional holes that
are not used.
1. Align the first back panel (P8) with the holes in the cabinet top.
Using Phillips-head screws (F3c), attach the panel (P8) to the
cabinet top and sides.
2. Overlap the bottom of the first back panel (P8) with the top of the
second back panel (P8) as shown. Using Phillips-head screws,
fasten back panel (P8) to the cabinet sides.
3. Repeat Step 2 to attach the four remaining back panels to the
cabinet sides.
F1 F2
F1
⁵⁄₁₆
" Hex-head bolt (24)
F2
⁵⁄₁₆
" Flange nut (8)
■ ¹⁄₂" Wrench
■ ³⁄₈" Wrench
■ Phillips screwdriver
■ Level
■ Hex key ■ Key
WARNING
Excessive Weight Hazard
Use two or more people to move, assemble or install
cabinet.
Failure to do so can result in back or other injury.
F3c
Phillips-head screw (40)
A. Cabinet top
P1
P1
P2
P3
P1
P2
Loading ...
Loading ...
Loading ...