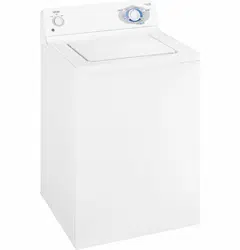
User Manual GE WHDSR109JWW 3.2 Cu. Ft. Super Capacity Washer

Documents for GE - General Electric WHDSR109JWW

The following documents are available:
User Manual Other Documents Photos
WHDSR109JWW photo

User Manual

For WHDSR109JWW.

Install screens.
(Screens
should be
brand new.
Replace
them if
they are old
or worn).
Use pliers to
tighten 1/2
turn beyond
hand-tight
5. Connect water supply
hoses to wall faucets
Avoid a
Repair!
Avoid a
Repair!
Install screen washers; without
them debris will clog the valve
and flooding will occur
Do not mix hot and cold water
supplies. Mixing them will
result in poor wash perfomance
Drain
hose
Fill hoses
and parts
bag
Styrofoam block &
owner’s manual
Circles or ovals are color matched
between pictures to help show
location on product
1. Unpack your washer
Installation Instruction - Quick Reference Guide
For the complete and detailed installation instructions as well as all safety concerns and warnings, please refer to the installation instructions manual.
GE imagination at work
Phillips Head
Screwdriver or 1/4"
Nut Driver
Slip Joint
Pliers
Level
Tools you will need
Use screwdriver
3. Install drain hose to the
back of the washer
Avoid a
Repair!
Use clamps and screws for drain
hose installation; without them
leaks and flooding may occur
Install washers. (Washers should
be brand new. Replace them if
they are old or worn). Use pliers
to tighten 1/2 turn beyond
hand-tight
4. Connect water supply
hoses to back of washer
Avoid a
Repair!
Do not cross thread the water
hoses and do not forget to
install the washers. Flooding
may occur
2. Remove metal rod from
bottom right
Remove rod by pulling on
yellow plastic handle
Avoid a
Repair!
Remove metal rod. Leaving rod
in place WILL result in severe
damage to the washer
Use cable tie
6. Connect drain hose
to drain opening
Avoid a
Repair!
Meet 30” drain hose height
requirement. Less than 30”
without U clip WILL NOT allow
proper washer operation
Congratulations! Your installation is successful and complete.
Refer to your Owner’s Manual for operation instructions.
8. Installation
complete!
Avoid a
Repair!
Check for leaks after you turn
on the water
Avoid a
Repair!
Avoid a
Repair!
7. Level your washer
and plug it in
Tilt washer
forward 4 to 6
inches and
then set it back
down – rear legs
will self-align
Ensure washer is properly
leveled, otherwise damage
WILL occur
Ensure that washer is powered
by 115V, 15 or 20 amp wall
receptacle
Level
front legs
left to right
Dele la vuelta para instrucciones en español
clip
GROUNDING INSTRUCTIONS
This appliance must be grounded. In the event of
malfunction or breakdown, grounding should
reduce the risk of electric shock by providing a
path of least resistance for electric current. This
appliance is equipped with a cord having an
equipment-grounding conductor and a grounding
plug. The plug must be plugged into an appropriate
outlet that is properly installed and grounded in
accordance with all local codes and ordinances.
WARNING – Improper connection of
equipment-grounding conductor can result in a risk
of electric shock. Check with a qualified electrician
or serviceman if you are in doubt as to whether the
appliance is properly grounded.
Specifications

GE - General Electric WHDSR109JWW Questions and Answers

Find answers or Ask a question.


  • Total questions: 1
  • Questions unAnswered : 1

#1 WASHER WATER TEMPERATURE CONCERNS?

If you experience issues with the water temperature check the following:
- Check to ensure both Hot and Cold water supply valves are turned on.
- Check to ensure the hose connections were not reversed. The hoses are marked with letters "H" for HOT and "C" for Cold. To view short videos about installing the water hoses:
- Check to ensure the proper temperature setting was selected
- Check the household water heater to make sure it is delivering water at 90-120 degrees F.
+ HOT wash water is the house hot water supply, when it reaches the washer. For 2015 models and after, see Washers - Hot Water Not Working or Not Hot Enough.
+ WARM is the mix of hot and cold water coming into the washer and can change depending on the incoming water temperatures to the washer. Note: Starting with 1995 and newer models washers, the warm water temperature is slightly lower than on previous models. This is due to a different mix of hot and cold water. This was done to meet federal energy guidelines. The biggest cost of energy for a clothes washer is the cost of heating the water, so slight changes reducing the amount of hot water result in energy savings without reducing wash performance.
+ COLD depends on the incoming supply and can vary from near freezing in some areas in the winter to about 80 degrees Fahrenheit in the summer. Note: The effectiveness of detergent is seriously diminished in extremely low water temperatures (below 60 degrees F, 15.6 degrees C). During the winter, incoming water temperatures are lower and the resulting warm water temperatures are lower as well.
- Check the water valve screen for a clog. One half of the water valve can fail and only hot or cold will come into the washer. Select cold or hot temperature and if one or the other does not work the valve screen may be clogged. For information on cleaning the water valve screen, see Washer Slow Fill With Water.

Note: On models that have a temperature sensor, you might hear the water valves automatically turn on and off while the temperature is being adjusted.

#2 WASHER DRIPS OR FILLS WHEN NOT TURNED ON

If the washer fills or drips water in to the tub even when it is not turned on, the water valve on the back of your washer may have failed. The valve may need to be replaced.

#3 WASHER - CLOTHES NOT CLEANING WELL

To improve wash performance, use the correct amount and type of detergent, load carefully, and select the right amount of water and settings for your load size. Keep the lid closed during the wash cycle.

Step 1: Select the right amount and type of detergent. Follow the manufacturer’s recommended amount for your load. Pre-treat stains if needed. If your washer has an infusor or precise-fill setting, you should use HE (High Efficiency) detergent. HE detergent is a low sudsing detergent. Contrary to other applications, suds in a washing machine can reduce cleaning performance.

Step 2: Loosely load the clothing into the washer basket around of the outside of the basket. Pouring and/or compacting the load can lead to poor cleaning performance and increase wrinkling and tangling. Do not wrap items around the agitator or infusor as that can lead to increased wrinkling.

Step 3: Close the lid. Select the settings for your washer cycle. Several washers can select the correct am