Loading ...
Loading ...
Loading ...
DEFROSTING OF THE FREEZER COMPARTMENT - COMBINED MECHANICAL
In case of a fridge with NO FROST technology, the freezer compartment does not need to be defrosted
because this product is equipped with an automatic system which prevents ice from forming.
For the version without NO FROST technology, we recommend manually defrosting the freezer area
when the layer of frost is more than 3 mm thick. Turn the knob to "0", open the door and place the foods
in a cool place. Leave the door open as long as is necessary for the layer of frost to melt. Dry the inside
of the freezer with a sponge/cloth. Reposition the foodstuffs and reset the knob to the usual values.
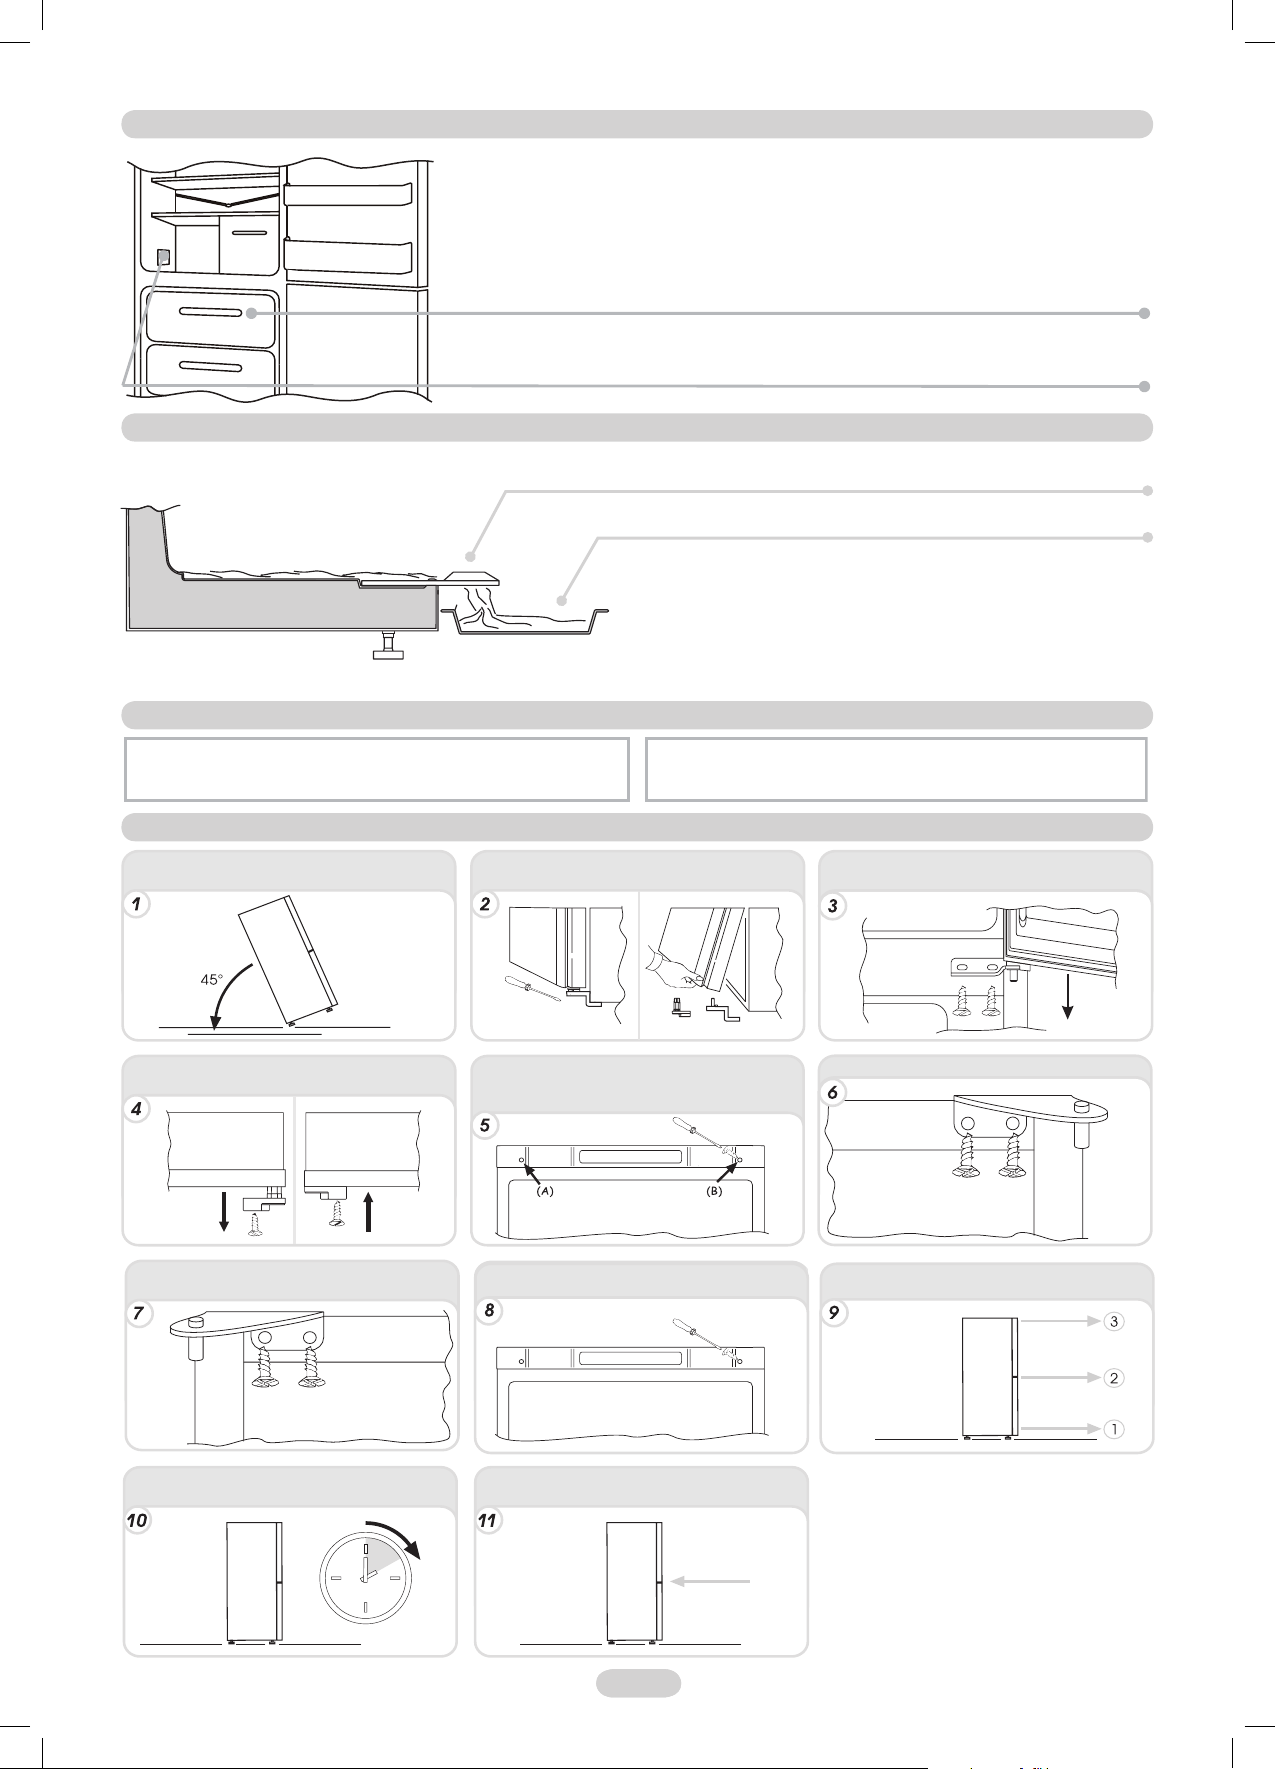
N.B.: This is the rating plate. If you need to contact our Service Department in the event of
faults, remember to give them the information on the plate.
N.B.: For better air circulation, leave some room between the
foodstuffs.
N.B.: To TEST consumption and preservation standards, remove
all drawers except for the bottom one.
(Figure 6)
DRAINING WATER - COMBINED MECHANICAL
In some models of mechanical refrigerators (without display) and without NO FROST technology, the freezer has a system for draining water while
defrosting. This system comprises:
A drip tray which must be pulled out so water can fl ow into a basin.
A drainage basin (not supplied).
In fridges with NO FROST technology, the system for draining water while defrosting is automatic.
7 IT
7 EN
REVERSING THE OPENING OF THE DOORS
Place or tilt the fridge at a 45° angle, since it is
necessary to work on the bottom of the appliance
Remove the bottom hinge by removing the screws,
the plug and washers, then remove the bottom door.
Unscrew the central hinge and remove the
top door
Unscrew the hinge from the fridge door and
mount the one supplied on the other side
Remove the caps (A) and (B), loosen the
screws and partially remove the panel taking
care not to damage the rear electrical part.
Unscrew the right hinge
Flip the top left-hand hinge found in the
accessories kit
Fit the panel, and secure with the screws
and caps
Reassemble the hinges and doors working
from bottom to top, 1 2 3
2 hours
Put the appliance in an upright position and
wait two hours before turning it on
In order to obtain the correct alignment of the
doors it is necessary to work on the middle hinge.
NOTES FOR ALL PRODUCTS - ELECTRONIC AND MECHANICAL
Loading ...
Loading ...
Loading ...