
Loading ...
Loading ...
Loading ...
16
en-us Conversion to another type of gas
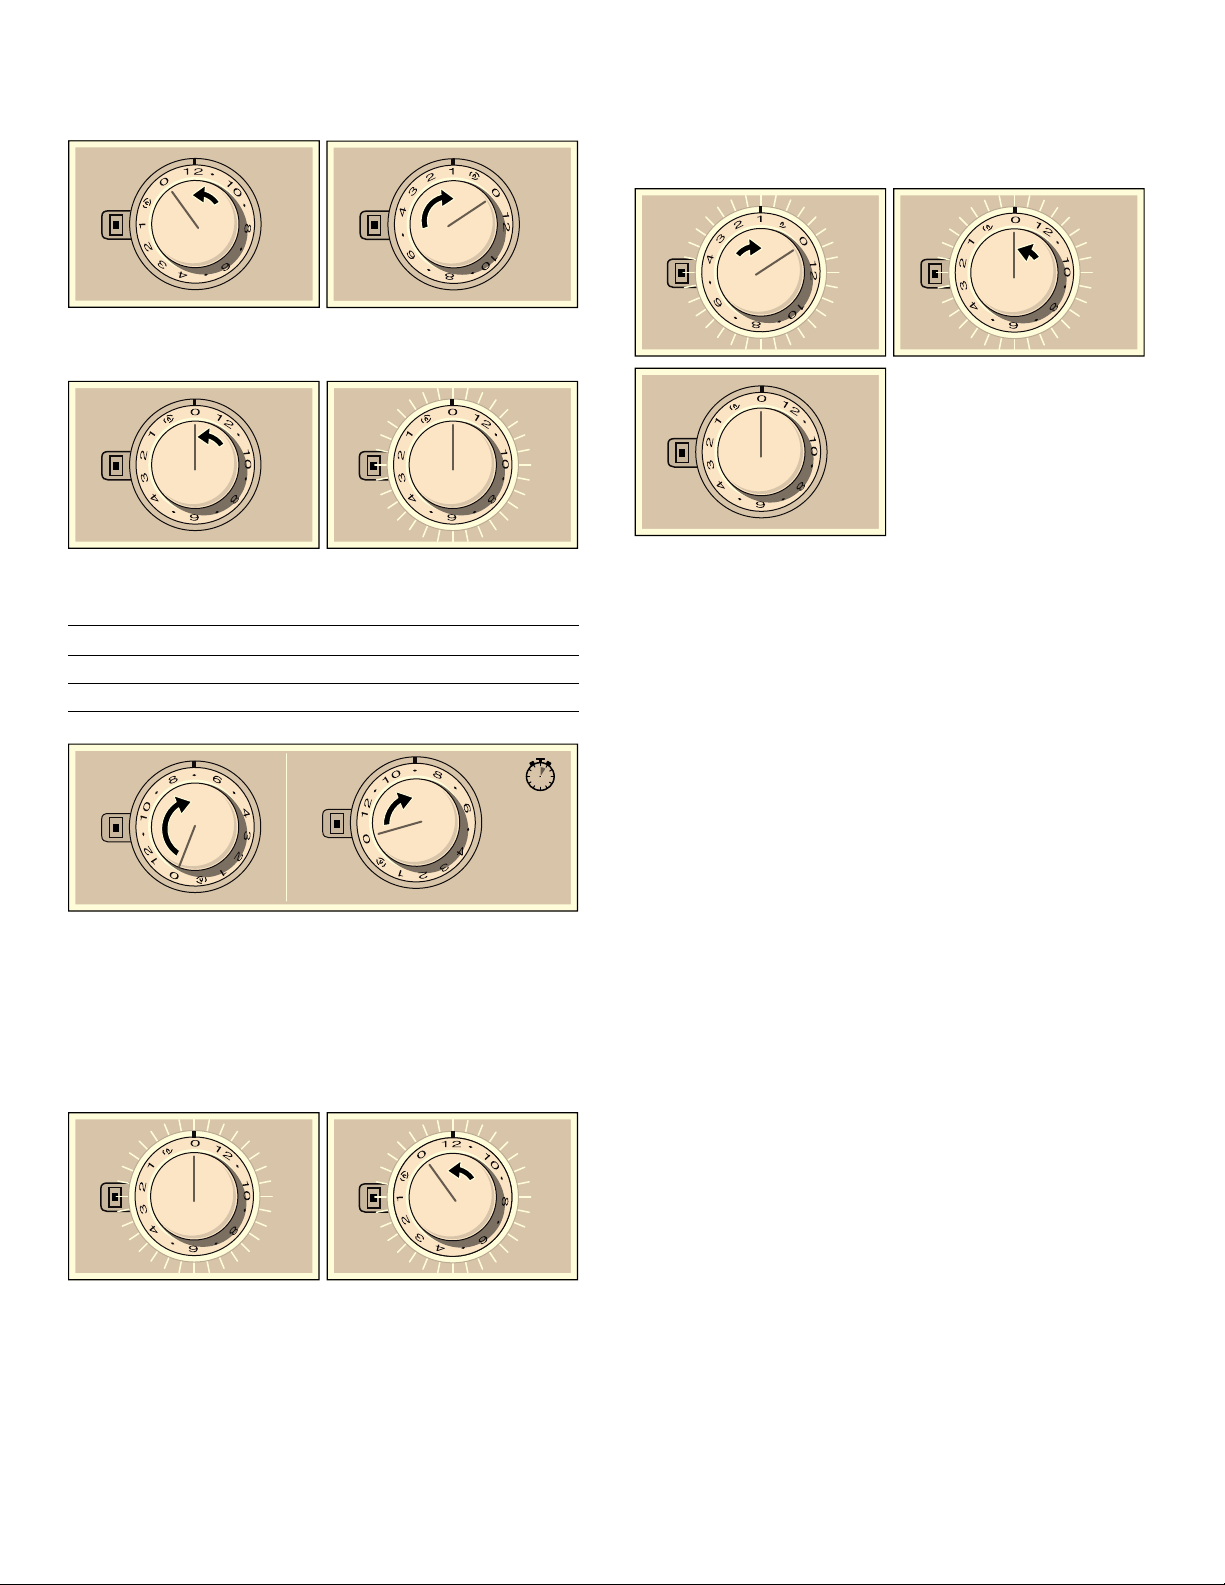
4. Turn the control knob clockwise to position 1 (F).
5. Turn the control knob counterclockwise to position 0
(G). Wait until the illuminated ring turns yellow (H).
6. Set the gas type on the control knob (I), the currently
selected position will turn green:
7. Keep the control knob at the desired setting for at
least 5 seconds. The illuminated ring around the
control knob will turn green (I).
8. To save the setting, it is necessary to exit the menu as
follows: Turn the control knob to position 0 (J). Then
turn the control knob counterclockwise to position 12
(K).
Turn the control knob clockwise to position 1 (L). Turn
the control knob counterclockwise to position 0 (M).
Wait until the illuminated ring goes out (N).
The setting is saved. The illuminated ring around the
control knob will turn yellow for a second. Wait until the
illuminated ring goes out.
Checking functions after the conversion:
The flames are adjusted correctly if no yellow tips are
visible. They must not go out when switching over swiftly
from the high to the low setting.
Note: Stick the adhesive label included with the nozzle
set over the rating plate of the appliance to document the
changeover to a different gas type.
Control knob position Gas Type
7 NG A 6" WC
9 Propane 10" WC
)
(
)
*+
3URSDQH:&
1*$:&
V
,
.-
1
0/
Loading ...
Loading ...
Loading ...