Loading ...
Loading ...
Loading ...
Wiring for method: #2 using LUX Power Bridge
4.2 Wiring Terminal Reference: Installing GEO with the LUX PowerBridge
The LUX PowerBridge is for applications that do not have a C-wire at the thermostat:
Take a photo of the wiring at both your thermostat and your furnace. The Power Bridge
cannot be used with 2-wire applications, and requires at least cooling or heating wires
and a fan “G” wire at the thermostat. If you have more wires (multi-stage systems) than
are needed for installing the Power Bridge, leave them attached as they are.
AT YOUR THERMOSTAT – Use the thermostat wire labels to identify each thermostat
wire with its current terminal letter. If any of your thermostat wiring connections are
unclear, please call LUX Technical Support.
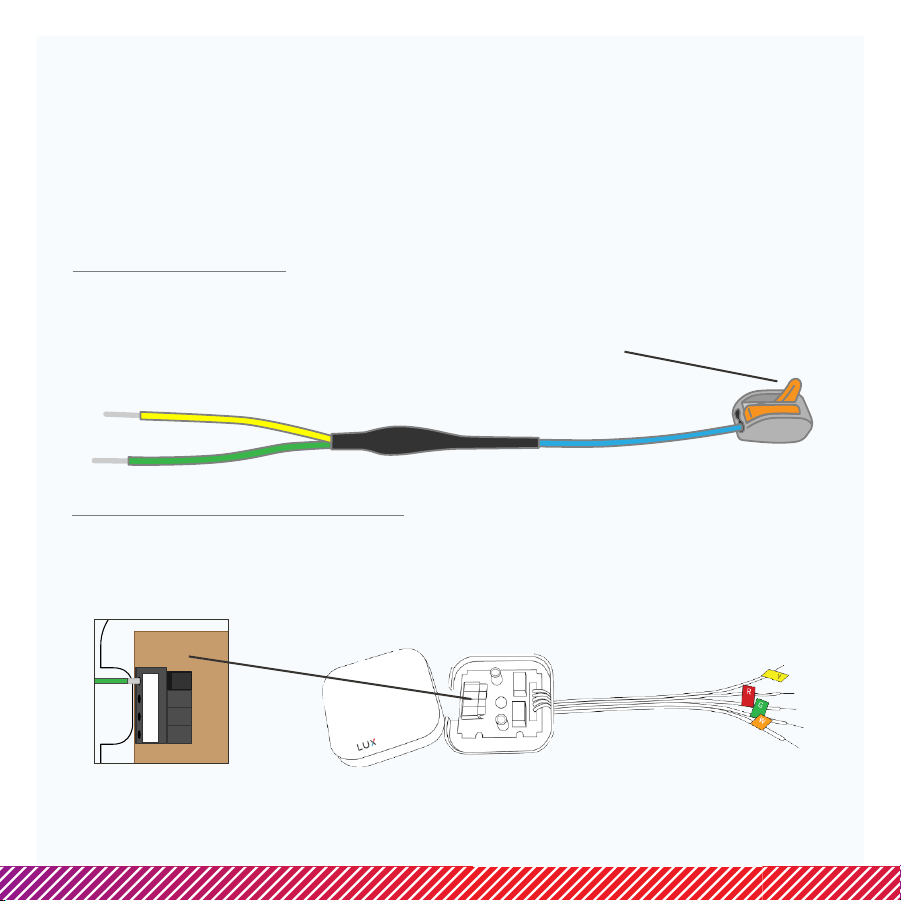
NOTE: When using the Y-Splitter, pull the orange
lever all the way up before inserting your wire.
Press the lever back down to lock a wire in place.
AT YOUR FURNACE (AIR HANDLER) – Remove the door panel and locate your control
board. Use the additional wire labels to identify each wire from your thermostat with
its terminal letter on the control board. If any of your furnace wiring is unclear, please
call LUX Technical Support. Depending upon your application, some wires attached to
the control board will remain in place and will not be used with the LUX Power Bridge.
1
2
3
4
NOTE: When installing the Power Bridge, press the terminal levers before inserting wires into the
holes. Once the wire is fully inserted, gently pull on the wire to confirm that it is securely installed.
Press all the way down on the lever to release a wire.
Loading ...
Loading ...
Loading ...