Loading ...
Loading ...
Notice for battery powered installations
GEO
®
should only be used with lithium batteries.
Battery failure could leave property without controlled heating or cooling. Reliance on battery
power is not recommended with prolonged absence from property.
Battery life will vary depending on your settings. After installation you can choose to adjust the
“energy profile” for your GEO. This energy profile will determine the delay in GEO responding to
changes from the App, but can increase battery life.
Refer to Step 4.1 for wiring method.
Notes for Method #3: Micro-USB
You can use any standard USB wall adapter and Micro-USB cable, however the wall adapter must
be rated for 1 Amp (1000 mA) or higher.
A Micro-USB kit with extra long power cable is available from LUX through our
www.luxproducts.com website.
Refer to Step 4.1 for wiring method.
Step 4: Remove existing thermostat and wire your LUX/GEO
AS AN ADDED RESOURCE, A GLOSSARY OF TERMS IS AVAILABLE ON
LUXGEO.COM, ALONG WITH VIDEO DEMOS
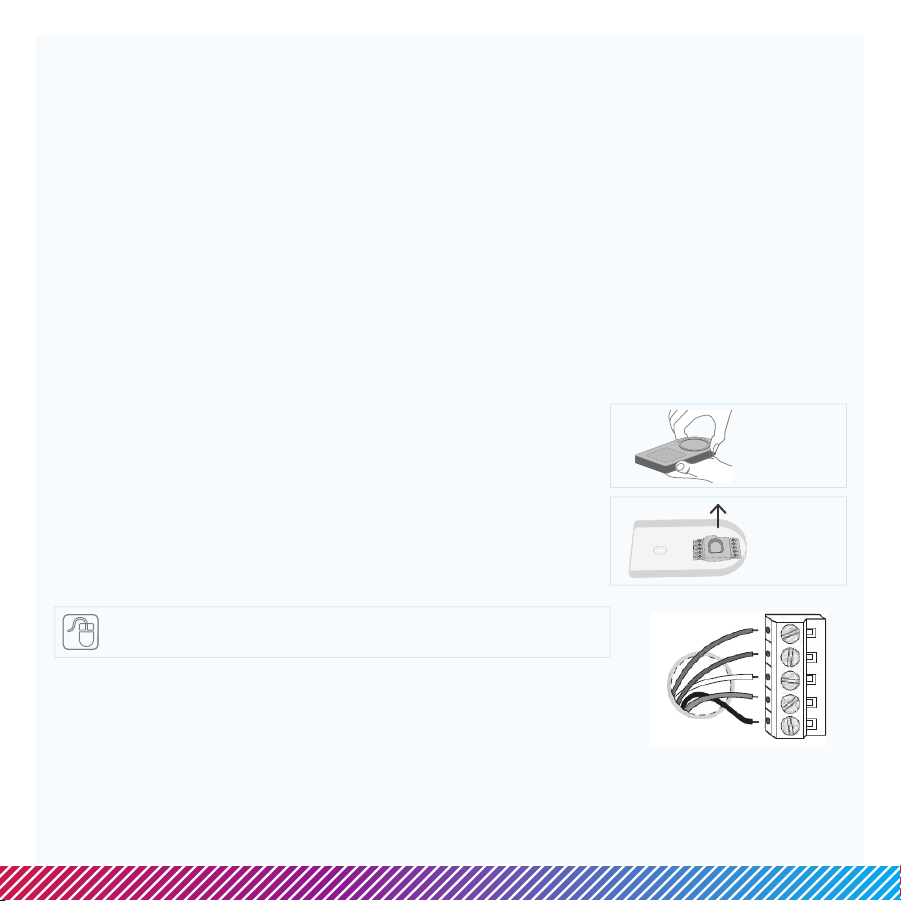
WIRES INSERT INTO SIDE OF
TERMINAL, UNDER SCREWS.
HOLD
AND
PULL TO
OPEN GEO
Release wires and mounting screws from old thermostat
and remove base from wall.
Open GEO from base, pull up on plastic “cover”
between terminal blocks to access and pull wires
through.
Secure GEO base to wall (mounting hardware &
optional wall plate included)
REMOVE
TERMINAL
COVER
On the following pages, there are several dierent methods
of wiring the GEO thermostat depending upon system
type and the power method selected in Step 3. Follow the
scenario most appriate for your system type, and please
contact LUX support if there are any questions.
Loading ...
Loading ...
Loading ...