Loading ...
Loading ...
Loading ...
57
E
• Wheninstalling,removingormovingthemonitor,ensurethatthisiscarriedoutbyatleast2people.
• Besuretouseawall-mountbracketdesignedordesignatedformountingthemonitor.
• Thismonitorisdesignedtobeinstalledonaconcretewallorpillar.Reinforcedworkmightbenecessaryforsomematerials
such as plaster / thin plastic board / wood before starting installation.
This monitor and bracket must be installed on a wall which can endure at least 4 times or more the weight of the monitor.
Install by the most suitable method for the material and the structure.
• ToattachaVESA-compliantmountingbracket,useM6screwsthatare5/16inch(8mm)to3/8inch(10mm)longerthanthe
thickness of the mounting bracket.
• Aftermounting,pleasecarefullyensurethemonitorissecure,andnotabletocomeloosefromthewallormount.
• DonotuseanyscrewholesotherthanVESAholesforinstallation.
Mounting Precautions
(For SHARP dealers and service engineers)
n
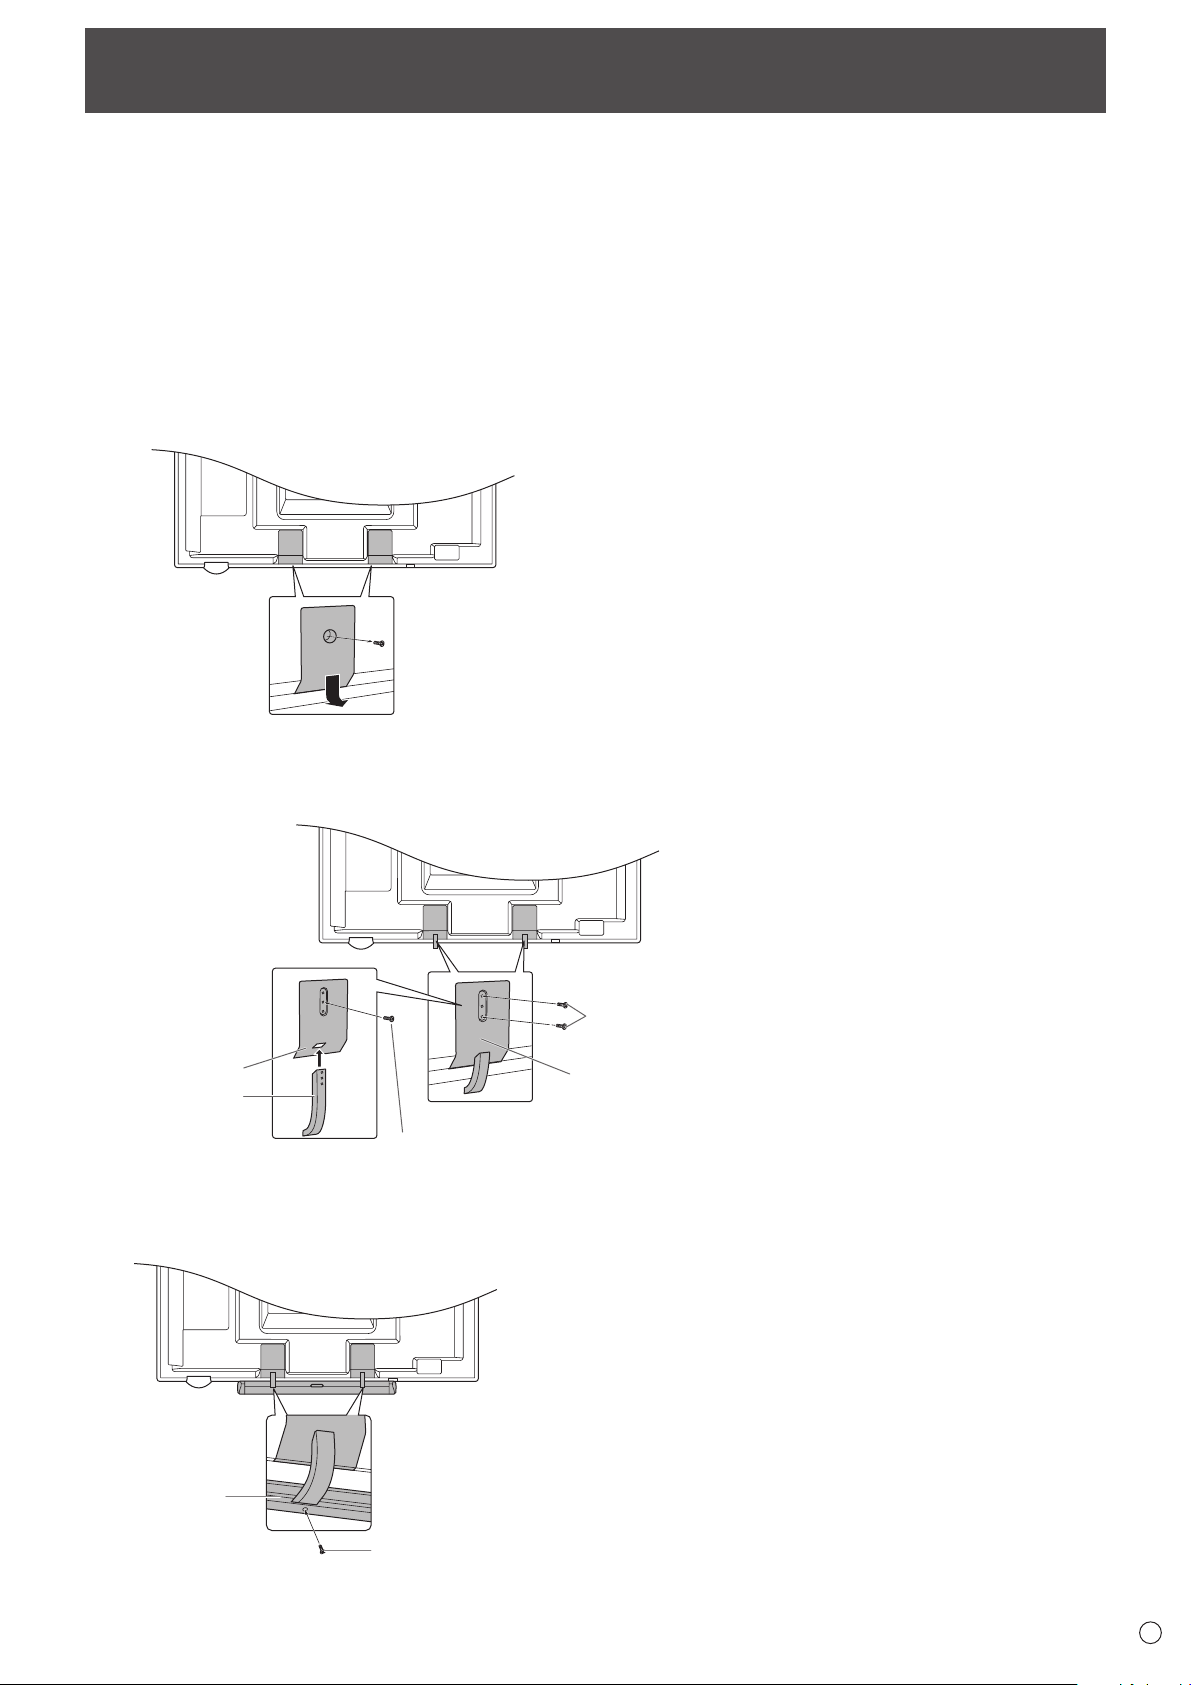
Attaching the Tray
1. Remove the cover from the back of the monitor.
2. Secure the tray mounting tting.
Secureusingthescrewremovedinstep1and2M5tray
mounting screws (supplied).
(3)
(2)
(1)
M5 tray mounting screws
(supplied)
Tray mounting
fitting
Screw removed in step 1
Cover (supplied)
Bracket (supplied)
3. Secure the tray.
Insertthetrayintothetraymountingttingandsecurewith
2 M4 tray mounting screws (supplied).
Tray
(supplied)
M4 tray mounting screws
(supplied)
Loading ...