Loading ...
Loading ...
Loading ...
27
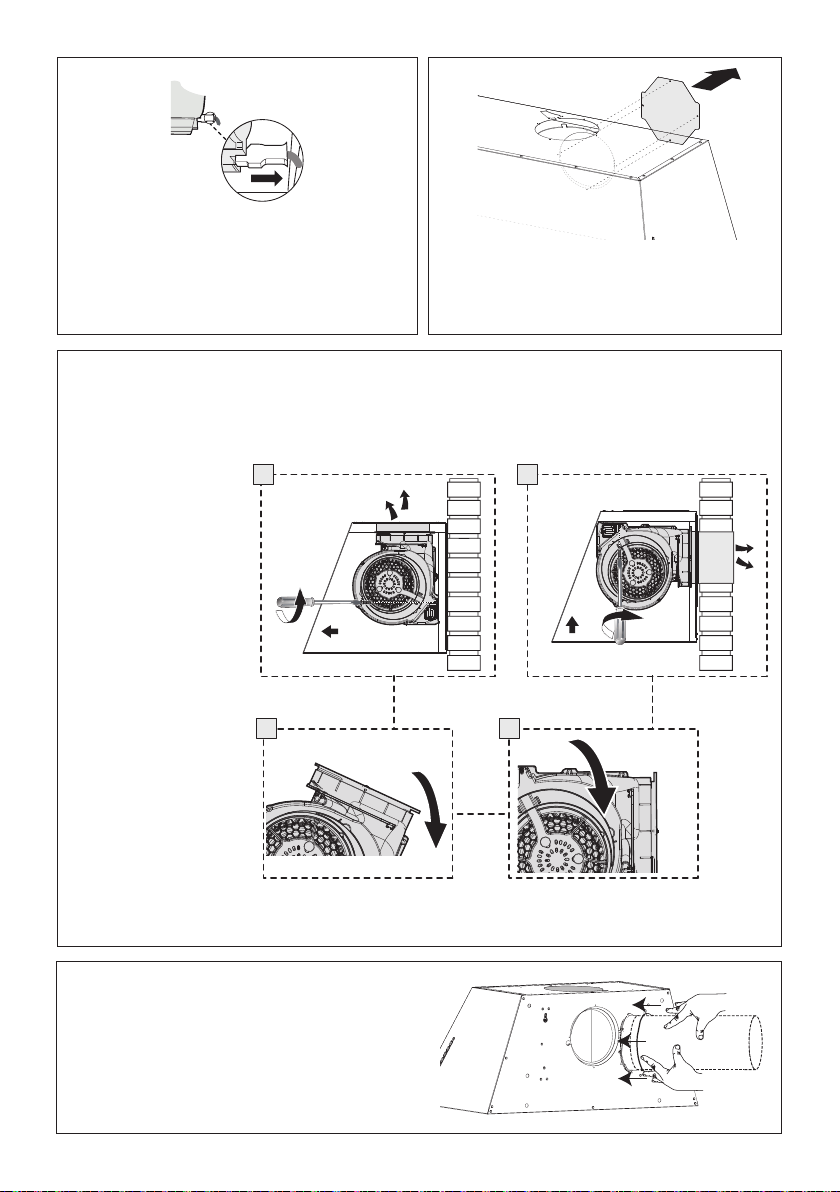
Unscrew the 2 screws
that hold the blower and
unlock it from the initial
position as shown in
Image a.
b c
a d
2x
2x
After removing blower
rotate as shown until
it is in the correct rear
venting position as
shown in Image b-c.
Use the two screws
that were removed to
secure the blower as
shown in Image d.
5
3 4
Unscrew the 4 screws that hold the plate and
unlock it from the initial position as shown in
image.
6
Install to the Roof or Wall attach ductwork.
From inside the hood, use the at head
screwdriver as shown in image above, to
disconnect the right Connectors from the blower.
A6
A8
A7
a
b
2x
A9
H=2x
A10
H=2x
Warning! Don't stress the power cable during the blower rotation operation and
carry out the operation in at least two people.
Loading ...
Loading ...
Loading ...