Loading ...
Loading ...
Loading ...
Appliance door en
19
7.
If necessary, you can remove the condensate
trough for cleaning.
‒ Open the appliance door.
‒ Tilt the condensate trough upwards and remove
it.
8.
WARNING‒Risk of injury!
Scratched glass in the appliance door may develop
into a crack.
▶
Do not use any harsh or abrasive cleaners or
sharp metal scrapers to clean the glass on the
oven door, as they may scratch the surface.
Clean the removed door panes on both sides with
glass cleaner and a soft cloth.
9.
Clean the condensate trough with a cloth and hot
soapy water.
10.
Clean the appliance door.
→"Suitable cleaning agents", Page14
11.
Dry the door panes and refit them.
→"Installing the door panes for the lower the appli-
ance door ", Page19
13.4 Installing the door panes for the lower
the appliance door
WARNING‒Risk of injury!
The hinges on the appliance door move when the door
is opened and closed, which could trap your fingers.
▶
Keep your hands away from the hinges.
Components inside the appliance door may have sharp
edges.
▶
Wear protective gloves.
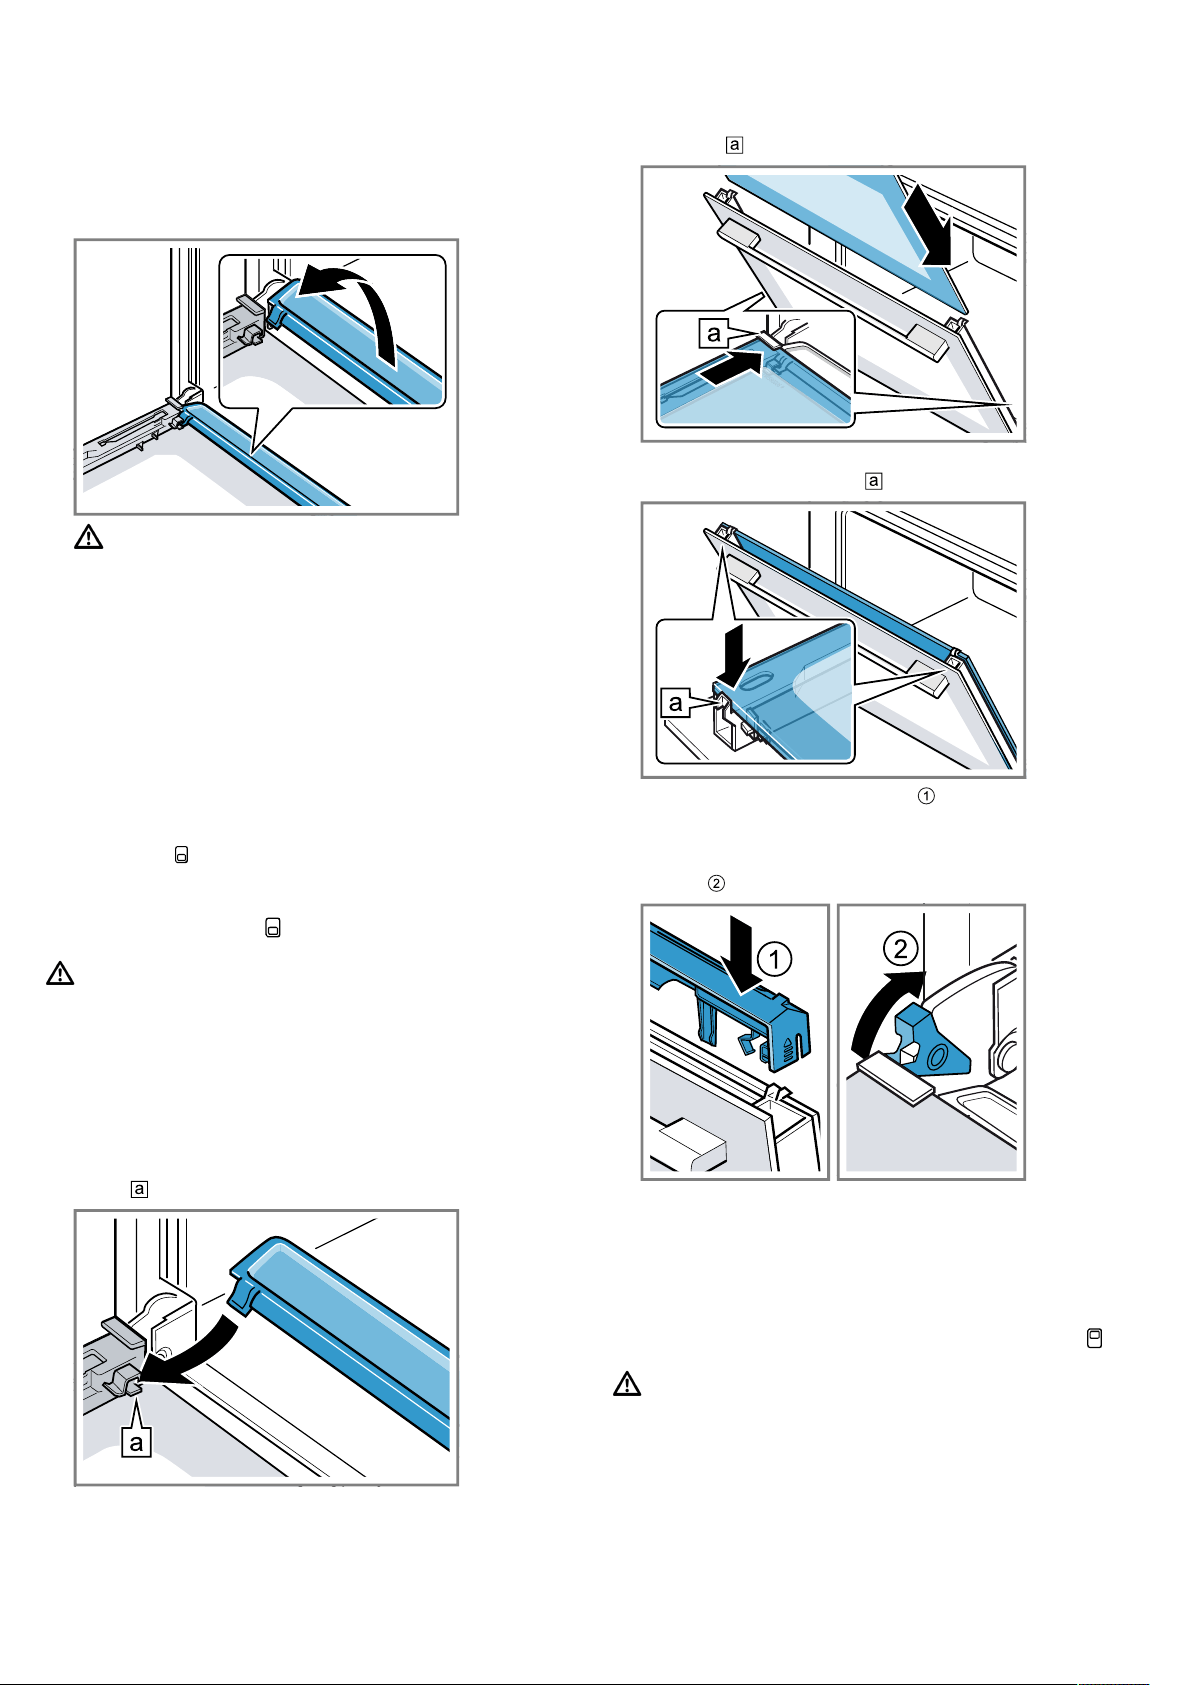
1.
Open the appliance door fully.
2.
Place the condensate trough vertically in the re-
tainer and turn it downwards.
3.
Slide the inner pane into the left- and right-hand
retainers .
4.
Push the inner pane upwards until it is in the left-
and right-hand retainers .
5.
Put the door cover in position and push down on
it until you hear it click into place.
6.
Open the appliance door fully.
7.
Close the locking levers on the left- and right-hand
hinges .
a The locking levers are closed. The appliance door is
secured and cannot be detached.
8.
Close the appliance door.
Note:Do not use the cooking compartment again until
the door panes have been correctly fitted.
13.5 Detaching the upper appliance door
WARNING‒Risk of injury!
The hinges on the appliance door move when the door
is opened and closed, which could trap your fingers.
▶
Keep your hands away from the hinges.
1.
Open the appliance door fully.
Loading ...
Loading ...
Loading ...