
Loading ...
Loading ...
Loading ...
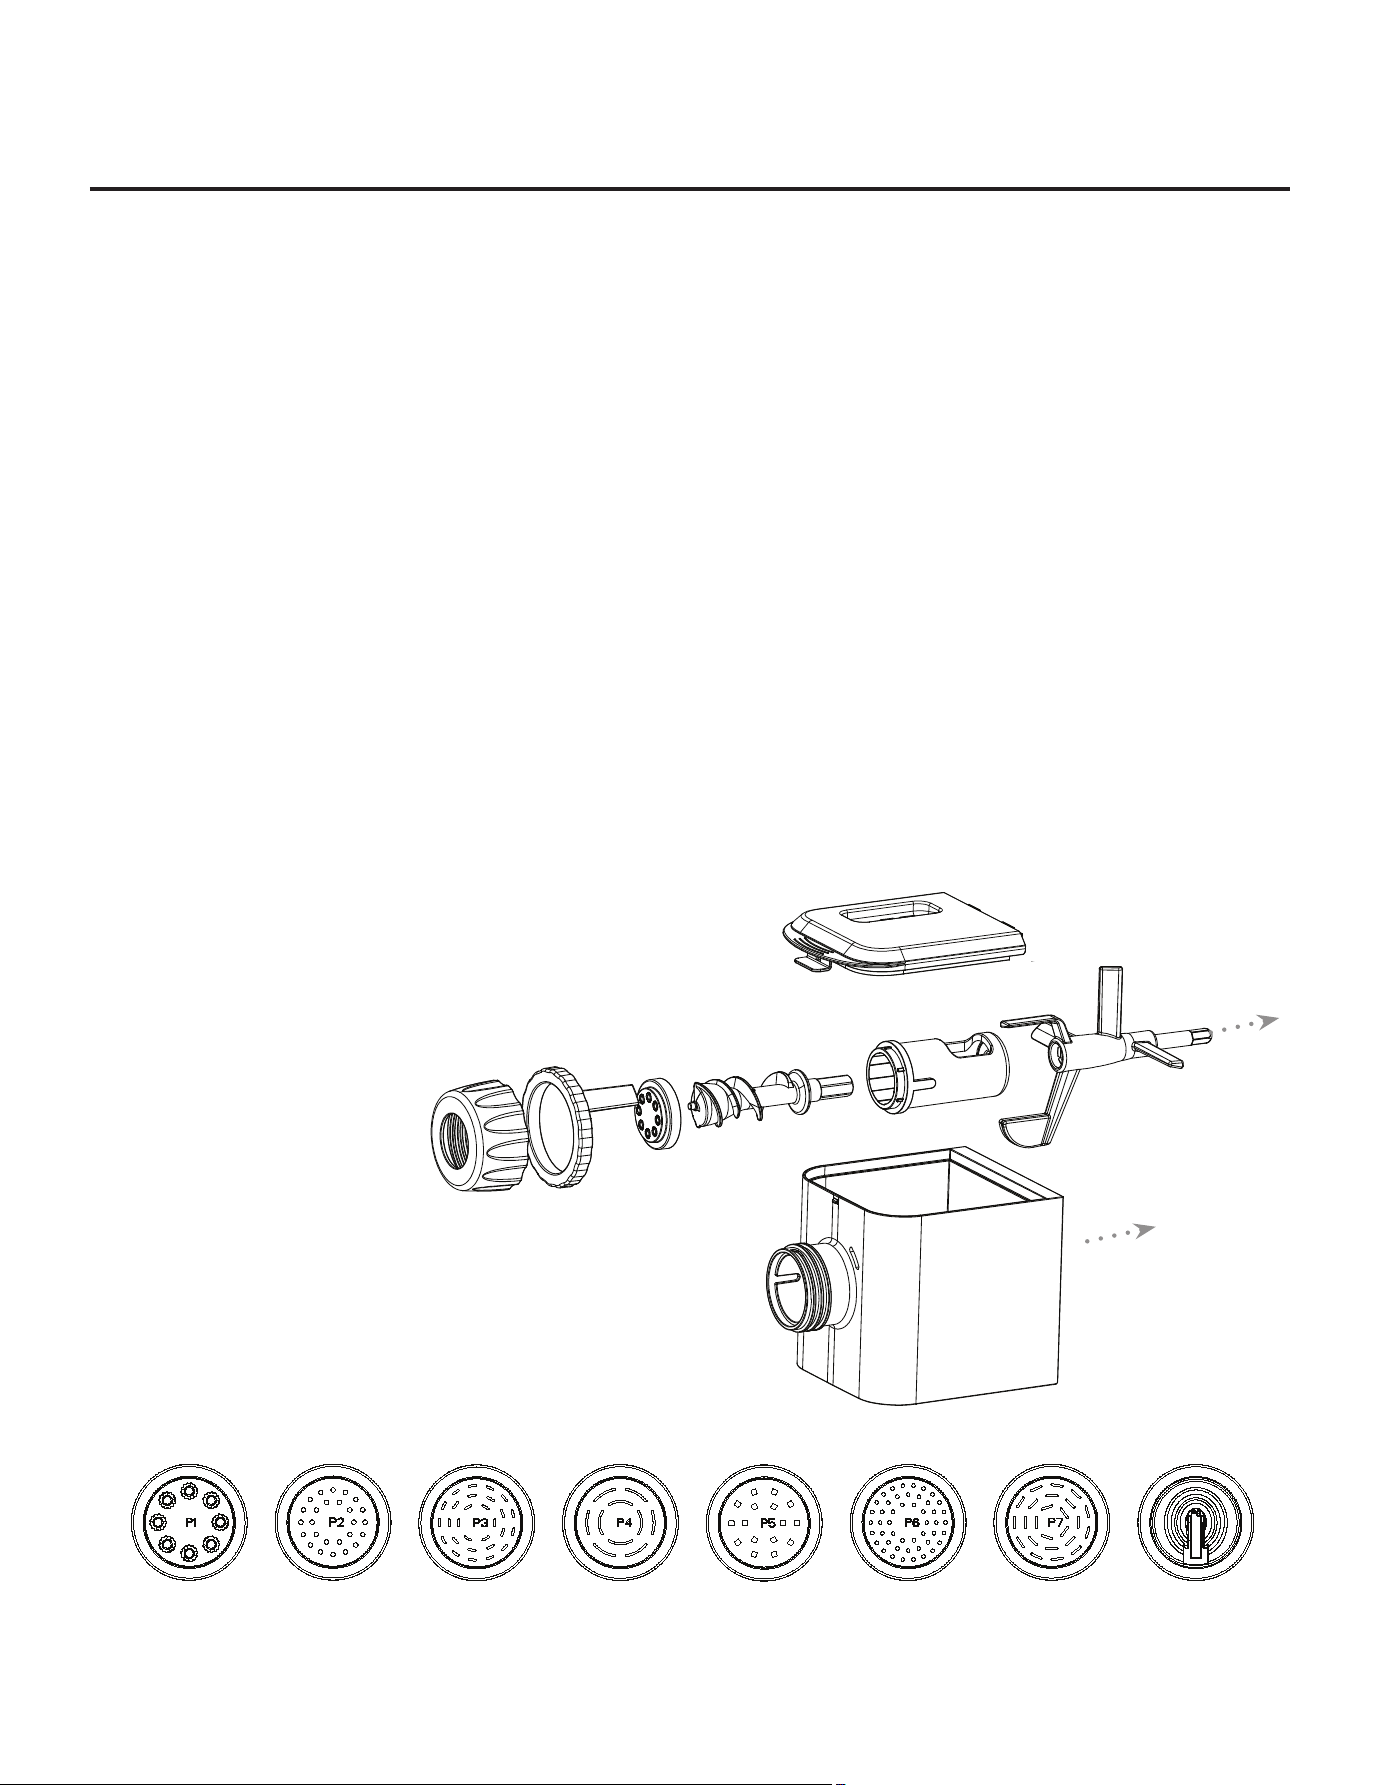
NOTE: All pasta parts are marked with a “P” to
identify which attachments are used for pasta making.
The parts of the Pasta Maker Housing are also color
coded (light gray) to help you identify which parts are
used with which housing.
P1
Penne
P2
Spaghetti
P3
Linguine
P4
Tagliatelle
P5
Udon
P6
Angel Hair
P7
Fettucine
P8
Lasagna
PASTA DISC TYPES (G)
10
Emeril Lagasse Pasta & Beyond
™
Parts & Accessories
Assembling the Pasta Maker Housing
1. Hold the Kneading Paddle (D) at a downward
angle and place it into the Mixing Chamber.
2. Slide the Mixing Chamber (B) into place on the
Base Unit (A) while inserting the metal end of the
Kneading Paddle into the Base Unit’s receptacle.
3. Insert the Auger (F) into the Auger Sleeve (E).
Slide the assembled Auger and Sleeve through
the Mixing Chamber’s mouth so that the Auger
shaft ts into the opening of the kneading paddle.
4. Choose one Pasta Disc (G) and press it onto the
front of the Auger Sleeve (E).
5. Place the Extrusion Collector Ring (H) on the
front of the appliance. NOTE: The Extrusion Ring
shaft ts through the front slot of the Mixing
Chamber.
6. Place the Screw Cap (I) on the front of the appliance
and hand tighten until all parts are secure.
7. Place the Mixing Chamber Lid (C) on top, angle
the front end slightly upward, and snap in place
into the Basic Unit Housing (A). CAUTION:
Operating this appliance with misaligned or
missing parts will cause damage to the appliance.
8. To remove the Mixing Chamber Lid, pinch the
lid’s latch and the ridge area to unlock the lid
from the Mixing Chamber.
A Basic Unit Housing
B Mixing Chamber
C Mixing Chamber Lid
D Kneading Paddle
E Auger Sleeve
F Auger
G Pasta Disc
H Extrusion
Collector Ring
I Screw Cap
PASTA MAKER PARTS
A
B
C
D
E
F
G
H
I
A
Loading ...
Loading ...
Loading ...