Installation Guide for Sprinkler
Introduction
Rain Bird R-VAN Adjustable Rotary Nozzles provide water efficiency and design exibility. R-VAN Adjustable Rotary Nozzles feature rotating stream technology which uniformly delivers water at a low precipitation rate, signi�cantly reducing runoff� and erosion. Retro�tting standard spray nozzles with R-VAN Adjustable Rotary Nozzles can reduce �ow by up to 60% and improve water efficiency by up to 30%. Nozzle spray pattern and distance are easily adjusted by hand with no tools required.
Models
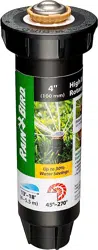
R-VAN18
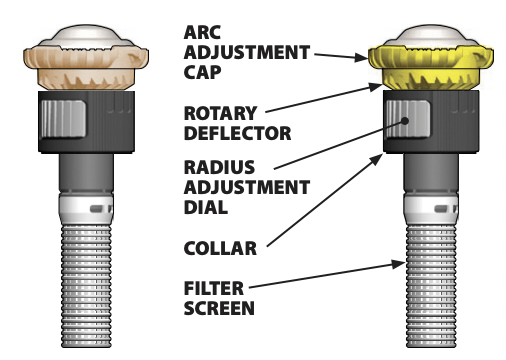
• Rotary Deflector
• 13’ to 18’ (4,0 to 5,5m) radius
• 45° to 270° arc
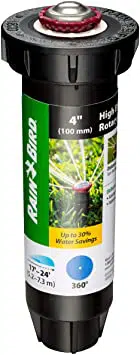
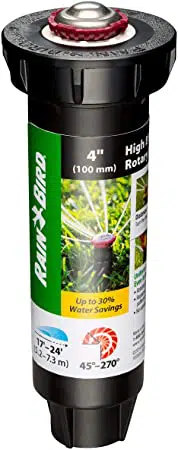
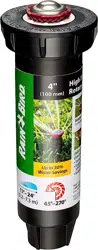
R-VAN1724
• Yellow Rotary Deflector
• 17’ to 24’ (5,2 to 7,3m) radius
• 45° to 270° arc
Features
• Adjust arc and radius without tools
• Color coded for easy identification of R-VAN model
• Low precipitation rate reduces run-off and erosion
• Maintains efficient performance at high operating pressures without misting or fogging
• Compatible with all models of Rain Bird spray bodies in addition to a wide variety of risers and adapters
• Three year trade warranty
• Installing with Rain Bird Rotary Nozzles, and 5000 Series Rotor matched precipitation rate (MPR) nozzles, allows for MPR irrigation designs from 13’ to 35’ (4.0m 10.7m)
Installation
Install Nozzle
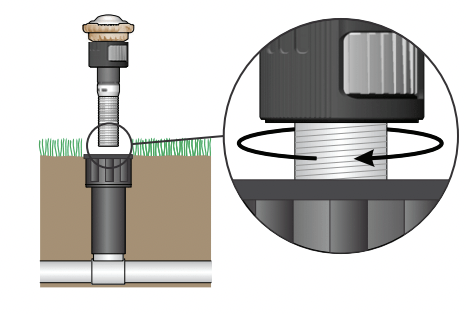
R-VAN Adjustable Rotary Nozzles can be used for a new installation or to replace existing sprinkler nozzles.
- Unscrew and remove the existing sprinkler nozzle (if applicable) from the spray body.
- Screw the nozzle onto the spray body until secure.
Identify the Left Edge
A grooved white mark located on the collar, just under the rotary deflector. represents the left edge of the arc.
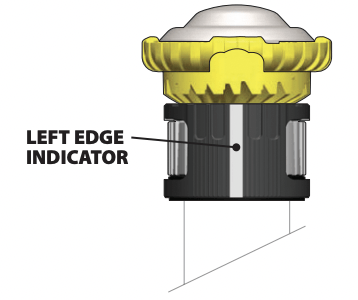
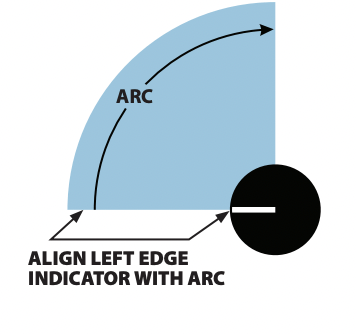
1. Align the nozzle to the left most edge of desired coverage area (arc).
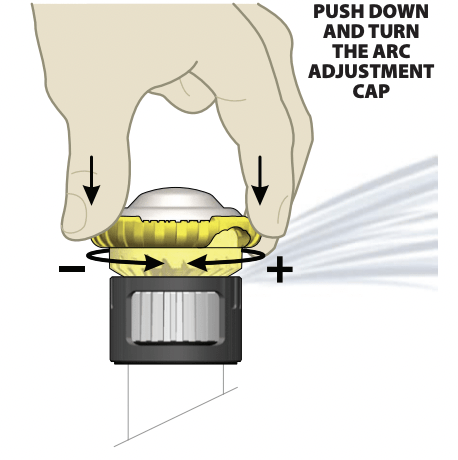
Initial Start Up
Apply water to the system. Verify proper operation of the nozzles and check for leaks.
NOTE: Nozzles may rotate at slightly different speeds. These nozzles maintain uniformity and apply water at the same rate. regardless of rotation speed.
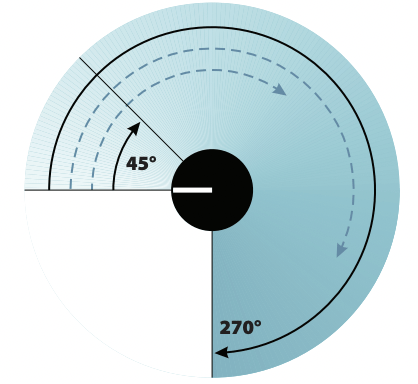
1. Push down and turn the Arc Adjustment Cap counterclockwise to decrease the arc.
2. Push down and turn the Arc Adjustment Cap clockwise to increase the arc.
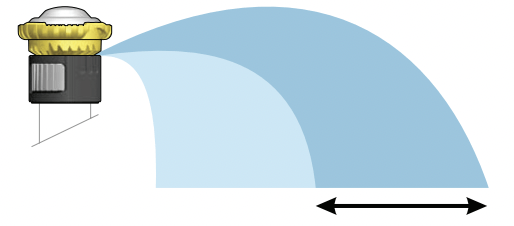
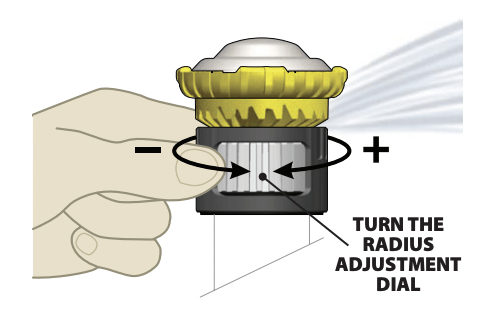
Radius Adjustment
Set the desired nozzle range, from 13’to 18’ (4,0 to 5,5m) for the R-VAN18 (Black) or 17’to 24’ (5,2 to 7,3m) for the R-VAN1724 (Yellow). The factory default setting is the maximum range for each model.
NOTE: Water must be turned ON in order to set the Radius Adjustment.
1. Turn the Radius Adjustment Dial counter-clockwise to decrease the nozzle range.
2. Turn the Radius Adjustment Dial clockwise to increase the nozzle range. A clicking sound will be heard when range limits are reached.
Re-program Controller
After installing R-VAN Adjustable Rotary Nozzles, the run times for your watering schedule will need to be adjusted. Refer to your controller's user manual for instructions.
NOTE: Adjust run times based on an application rate of 0.6 in/hr. (14.7 mm/hr.). Run times for R-VAN Adjustable Rotary Nozzles could be two to three times as long as standard spray nozzles.
Troubleshooting
The following table lists common problems and solutions associated with nozzle operation.
| Problem |
Cause |
Solution |
| Nozzle is not rotating or watering. |
Filter screen may be clogged with debris. |
Clean screen. |
| Water head pressure may be too low. |
Effective pressure range for R-VAN nozzles is 20 to 55 psi. Recommended operating pressure is 45 psi. Check system. |
| A small amount of fine grit may be inside the nozzle. |
Cycle the system a few times to flush. Pull up on nozzle to flush. |
| Water path in the rotary deflector may be clogged with debris. |
Visually inspect water paths in the rotary deflector and clean out any debris. |
| Nozzle operating in a very sandy environment. |
Wait 2 to 4 minutes to see if sand flushes out and nozzle begins to rotate. |
| Gaps or distorted streams in the water spray pattern. |
Nozzle operating in a very sandy environment. |
Clean screen. |
| Range of water spray from nozzles is less than expected. |
Water head pressure may be low. |
Ensure Radius Adjustment Dial is fully open. Turn clockwise until clicking sound is heard. Check system to ensure proper pressure. |
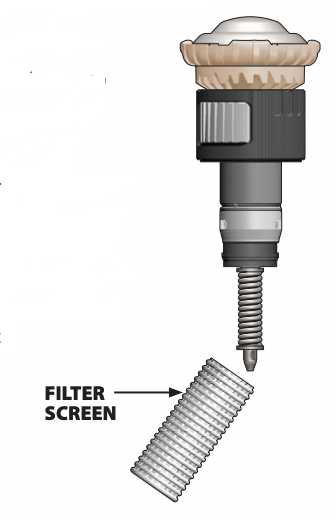
Nozzle Maintenance
Clean the filter screen if it becomes clogged. A build-up of debris causes degradation of performance.
1. Unscrew the rotary nozzle from the riser.
2. Remove the clogged screen.
3. Clean and replace the screen.
4. Screw the nozzle back onto the riser.
NOTE: Rotary Nozzles may be damaged by mowers or other equipment. Check the nozzles regularly to ensure proper operation and for safety
Nozzle Spacing Options
This section describes the two most common sprinkler layout designs for an irrigation zone, square spacing and triangular spacing. Single row applications are not recommended. Since the application rate of R-VAN Adjustable Rotary Nozzles is much lower than standard spray nozzles, mixing rotary and spray nozzles in the same zone is not recommended.
NOTE: Square and triangular spacing is typically based on 50% diameter of throw.
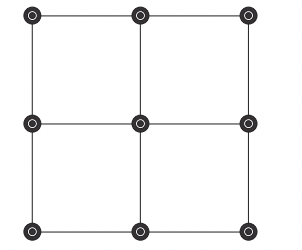
Square Spacing
Square spacing is a sprinkler layout where nozzles are placed in a square pattern. with the same distance between all nozzles. This is the best pattern for areas with 90° corners and fixed boundaries. The disadvantage is that there will be areas that overlap. causing some over watering.
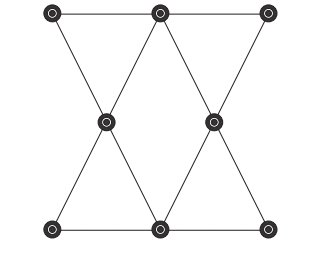
Triangular Spacing
Triangular spacing is a sprinkler layout where nozzles are placed in a triangular grid, with the same distance between all nozzles. This works best for irregularly shaped areas. More surface area is watered with less overlap.