
Loading ...
03/16/17 - DR www.elitescreens.com
2
Note: Additional spare parts may be included.
Frame Assembly
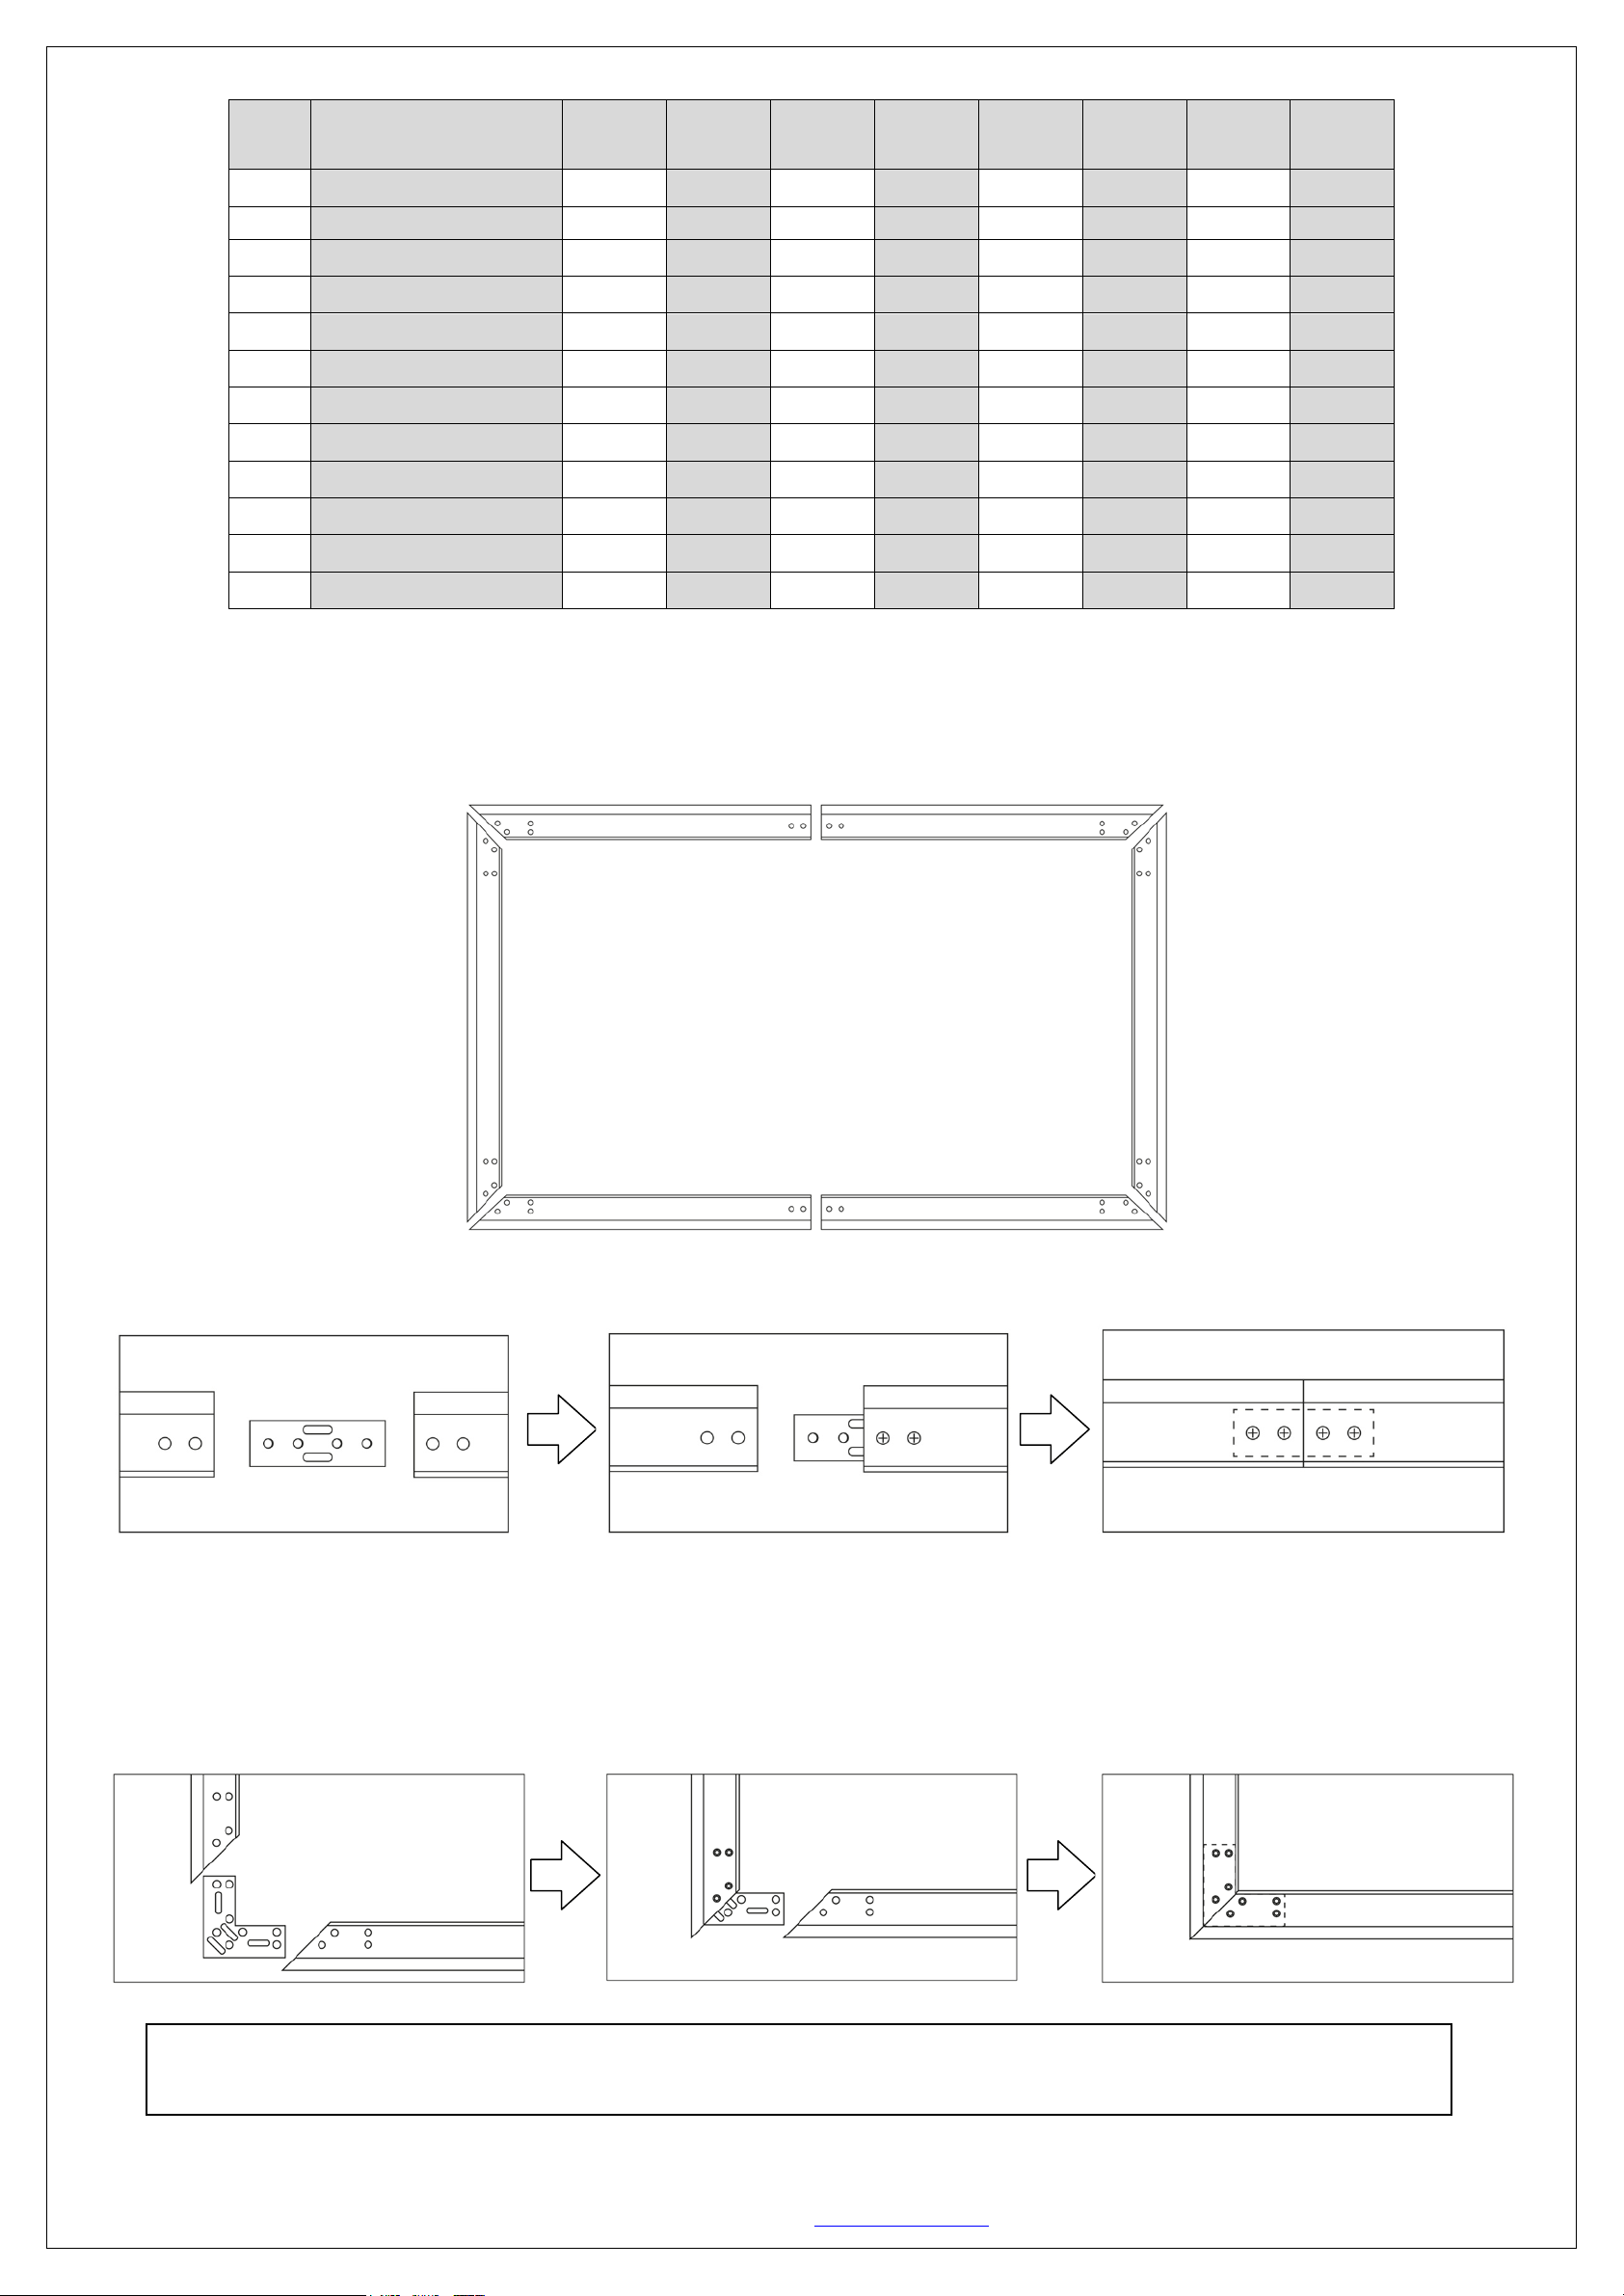
Step 1. Place a soft-clean cloth on the ground or other flat surface of the area where the screen will be assembled.
Step 2. Position the pieces of the frame face-down on the soft-clean cloth in the arrangement shown below.
Step 3. Insert the Center Joint (a) connectors into one-half of the horizontal frame and secure with two 6x12mm Hex Screws (d). Once secure,
connect the other half of the horizontal frame and fasten with two 6x12mm Hex Screws (d).
Step 4. Connect the Elbow Joints (c) to top and bottom sections of the vertical frame. Once inserted, connect the vertical sections to the horizontal
frame sections. Make sure all the holes are in alignment and the frames pieces are flush (no gaps). They should form perfect right angles.
Step 5. Secure the Elbow Joints (c) by fastening them with the 6x12mm Hex Screws (d), 8 at each corner. Do no tighten completely until all frame
pieces are assembled correctly.
To prevent permanent damage to the screen material, be sure your hands are clean for the next step.
Item Parts List
92”
Screen
100”
Screen
110”
Screen
120”
Screen
135”
Screen
150”
Screen
180”
Screen
200”
Screen
a.
Center Joints 2 2 2 2 2 2 2 2
b.
Springs
35
38
41
44
52
58
66
76
c.
Elbow Joints 4 4 4 4 4 4 4 4
d.
6x12mm Hex Screws
40
40
40
40
40
40
40
40
e.
M4x12 Screws 2 2 2 2 2 2 2 2
f.
Pull Hook 1 1 1 1 1 1 1 1
g.
Wall Bracket 2 2 2 2 2 2 3 3
h.
Concrete Screw 8 8 8 8 8 8 8 8
i.
Allen Key
1 1 1 1 1 1 1 1
j.
Wood Screws/Anchors
4/4 4/4 4/4 4/4 4/4 4/4 4/4 4/4
k.
Tension Rods
6 6 6 6 6 6 6 6
l.
Center Support Bar
1 1 1 1 1 1 1 1
Note: You may have to loosen and adjust the brackets and frame pieces. It will help to leave the screws loose until perfect right angles
are formed, then tighten the screws securely.
Loading ...
Loading ...
Loading ...