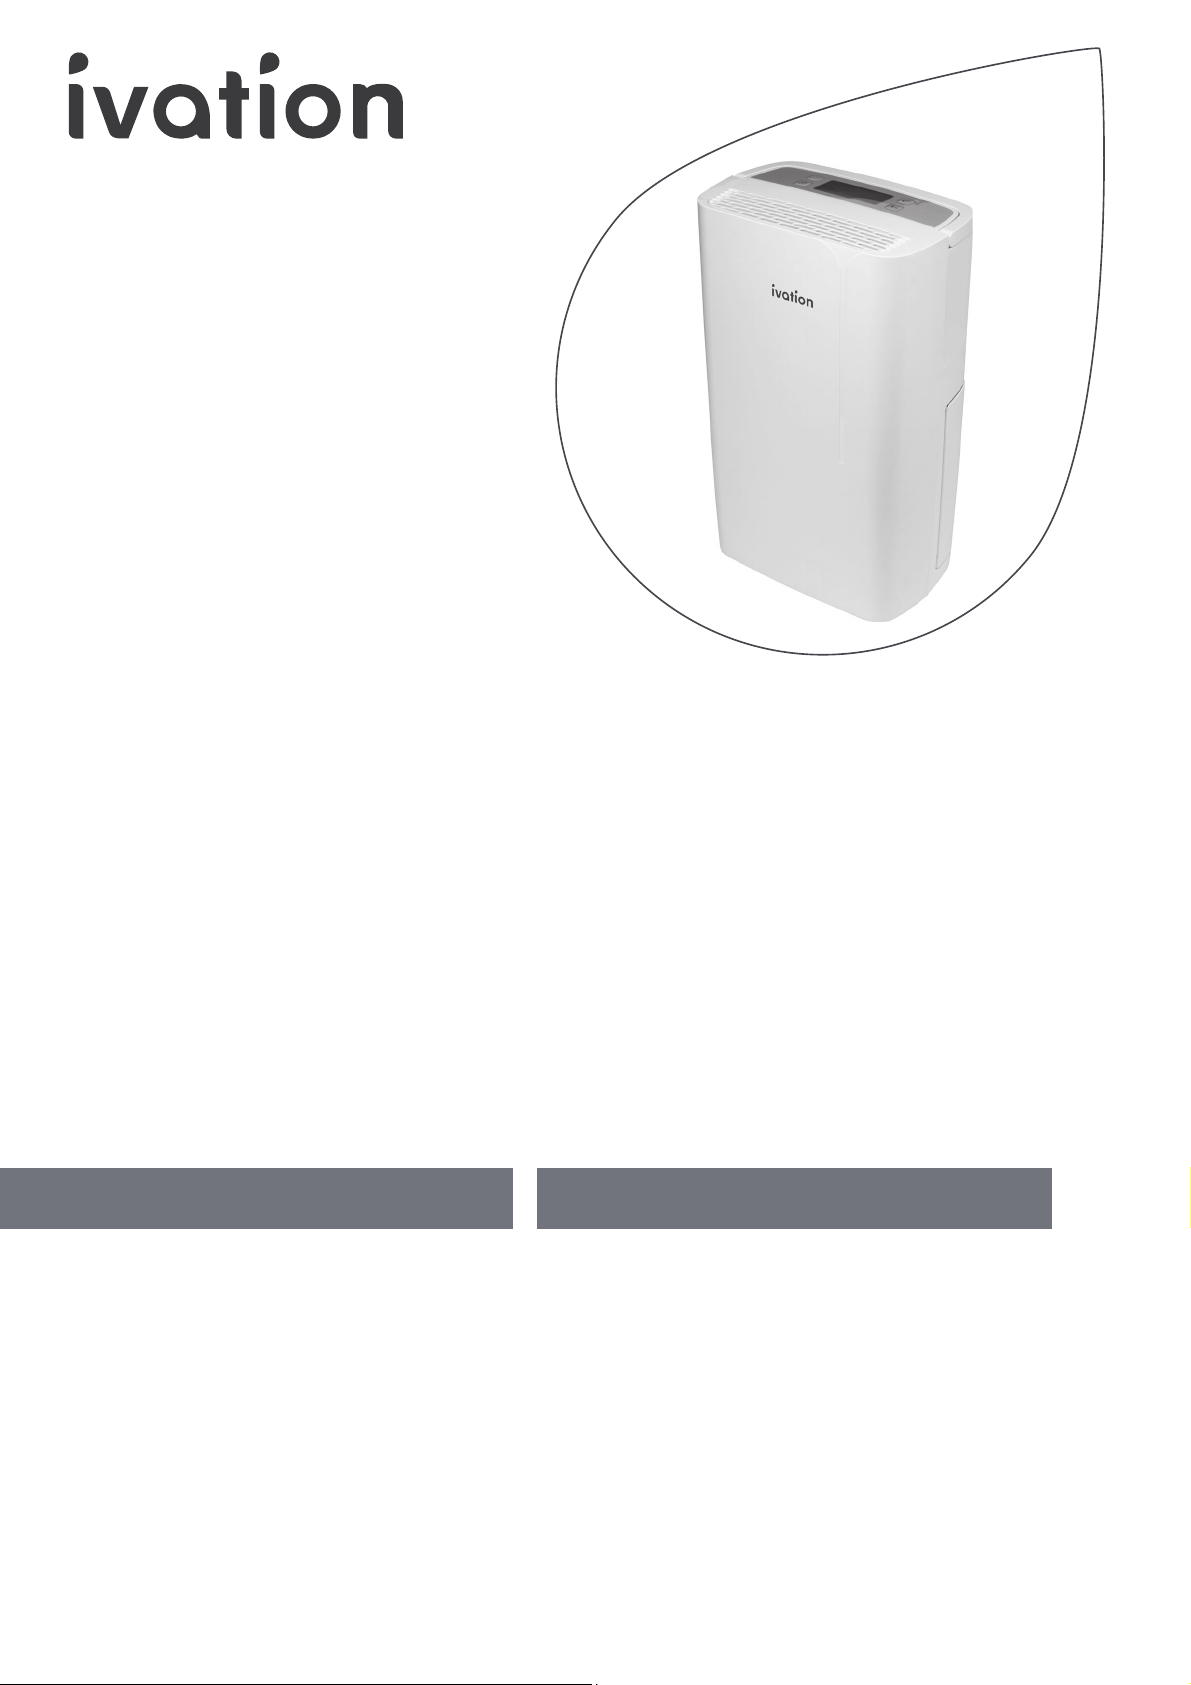
14.7 PINT COMPACT
COMPRESSOR
DEHUMIDIFIER
WITH DRAINAGE HOSE
7 LITER COMPACT
COMPRESSOR
DEHUMIDIFIER
WITH DRAINAGE HOSE
USER GUIDE
USER GUIDE
IVACDEH15P
Thank you for purchasing the Ivation® 14.7 Pint (7 Liter) Compact Compressor Dehumidifier. This User Manual is
intended to provide you with guidelines to ensure that operation of this product is safe and does not pose risk
to the user. Any use that does not conform to the guidelines described in this User Manual may void the limited
warranty.
Please read all directions before using the product and retain this guide for reference. This product is intended
for household use only. It is not intended for commercial use
This product is covered by a limited one-year warranty. Coverage is subject to limits and exclusions. See
warranty for details.
TABLE OF CONTENTS
2 PACKAGE CONTENTS
2 SAFETY PRECAUTIONS
3 SAFE USE REQUIREMENTS
3 PARTS
4 CONTROL PANEL OVERVIEW
4 IMPORTANT NOTES BEFORE USE
5 USING YOUR DEHUMIDIFIER
7 DRAINAGE OPTIONS
8 TROUBLESHOOTING
9 CARE AND MAINTENANCE
10 SPECIFICATIONS
TABLE OF CONTENTS
11 PACKAGE CONTENTS
11 SAFETY PRECAUTIONS
12 SAFE USE REQUIREMENTS
12 PARTS
13 CONTROL PANEL OVERVIEW
13 IMPORTANT NOTES BEFORE USE
14 USING YOUR DEHUMIDIFIER
16 DRAINAGE OPTIONS
17 TROUBLESHOOTING
18 CARE AND MAINTENANCE
19 SPECIFICATIONS

2
PACKAGE CONTENTS
SAFETY PRECAUTIONS
• Before plugging this device in, make sure that the power cord and wattage/voltage of the outlet supplying
power to the unit comply with the recommended wattage/voltage on the rating label.
• Before cleaning, make sure to completely turn o and unplug this appliance.
• Never unplug the power cable without first pressing the button to turn o the dehumidifier. Failure to do so
could damage the unit.
• Never let any hard or heavy objects press into or sit atop the power cord. This could damage the cord, which will
result in electrical shock or a similar safety hazard.
• Never remove the plug from the outlet or attempt to move the dehumidifier by yanking or pulling on the power cord.
• Do not run the power cord under carpeting, nor cover it with rugs or runners. Make sure the cord is moved out of
the way so that no one can trip over it.
• Never use any heating device (space heater, fireplace, etc.) near the dehumidifier.
• Never place anything on top of the dehumidifier, and do not cover it with any kind of material during use.
• Never remove the plug from the power supply or handle any other electrical parts of the dehumidifier with wet hands.
• Never immerse the dehumidifier, plug, or power cable in water, or spray them with liquids.
• Never place the dehumidifier under any wet and/or dripping objects.
• Always make sure the power cable is plugged into a grounded outlet, the plug is undamaged, and the connection
is secure before turning on the appliance.
• Please make sure to disconnect the unit fully from the power supply if you will not be using it for any period of
time. This dehumidifier includes a memory function that stores and remembers any programmed settings when
the unit is unplugged, so your settings will be saved when you plug it back in and resume use.
• Never attempt to repair or disassemble this appliance by yourself for any reason.
• If at any point you notice a device malfunction or abnormal behavior (for example, a burning odor emitting from
the unit), immediately disconnect the product from the power supply and contact Ivation® customer service.
• Never dispose of this product with regular household waste. If you intend to dispose of this product, please contact your
local waste disposal service for information about how to properly dispose of a product of this nature.
• This appliance should not be used by children or persons with reduced physical, sensory, or mental capabilities, or
lack of experience and knowledge, unless they are closely supervised at all times, and/or have received extensive
instruction and training on how to use this device by a person responsible for their safety.
• Young children should always be supervised around this appliance to ensure that they do not play with or climb on it.
• Individuals with disabilities should not attempt to use this device without supervision to avoid risk of injury.
• User maintenance and cleaning should always be conducted with adult supervision. Children should not be
allowed to maintain or clean this device.
• Use of an extension cord is not recommended with this appliance.
• Make sure to install this appliance in accordance with national wiring regulations.
• Check the voltage in your household to ensure it conforms with this dehumidifier’s rated specification (120 V ~
60Hz) before operating the unit.
• If for some reason the power cord becomes damaged, it must be replaced by either Ivation®, an authorized
serviceperson, or a similarly qualified professional as soon as possible. Do not attempt to repair or replace the
power cord on your own.
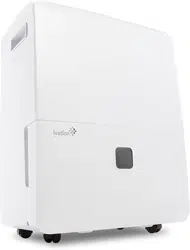
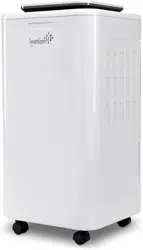
Ivation® 14.7 pint (7 liter) compact compressor dehumidifier and power cable
Water tank
Drainage hose
User manual

SAFE USE REQUIREMENTS
PARTS
• The dehumidifier is only intended for indoor residential use. It should not be used for commercial or industrial
spaces or else it may not perform as intended and could present a safety hazard.
• Always place the dehumidifier on a smooth and level floor in an upright position to avoid any damage.
• When operating, this device will have no eect on adjacent enclosed areas such as closets or pantries, as long as
they remain enclosed. If the door to such an area is left open, the dehumidifier may remove humidity from that
space as well.
• Make sure to place this appliance in an area where the temperature will not fall outside the specified working
range of 41° – 95°F (5° – 35°C) and where the humidity will remain within the specified working range of 30% –
90%. Please note that outside of these ranges the dehumidifier will not function properly, and could present a
safety hazard if you attempt to operate it.
• Always make sure to allow at least 8" (20.3 cm) of air space on the sides and rear of this device, 20" (50.8 cm) in
front of it, and 24" (61 cm) above it.
• Never operate the dehumidifier without the air filter.
• Always empty the water tank before storing the dehumidifier for long periods of time.
• When/if using the dehumidifier to speed up the drying of wet clothes in the room, make sure to keep all clothing
at a safe distance from the dehumidifier to prevent water dripping onto it. Failure to do so could result in electric
shock or fire.
• Please make sure the air inlet is kept clean and free from blockage at all times.
• Never use a dehumidifier in a bathroom.
• Avoid exposure to direct sunlight.
• This dehumidifier has built-in castors on the bottom to aid in its placement. Do not attempt to roll it across carpet
or over objects, or else water could spill out from the bucket and present a safety hazard, or the dehumidifier
could get caught on the objects and malfunction.
3
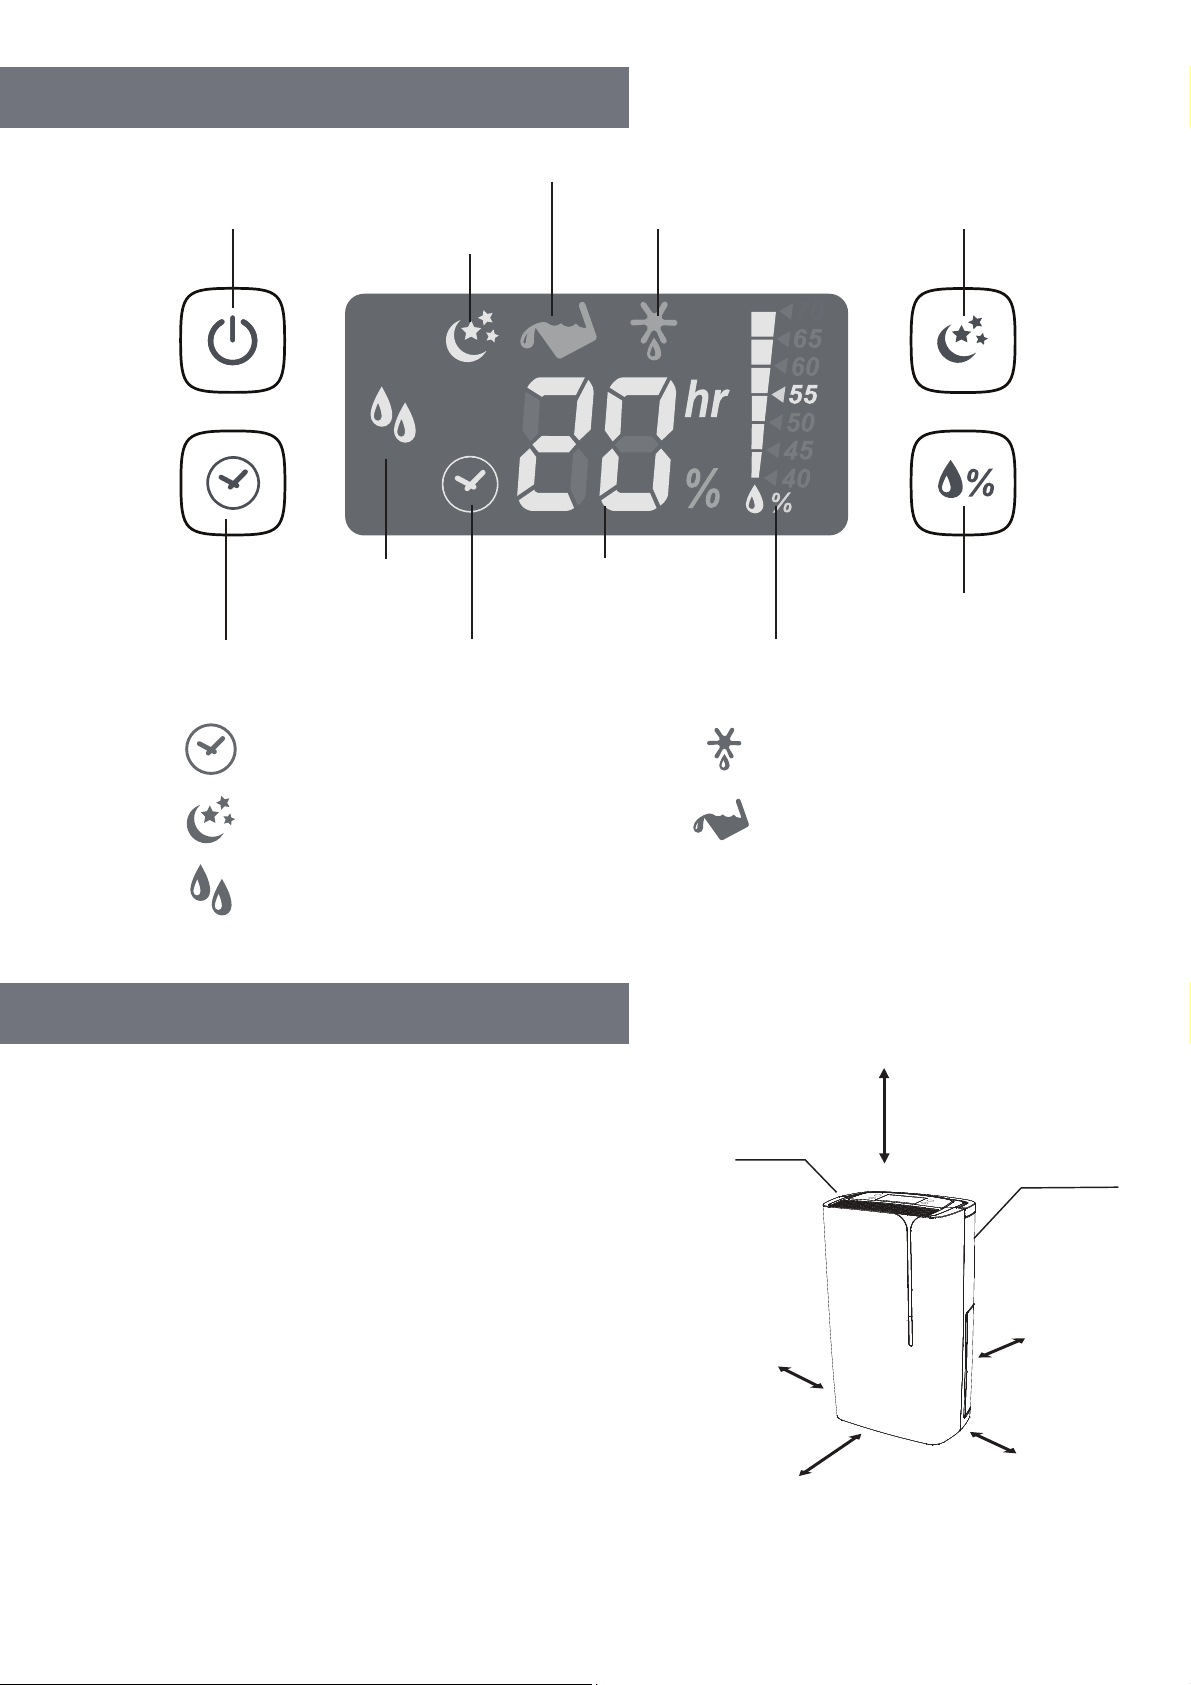
NOTE: For further details about the control panel, please refer to the Control Panel Overview section on page 4.
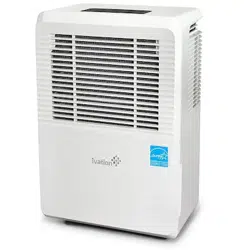
Air outlet
LCD
Control panel
Filter
Handle
Air inlet
Water tank
Continuous drainage hole
4
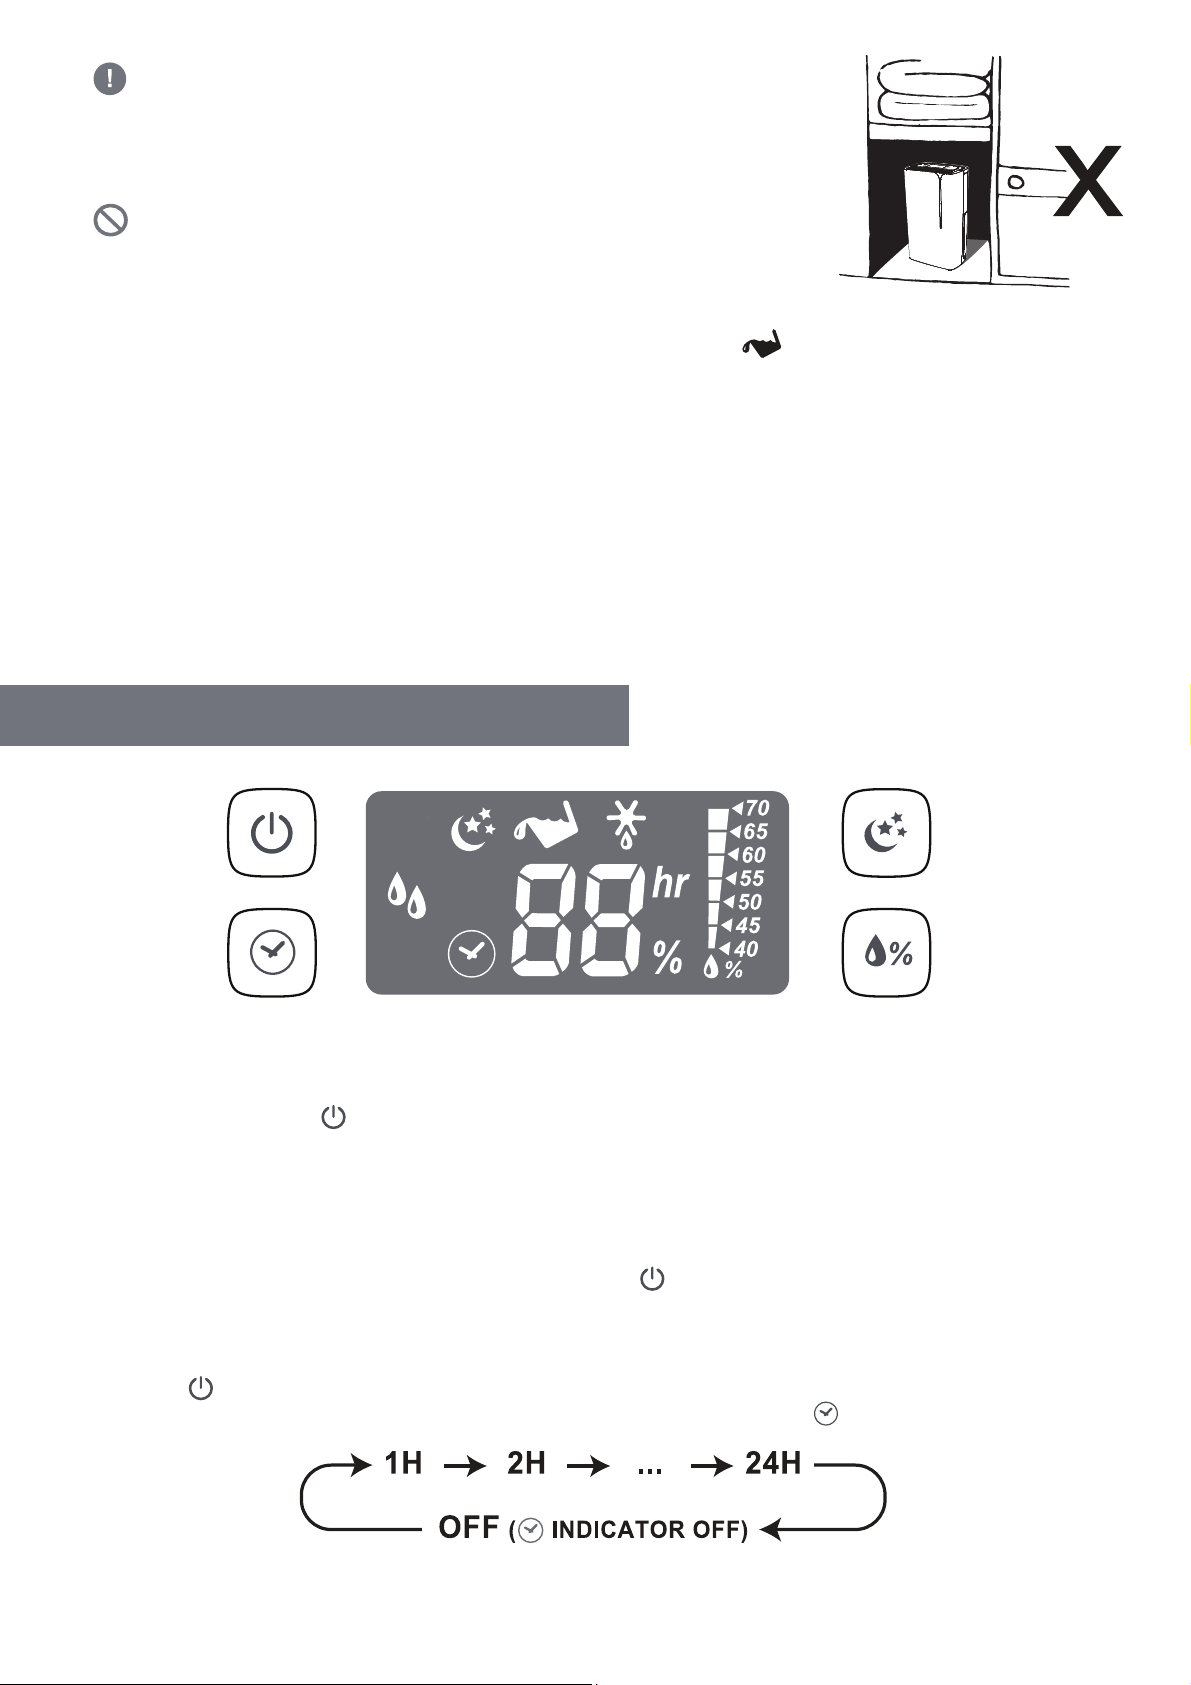
CONTROL PANEL OVERVIEW
IMPORTANT NOTES BEFORE USE
• Please ensure the dehumidifier is a safe distance away
from walls and furniture on all sides, as shown in
the diagram.
• Place the unit in an upright position on a stable, level
surface, making sure that it is not sitting on its own
power cable.
• Ensure clothes are kept at a safe distance of at least
23.6" (60 cm) from the air outlet of the dehumidifier,
to prevent water dripping into the unit.
• For best results, position your dehumidifier somewhere
central, such as a landing or a hallway. As long as other
internal doors are open, the excess moisture from other
rooms in the house will naturally migrate toward the
dehumidifier and be processed.
Power button
Water tank full indicator
Dimming
indicator
Defrost indicator
Backlight dimming
button
Relative Humidity
button
Humidity setting
indicator
Room humidity
setting
indicator
Timer
indicator
Timer button
Dehumidifying
Displays only when timer is set Blinks when defrosting
Blinks when water tank is full
Dehumidifying mode
Displays when LCD backlight is dimmed
At least 24 height clearance
Air outlet
Air inlet
at least 8
at least 8
at least 8
at least 20
(back)
5
USING YOUR DEHUMIDIFIER
• CAUTION: Do not place the dehumidifier in a broom cupboard,
boiler room, or similar small, unventilated rooms. Avoid placing
the dehumidifier in small, confined areas; in close proximity to a
radiator; or close to a similar heat source, such as tumble dryers
and ovens, to prevent the dehumidifier from overheating.
• Do not use this dehumidifier in a dusty or industrial environment,
where particles can get into the unit. This will cause a malfunction and
void your warranty.
• The water bucket must be properly installed and emptied in order
for the dehumidifier to function. If the tank is full or not in place, the icon will start blinking and the
unit will stop running.
• Do not remove the bucket while the unit is in operation. If the bucket needs to be emptied, please make
sure you shut o the unit first. You should not remove it while the unit is running to avoid risk of electrical
shock, water leakage, or other safety hazards.
• All successful button presses on the control panel will be indicated with an auditory “beep” response
as confirmation.
• Do not insert small objects into the unit. This will damage it, cause a hazard, and void your warranty.
• When the power cable is connected, the indicator light above the power button will be lit and the
dehumidifier will beep to confirm it has been connected to a power source.
Powering On & O
1. Plug the power cable into the appropriate electrical outlet.
2. Press the on/o button to turn the unit on. The LCD panel will light up.
3. If the dehumidifier has previously been properly switched o, and you are turning it back on again, it will
resume operating with your previously applied settings for the mode, humidity, and backlight. The timer
setting will be the only one reset.
4. If the power is being restored after a power failure, all settings will be restored, including the timer.
5. To power down the dehumidifier, press the on/o button first, and then unplug the power cable from
the electrical outlet.
Setting the Timer
1. Press the button to set a timer from 1 to 24 hours, or turn it o. The timer will cycle through the times
available in hour increments, from 1-24h, then o. When the timer is o, the icon will switch o.

6
2. After setting the timer, the icon and numbers on the LCD panel will blink for five (5) seconds and then
return to displaying the current humidity level in the room.
3. Press the button once at any time to check the time remaining.
Setting the Humidity
1. Press the button to adjust the humidity level by increments of 5%, or set it to CO (Continuous Mode).
The display will cycle through the available humidity levels, ending with continuous mode.
Dimming the LCD Backlight
1. Press the button to cycle through the dimming options for the LCD backlight, from H (no dimming), to
L5 (slightly dim) through L1 (dimmest), ending with L0 (no backlight).
2. The icon will only light up when the backlight is set between L5 and L0.
Humidity Levels
≥ 60%
50-55%
40-45%
Continuous Mode
Recommendations for Use
Maintaining the room at a comfortable indoor humidity level
Deterring mold and bacteria growth. Ideal for normal daily household use to maintain
humidity at a healthy level. Bacteria and mold are less likely to breed at this RH level.
Preventing condensation (extra-dry mode). Ideal for controlling a very damp room.
Start at this level for the first couple days, and then increase to 50-60% or higher
to conserve energy.
Drying clothes faster (especially in the winter). The unit will continue to remove
humidity from the air regardless of the current humidity level, unless the water tank
is full. We recommend setting a timer in this mode to conserve energy.
NOTES ON HUMIDITY:
• Humidity levels are only available from 40% – 70%. This is a standard feature on the majority of
dehumidifiers. Under 40% humidity is too dry to be comfortable, and over 70% humidity can be
too muggy to be comfortable, and could also cause the device to malfunction or create the risk of
electrical shock.
• The RH level indicated on the LCD panel has a ±10% RH tolerance, and can vary depending on the
ambient room temperature.
• Once the set humidity level has been reached, the unit will pause the dehumidification process to
save energy. See the section on page 7 for information about the auto-pause and restart function.
2. If continuous mode is not selected, the dehumidifier will run and dehumidification will occur once the room
humidity level is detected rising above the selected RH (relative humidity) level.
3. After setting the RH level, the icon and numbers on the LCD panel will blink for five (5) seconds and then
return to displaying the current humidity level in the room.
7
Auto Pause & Restart Function
Once the set humidity level has been reached, the unit will pause the dehumidification process for 60 minutes,
to conserve energy. After 60 minutes, the unit will run on fan mode for five (5) minutes to monitor the humidity
level in the room. If the humidity level in the room increases by 5% or more during the time that the dehumidifier
is paused or running on fan mode, the unit will start dehumidifying again.
If the humidity level in the room does not increase during this time, the dehumidifier will repeat the 60-minute
pause and 5-minute fan cycle until the unit detects an increase in humidity level.
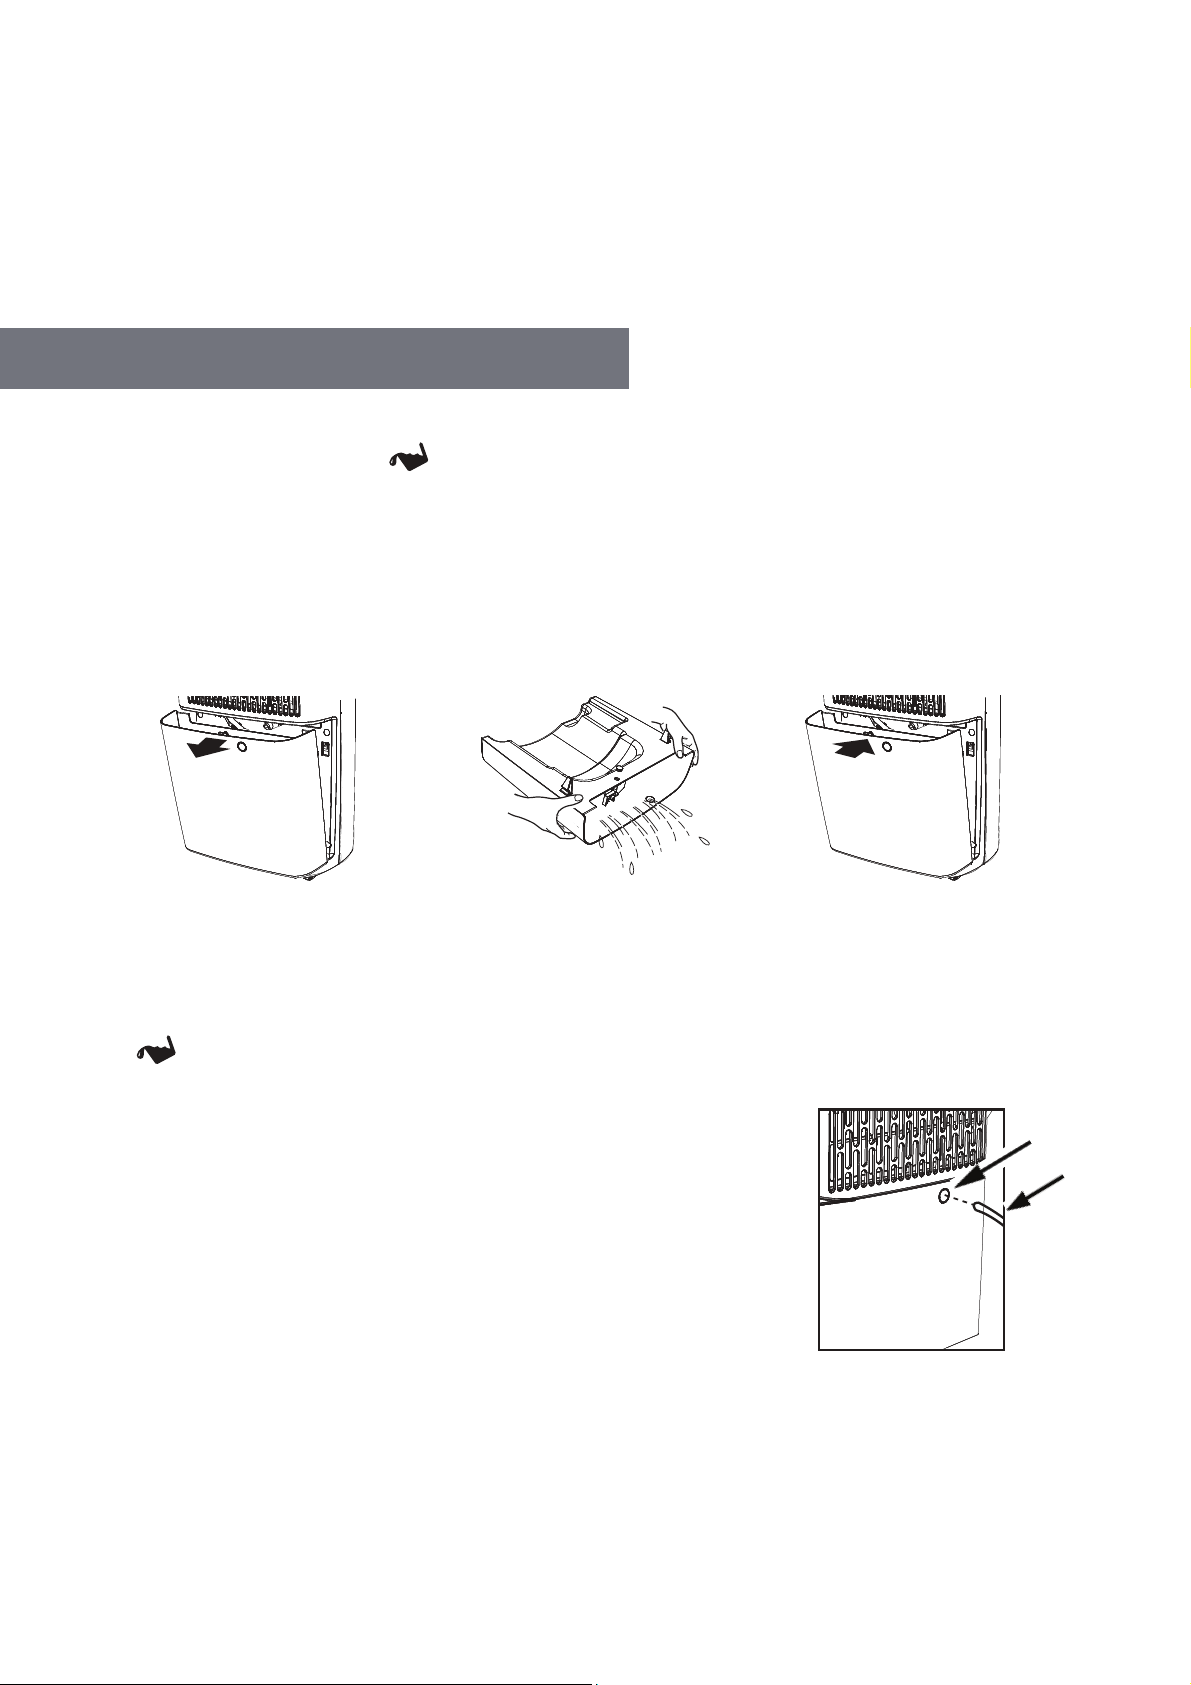
Option 1: Manually Emptying the Water Tank
1. Once the water tank is full, the icon light will blink and the dehumidifier will stop running.
2. Never move the unit or remove the water tank while the dehumidifier is running, as water may leak, damage
the unit, or cause an electric shock hazard.
3. Hold the handles on both sides of the water tank and gently lift it toward you. Please make sure to do this
slowly and carefully because water may slosh onto the floor or the unit itself.
4. Empty the water (into a drain) and then clean the water tank.
5. Once the bucket is emptied and cleaned, replace it as normal into the dehumidifier
NOTE:
• Use clean water to clean the tank as needed. Do not use detergent, solvents, abrasives, or hot water, in order
to avoid damaging the dehumidifier.
• Do not remove or damage the float in the water tank, or else the unit will not work correctly.
• The icon will blink if the water tank is not properly repositioned in the unit.
Option 2: Continuous Hose Drainage
1. A hose is included in the box; however you can also use your own hose,
if the provided hose is not long enough. The hose should have an inner
diameter of 0.47" (12 mm).
2. Use a screwdriver to remove the knockout hole at the rear of the unit
(on the tank).
3. Attach the hose through the hole to the connector.
4. Make sure that the drainage hose you have installed is aimed downward.
Feed the other end of the hose into a floor drain and then cover the
hole with a lid so the water will run straight into the drain and not spill.
Please note that the hose should not be pressed, twisted, or run up an incline, or else the water will not
drain properly.
NOTE:
• Ensure the water tank is properly fitted into position before you insert the hose.
• Make sure to disconnect the hose prior to removing the water tank.
DRAINAGE OPTIONS
Knockout
Hose
8
TROUBLESHOOTING
The following symptoms are normal and do not merit concern:
1. The compressor will stop, or rest, for three (3) minutes every time the dehumidifier shuts down, as well as
every time it is plugged in to the electrical outlet. This ensures a smooth start for the dehumidifier.
2. The unit will only work within the ambient room temperature range of 41~95°F (5~35°C). It may cease
operation when the room temperature is outside of this range, or when the air inlet/outlet are covered.
3. During normal operation, it is possible for the dehumidifier to increase the room temperature by as much
as 34~37°F.
If your dehumidifier is not functioning as expected, please refer to this table first. If these solutions do not
resolve your issue, contact Ivation Customer Care. Do not try to repair the unit yourself, as this could cause an
electrical shock hazard and void your warranty.
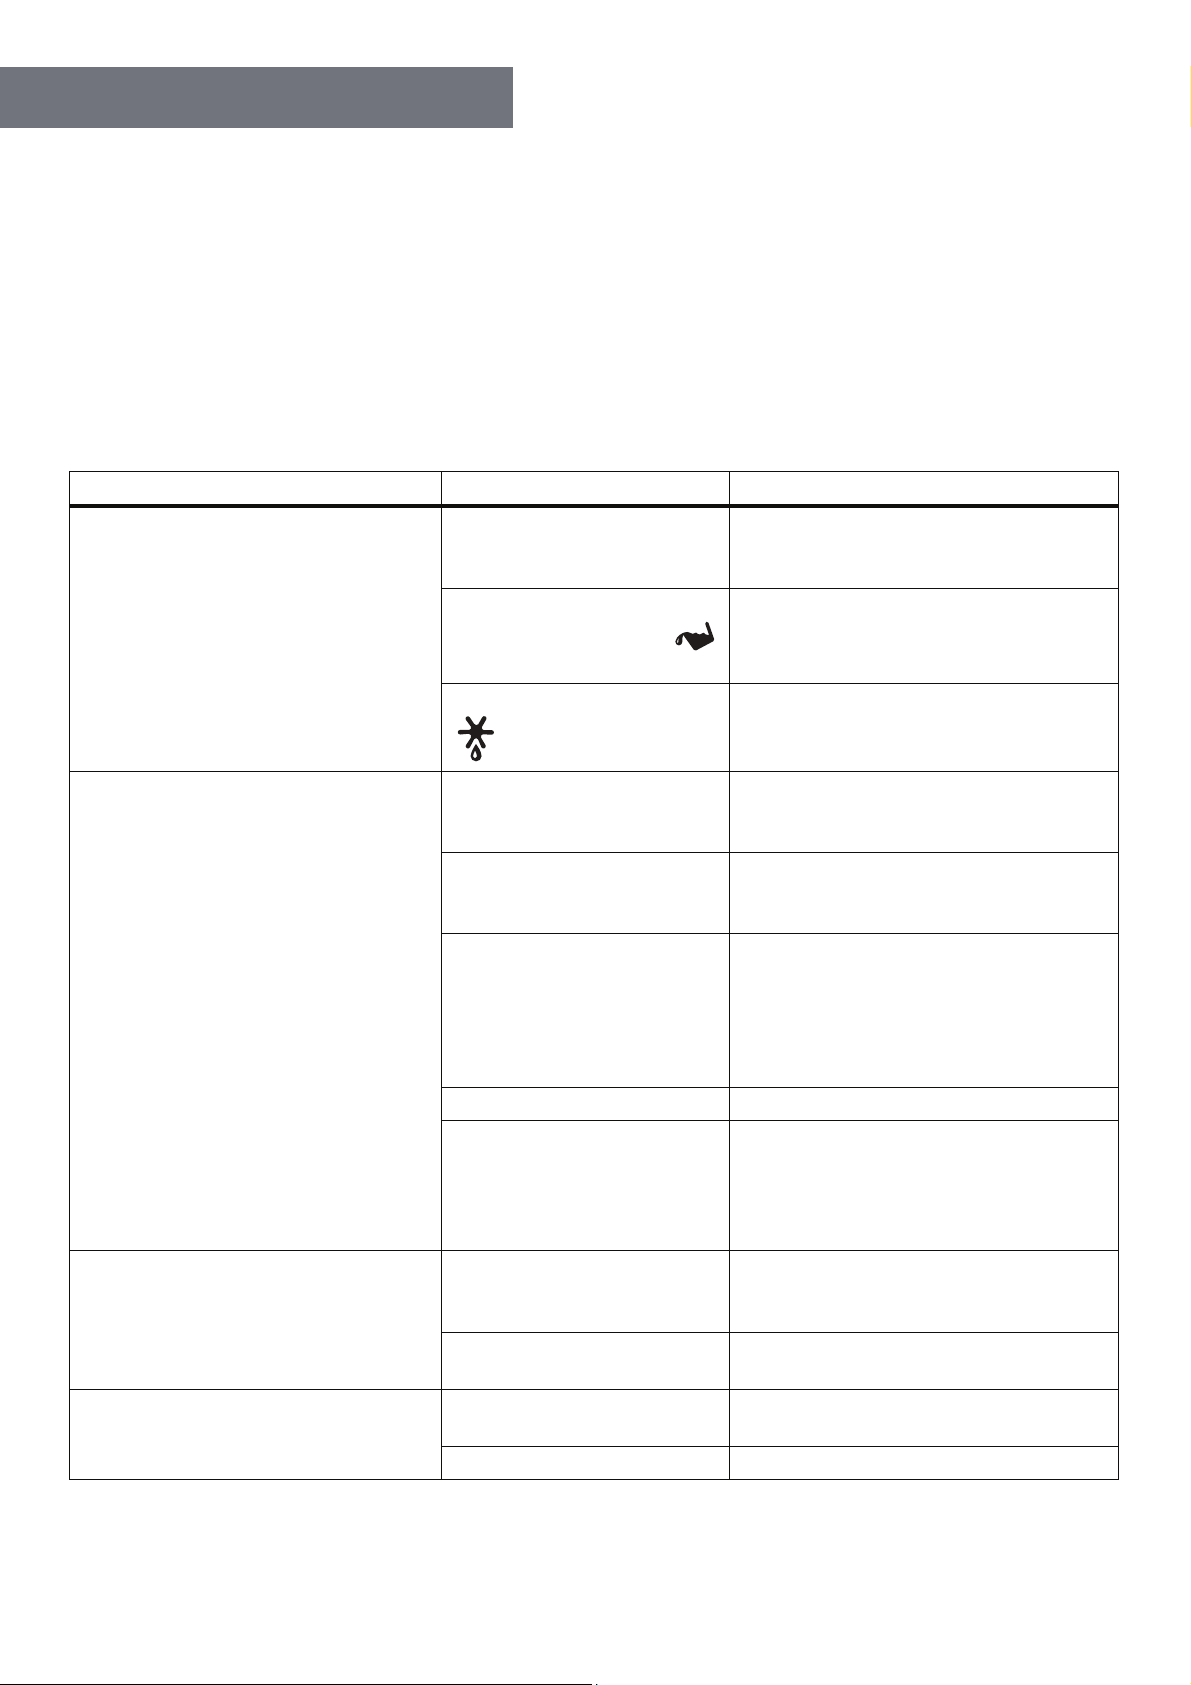
Symptoms Possible Causes Probable Solution
Dehumidifier not operating
The unit is unplugged
Make sure the plug is pushed completely
into the electrical outlet, and that there is
power being supplied to the outlet.
The water tank is full, or not
positioned properly (the
icon is blinking)
Empty the water tank, check to make
sure the float is in position, and replace it
correctly.
The unit is defrosting (the
icon is blinking)
This is normal, and the unit will restart as
soon as it has finished defrosting.
Very little water is being collected
Humidity in the room has
reached the set level
This is normal, but you can choose a
lower humidity setting (e.g., 40%) for
drier air.
Ambient temperature is too
low, causing the unit to
defrost often
This is normal if the temperature is too
low. Consider waiting for the room to
warm up before using the dehumidifier.
Ambient temperature is too
high, causing the unit to
overheat
This is normal if the temperature is too
high. Do not use the unit in small,
enclosed spaces, or in rooms where the
ambient temperature is high. Move the
unit to a cooler spot and wait at least ten
(10) minutes before resuming operation.
Air filter is dirty Clean the air filter.
The air inlet/outlet is covered
Ensure nothing is obstructing the air
inlets and outlets, and that the unit is
correctly set up. (Refer to Important
Notes Before Use on page 4)
Unit is leaking
The unit is not level
Ensure that the dehumidifier is placed on
a level surface, and not accidentally
sitting on a cable, etc.
Drainage is clogged or loose
Check the drainage hose and its
connection.
Unit is noisy
Unit is not on a flat, level
surface
Move and then restart the unit.
Air filter is dirty Clean the air filter.
9
CARE AND MAINTENANCE
WARNINGS:
• Before cleaning, turn o the dehumidifier and disconnect it from the power supply. If you do not do this, you
could create the risk of electrical shock or other safety hazards.
• Do not wash the dehumidifier with water or submerge the unit in water at any time. This could cause electrical
shock or even a fire.
• Do not use harsh detergents to clean the dehumidifier at any time or else it will strip the paint and damage the
unit’s appearance.
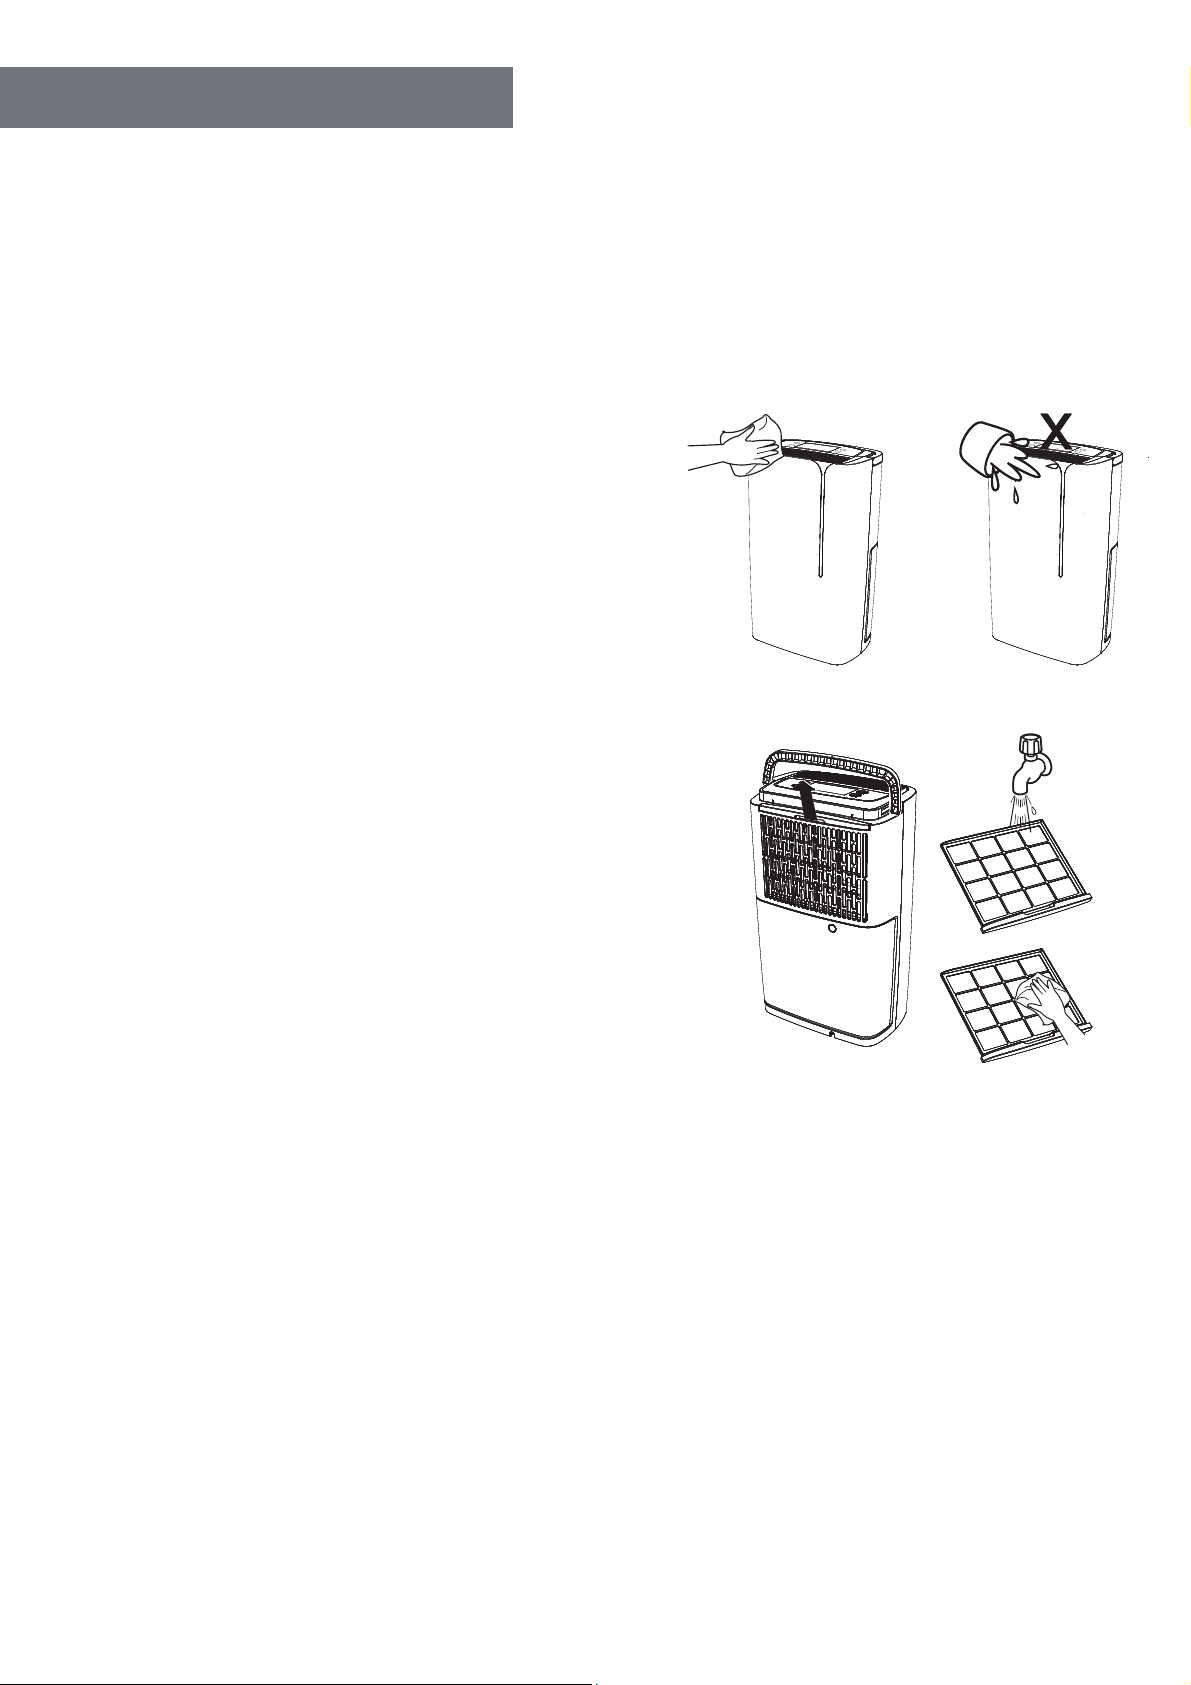
Caring for the Outer Casing
• Make sure the unit is turned o. Wait for the fan to stop, and
then unplug it from the outlet.
• Use a soft towel that is damp—NOT wet—with warm water
and mild detergent to clean the casing. Do not use solvents
or abrasive materials.
• Use a soft, dry towel to thoroughly dry the unit after cleaning.
• In order to avoid damage, do not wash the unit with water or
let water drip into the air inlet or outlet.
• To clean the air intake vent, you should use a dust catcher or
gentle brush.
Caring for the Air Filter
• Check the filter periodically to ensure any dust is removed that
could cause airflow or performance issues. We generally
recommend cleaning the air filter every month. If you are using
the dehumidifier in a location where dust accumulates more
quickly, you will need to clean the air filter more often.
• To remove the air filter, first turn the unit o and unplug the
power cable from the outlet. Then, reach inside the opening
at the rear of the unit, grasp the top plastic edge of the air filter,
and pull straight up to remove it.
• Use warm soapy water to wash and wipe down the air filter,
making sure to rinse it and allow it to air-dry before replacing
it in the dehumidifier.
WARNINGS:
• Do not attempt to operate the dehumidifier without the filter, or else dust will accumulate on the evaporator and this
will aect the unit’s performance.
• Do not dry the air filter with fire or an electric hair-dryer, otherwise the filter could become misshapen or catch on fire.
• Do not use a dust catcher or brush to clean the air filter, as these can permanently damage the filter.
Before Use (Seasonally)
• Check to make sure the air outlet is not blocked.
• Check to make sure the power plug and power socket are in good condition.
• Check to make sure the air filter is clean.
• Check to make sure the drain hose is not damaged.
After Use (Seasonally)
• Disconnect power.

10
IVATION is a trademark of C&A IP Holdings, LLC, in the U.S, Canada, and the EU.
All other products, brand names, company names, and logos are trademarks of their respective owners, used merely
to identify their respective products, and are not meant to connote any sponsorship, endorsement, or approval.
Distributed by C&A Marketing, Inc., 114 Tived Lane East, Edison, NJ 08837. Made in China.
© 2019. C&A IP Holdings, LLC. All Rights Reserved.
QUESTIONS OR PROBLEMS? CONTACT US!
info@myivation.com | 1-866-849-3049
SPECIFICATIONS
• Rated Voltage: 120V
• Rated Frequency: 60Hz
• Rated Dehumidification Capacity: 14.7 pints/day (7 L/day)
• Power Consumption: ~200W
• Water Tank Capacity: 3.8 pints (1.8 L)
• Set Humidity Range: 40% – 70%
• Dimensions: 10.9 W x 7.1 D x 18.3 H (27.7 x 18 x 46.5 cm)
• Net Weight: 21.8 lb. (9.89 kg)
• Clean air filter and outer casing.
• Clean the dust and any obstacles from the dehumidifier.
• Empty the water bucket and clean it. Allow it to drain for approximately 24 hours.
Seasonal Storage Instructions
If you intend to put your dehumidifier in storage for the season, or simply plan on not using it for an extended period
of time, we recommend you take the following steps:
• Make sure the water bucket is emptied and dry, and the drainage hose is removed.
• Unplug the dehumidifier and store the power cable safely.
• Clean the unit and wrap it up so that dust will not accumulate in the filters, air vents, etc.
• Store the unit upright in a cool, dry place. Do not expose it to direct sunlight.