Loading ...
Loading ...
Loading ...

GB
Owner’s manual
•
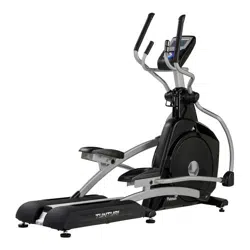
PLATINUM PRO
5
Electrical safety
(only for equipment with electric power)
• Before use, always check that the
mains voltage is the same as the
voltage on the rating plate of the
equipment.
• Do not use an extension cable.
• Keep the mains cable away from
heat, oil and sharp edges.
• Do not alter or modify the mains
cable or the mains plug.
• Do not use the equipment if the
mains cable or the mains plug is
damaged or defective. If the mains
cable or the mains plug is damaged
or defective, contact your dealer.
• Always fully unwind the mains cable.
• Do not run the mains cable
underneath the equipment. Do not
run the mains cable underneath a
carpet. Do not place any objects on
the mains cable.
• Make sure that the mains cable does
not hang over the edge of a table.
Make sure that the mains cable
cannot be caught accidentally or
tripped over.
• Do not leave the equipment
unattended when the mains plug is
inserted into the wall socket.
• Do not pull the mains cable to
remove the mains plug from the wall
socket.
• Remove the mains plug from the
wall socket when the equipment
is not in use, before assembly or
disassembly and before cleaning and
maintenance.
SAVE THIS INSTRUCTION MANUAL
Assembly
Step 1:
Rear Rail and Pedal Tube Assembly
1. Slide the rail assembly (2) under the
rear support tube of the main body.
Bolt the two together with two 3/8”
x 2-1/4” bolts (97) and 3/8” washers
(100) from the top of the tube, and
four 3/8” x 3-3/4” bolts (98) and 3/8”
curved washers (99) through the front
of the support tube. Make sure all six
bolts are tightened very securely.
2. Attach the two foot pedals (52 left &
53 right) to the pedal mounting plates
with eight M5 x10mm Phillips head
screws (112).
3. Assemble the inner pedal tube
assemblies (5 & 6) to the crank
axles of the main body. The bearings
in the pedal tubes should slide
onto the axles, do not force them
because damage to the bearings can
occur. The pedal tubes have been
previously assembled at the factory
to assure the correct fit. Secure the
pedal tubes with two 5/16” x 18mm
bolts (111) and 5/16” washers (84).
4. Install the two covers (50 right, 49
left) over the pedal tube connection
at the axle with two M6 x 15mm
Phillips head screws (94). Install the
two roller covers (54) with four M5 x
12mm Phillips head screws (77).
Loading ...
Loading ...
Loading ...