Loading ...
Loading ...
Loading ...
6 7
• Input Voltage: AC100~240V
• Frequency: 50~60Hz
• Output Voltage: DC12V
• Rated Power: 4W
• Coverage Area: 40 sq.ft. (3.75 sq. meters)
• Appliance Size: 6.7 in x 6.7 in x 8 in (170mm X 170mm X 205mm)
• Appliance Weight: 2.4 lbs (1.1 kg)
1. Connect the power supply
Insert the output end of supplied adapter into the connector on the bottom of the appliance
(see Figure 1). Make sure the lter and the bottom cap are fully assembled, then put the
appliance on a at surface. After that, plug the adapter into a power outlet.
WARNING
To ensure safe operation of the appliance, always use the supplied adapter to avoid any
accident or injury. If the supplied adapter is damaged or lost, please contact
2. Turn on/off and seings
Once the appliance is plugged in, the LED indicator light around the power button will turn
red indicating you are in “standby” mode.
Press the “power button” to turn the appliance to low speed (the indicator LED surrounding
the power button will turn light blue in color).
Press the “power button” again to turn the appliance to high speed (the indicator LED
surrounding the power button will turn dark blue in color).
Press the power button again to turn the appliance off.
WARNING
If the appliance is not being used, please turn off the appliance and unplug it from the
power outlet to avoid damage.
3. Ion function
The ion generator inside the appliance provides millions of ions and turns on automatically
when the appliance is on. The ion generator turns off when the appliance is on “standby”
mode or turned off.
4. Change Filter Indicator
The “change lter” indicator light will ash each time the lter needs to be replaced.
SPECIFICATIONS
How to Use Your Appliance
Get to Know Your Appliance
Always make sure the appliance is turned off and unplugged before cleaning.
Follow the steps below to change the lter in your appliance:
Cleaning and Maintenance
You can use vacuum cleaner to clean the surface of lter every 4 weeks use to extend the life time
of lter. More frequent cleaning will be necessary if the unit is located in an area with a high level of
airborne contaminants (excessive amounts of smoke, pet dander, etc.).
We suggest to replace the lter at least 6 months of use or replace once the reminding indicator on
the top panel is ashing to keep the efcient working of the air purier.
Exposing the air purier to candle/oil/replace soot and smoke is not recommended and will
require more frequent cleaning.
ATTENTION: Do not use water or any household cleaners or detergents to clean the Filter.
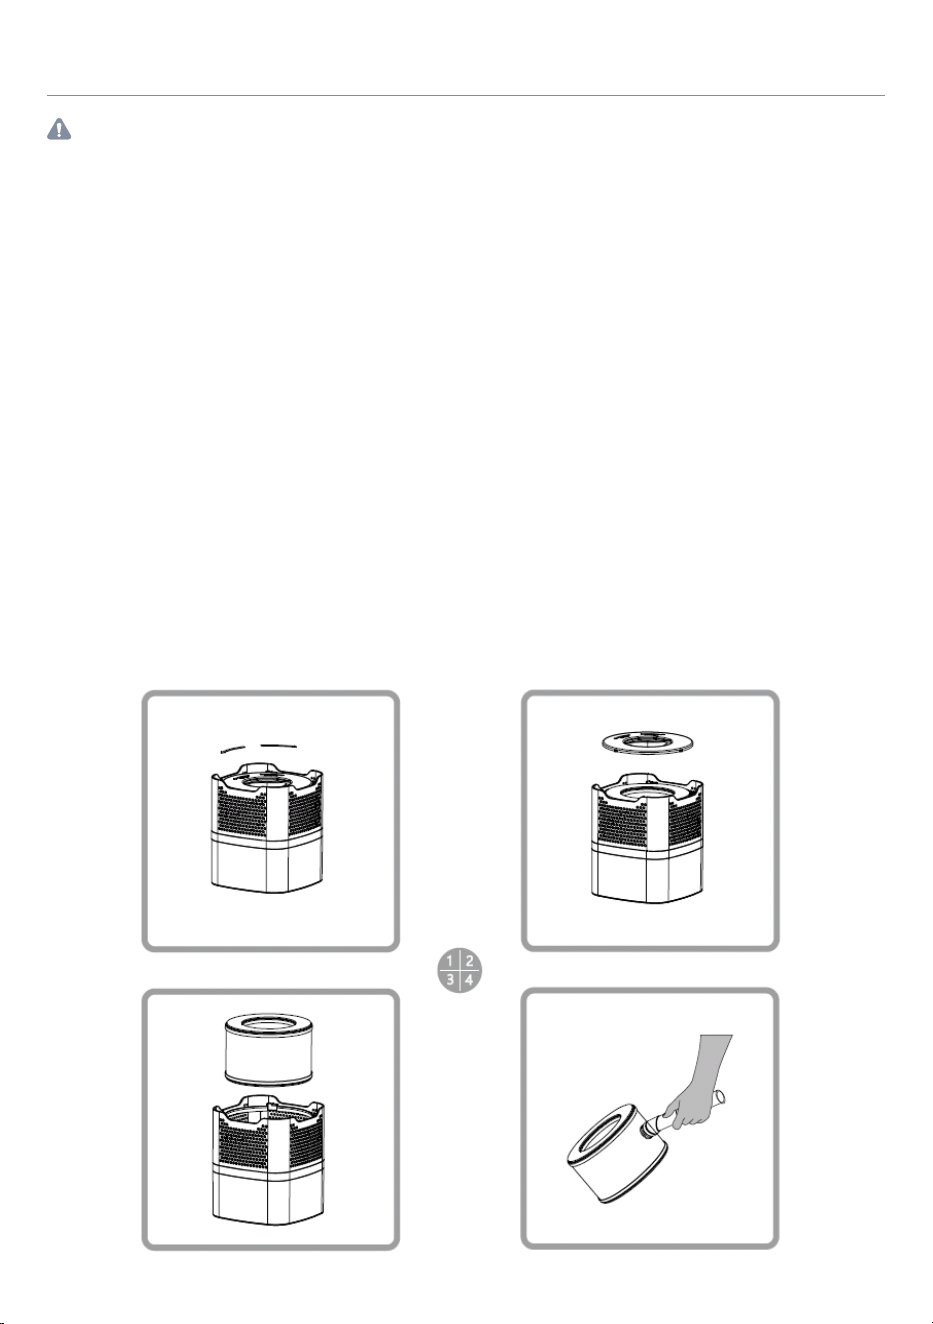
1. Clean the lter
• Rotate the bottom cap anticlockwise to the opening and take detach the bottom cap
(see picture 1).
• Take out the Filter according to the direction as picture 2 and picture 3.
• To clean the Filter, use the brush or crevice attachment with a vacuum cleaner. Run the
attachment along the inlet and outlet side of the lter, cleaning between the crevices as
much as possible. Do not use water or any household cleaners or detergents to clean
the Filter.
• Once the Filter has been cleaned and checked for any possible damage, replace the
lter back in the reverse direction described here. And rotate it clockwise till you can
hear a click, the cap is closed.
WARNING
Loading ...
Loading ...
Loading ...