Loading ...
Loading ...
Loading ...
12 13
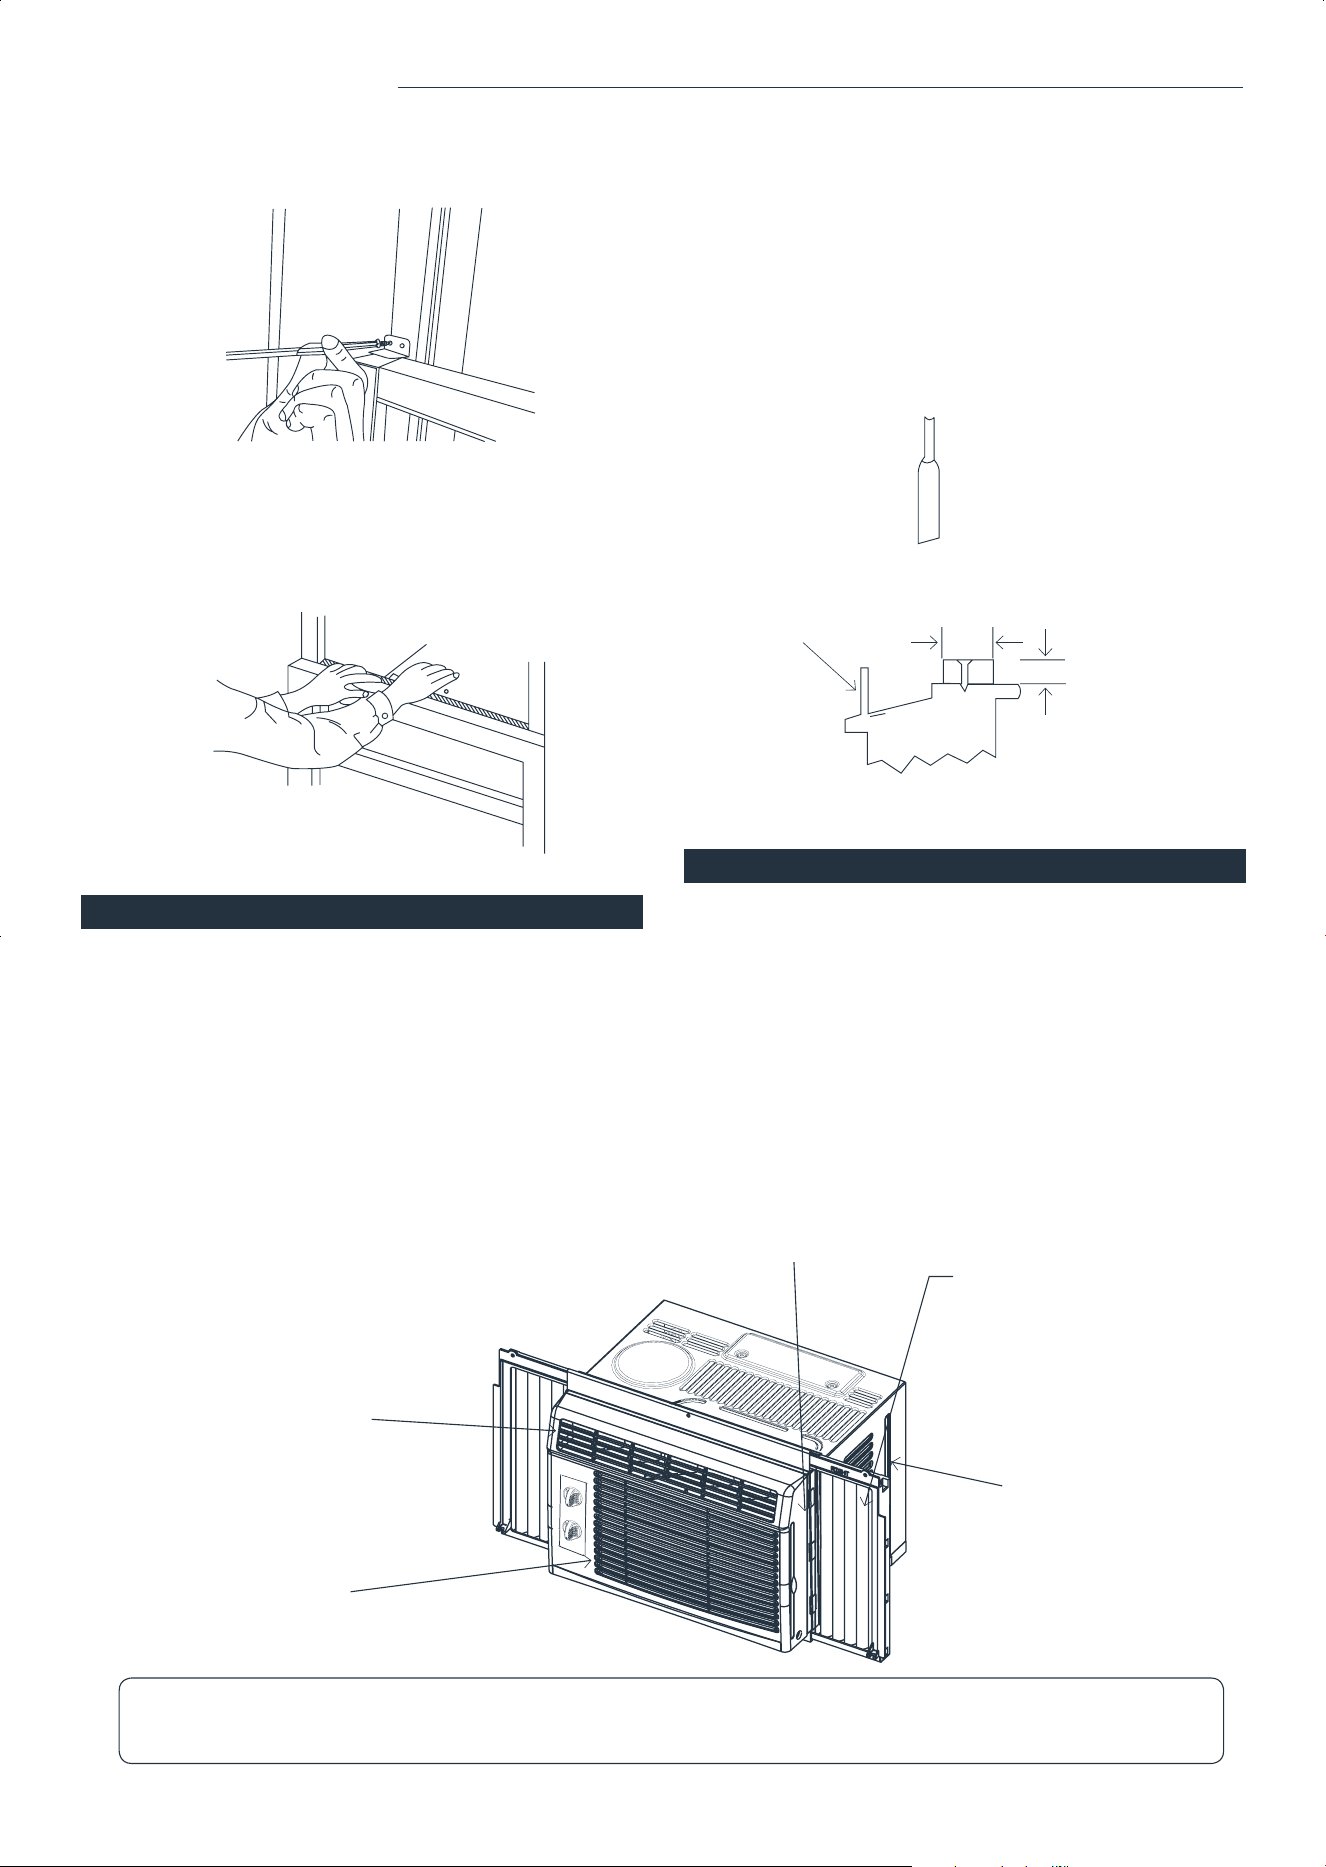
IF A/C IS BLOCKED BY STORM WINDOW
C. To secure lower sash in place, attach right angle
sash lock with 3/4” or 1/2” screw as shown (Fig. 9).
Fig. 9
D. Cut Window sash seal foam and insert it in the
space between the upper and lower sashes (Fig. 10).
Fig. 10
Add wood as shown in Fig. 11, or remove storm window
before air conditioner is installed.
If Storm Window Frame must remain, be sure the
drain holes or slots are not caulked or painted shut.
Accumulated Rain Water or Condensation must be allowed
to drain out.
Removing AC From Window
• Turn AC off, and disconnect power cord.
• Remove sash seal from between windows, and unscrew
safety sash lock.
• Remove screws installed through frame and frame-lock.
• Close (slide) side panels into frame.
• Keeping a rm grip on air conditioner, raise sash and
carefully remove.
• Be carefully not to spill any remaining water while lifting
unit from window. Store parts WITH air conditioner.
Fi
g
. 11
SASH
1-1/2” min
(38mm)
Storm window
frame or other
obstruction.
Board thickness
as required, for
proper pitch to
rear, along entir
e
sill. Fasten with
nails or screws.
- Once installation is completed, keep A/C in upright
position for 24 hours before initial power up.
- Turn on the A/C. Start with low fan, then high fan and low
cool with 10 minute intervals.
- Set thermostat to maximum when at low cool and keep
it for 30 minutes, then shift from low cool to high cool.
- Observe if cooling properly and call customer service for
any issue.
Installation Instructions
FOAM SEAL
Unit may vibrate and make
noise because of poor wall or
window construction or incorrect
installation.
HIGH PITCHED CHATTER
High efciency compressors may have
a high-pitched chatter during the
cooling cycle.
SOUND OF RUSHING AIR
At the front of the unit, you may
hear the sound of rushing air being
moved by the fan.
GURGLE / HISS
“Gurgling or hissing” noise may be
heard due to refrigerant passing
through evaporator during normal
operation.
PINGING OR SWITCHING
Droplets of water hitting
condenser during normal
operation may cause “pinging or
switching” sounds.
Note: All the illustrations in this manual are for explanation purpose only. Your air conditioner may be
slightly different. The actual shape shall prevail.
AFTER INSTALLATION
Air Conditioner Features
Air Directional Louvers
WARNING: To reduce the risk of re, electric shock,
or injury to persons, read the IMPORTANT SAFETY
INSTRUCTIONS before operating this appliance.
The levers will allow you to direct the air ow Left
or Right throughout the room as needed.
Move the levers from side to side until the desired
Left/Right direction is obtained.
Please always wait 3 minutes when turning unit off
then on again, and when changing from cool to fan
and back to cool. This prevents compressor from
overheating and possible circuit breaker tripping.
CAUTION
To begin operating the air conditioner, follow these steps:
1. Set the thermostat to the highest number (coldest or
cooler setting).
2. Set the selector control to the highest COOL setting.
3. Adjust the louver for comfortable airow (see Air
Directional Louvers).
4. Once the room has cooled, adjust the thermostat to
the setting you nd most comfortable.
5. Make sure that the airow inside and outside are not
obstructed by anything.
COOL MODE
FAN MODE
THERMOSTAT
The desired cool setting is selected by rotating the knob to the right to the
appropriate location.
HI COOL has maximum cooling effect and airow.
LOW COOL has minimum cooling effect and airow.
Rotate the knob to the left to select your choice of fan speeds for air circulation.
The thermostat is used to set the desired room temperature when the unit is
being operated in the COOL MODE.
To set the desired room temperature, rotate the thermostat switch to the desired
setting. After the set temperature is achieved, the thermostat will automatically
start and stop the compressor in order to maintain the desired set temperature.
Rotate the thermostat selector clockwise for higher cool settings. Higher
cool settings will provide a lower room temperature. Rotate the thermostat
selector counter clockwise for lower cool settings. Lower cool settings will
provide a higher room temperature.
Note: When selecting a fan speed, the compressor will not run.
Air Direction
Lever
Unit Control
Loading ...
Loading ...
Loading ...