Loading ...
Loading ...
Loading ...
07-01913L F515 5 Legend Brands Products, Inc.
BEFORE MOVING THE UNIT
To reduce the possibility of drips when moving the
unit, follow these additional steps to ensure that all
water is removed from the unit.
NOTICE: To ensure all water is removed from the dehu-
midifier, the unit will complete the defrost cycle even if
the unit is turned off. If the unit is unplugged during the
defrost cycle, excessive water may accumulate in the
unit and may drip out when you move the unit.
NOTICE: To ensure the condensate tank empties com-
pletely while purging, make sure the unit is placed up-
right on a horizontal surface.
1. If the unit is in a defrost cycle, wait until the unit
has returned to normal operating mode before pro-
ceeding. To check, review the control panel. The
control panel will show one of the following:
Defrost in progress:
UNIT ON 00 HRS
DEFROST XX
Display mode when unit is in defrost mode. XX indicates
the seconds remaining on the defrost cycle.
Shutdown sequence
WAIT FOR
DEFROST XX
Display mode when unit in defrost and unit is powered
down (shut off by user). Unit will complete the defrost cy-
cle to remove any built-up ice then purge the pump. XX
indicates the seconds remaining on the defrost cycle.
Drying sequence
WAIT FOR
UNIT DRYING XX
Display mode when unit not in defrost and unit is pow-
ered down (shut off by user). Unit will complete the 5 mi-
nute drying cycle then purge the pump. XX indicates the
seconds remaining on the drying cycle.
Normal display:
UNIT ON 00 HRS
INLET XX° C
Wait until the control shows the normal display before
proceeding.
2. Gently rock the machine to ensure any water re-
maining on interior surfaces falls into the sump area.
3. Press the PURGE key. When the purge cycle is
complete, turn the unit off.
4. Remove the external drain hose, drain it carefully,
coil it and secure it with one of the straps provided
on the side of the unit.
5. Remove the power cord, coil it neatly, and secure
it with one of the straps provided.
TRANSPORTATION AND STORAGE
NOTICE: Always remove power cord before moving,
transporting, or storing the unit.
NOTICE: Handle the unit carefully. Do not drop, throw,
or place the unit where it could fall. Rough treatment can
damage this equipment and may create a hazardous
condition or void warranty.
• Do not expose the control panel to moisture, snow
or rain.
• Protect from freezing.
• Store and transport securely to avoid any damaging
impact to internal parts.
• Secure during transport to prevent sliding and possi-
ble injury to vehicle occupants.
MAINTENANCE SCHEDULE
WARNING! ELECTRIC SHOCK HAZARD. Unplug unit
before cleaning or servicing.
WARNING: Risk of dust and contaminants exposure.
Use of respirator mask and gloves is recommended. If
unit has been exposed to potentially dangerous contami-
nants, clean thoroughly and sanitize before reuse.
NOTICE: The unit is fitted with sensitive electronic sen-
sors. Protect the sensors and their lead wires from dam-
age and do not expose them to water or cleaning solu-
tion.
The following tools and supplies are needed to com-
plete the maintenance procedures described in this
manual:
Philips screwdriver
10 mm wrench
6 mm hex bit
¼ in. nut driver
Cleaning cloths
HEPA vacuum cleaner with soft brush nozzle and
crevice nozzle.
Recommended
Cordless drill, small knife, small-jaw pliers, coil clean-
ing solution, rotomolded housing cleaning solution.
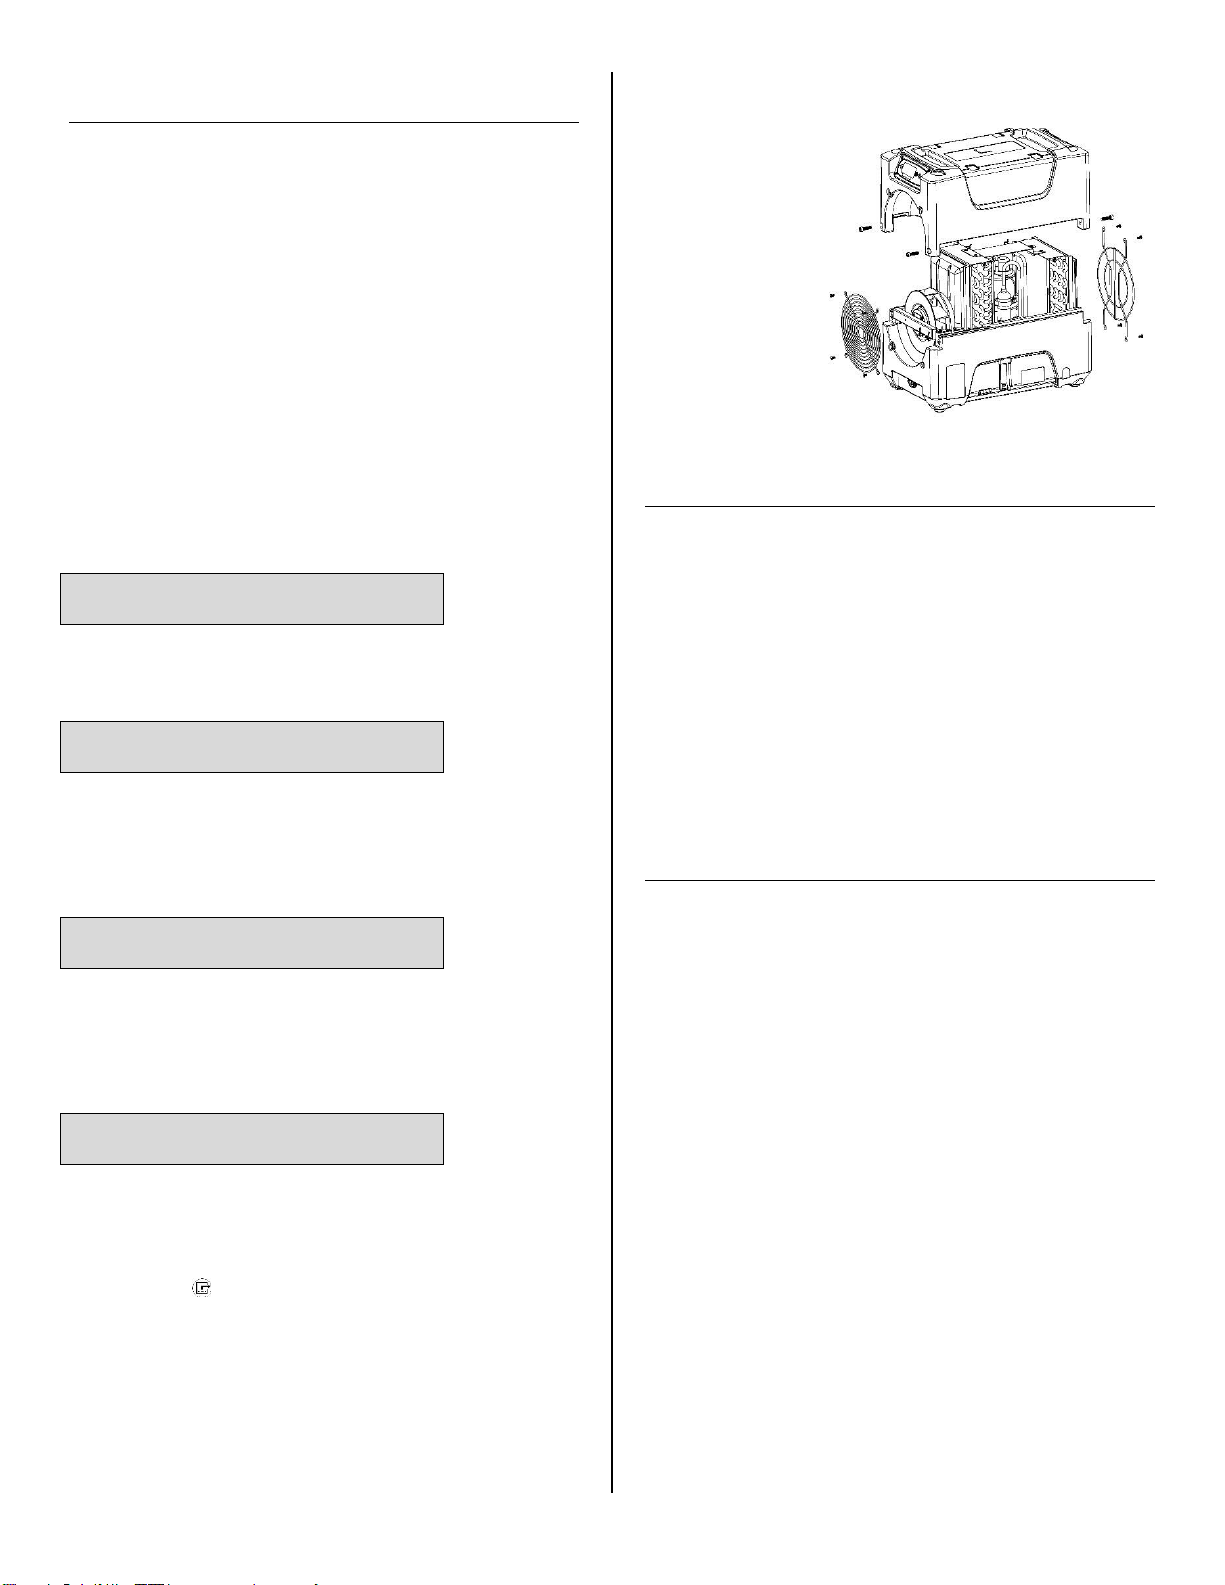
Remove the 4 screws
from housing and 2
top screws each from
inlet and outlet grills
and lift off cover.
Fig. B: Disassembly for Cleaning
Loading ...
Loading ...
Loading ...