Loading ...
Loading ...
➔➔
➔➔➔
STEP 15: Using a razor knife, you need to cut out
the rubber lining that covers the passenger’s side
rear wheel well.
The cut needs to run from the floor at rear of the
wheel well, over the wheel well forward to the C-
pillar and over to the outer sheet metal.
STEP 21: Remove the wax square and run speak-
er wire to the enclosures mounting location.Test
woofer for proper operation.Then connect the
speaker wire to the wire terminal found on the
enclosure.
Cont.
From
Previous
Page
Continued on Next Page ➔
➔
STEP 16: Place the supplied wax square with the
paper removed and sticky side down, in the mount-
ing location of the threaded insert inside the enclo-
sure.
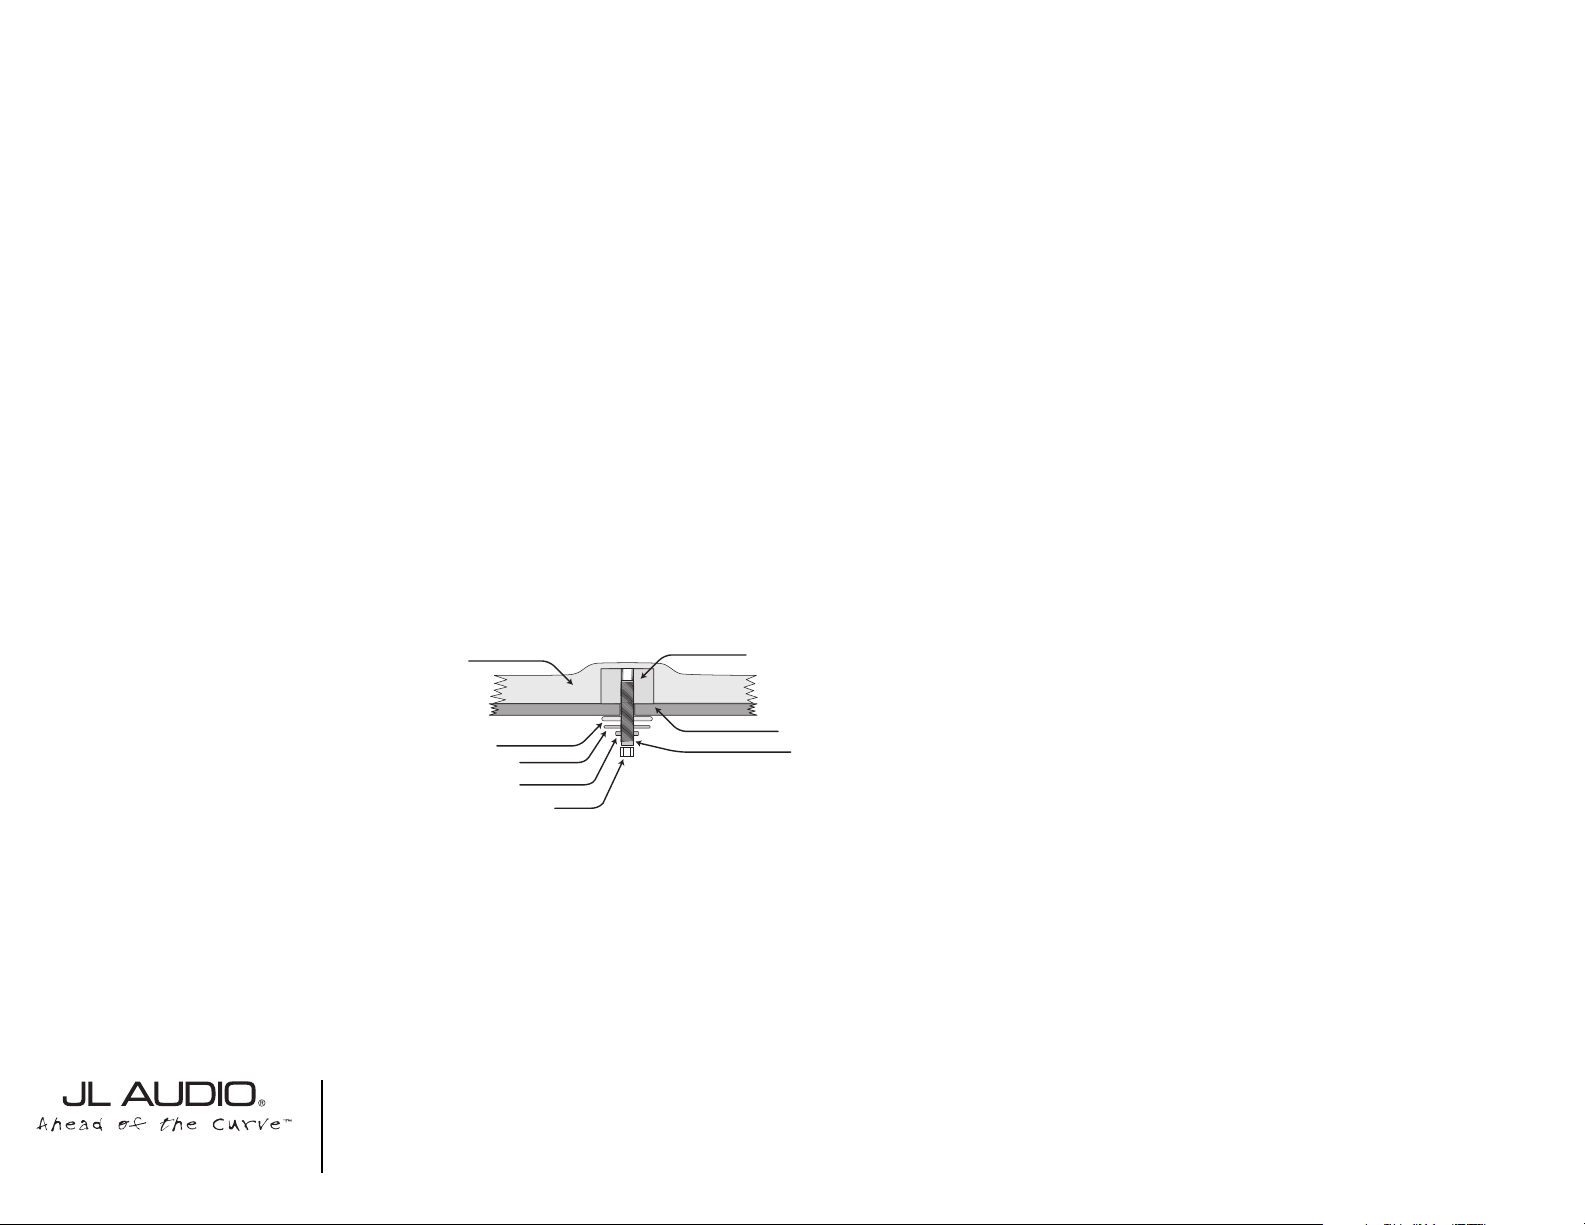
STEALTHBOX WALL
THREADED INSERT
VEHICLE SHEET METAL
FENDER WASHER
SOCKET CUP SET SCREW
LOCK WASHER
FLAT WASHER
HEX NUT
STEP 22: Back out the socket cup set screw to
expose 1-1/2”. Place the enclosure into location,
guiding the socket cup set screw through the drilled
hole.
STEP 23: In these steps, place the supplied fender
washer, flat washer, lock washer and then hex nut
onto the socket cup set screw.
If necessary , back out or in the socket cup set
screw for proper length. Use the least amount of
length.
➔
STEP 24: With an 8mm socket, mount the tool kit
partition that was removed in STEP 14.
STEP 25: Outside the vehicle, flip over the large
cargo panel that was removed in STEP 13.
Remove the clips from the edge of the storage
pocket.
If your Expedition/Navigator is equipped with the
OEM woofer system.You will need this storage
pocket trim from an Expedition(only) that does not
have the OEM woofer system. Check your Ford
Parts Department or local vehicle recycling yard.
STEP 17: Thread in the supplied socket cup set
screw into the enclosure. Allow 1/2” to be exposed.
STEP 18: Place the enclosure into the mounting
location and press firmly down.This to leave an
impression on the wax square from STEP 16.
STEP 19: Remove the enclosure, making sure that
the wax square does stay on the floor.
STEP 20: *CAUTION*
Before drilling, check under the vehicle for
fuel lines, brake lines, exhaust pipes, electri-
cal wiring or any other objects that present
a hazard.Always wear eye protection when
drilling
With a drill and a 1/2” drill bit, drill at the impression
on the wax square as a guide.
SB-F-EXPED/10W6AE, JL AUDIO, Inc 2003
Sheet SKU#011106 Revision6/29/2004 Page 3
www.jlaudio.com
Loading ...