Loading ...
Loading ...
Loading ...
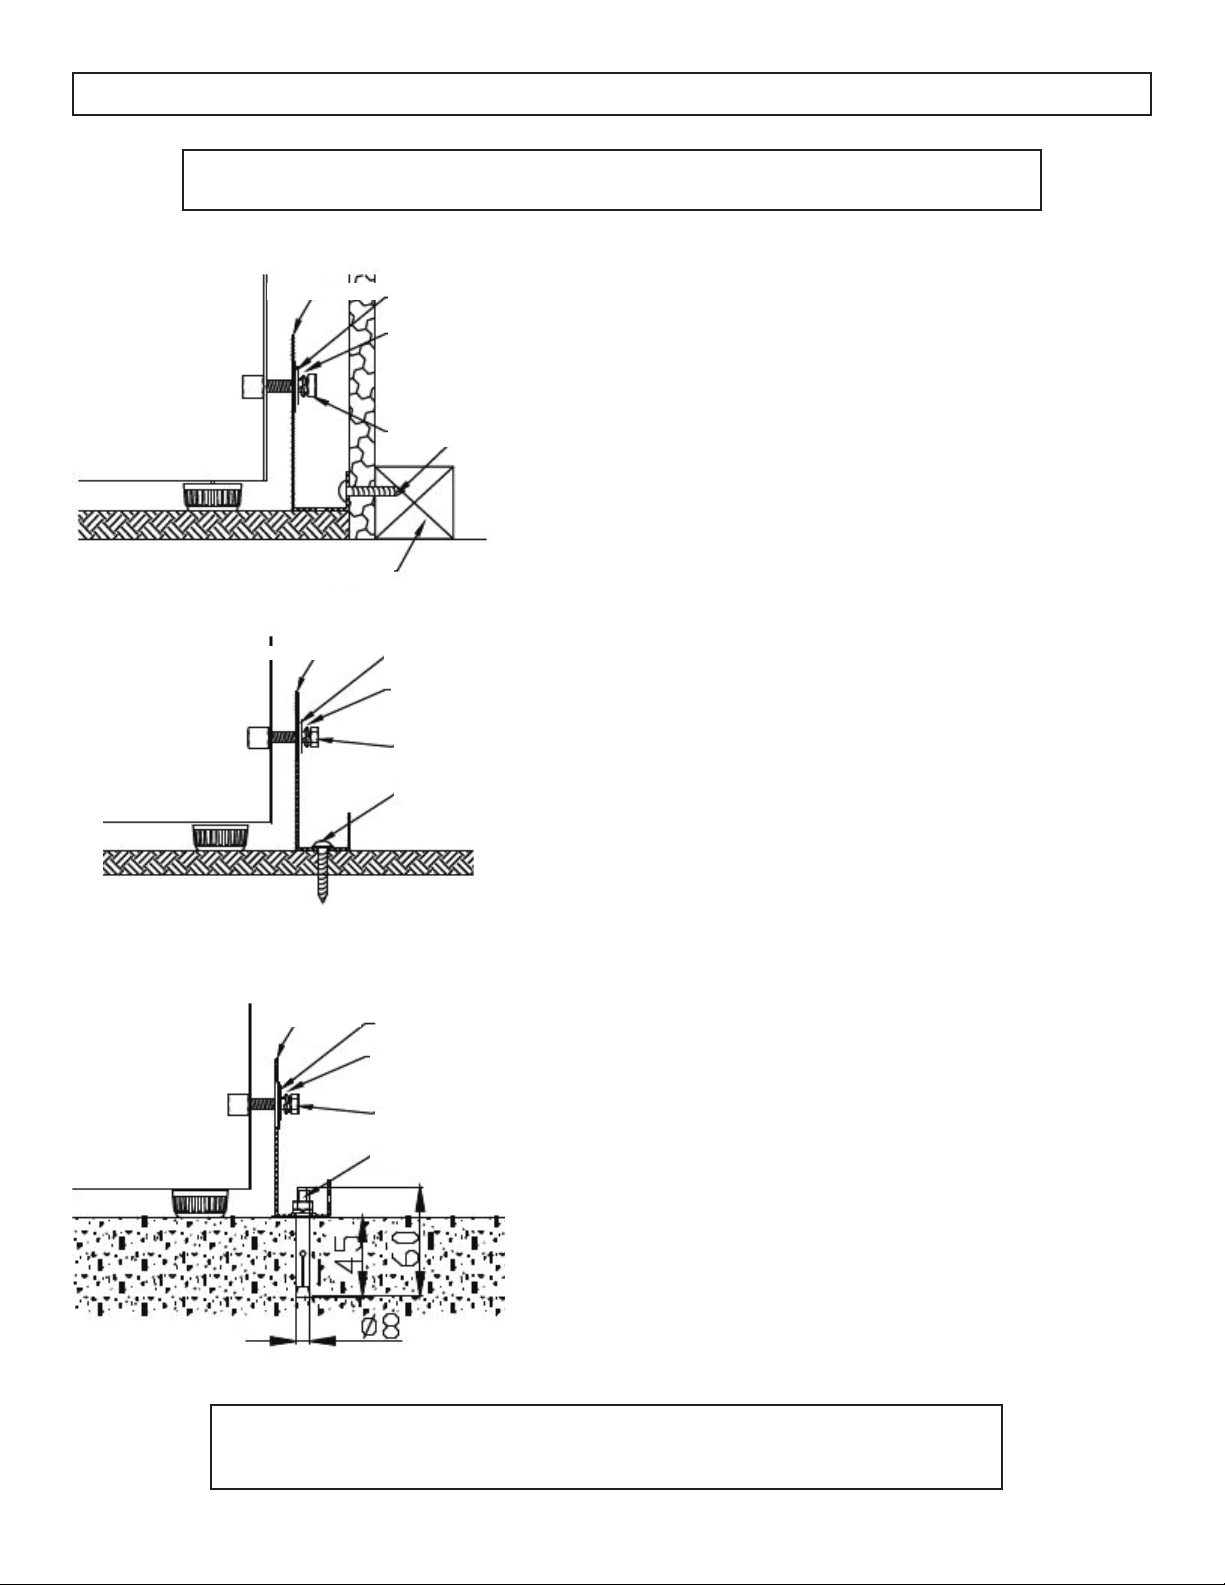
Drywall Installation:
1. Place the bracket on the fl oor with mounting hole B
against the wall.
2. Use two screws to secure the bracket to the wall.
3. Ensure at least one screw is secured to a wall stud.
4. Place the unit so that the mounting hole E on the unit is
lined up with mounting hole A on the bracket and secure
with a bolt, a lock washer and a fl at washer.
Note: At least one screw must enter a wood wall stud. If there
are no wall studs available, use fl oor installation.
Wood Floor Installation:
1. Place the bracket on the fl oor and secure it with two
screws.
2. Place the unit so that mounting hole E on the unit is
aligned with mounting hole A on the bracket and secure
with a bolt, a lock washer and a fl at washer.
Concrete Floor Installation:
1. Place the bracket on the fl oor and mark the location of
mounting hole D on the fl oor.
2. Using a concrete drill bit, drill an 8mm (3/8”) pilot hole
45~55mm (1.7”~2”) deep at the marked location.
3. Remove the nut, spring washer and washer from the
expansion screw.
4. Carefully tap the expansion screw into the drilled hole
using a hammer or mallet.
5. Place the fl oor bracket with mounting hole D over the
expansion screw and secure with the nut, spring washer
and washer.
6. Place the unit so that mounting hole E on the unit is
aligned with mounting hold A on the bracket and secure
with a bolt, lock washer and fl at washer.
Anti-tip bracket
Flat washer
Lock washer
Bolt
Screw
Wall stud
Anti-tip bracket
Flat washer
Lock washer
Bolt
Screw
Anti-tip bracket
Flat washer
Lock washer
Bolt
Expansion screw
INSTALLATION INSTRUCTIONS
Important: Determine the fi nal location of the appliance before attempting to install
the bracket. Choose one of the three installation methods below.
Important: After installing the bracket, try using light force to tip the unit. If
the unit does not tip then the bracket is installed correctly. If the unit does tip,
reinstall the bracket more securely.
6
Loading ...
Loading ...
Loading ...