Loading ...
Loading ...
Loading ...
126
CHECKING THE DATE AND TIME
To check if the date and time are set correctly in the machine, follow the steps below.
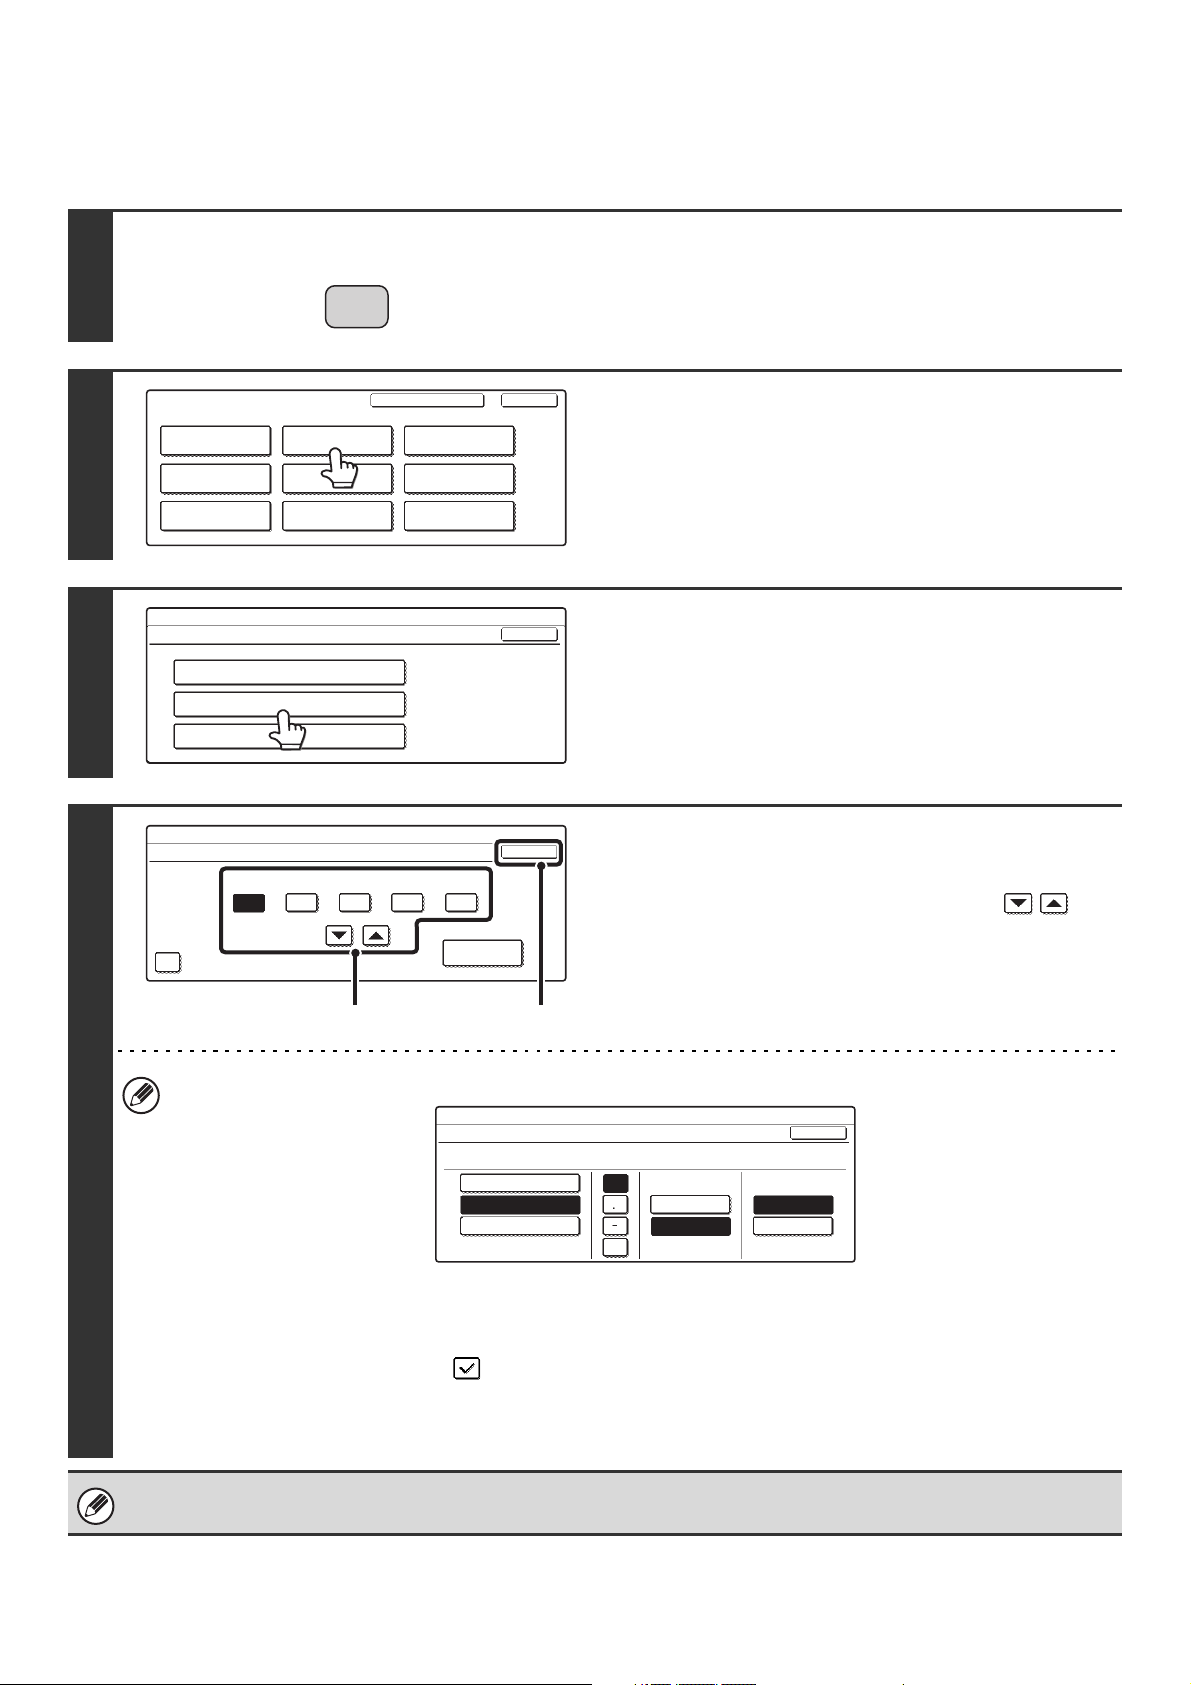
1
Press the [SYSTEM SETTINGS] key.
2
Touch the [Default Settings] key.
3
Touch the [Clock] key.
4
Adjust the date and time.
(1) Touch the [Year], [Month], [Day], [Hour],
and/or [Minute] keys and use the
keys to set the current date and time.
(2) Touch the [OK] key.
• To change the format of the date, touch the [Date Format] key. The following screen will appear.
In the date format screen, select the order of the year, month, and day (MM/DD/YYYY), the separator character, the
position of the day, and 12-hour or 24-hour format.
Select each item and touch the [OK] key.
• If you want the clock to change automatically at the beginning and end of daylight saving time, select the [Daylight
Saving Time Setting] checkbox .
When this function is used, the time changes at the beginning and end of daylight saving time as follows:
Standard time ➞ Daylight saving time: First Sunday in April, 2:00 ➞ 3:00 AM
Daylight saving time ➞ Standard time: Last Sunday in October, 2:00 ➞ 1:00 AM
If "Disabling of Clock Adjustment" has been enabled in the system settings (administrator), the date and time cannot be set.
SYSTEM
SETTINGS
System Settings
Admin Password
Default Settings
Total Count
Address Control
Exit
List Print
(User)
Fax Data
Receive/Forward
USB-Device Check
Paper Tray
Settings
Printer Condition
Settings
Document Filing
Control
System Settings
Default Settings
OK
Display Contrast
Clock
Keyboard Select
System Settings
Clock Adjust
OK
2005
08
MonthYear
01
Day
10
Hour
50
Minute
Date Format
Daylight Saving Time Setting
(2)(1)
System Settings
Date Format
YYYY/MM/DD
MM/DD/YYYY
DD/MM/YYYY
08/01/2005/Mon 10:51 AM
OK
Day-Name
Position
First
Last
12-Hour
24-Hour
/
Loading ...
Loading ...
Loading ...