Loading ...
Loading ...
Loading ...
49-7805-3 11
Installation Instructions
INSTALLATION INSTRUCTIONS
6
A
B
2 Frame locking brackets
(For AEC10, AEK10, AEC12, AEK12, AEC14, and AHC14 Models)
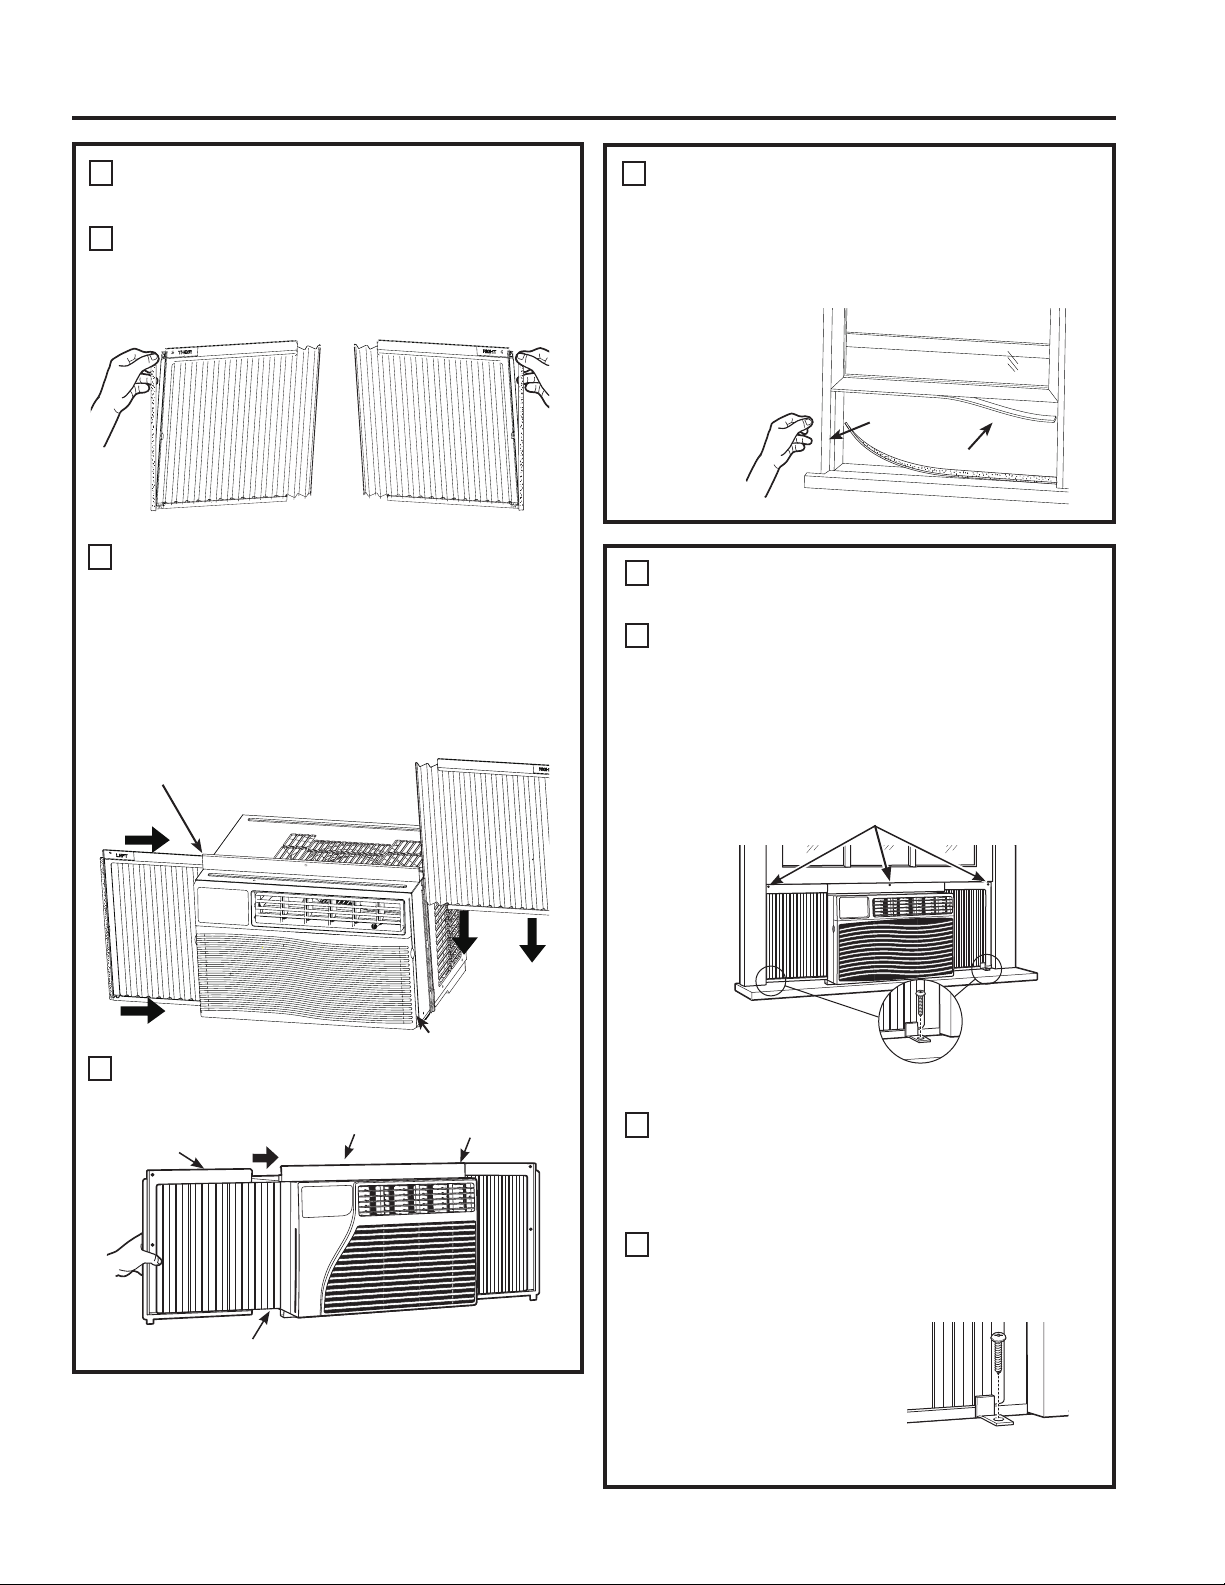
PREPARE THE WINDOW
Cut the window seal (2 long strips) to the proper
length. Peel off the backing and attach the
seal to the underside of the window sash. One
attached to sash and one attached to sill.
5
3 Screws
C
INSTALL THE AIR CONDITIONER
IN THE WINDOW
Place the air conditioner on the sill with the
bottom mounting rail against its back edge.
Center it and close the window securely behind
the top mounting rail. It should be level or
slightly tilted to the outside. Use a level; about a
1/3 bubble will be the correct case slant to the
outside.
Extend the left and right accordion panels to
the vertical window sashes and attach 3 screws
through the holes in the upper panels, as
appropriate.
For AEC10, AEK10, AEC12, AEK12, AEC14,
and AHC14 Models: Install the frame locking
brackets between the bottom of the accordion
panel and the window sill. Attach with 2 screws.
NOTE: To prevent the
window sill from splitting,
drive the pilot holes before
driving the screws.
Sealing Strip
(with adhesive)
PREPARE THE AIR CONDITIONER
(cont.)
Remove the backing from the accordion seal
(two short strips). Stick one sealing strip
respectively on the left side and right side of the
accordion panels, as shown.
Slide the free end of the accordion panel into
the side panel rails. Slide the panel down. Be
sure to leave enough space to slip the top and
bottom of the frame into the rails on the cabinet.
NOTE: There is a right and a left accordion
panel. Be sure to use the proper panel for each
side.
Slide the left and right accordion panels into the
top and bottom mounting rails.
4
C
Top left
Top right
Top mounting rail
Bottom mounting rail
D
Top mounting rail
Bottom mounting rail
E
Loading ...
Loading ...
Loading ...