
™
Triple Action Humidier
Model: AW600
•Read and follow all safety rules and instructions before operating
this equipment.
•Please keep this manual for future reference.
Thank you for purchasing this WINIX product
1
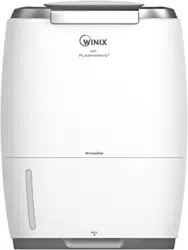
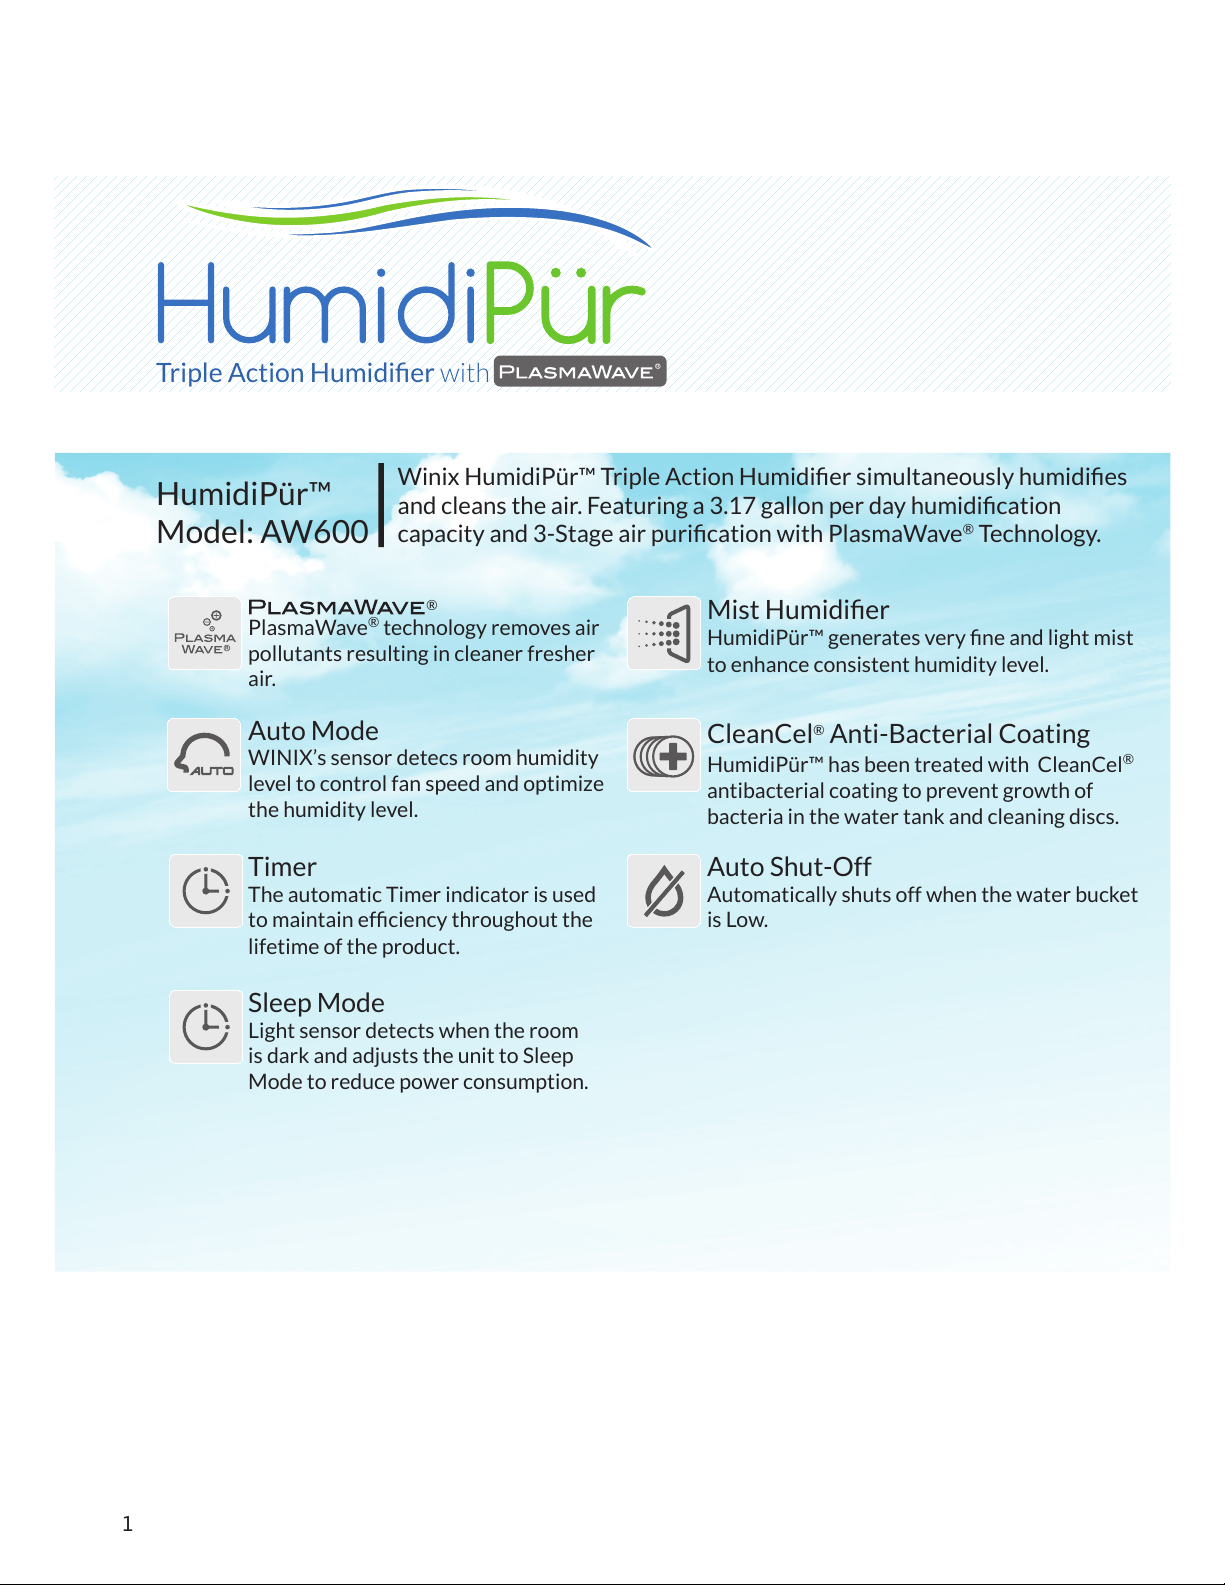
Winix HumidiPür™ Triple Action Humidier simultaneously humidies
and cleans the air. Featuring a 3.17 gallon per day humidication
capacity and 3-Stage air purication with PlasmaWave
®
Technology.
HumidiPür™
Model: AW600
Triple Action Humidier with
PlasmaWave
®
technology removes air
pollutants resulting in cleaner fresher
air.
Auto Mode
WINIX’s sensor detecs room humidity
level to control fan speed and optimize
the humidity level.
Timer
The automatic Timer indicator is used
to maintain efciency throughout the
lifetime of the product.
Sleep Mode
Light sensor detects when the room
is dark and adjusts the unit to Sleep
Mode to reduce power consumption.
®
Mist Humidier
HumidiPür™ generates very ne and light mist
to enhance consistent humidity level.
CleanCel
®
Anti-Bacterial Coating
HumidiPür™ has been treated with CleanCel
®
antibacterial coating to prevent growth of
bacteria in the water tank and cleaning discs.
Auto Shut-Off
Automatically shuts off when the water bucket
is Low.
2
Table of Contents
Safety Instructions
Product Information
Installation
Operation
Troubleshooting
Warning
Unit Diagram
Control Panel/Display
Selecting a Location
Set-Up Instructions
Modes of Operations
Care and Maintenance
FAQ/Solutions
Product Specications
3
11
12
13
14
15
19
25
27
3
Safety Instructions
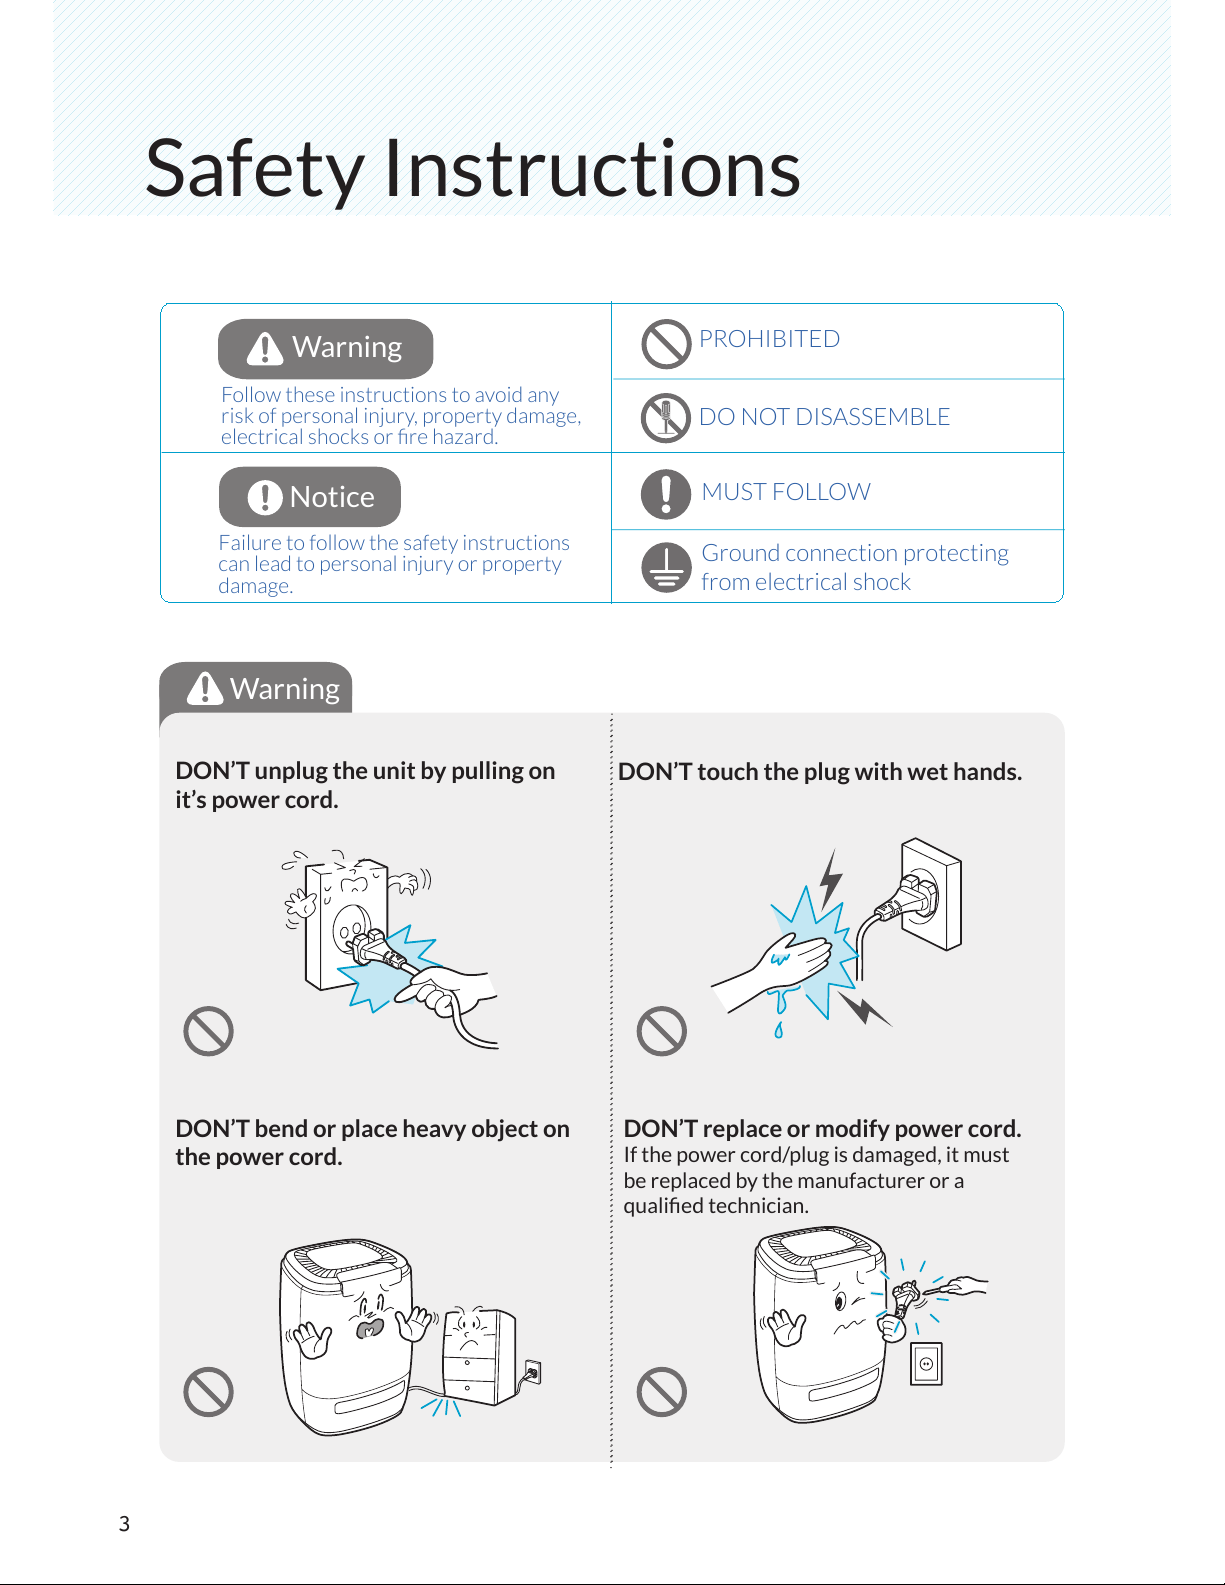
Warning
Warning
Notice
PROHIBITED
DO NOT DISASSEMBLE
MUST FOLLOW
Ground connection protecting
from electrical shock
Failure to follow the safety instructions
can lead to personal injury or property
damage.
Follow these instructions to avoid any
risk of personal injury, property damage,
electrical shocks or re hazard.
DON’T unplug the unit by pulling on
it’s power cord.
DON’T touch the plug with wet hands.
DON’T bend or place heavy object on
the power cord.
DON’T replace or modify power cord.
If the power cord/plug is damaged, it must
be replaced by the manufacturer or a
qualied technician.
4
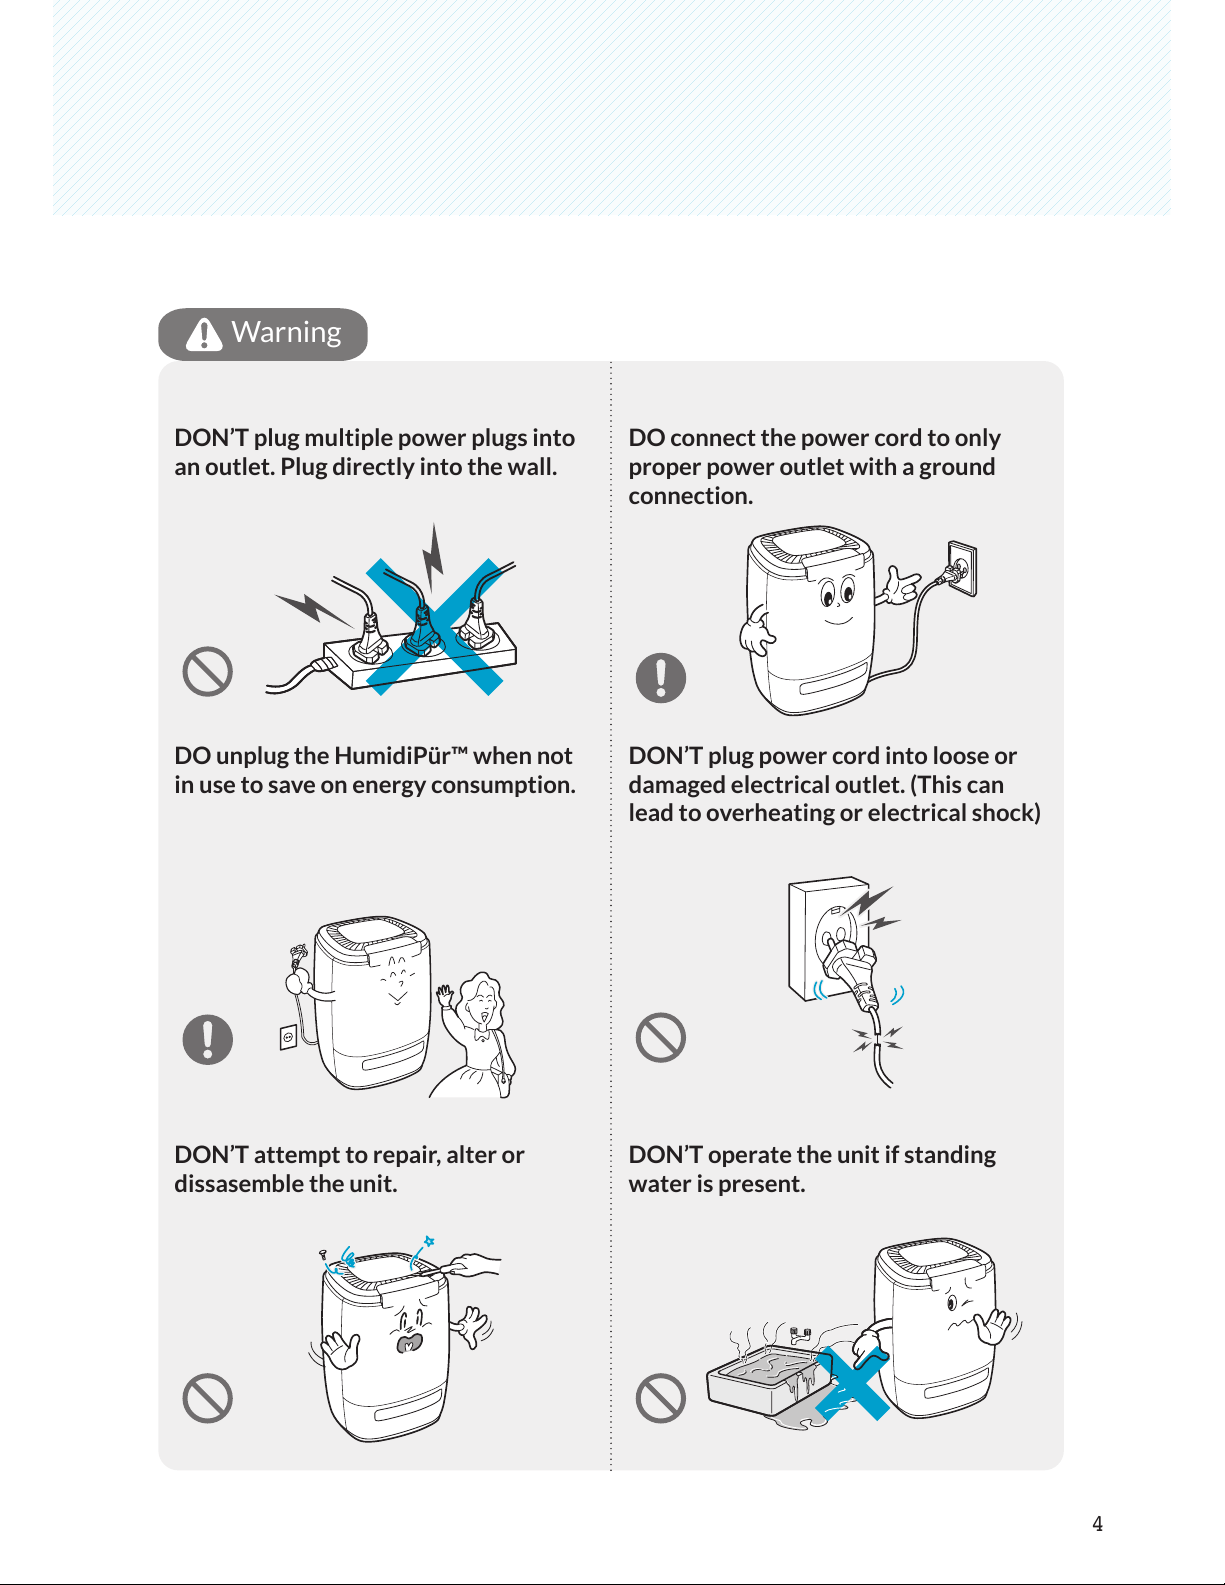
Warning
DON’T plug multiple power plugs into
an outlet. Plug directly into the wall.
DO connect the power cord to only
proper power outlet with a ground
connection.
DO unplug the HumidiPür™ when not
in use to save on energy consumption.
DON’T plug power cord into loose or
damaged electrical outlet. (This can
lead to overheating or electrical shock)
DON’T attempt to repair, alter or
dissasemble the unit.
DON’T operate the unit if standing
water is present.
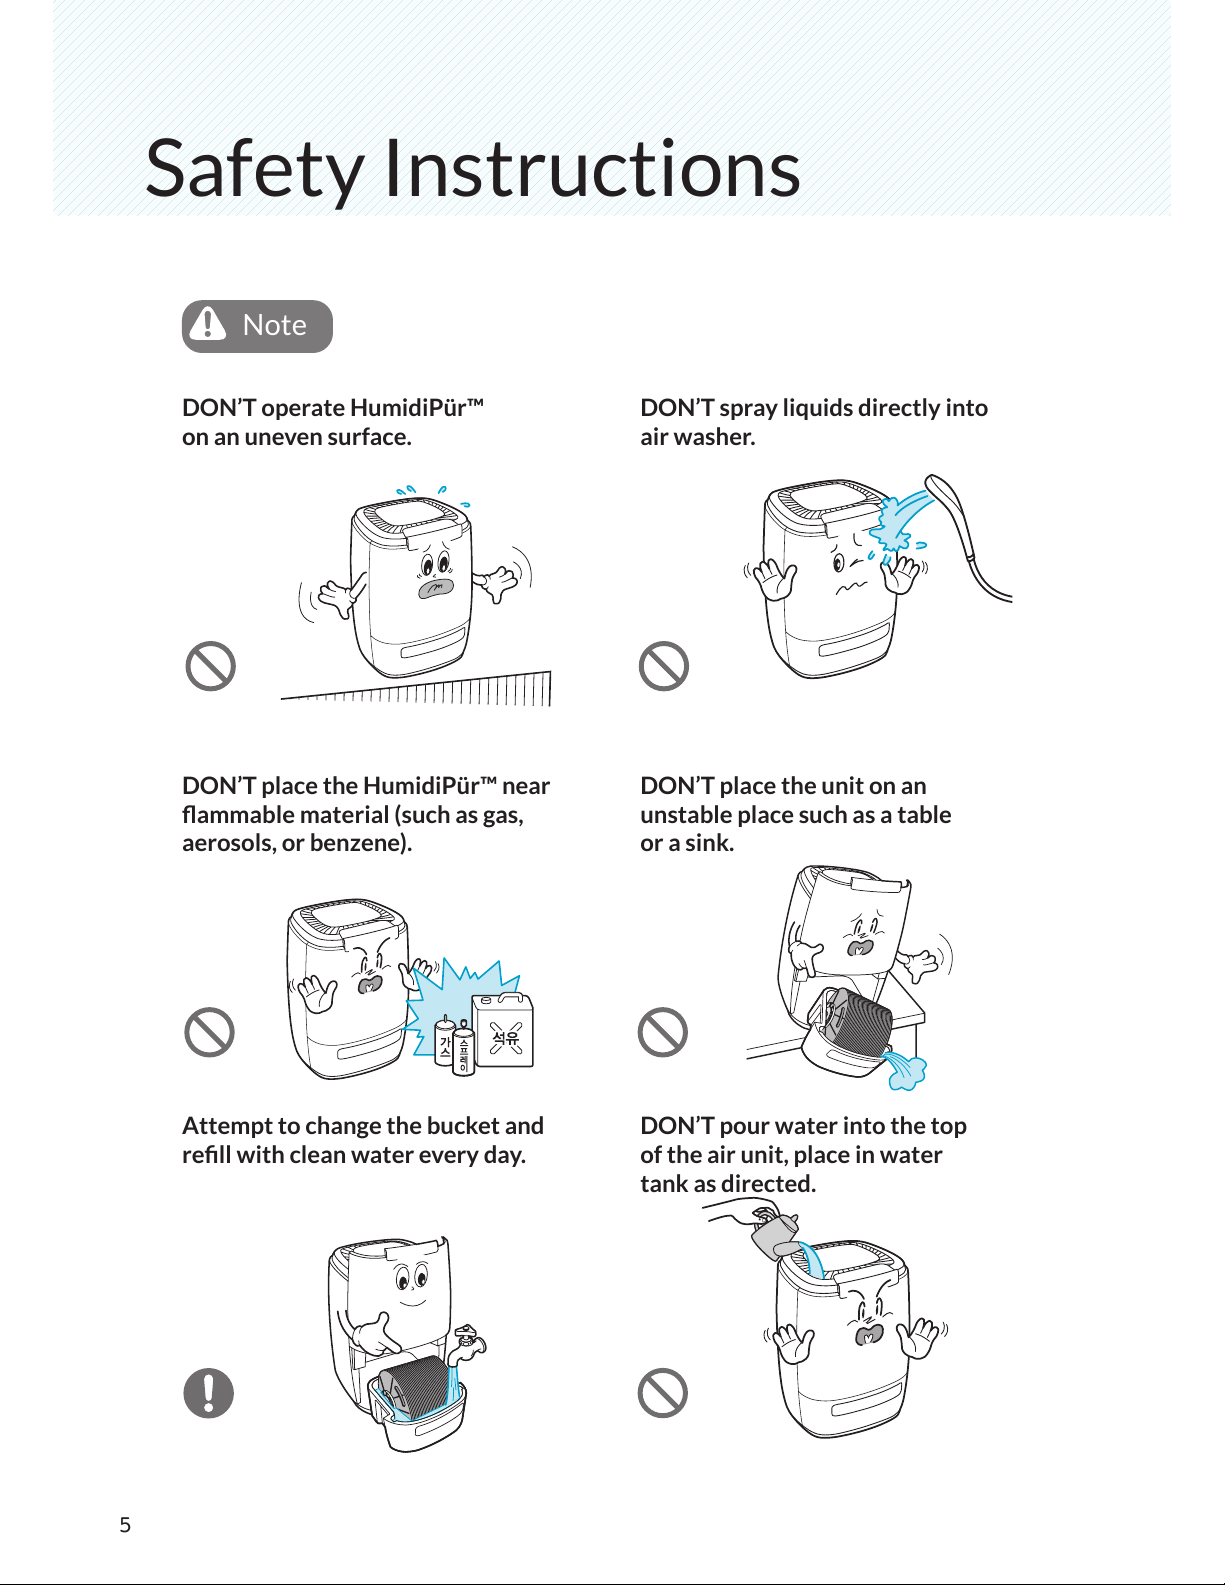
Safety Instructions
Note
5
DON’T operate HumidiPür™
on an uneven surface.
DON’T place the HumidiPür™ near
ammable material (such as gas,
aerosols, or benzene).
Attempt to change the bucket and
rell with clean water every day.
DON’T spray liquids directly into
air washer.
DON’T place the unit on an
unstable place such as a table
or a sink.
DON’T pour water into the top
of the air unit, place in water
tank as directed.
Note
6
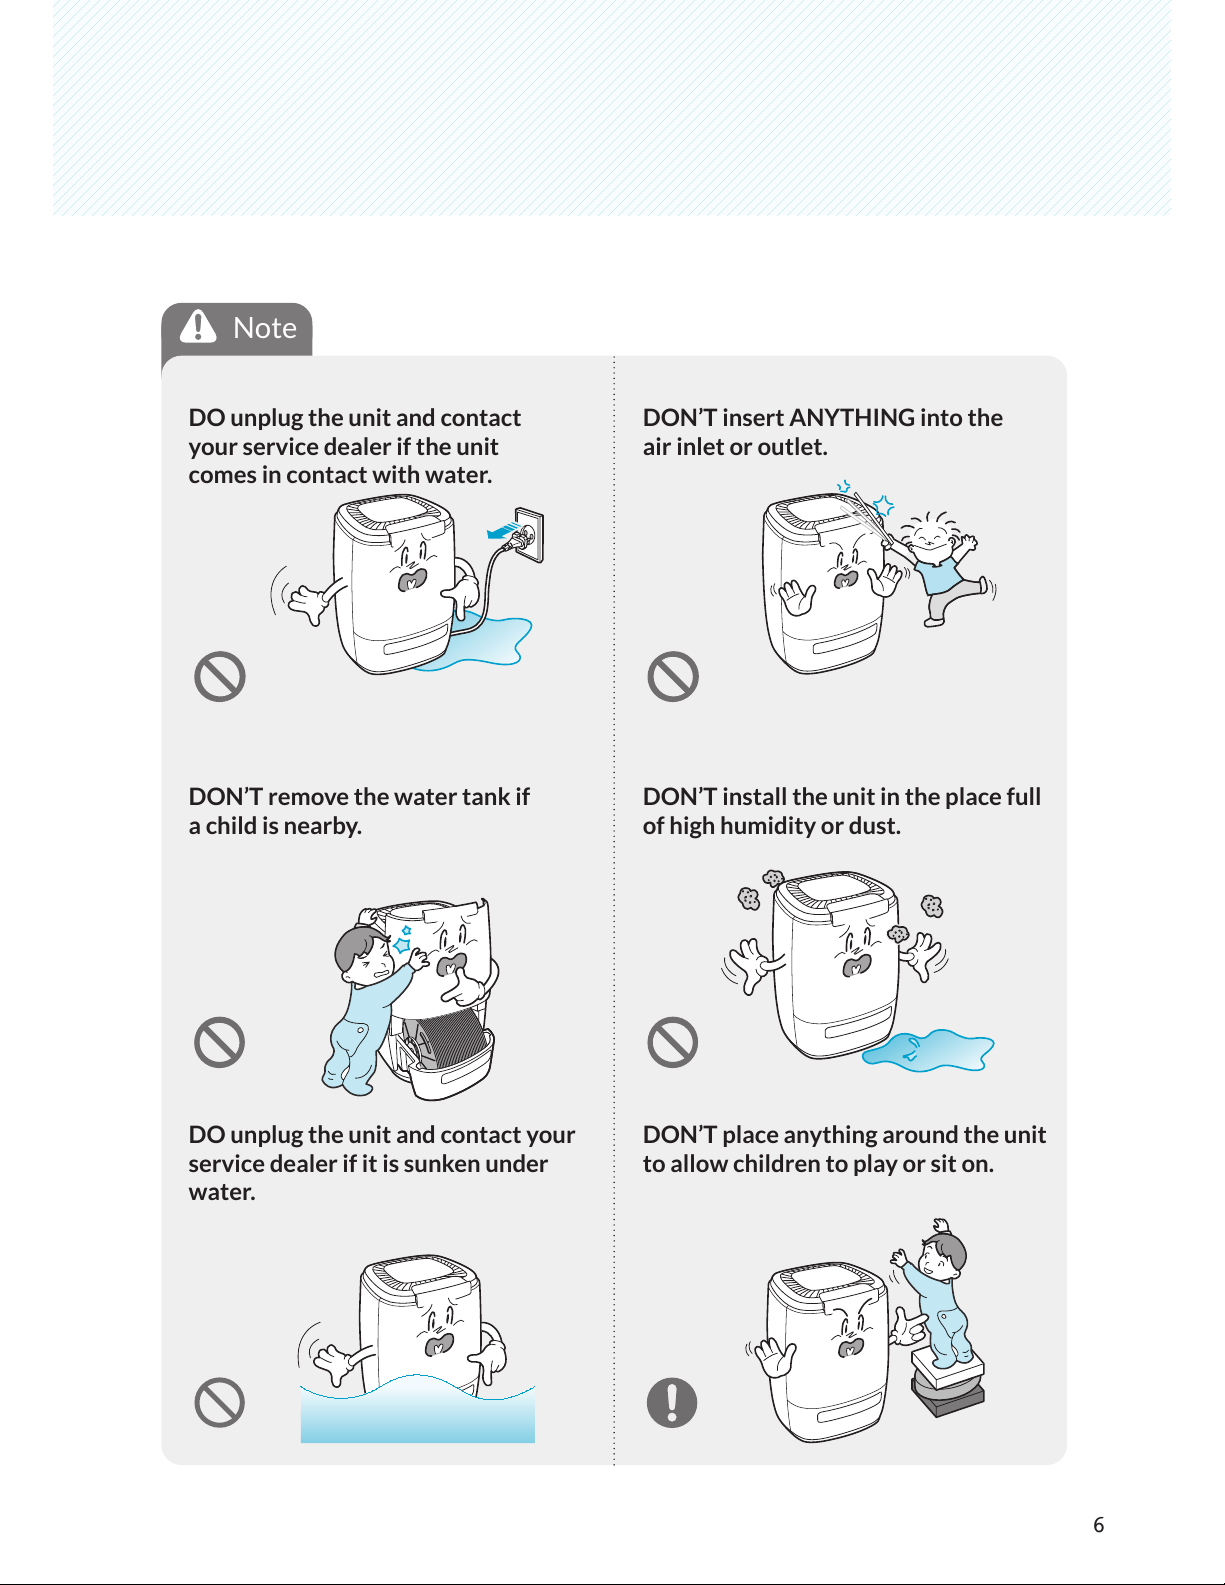
Note
DO unplug the unit and contact
your service dealer if the unit
comes in contact with water.
DON’T insert ANYTHING into the
air inlet or outlet.
DON’T remove the water tank if
a child is nearby.
DON’T install the unit in the place full
of high humidity or dust.
DO unplug the unit and contact your
service dealer if it is sunken under
water.
DON’T place anything around the unit
to allow children to play or sit on.
Safety Instructions
7
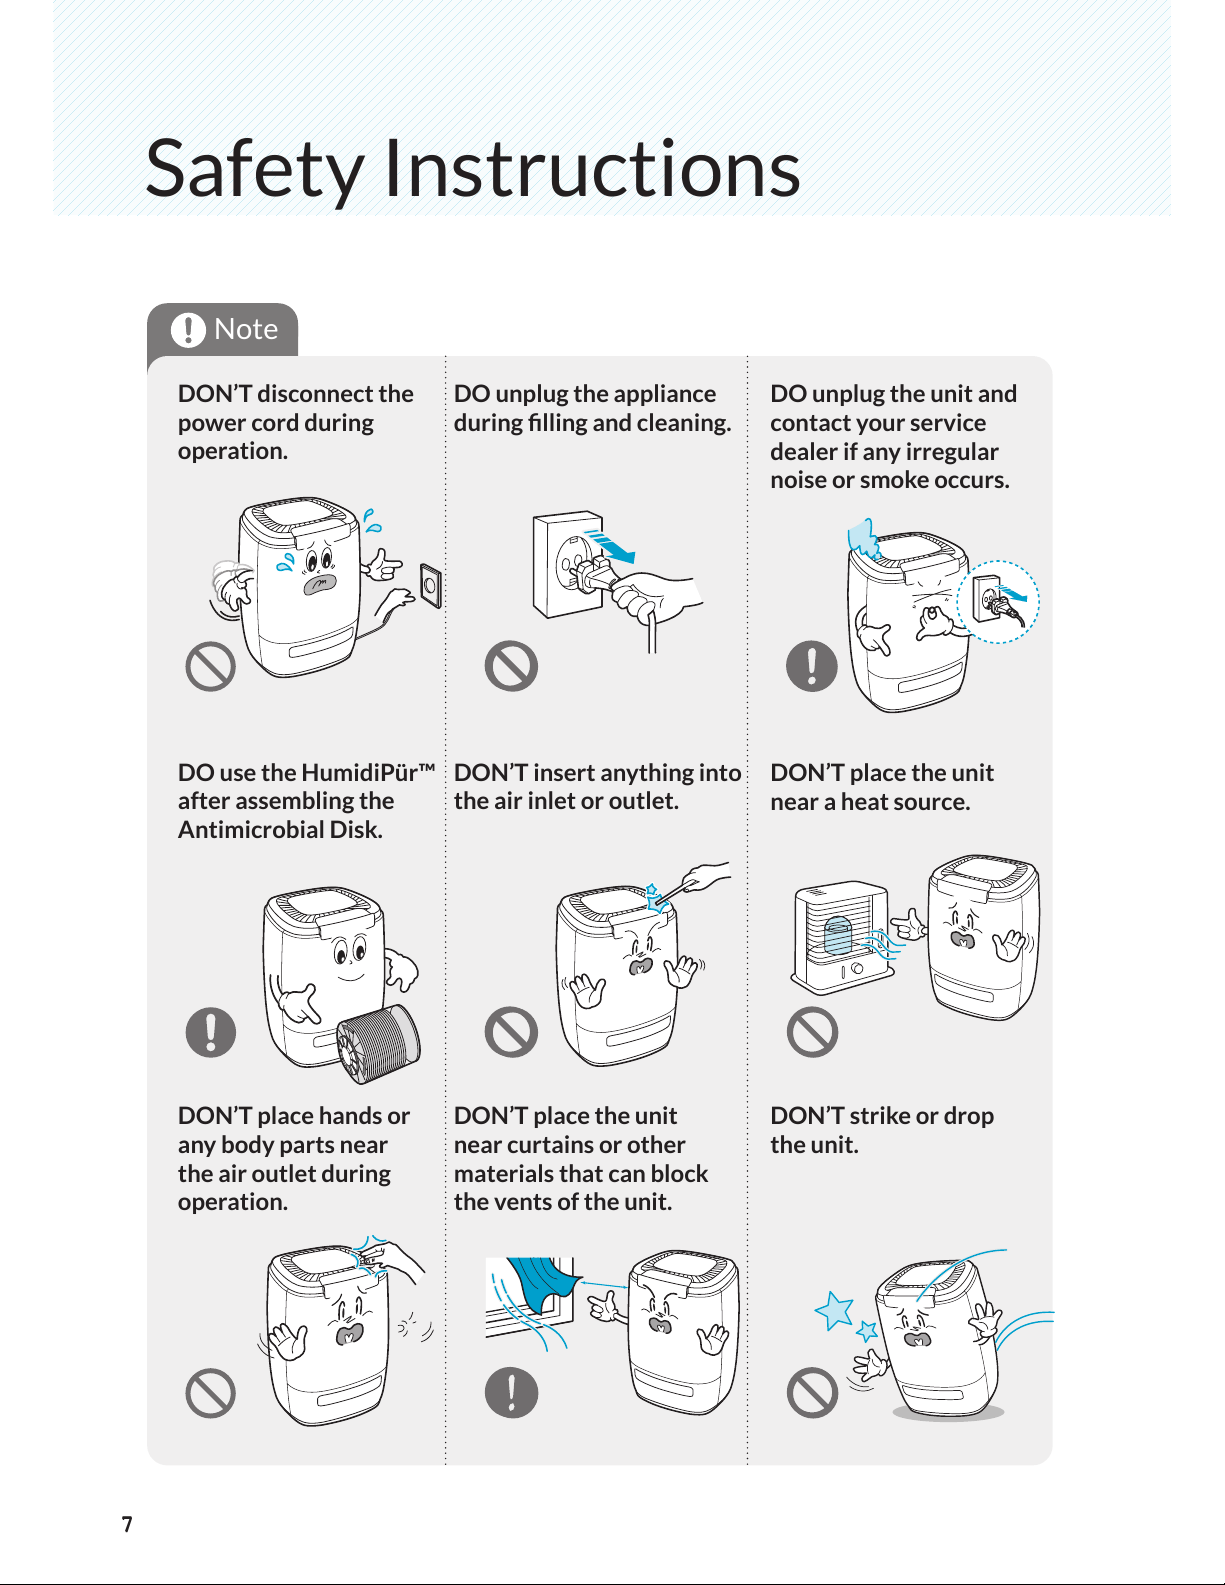
DON’T disconnect the
power cord during
operation.
DO unplug the appliance
during lling and cleaning.
DO use the HumidiPür™
after assembling the
Antimicrobial Disk.
DON’T insert anything into
the air inlet or outlet.
DON’T place hands or
any body parts near
the air outlet during
operation.
DON’T place the unit
near curtains or other
materials that can block
the vents of the unit.
DO unplug the unit and
contact your service
dealer if any irregular
noise or smoke occurs.
DON’T place the unit
near a heat source.
DON’T strike or drop
the unit.
7
Note
8
play
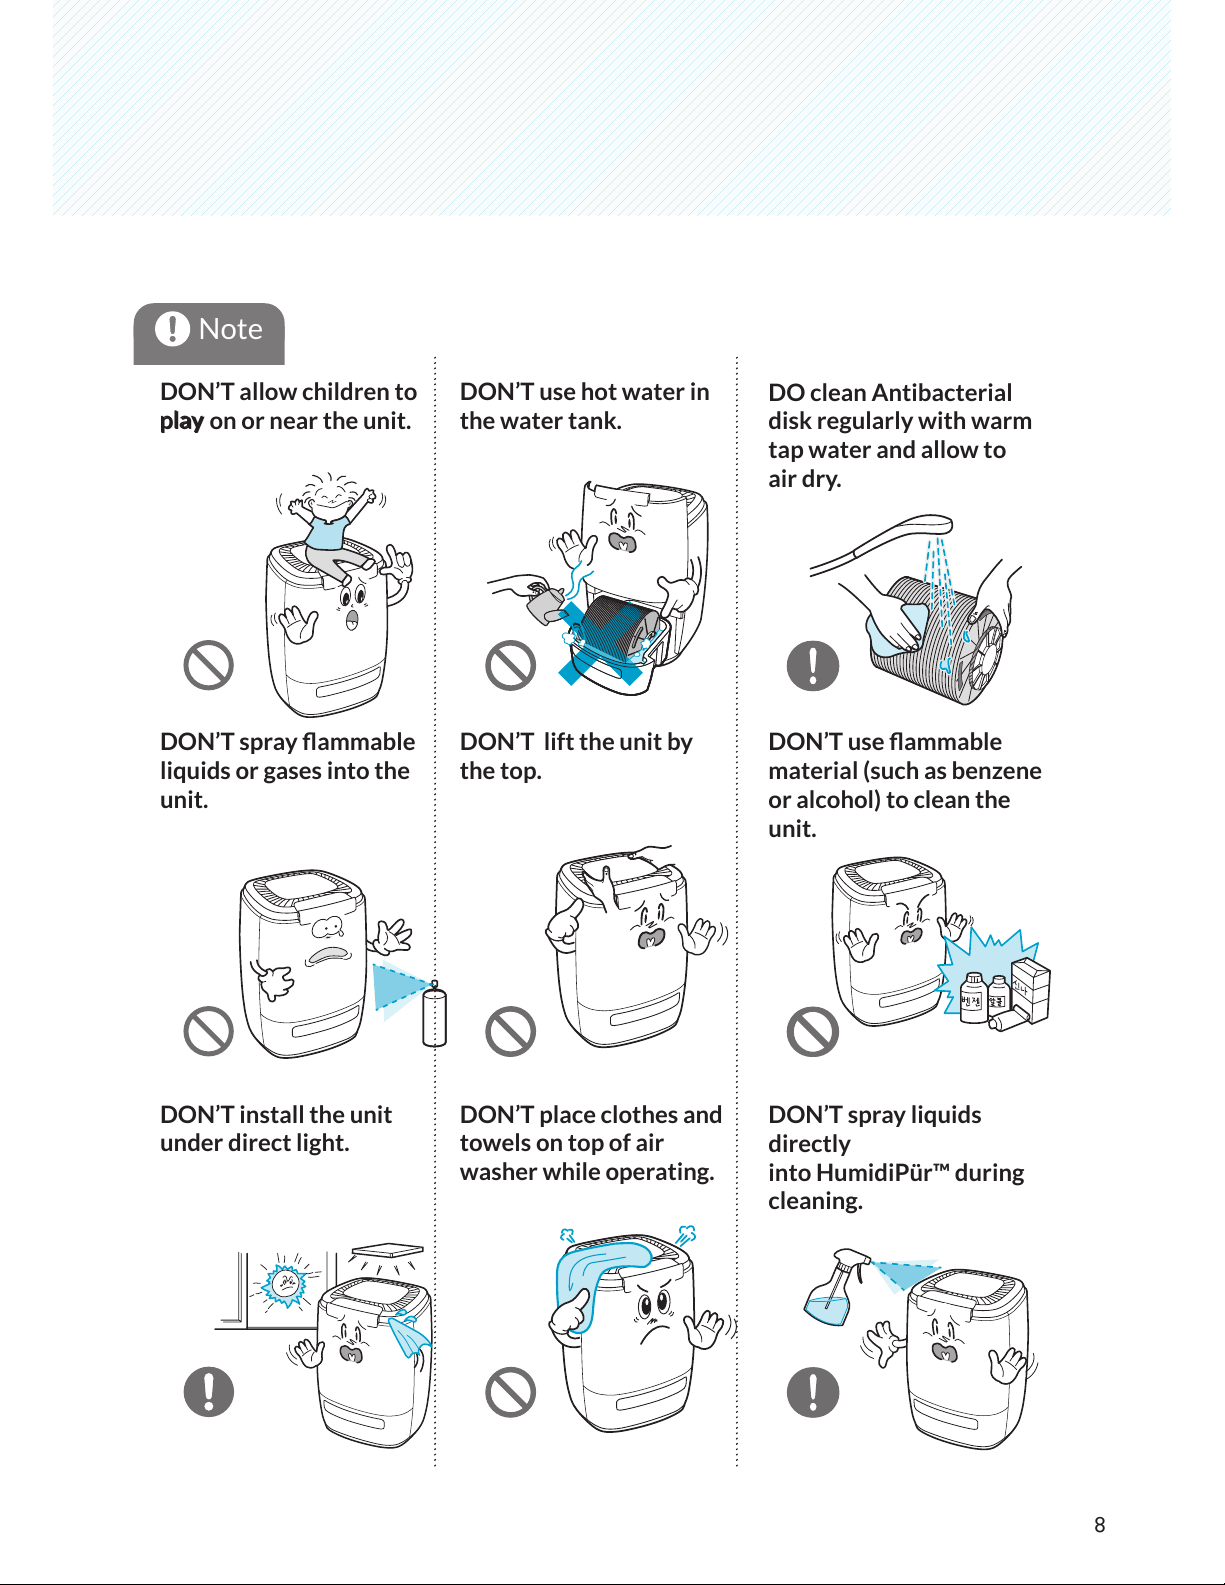
Note
DON’T allow children to
play on or near the unit.
DON’T use hot water in
the water tank.
DON’T spray ammable
liquids or gases into the
unit.
DON’T lift the unit by
the top.
DON’T install the unit
under direct light.
DON’T place clothes and
towels on top of air
washer while operating.
DO clean Antibacterial
disk regularly with warm
tap water and allow to
air dry.
DON’T use ammable
material (such as benzene
or alcohol) to clean the
unit.
DON’T spray liquids
directly
into HumidiPür™ during
cleaning.
9
Safety Instructions
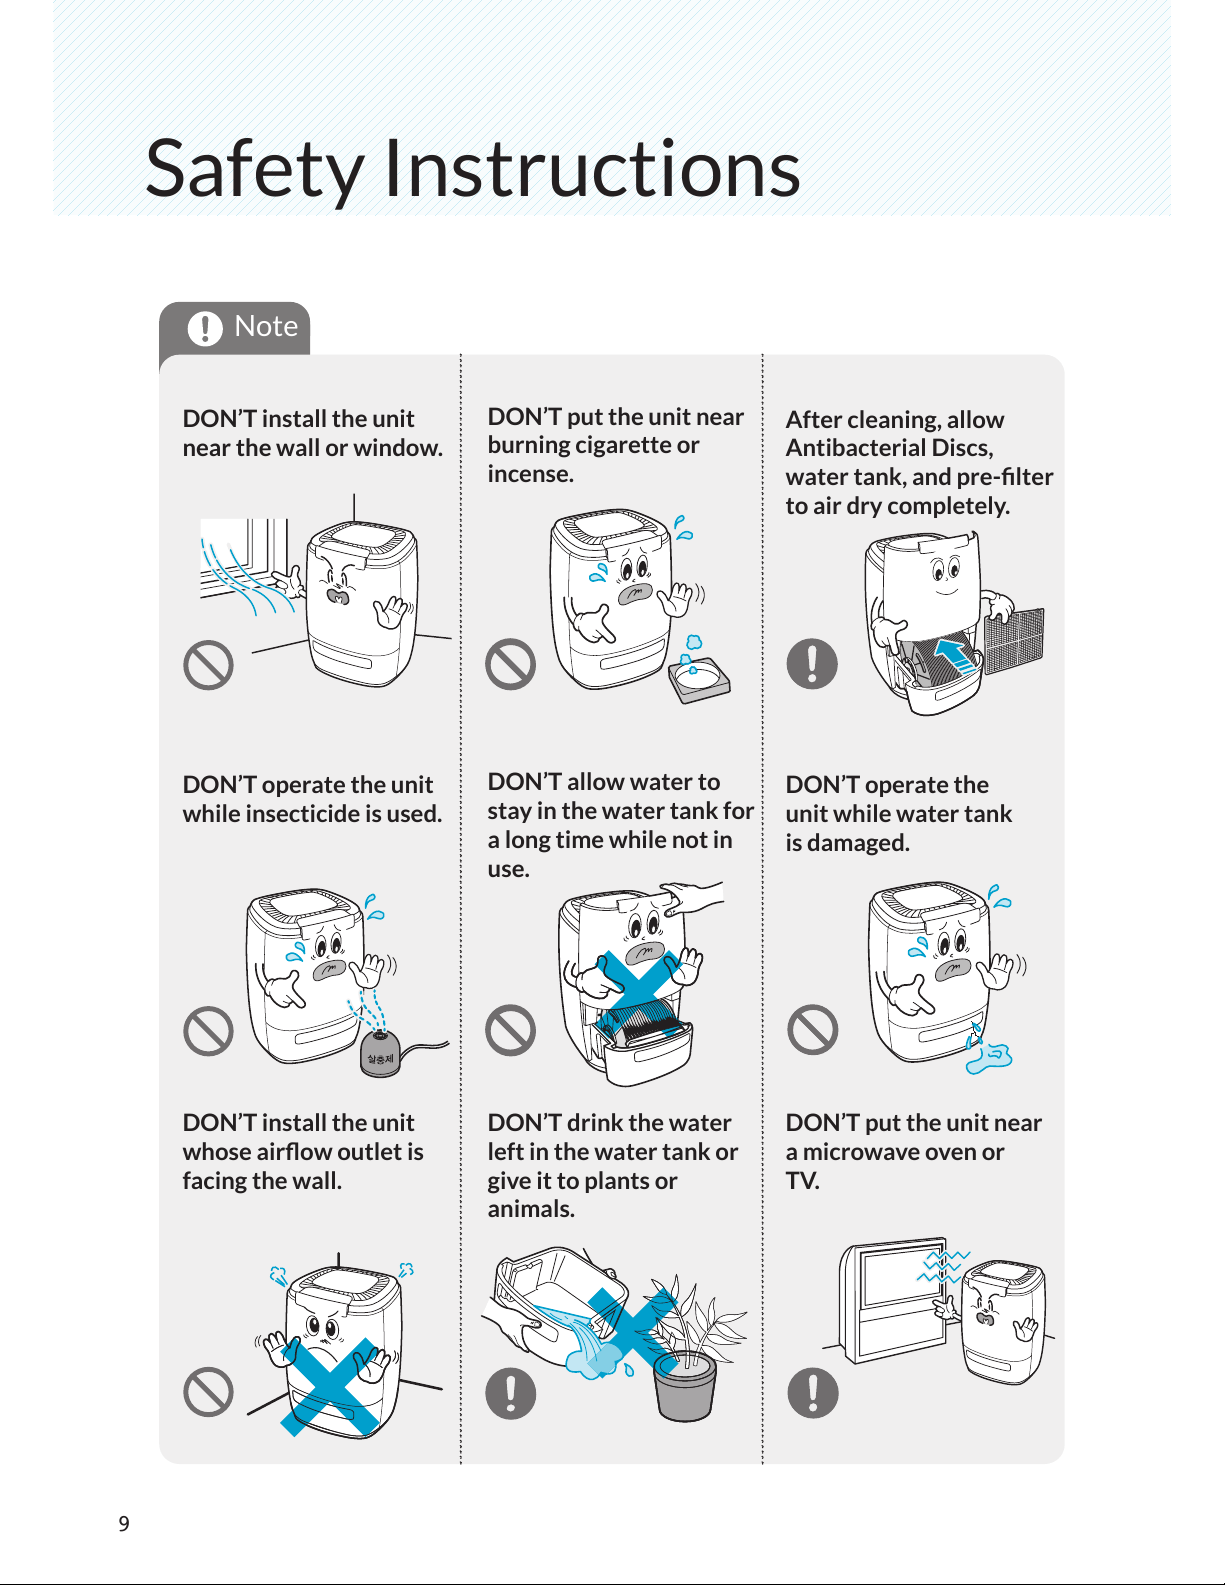
DON’T install the unit
near the wall or window.
DON’T put the unit near
burning cigarette or
incense.
DON’T operate the unit
while insecticide is used.
DON’T allow water to
stay in the water tank for
a long time while not in
use.
DON’T install the unit
whose airow outlet is
facing the wall.
DON’T drink the water
left in the water tank or
give it to plants or
animals.
After cleaning, allow
Antibacterial Discs,
water tank, and pre-lter
to air dry completely.
DON’T operate the
unit while water tank
is damaged.
DON’T put the unit near
a microwave oven or
TV.
Note
10
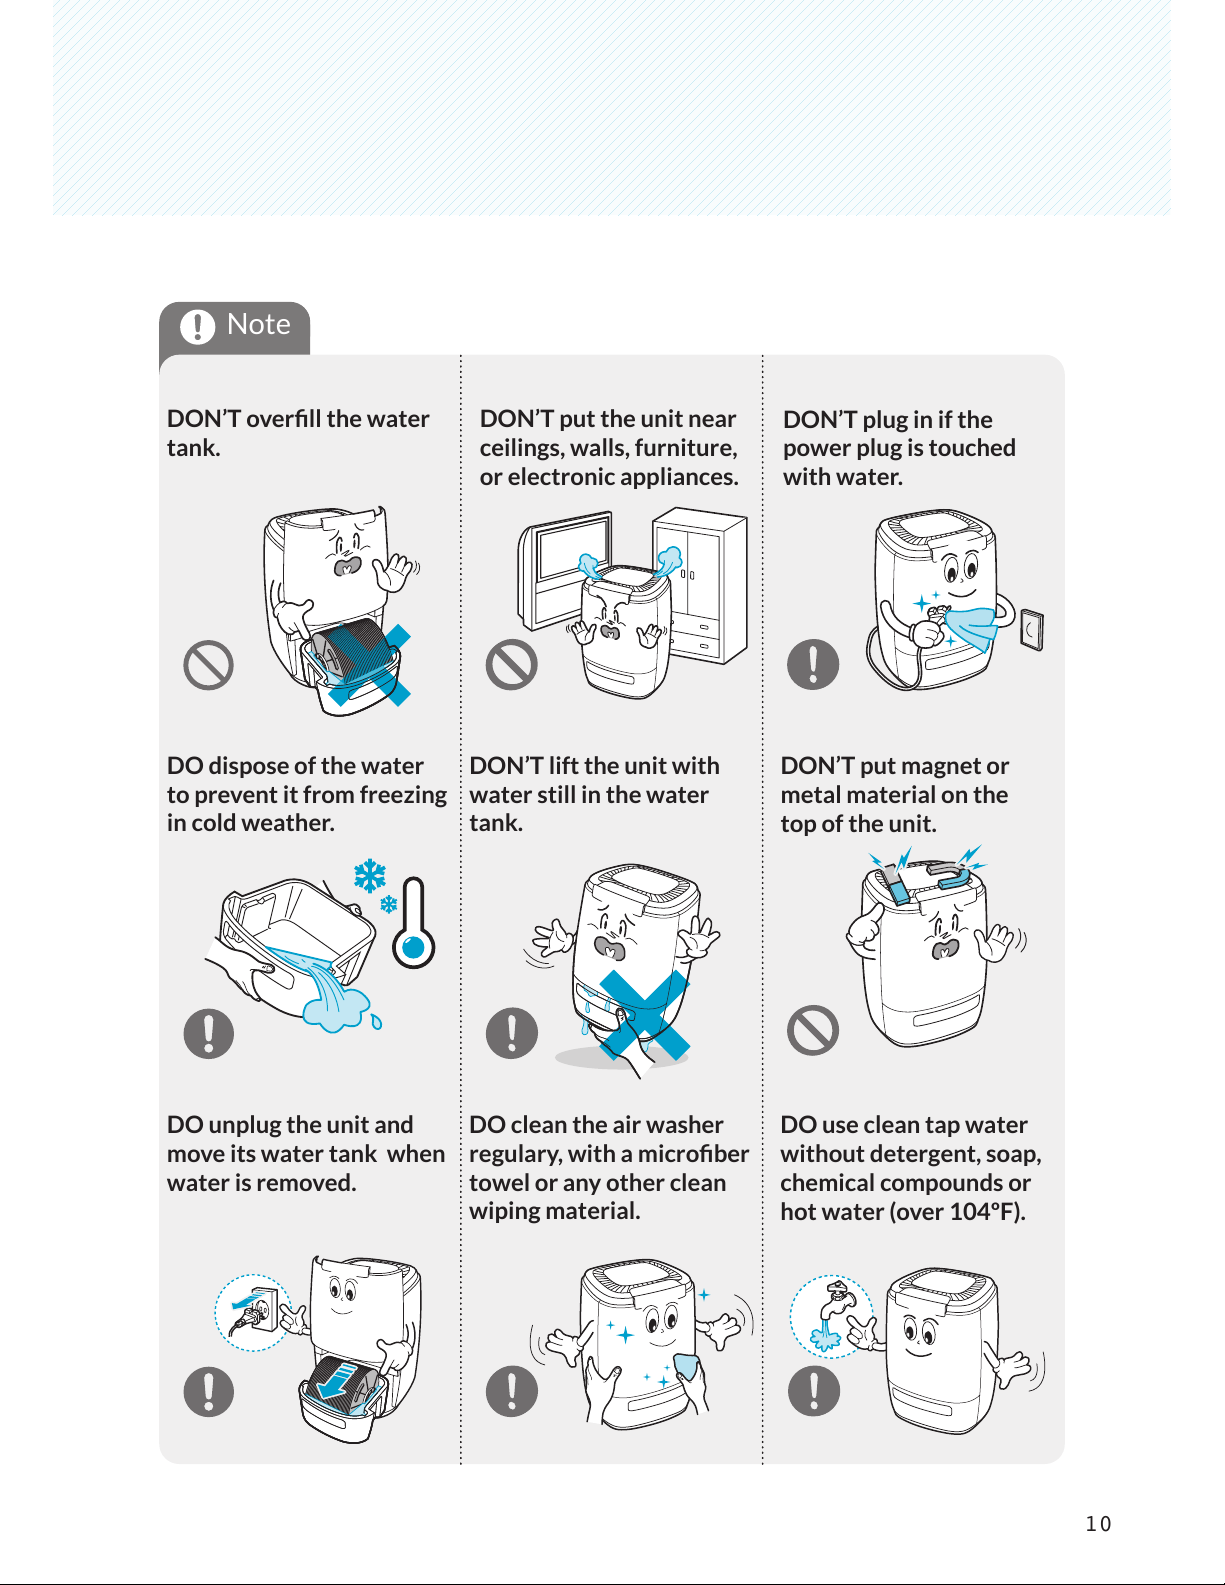
DON’T overll the water
tank.
DON’T put the unit near
ceilings, walls, furniture,
or electronic appliances.
DO dispose of the water
to prevent it from freezing
in cold weather.
DON’T lift the unit with
water still in the water
tank.
DO unplug the unit and
move its water tank when
water is removed.
DO clean the air washer
regulary, with a microber
towel or any other clean
wiping material.
DON’T plug in if the
power plug is touched
with water.
DON’T put magnet or
metal material on the
top of the unit.
DO use clean tap water
without detergent, soap,
chemical compounds or
hot water (over 104ºF).
Note
11
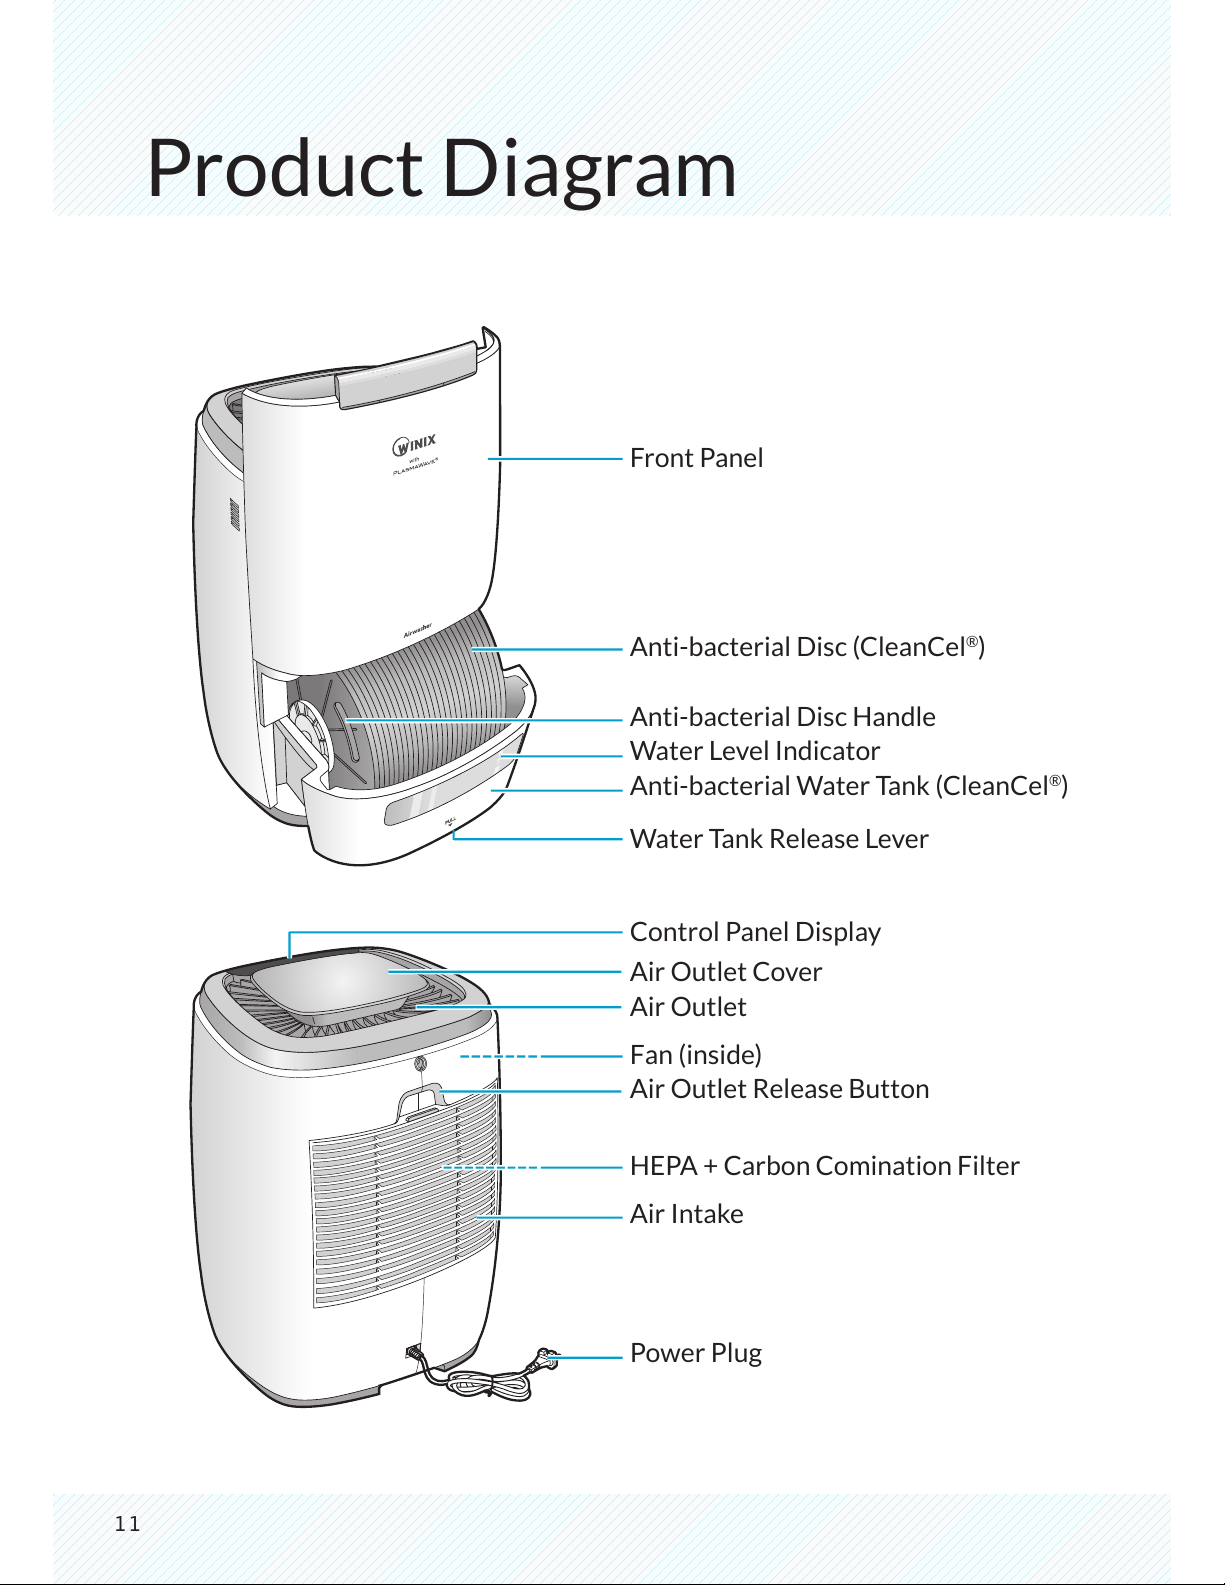
Product Diagram
Front Panel
Anti-bacterial Disc (CleanCel
®
)
Anti-bacterial Disc Handle
Water Level Indicator
Anti-bacterial Water Tank (CleanCel
®
)
Water Tank Release Lever
Control Panel Display
Air Outlet Cover
Air Outlet
Fan (inside)
Air Outlet Release Button
HEPA + Carbon Comination Filter
Air Intake
Power Plug
12
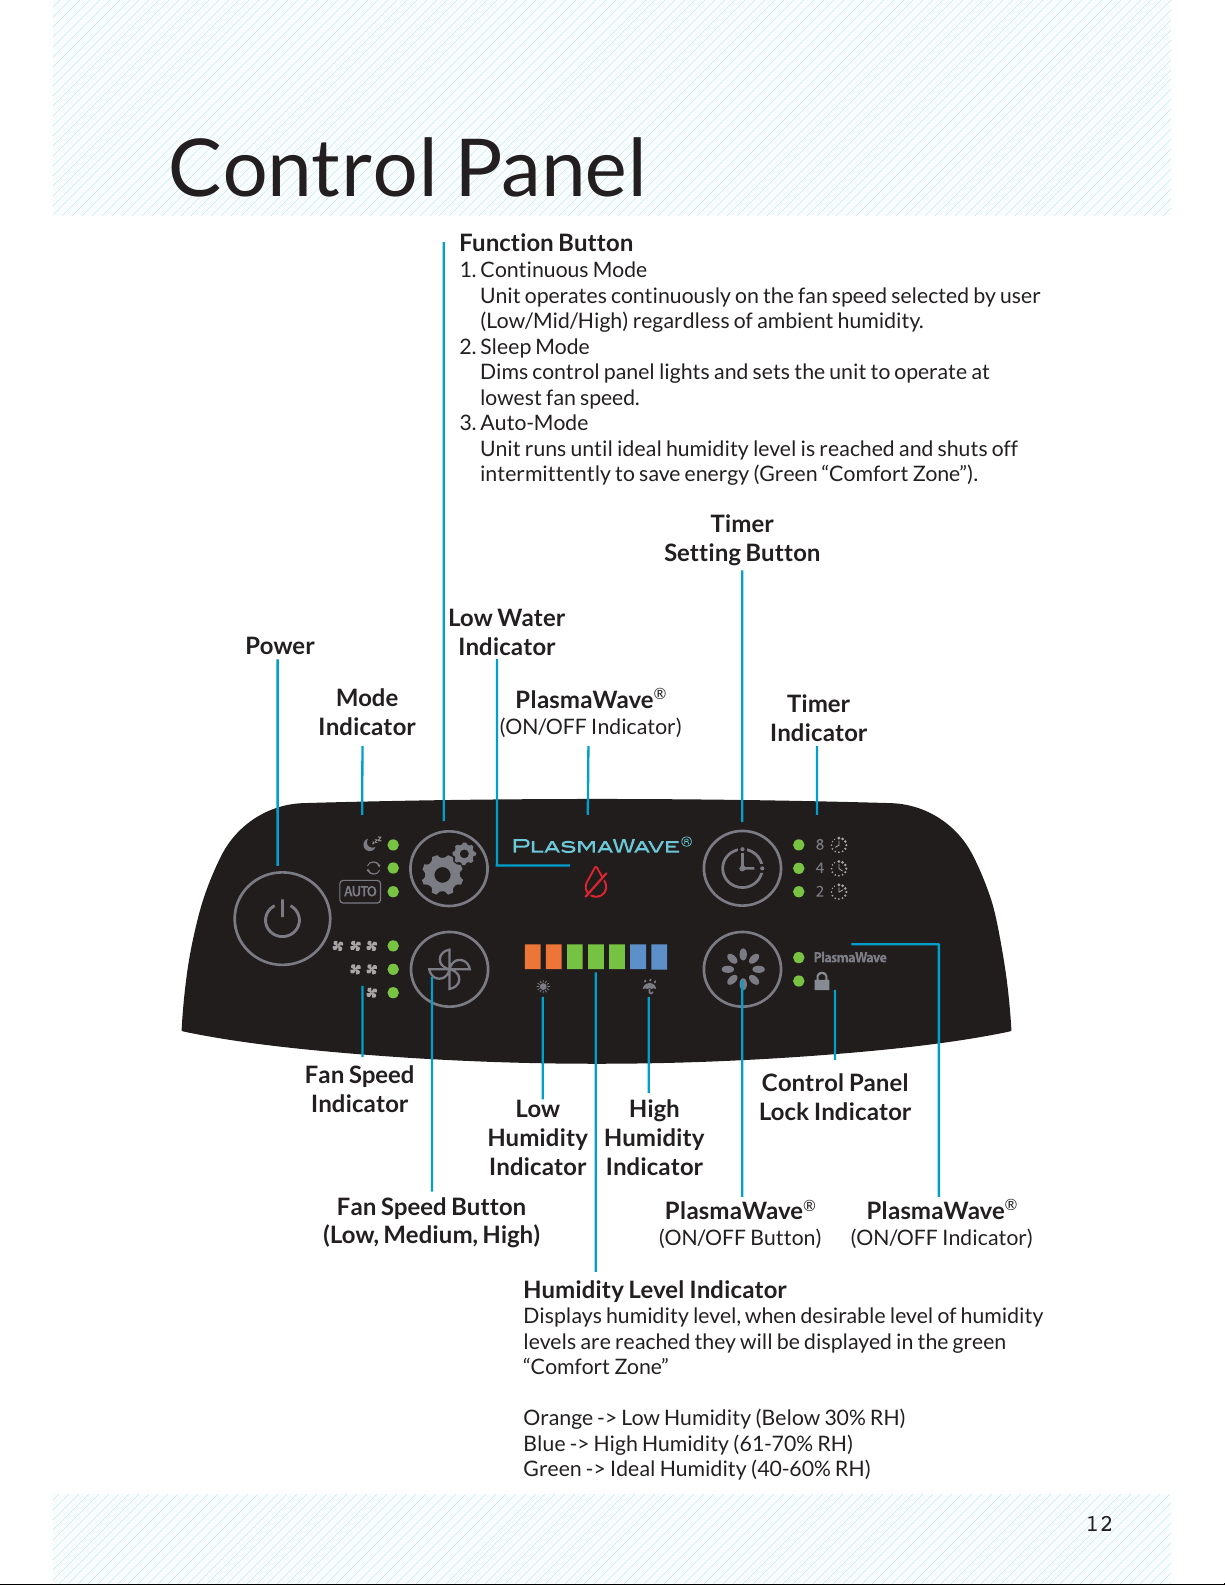
Control Panel
Function Button
1. Continuous Mode
Unit operates continuously on the fan speed selected by user
(Low/Mid/High) regardless of ambient humidity.
2. Sleep Mode
Dims control panel lights and sets the unit to operate at
lowest fan speed.
3. Auto-Mode
Unit runs until ideal humidity level is reached and shuts off
intermittently to save energy (Green “Comfort Zone”).
Power
Timer
Indicator
Timer
Setting Button
Low Water
Indicator
Mode
Indicator
PlasmaWave
®
(ON/OFF Indicator)
Control Panel
Lock Indicator
High
Humidity
Indicator
Low
Humidity
Indicator
Fan Speed
Indicator
Fan Speed Button
(Low, Medium, High)
PlasmaWave
®
(ON/OFF Indicator)
PlasmaWave
®
(ON/OFF Button)
Humidity Level Indicator
Displays humidity level, when desirable level of humidity
levels are reached they will be displayed in the green
“Comfort Zone”
Orange -> Low Humidity (Below 30% RH)
Blue -> High Humidity (61-70% RH)
Green -> Ideal Humidity (40-60% RH)
13
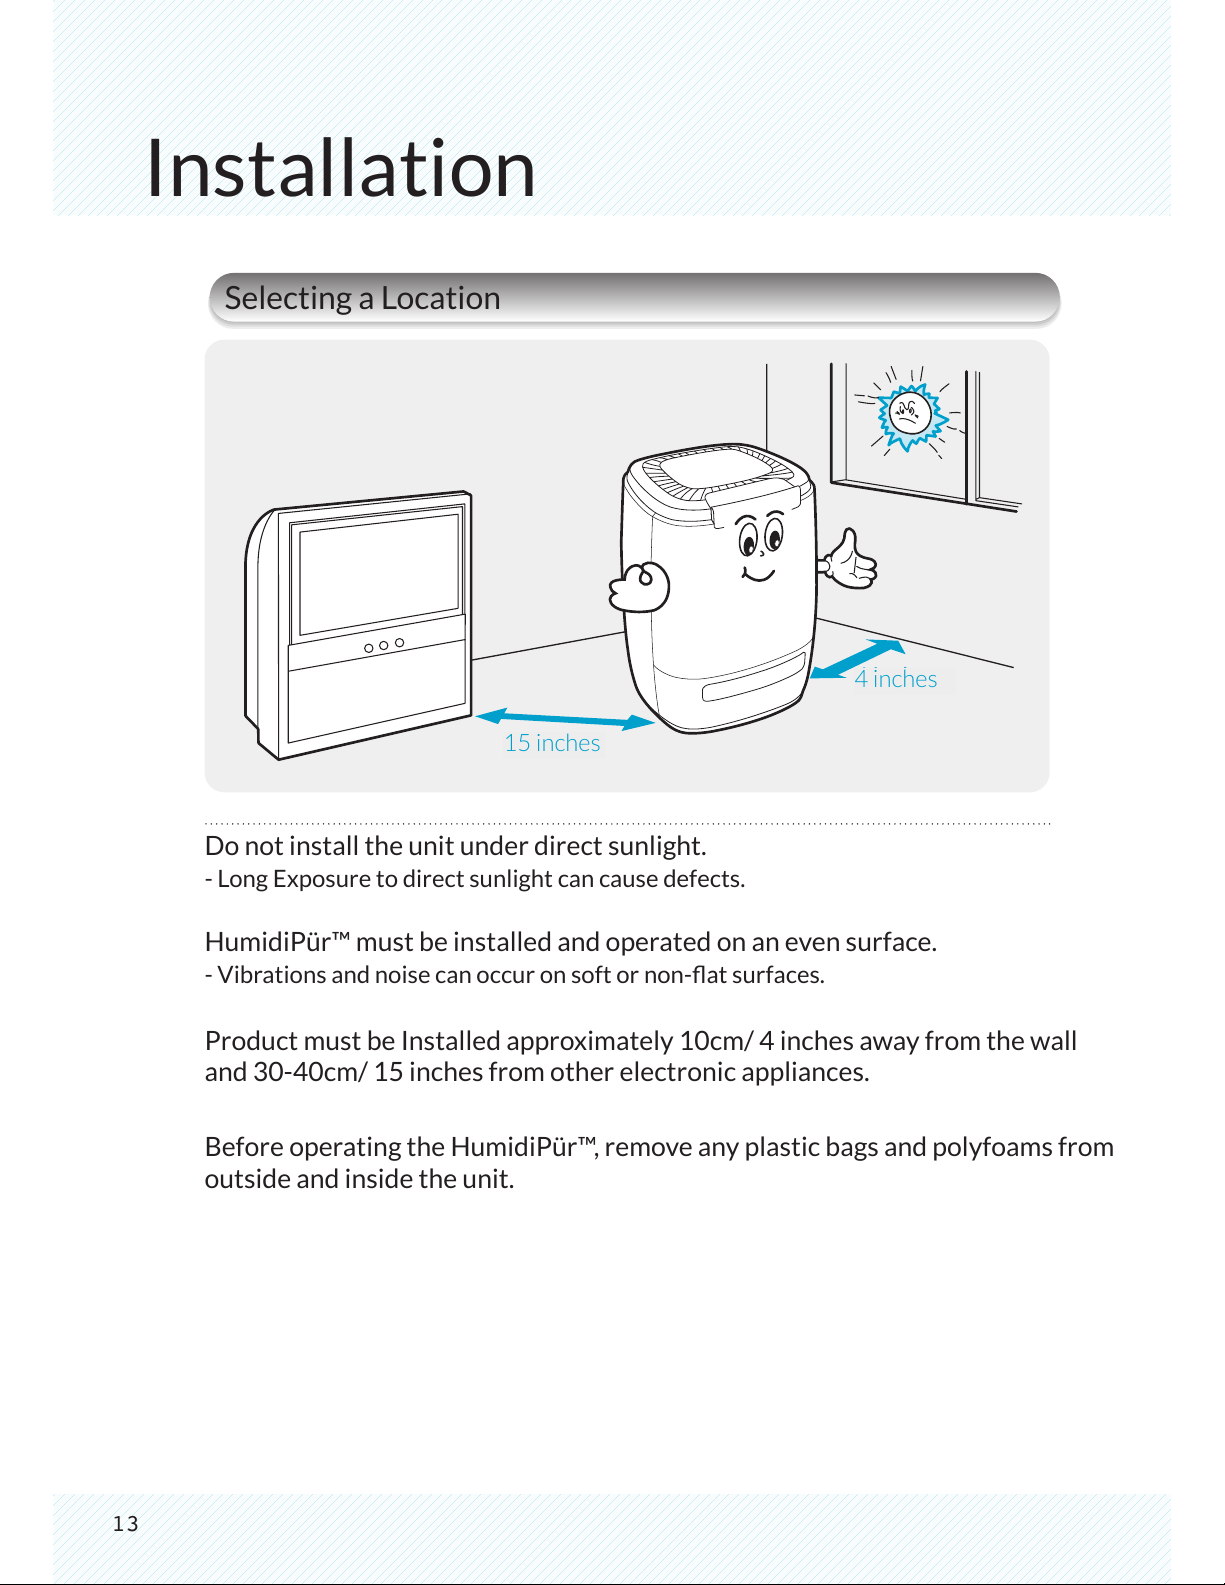
4 inches
15 inches
Installation
Selecting a Location
15 inches
4 inches
Do not install the unit under direct sunlight.
- Long Exposure to direct sunlight can cause defects.
HumidiPür™ must be installed and operated on an even surface.
- Vibrations and noise can occur on soft or non-at surfaces.
Product must be Installed approximately 10cm/ 4 inches away from the wall
and 30-40cm/ 15 inches from other electronic appliances.
Before operating the HumidiPür™, remove any plastic bags and polyfoams from
outside and inside the unit.
14
Operation
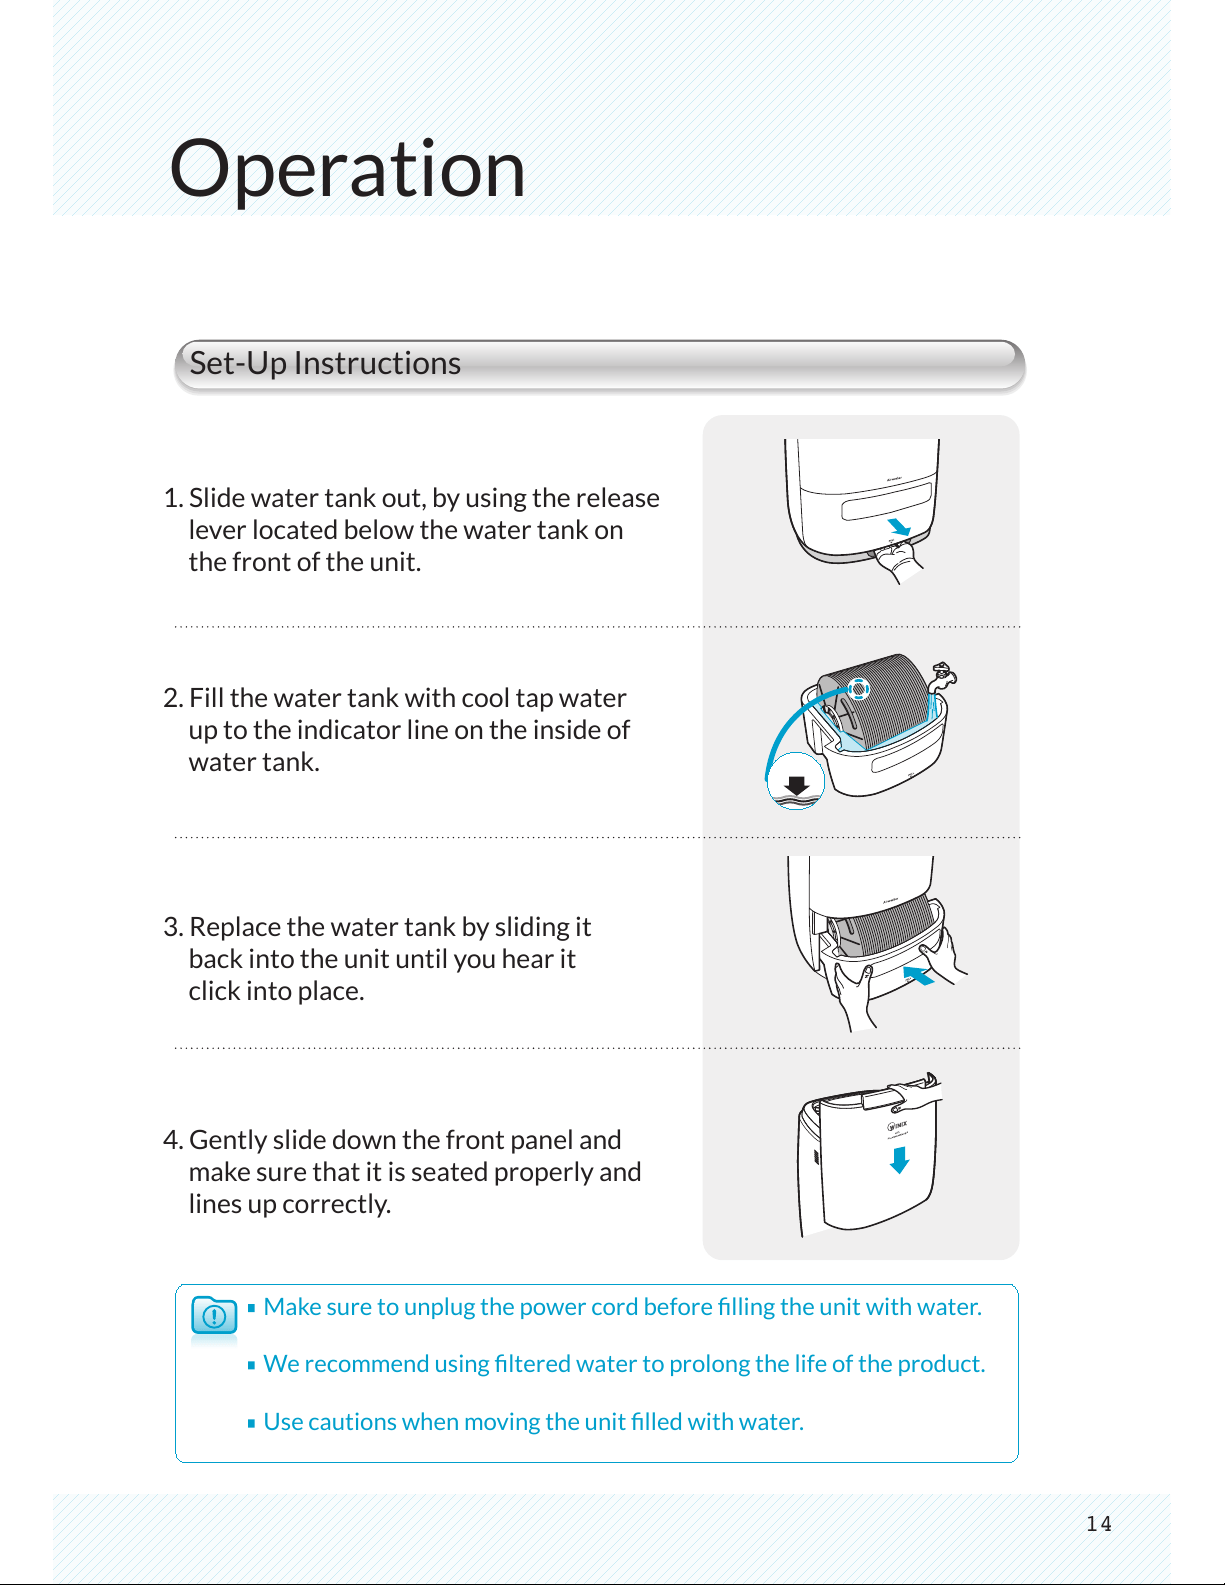
Set-Up Instructions
1. Slide water tank out, by using the release
lever located below the water tank on
the front of the unit.
2. Fill the water tank with cool tap water
up to the indicator line on the inside of
water tank.
3. Replace the water tank by sliding it
back into the unit until you hear it
click into place.
4. Gently slide down the front panel and
make sure that it is seated properly and
lines up correctly.
Make sure to unplug the power cord before lling the unit with water.
We recommend using ltered water to prolong the life of the product.
Use cautions when moving the unit lled with water.
15
Operation
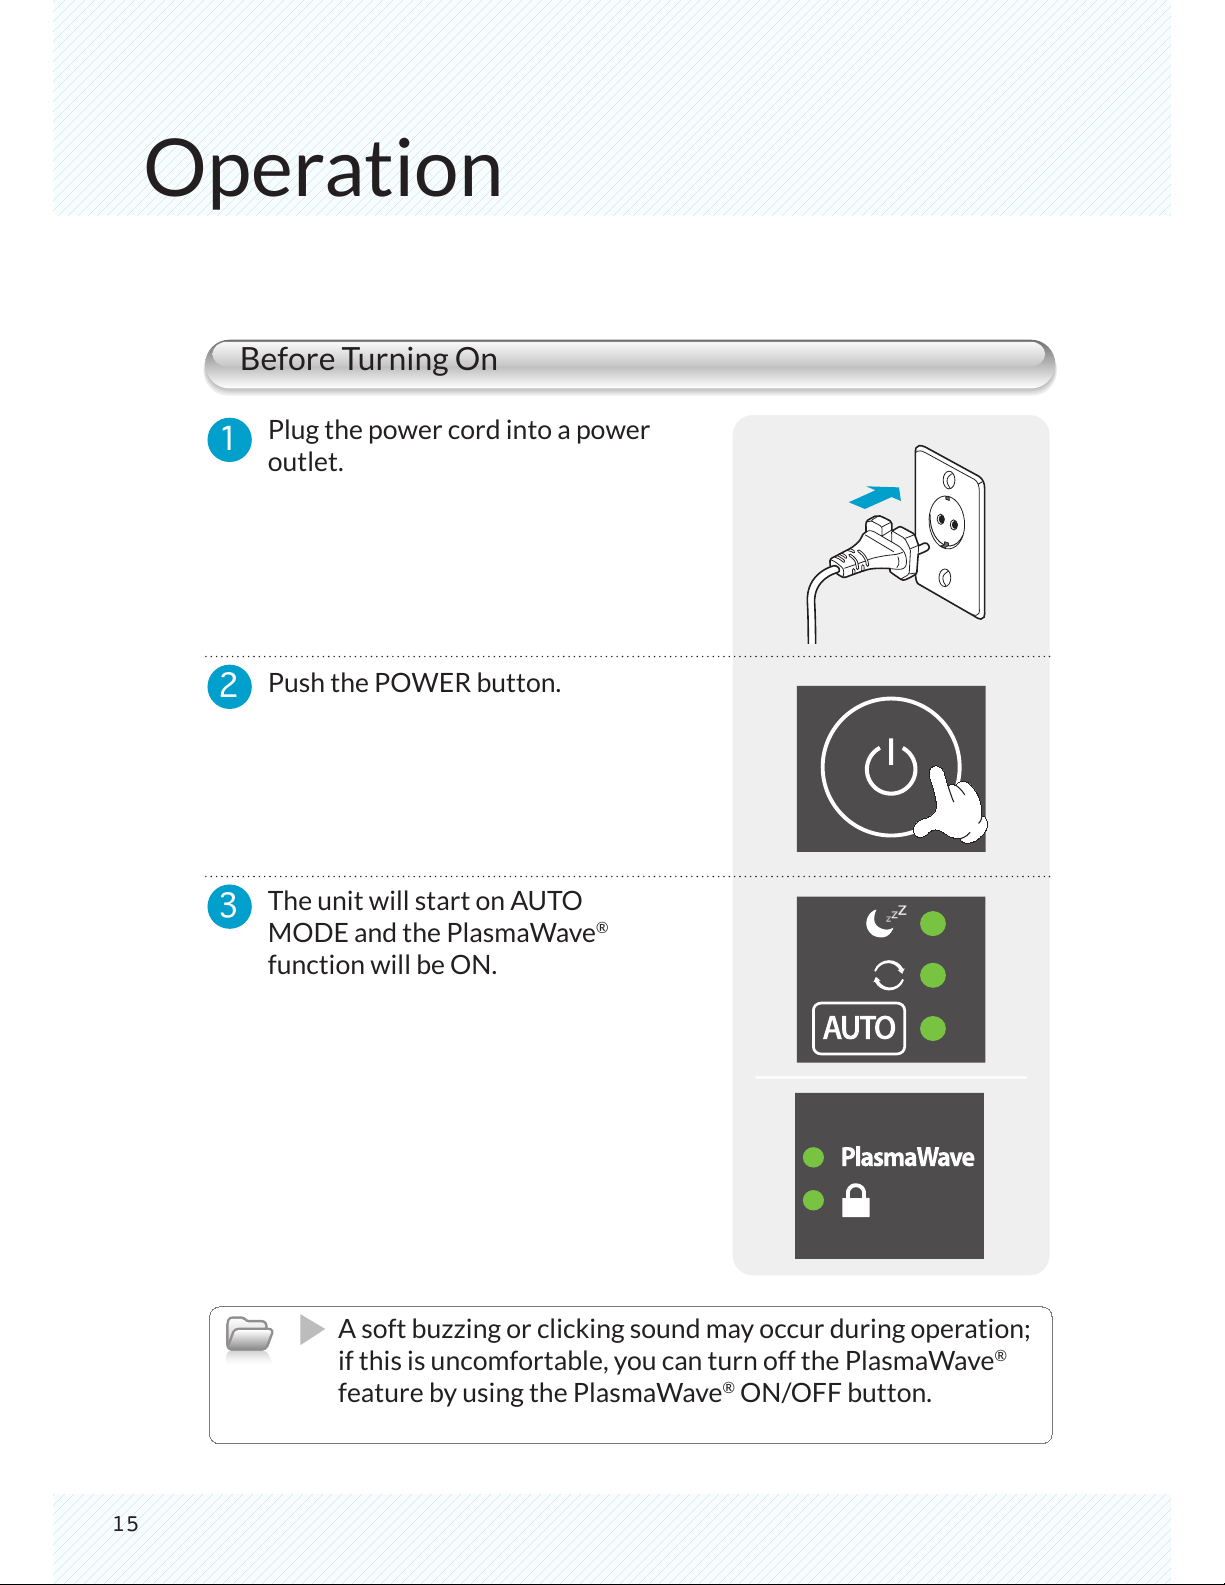
Before Turning On
1
2
3
Plug the power cord into a power
outlet.
Push the POWER button.
The unit will start on AUTO
MODE and the PlasmaWave
®
function will be ON.
A soft buzzing or clicking sound may occur during operation;
if this is uncomfortable, you can turn off the PlasmaWave
®
feature by using the PlasmaWave
®
ON/OFF button.
16
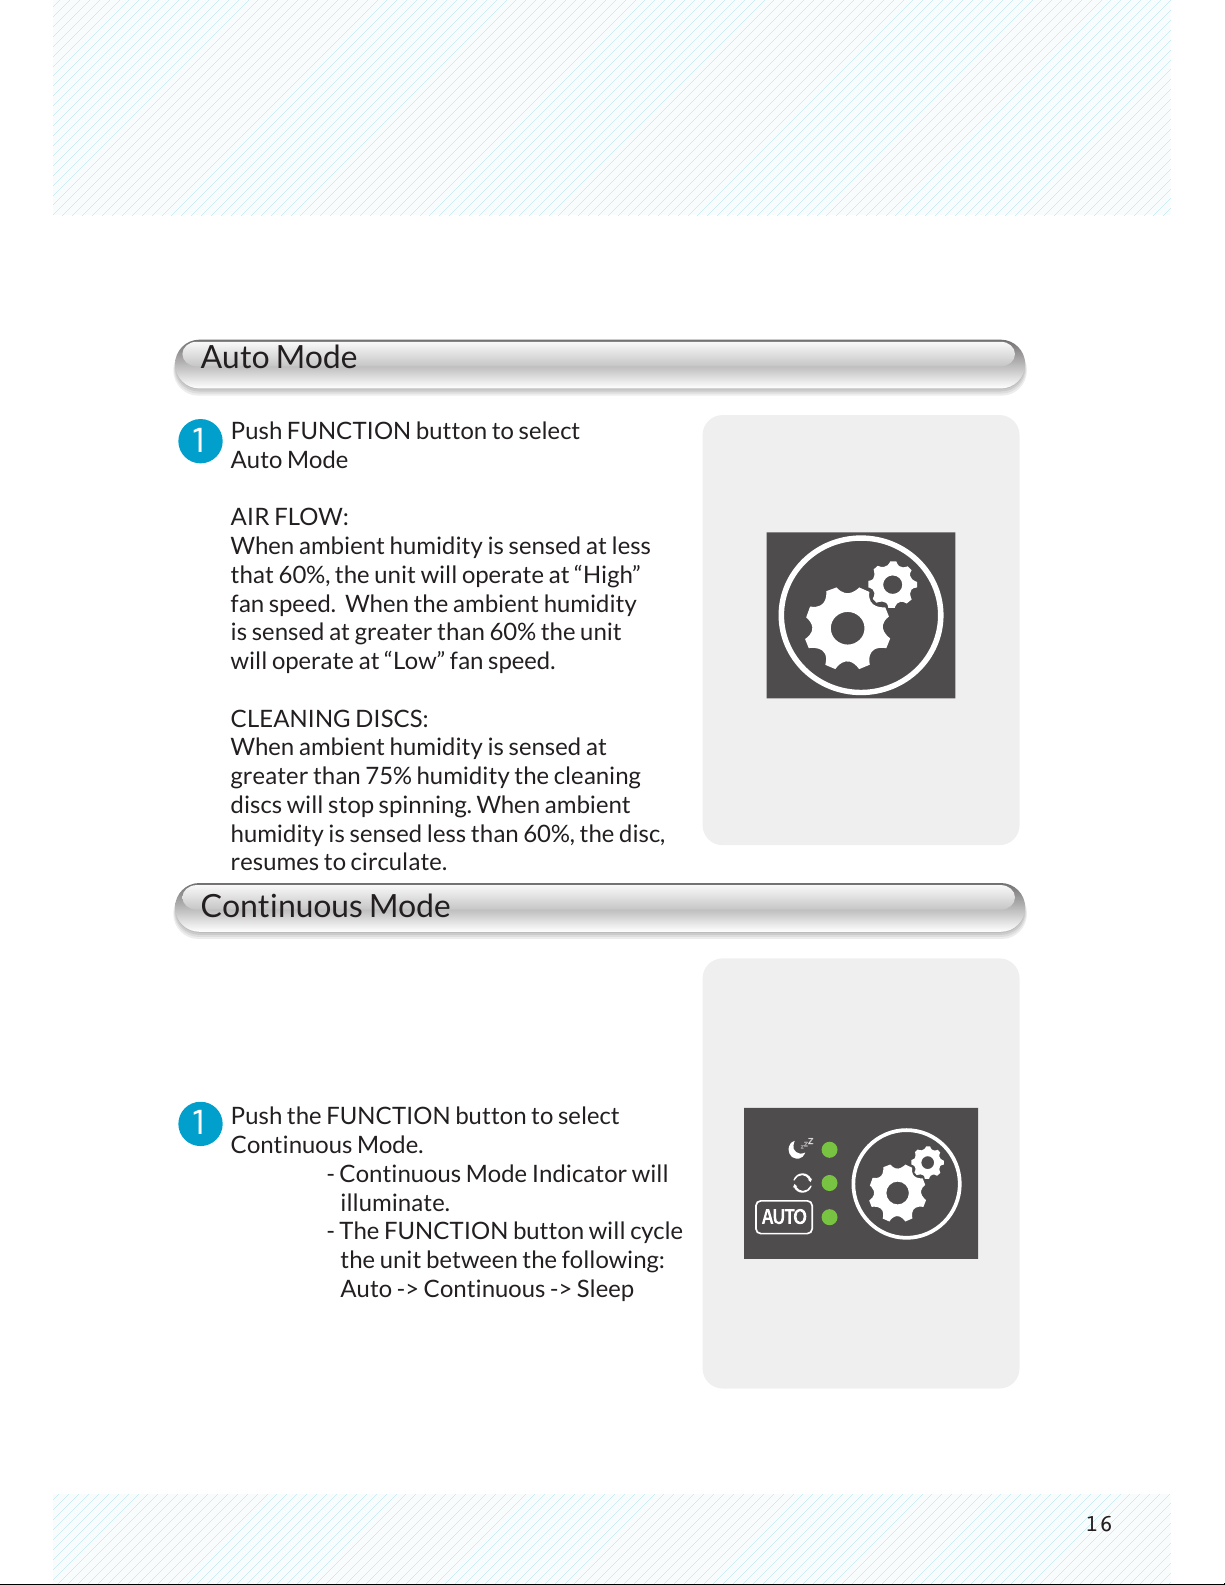
Auto Mode
Continuous Mode
1
1
Push FUNCTION button to select
Auto Mode
AIR FLOW:
When ambient humidity is sensed at less
that 60%, the unit will operate at “High”
fan speed. When the ambient humidity
is sensed at greater than 60% the unit
will operate at “Low” fan speed.
CLEANING DISCS:
When ambient humidity is sensed at
greater than 75% humidity the cleaning
discs will stop spinning. When ambient
humidity is sensed less than 60%, the disc,
resumes to circulate.
Push the FUNCTION button to select
Continuous Mode.
- Continuous Mode Indicator will
illuminate.
- The FUNCTION button will cycle
the unit between the following:
Auto -> Continuous -> Sleep
Operation
17
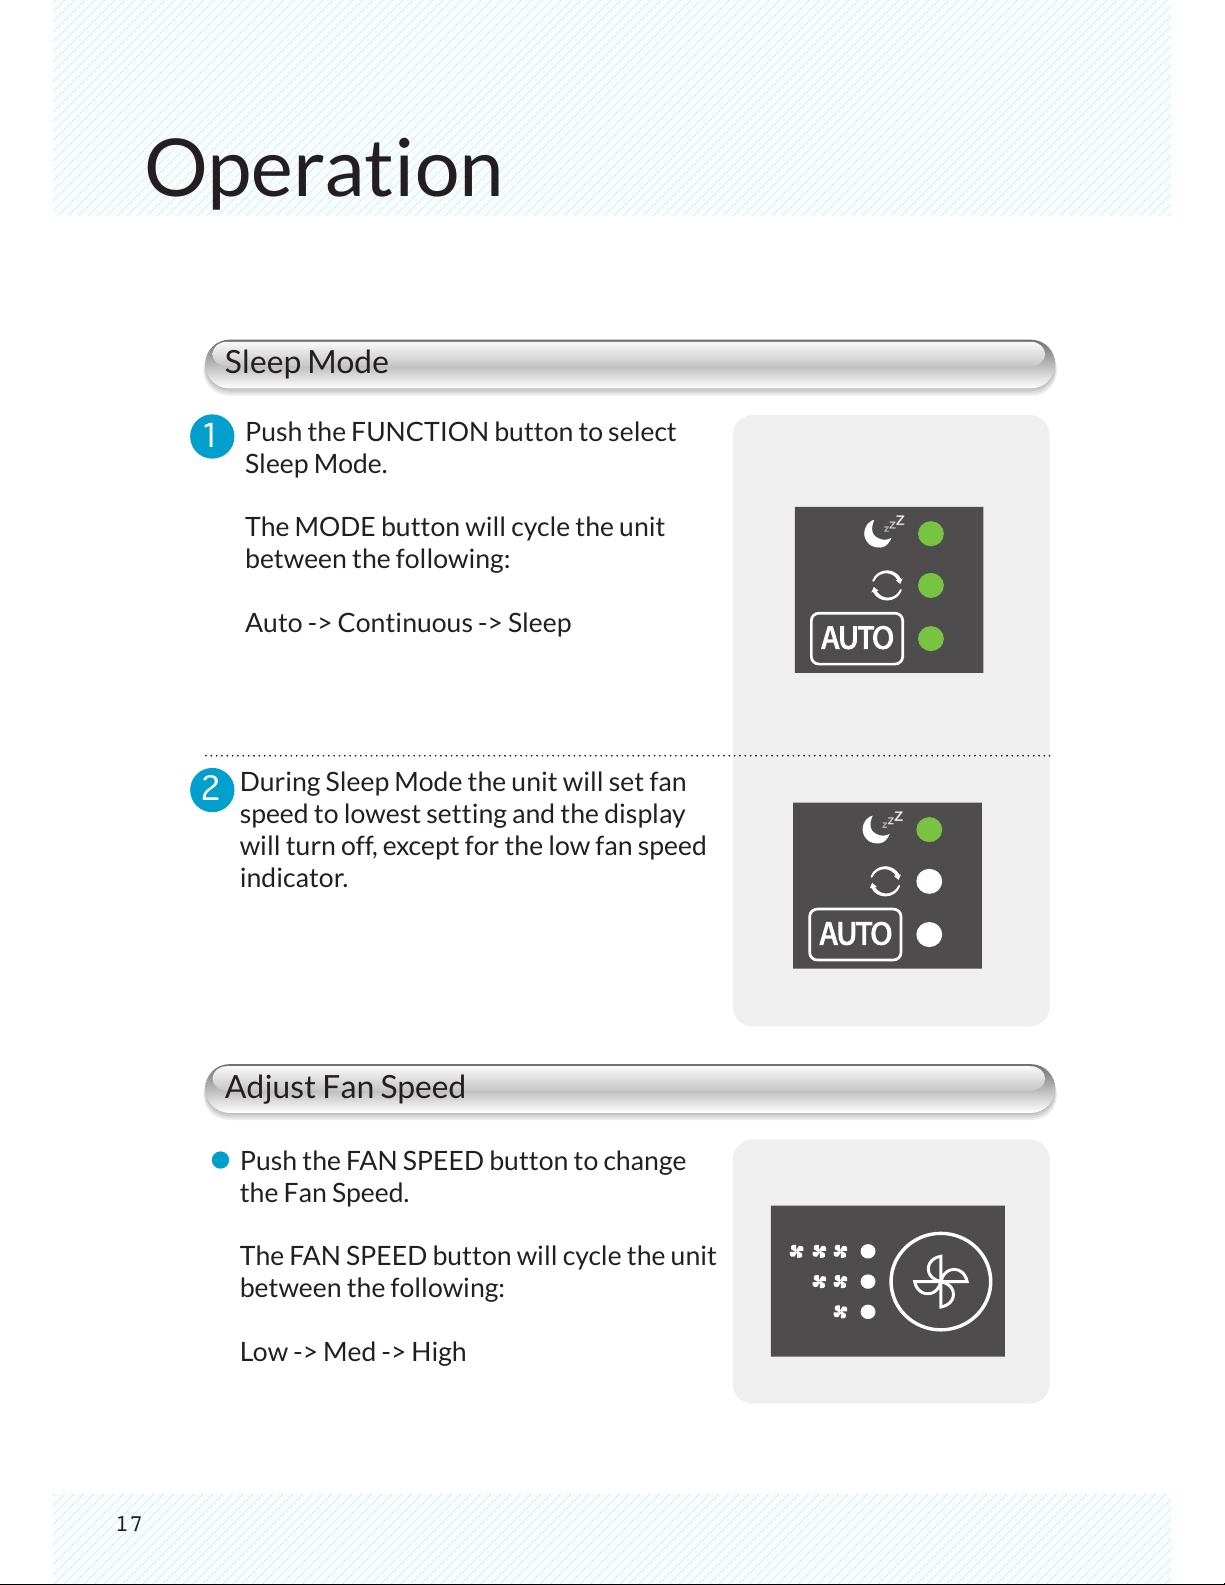
Sleep Mode
Adjust Fan Speed
1
2
Push the FUNCTION button to select
Sleep Mode.
The MODE button will cycle the unit
between the following:
Auto -> Continuous -> Sleep
During Sleep Mode the unit will set fan
speed to lowest setting and the display
will turn off, except for the low fan speed
indicator.
Push the FAN SPEED button to change
the Fan Speed.
The FAN SPEED button will cycle the unit
between the following:
Low -> Med -> High
During Humidification process
During PlasmaWave® operation only
18
Adjust Timer
PlasmaWave
®
Technology
Lock Button
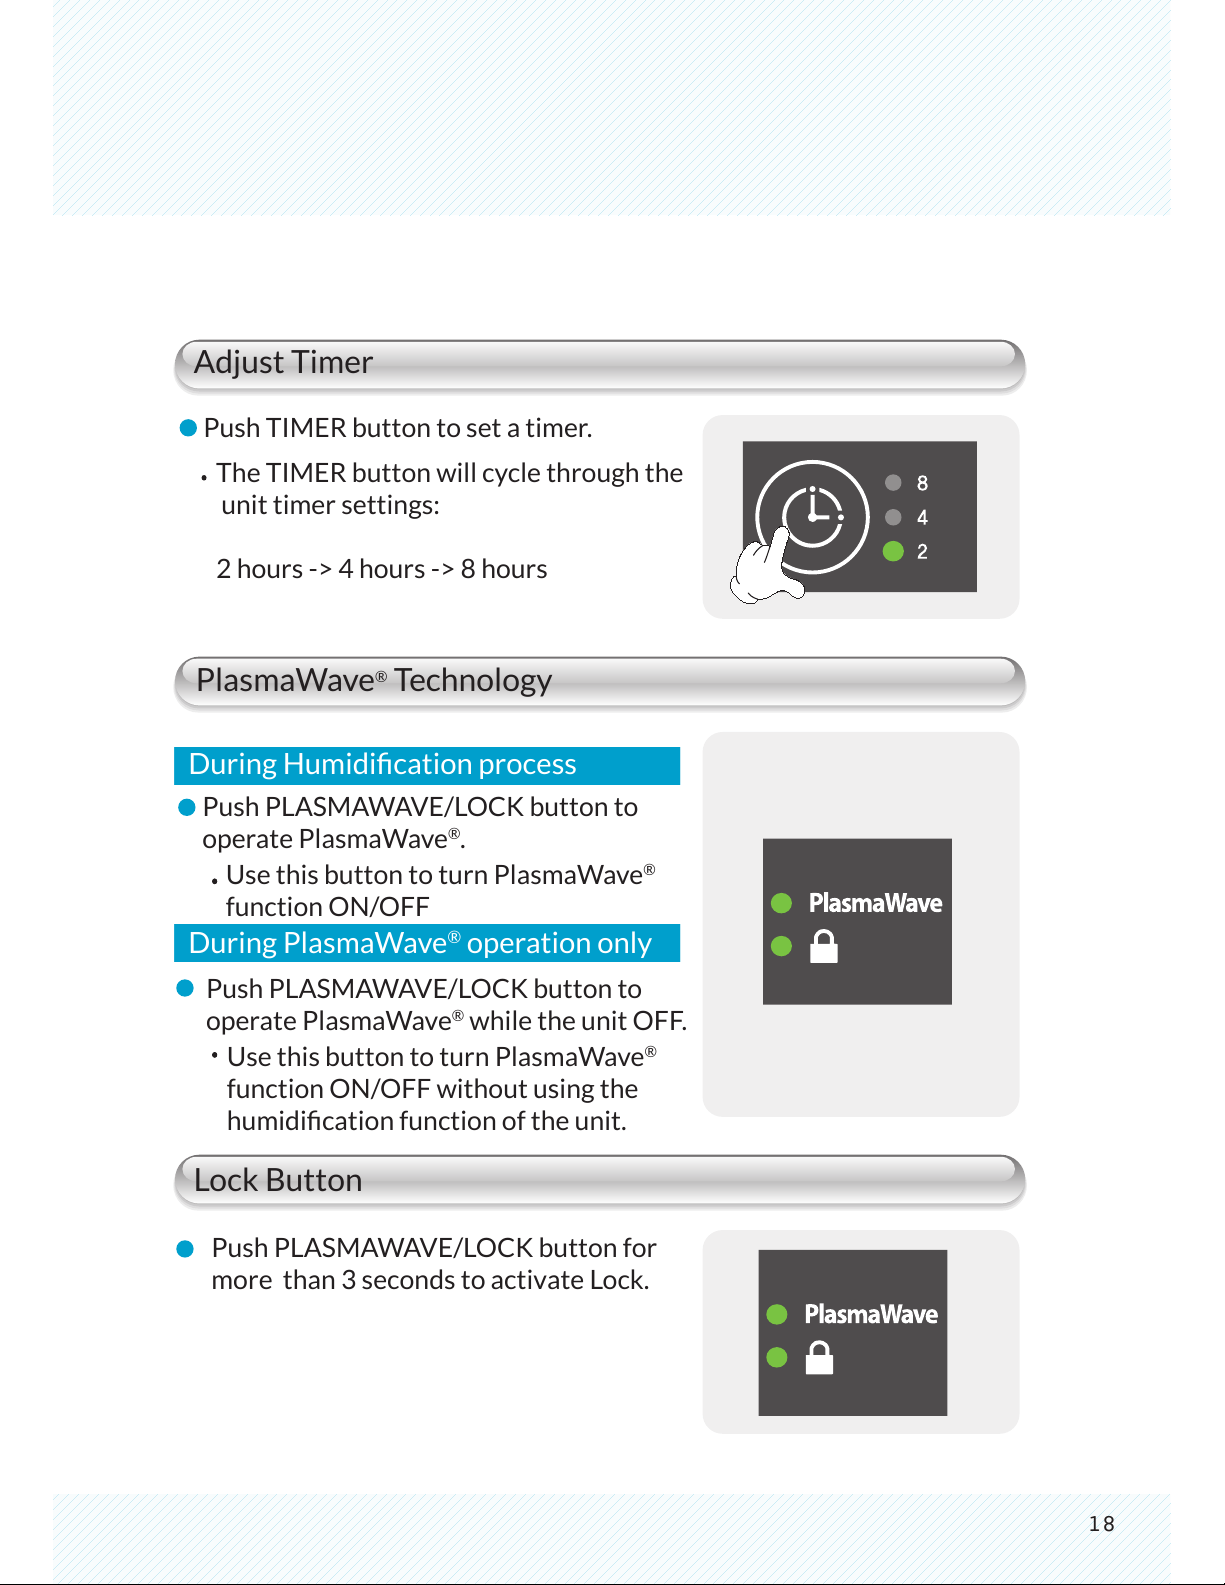
Push TIMER button to set a timer.
Push PLASMAWAVE/LOCK button for
more than 3 seconds to activate Lock.
During Humidication process
The TIMER button will cycle through the
unit timer settings:
2 hours -> 4 hours -> 8 hours
Push PLASMAWAVE/LOCK button to
operate PlasmaWave
®
.
During PlasmaWave
®
operation only
Use this button to turn PlasmaWave
®
function ON/OFF
Push PLASMAWAVE/LOCK button to
operate PlasmaWave
®
while the unit OFF.
Use this button to turn PlasmaWave
®
function ON/OFF without using the
humidication function of the unit.
19
Care & Maintenance
1 2
3
4
5
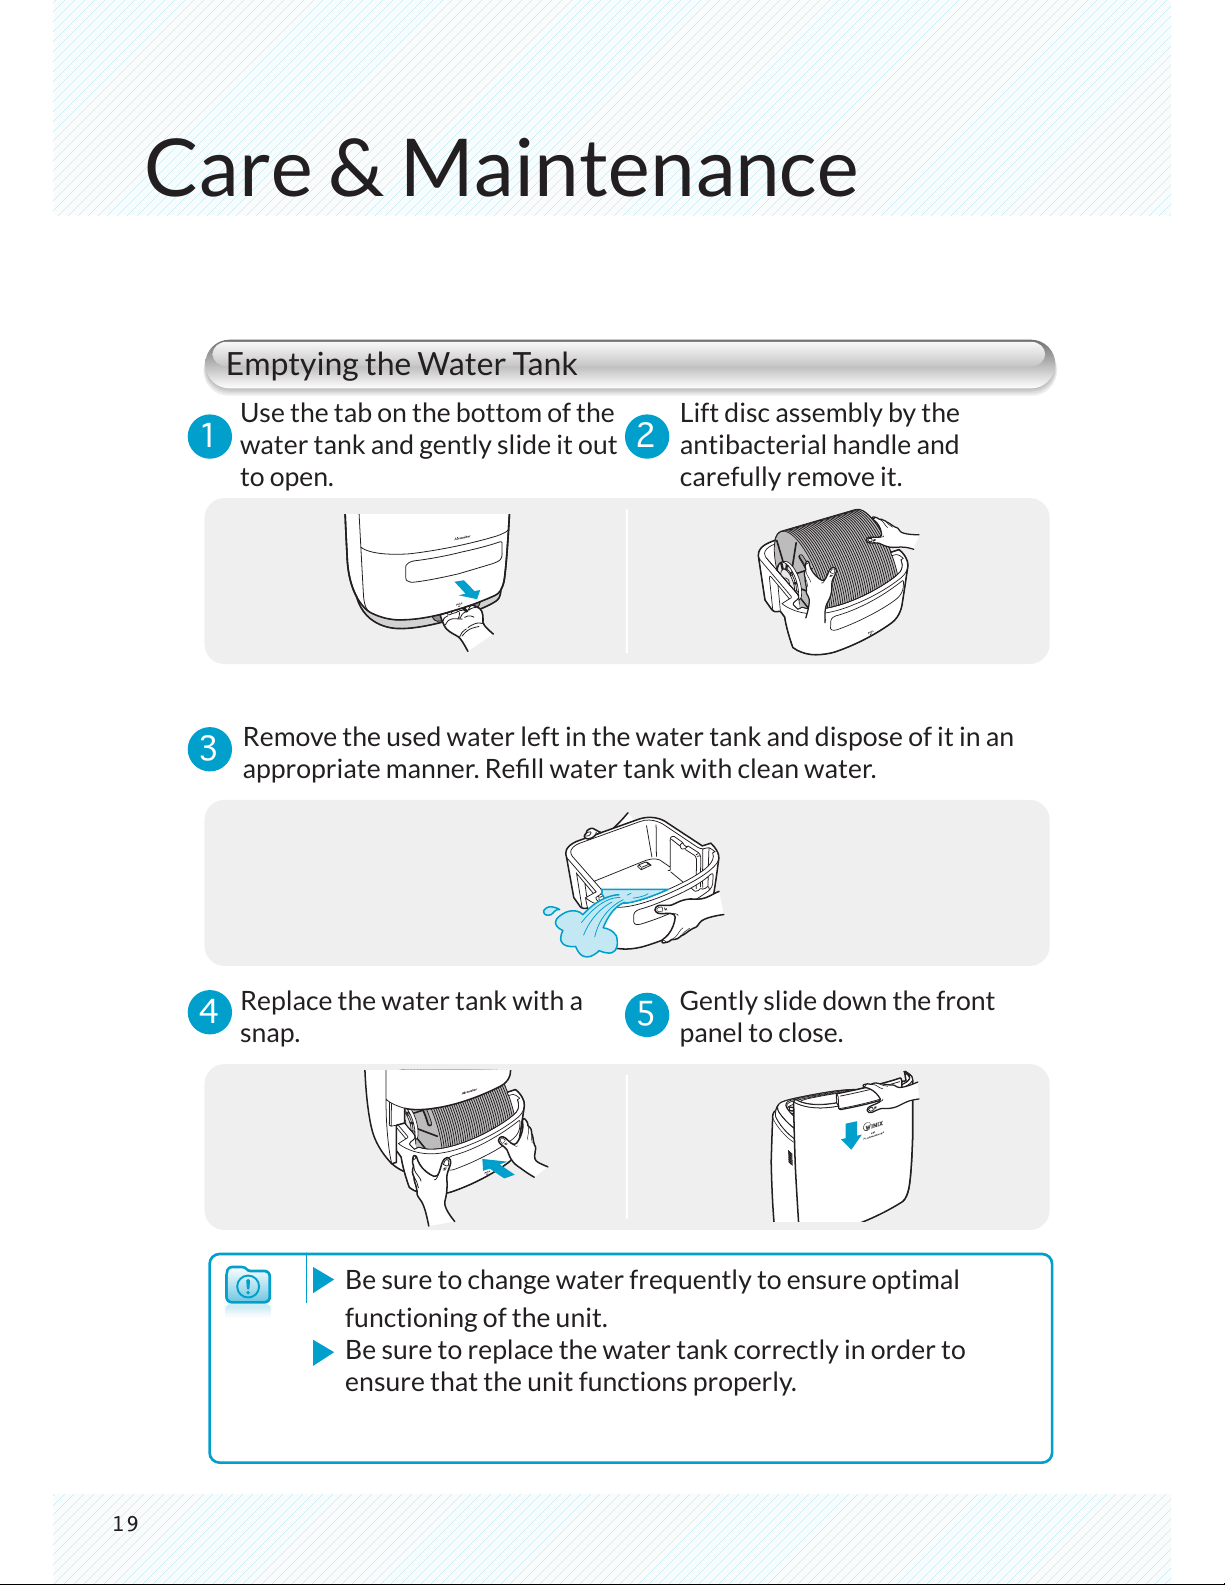
Emptying the Water Tank
Use the tab on the bottom of the
water tank and gently slide it out
to open.
Lift disc assembly by the
antibacterial handle and
carefully remove it.
Remove the used water left in the water tank and dispose of it in an
appropriate manner. Rell water tank with clean water.
Replace the water tank with a
snap.
Gently slide down the front
panel to close.
Be sure to change water frequently to ensure optimal
functioning of the unit.
Be sure to replace the water tank correctly in order to
ensure that the unit functions properly.
20
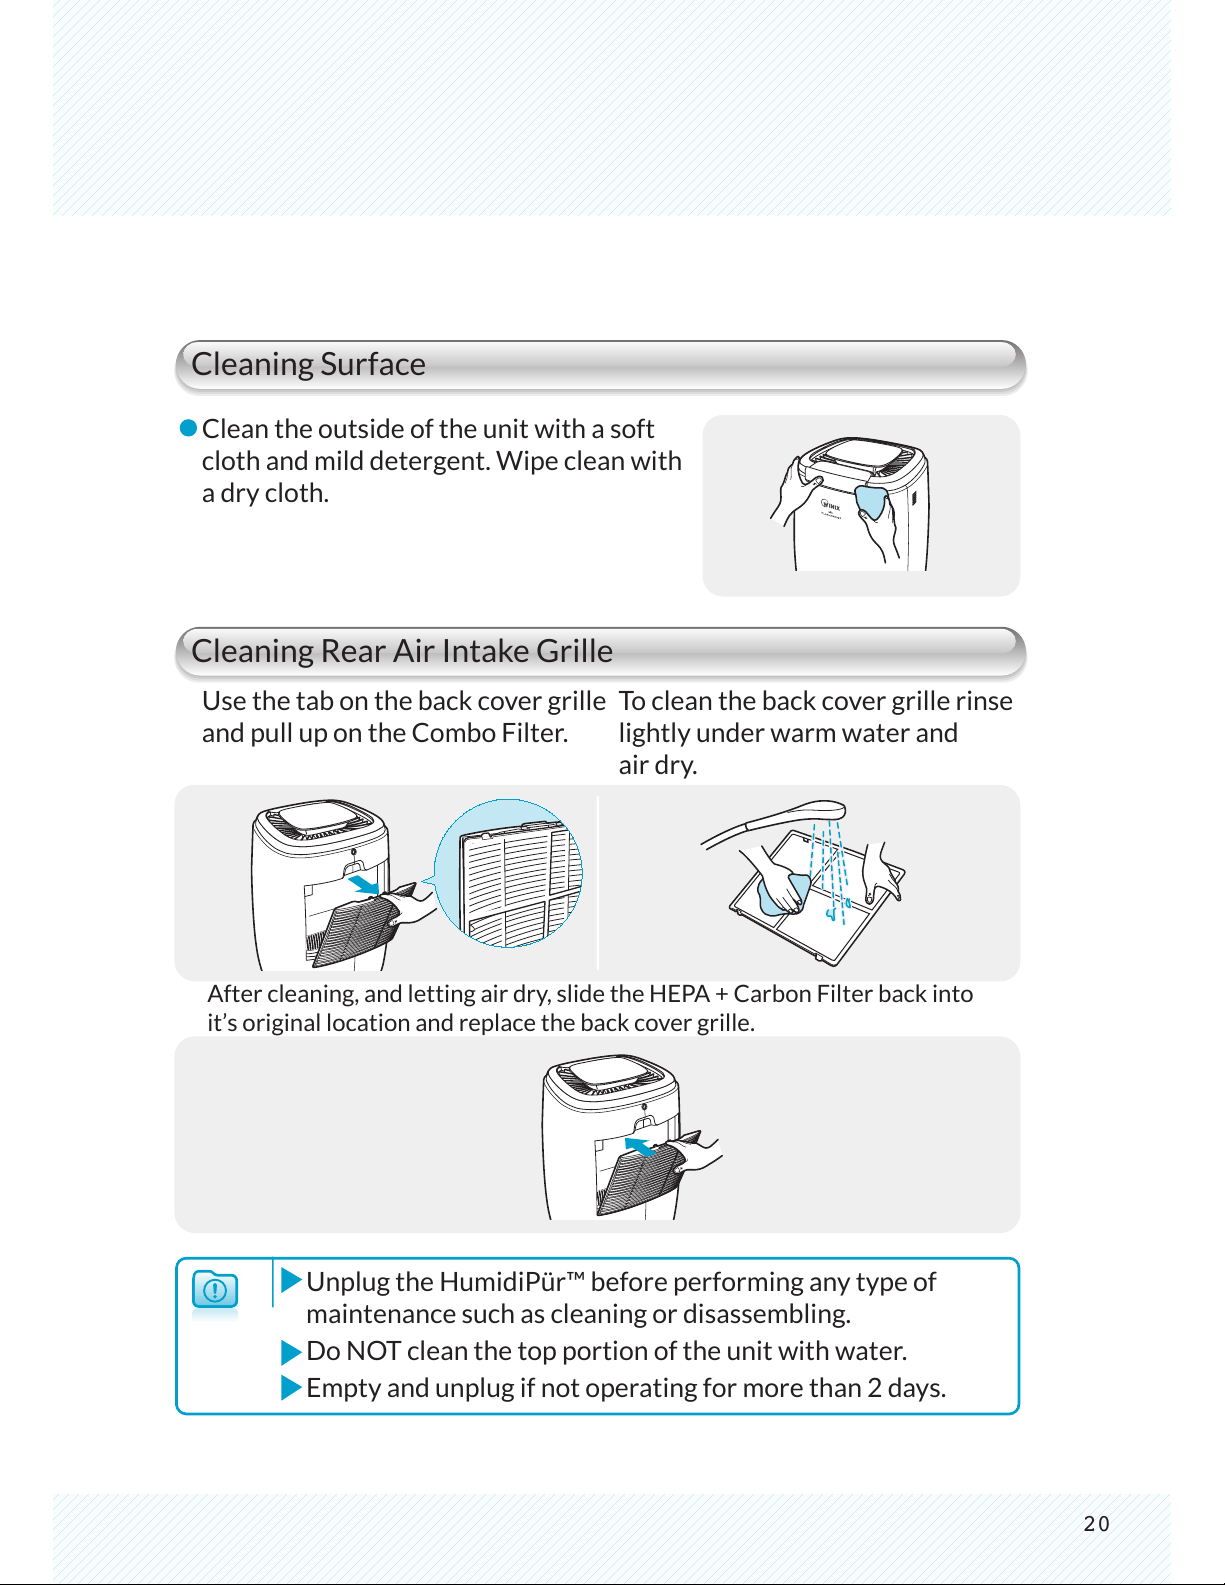
Cleaning Surface
Cleaning Rear Air Intake Grille
Unplug the HumidiPür™ before performing any type of
maintenance such as cleaning or disassembling.
Do NOT clean the top portion of the unit with water.
Empty and unplug if not operating for more than 2 days.
Clean the outside of the unit with a soft
cloth and mild detergent. Wipe clean with
a dry cloth.
Use the tab on the back cover grille
and pull up on the Combo Filter.
To clean the back cover grille rinse
lightly under warm water and
air dry.
After cleaning, and letting air dry, slide the HEPA + Carbon Filter back into
it’s original location and replace the back cover grille.
2
1
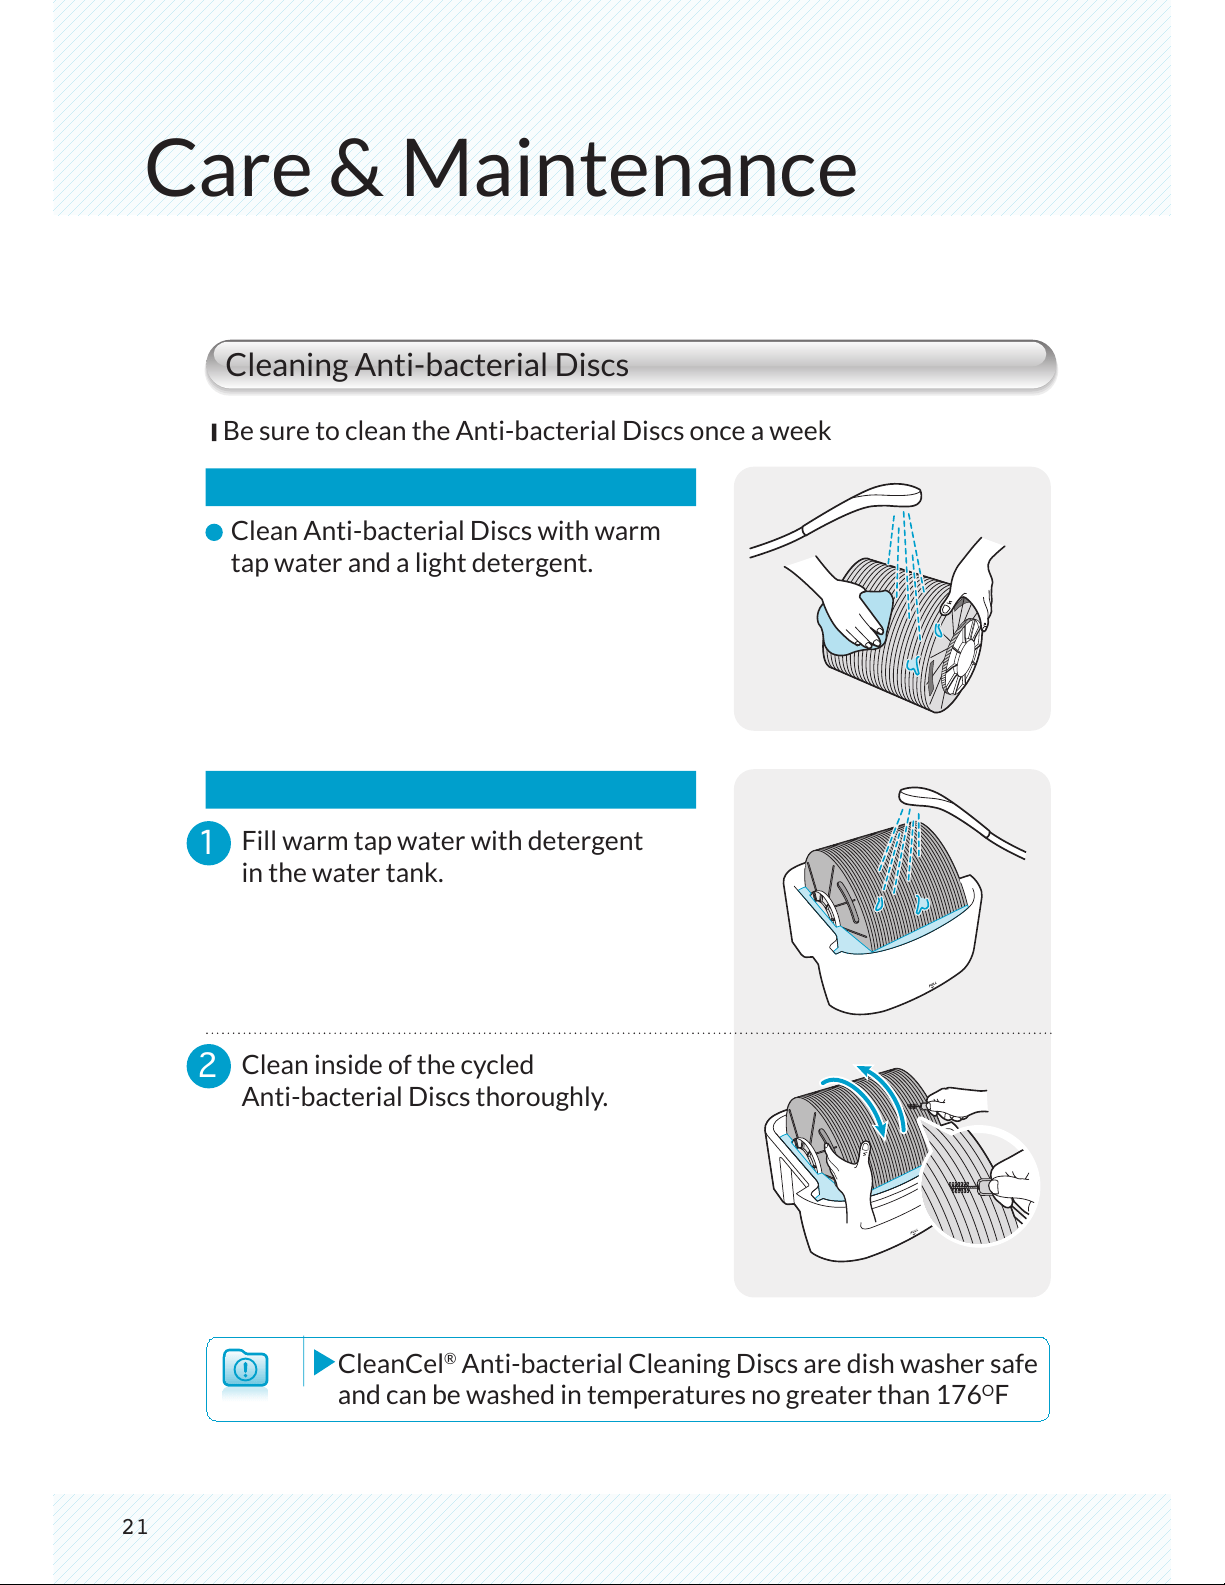
CleanCel
®
Anti-bacterial Cleaning Discs are dish washer safe
and can be washed in temperatures no greater than 176
O
F
Care & Maintenance
Cleaning Anti-bacterial Discs
Be sure to clean the Anti-bacterial Discs once a week
Clean Anti-bacterial Discs with warm
tap water and a light detergent.
Fill warm tap water with detergent
in the water tank.
Clean inside of the cycled
Anti-bacterial Discs thoroughly.
21
2
1
3
4
22
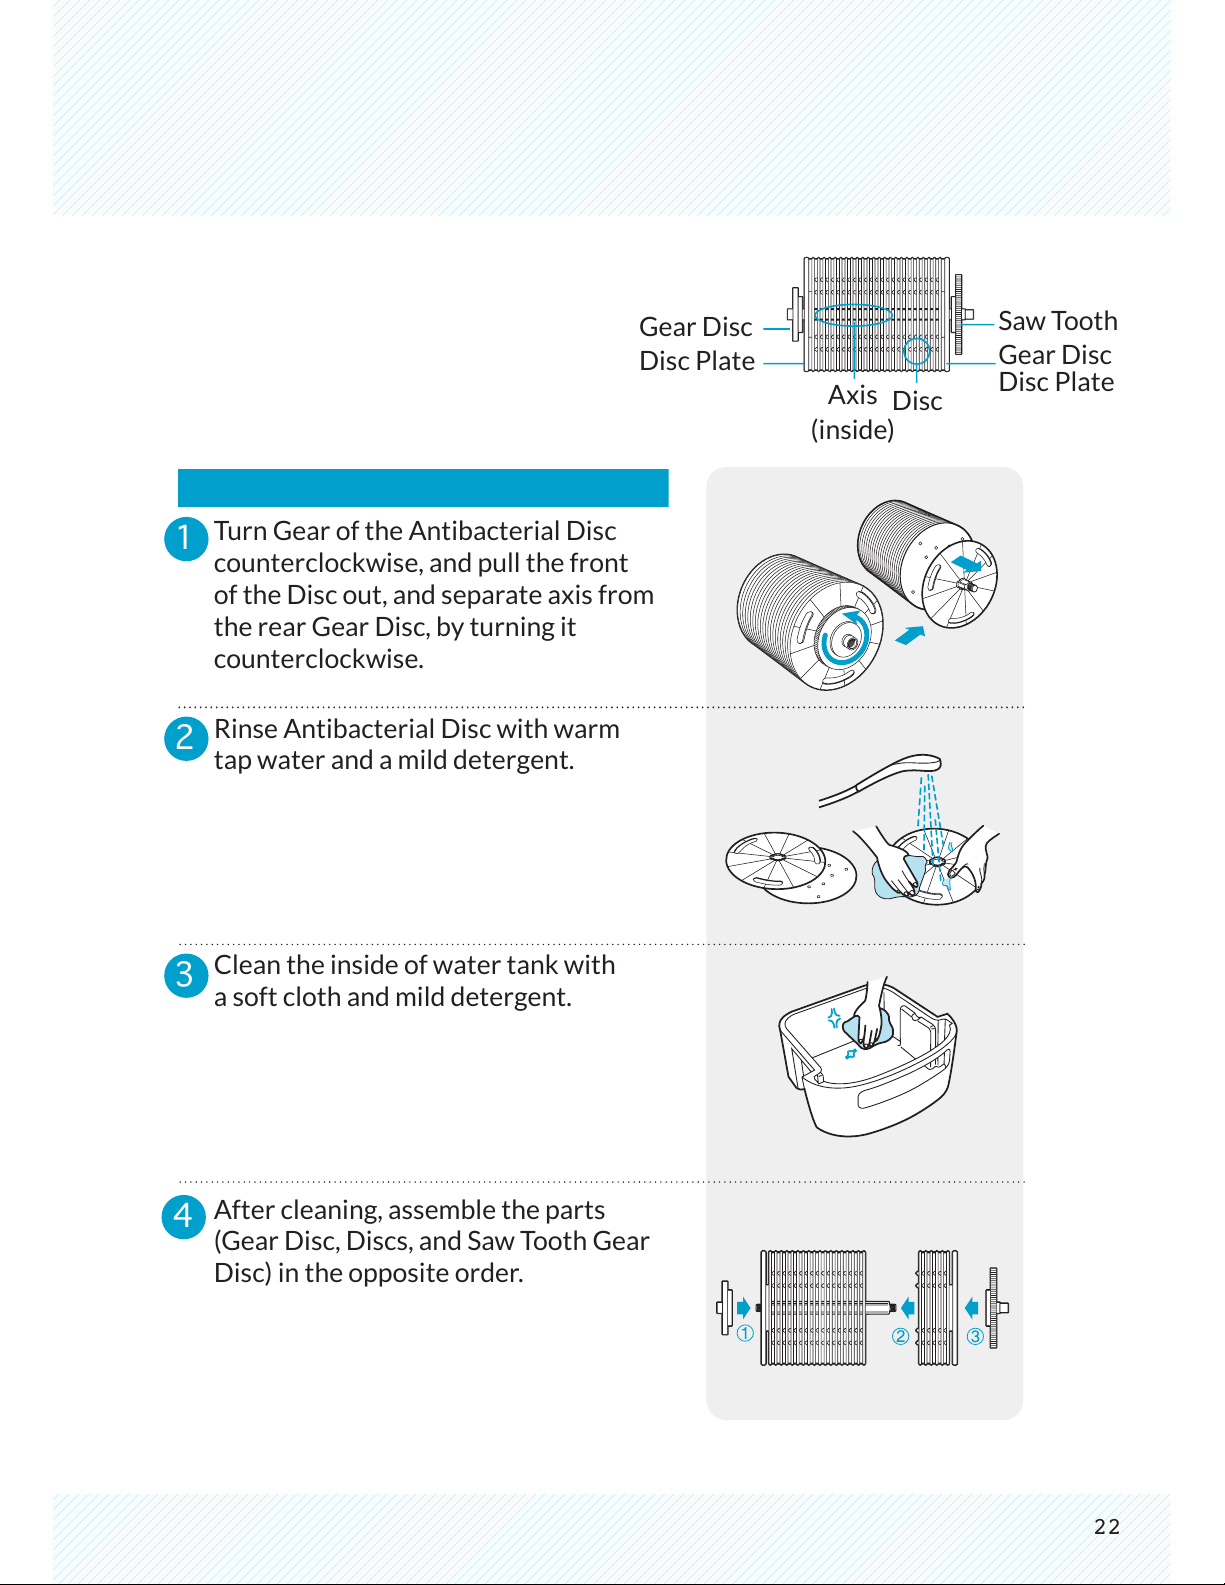
Turn Gear of the Antibacterial Disc
counterclockwise, and pull the front
of the Disc out, and separate axis from
the rear Gear Disc, by turning it
counterclockwise.
Rinse Antibacterial Disc with warm
tap water and a mild detergent.
Clean the inside of water tank with
a soft cloth and mild detergent.
After cleaning, assemble the parts
(Gear Disc, Discs, and Saw Tooth Gear
Disc) in the opposite order.
Gear Disc
Disc Plate
Saw Tooth
Gear Disc
Disc Plate
Axis
(inside)
Disc
23
Care & Maintenance
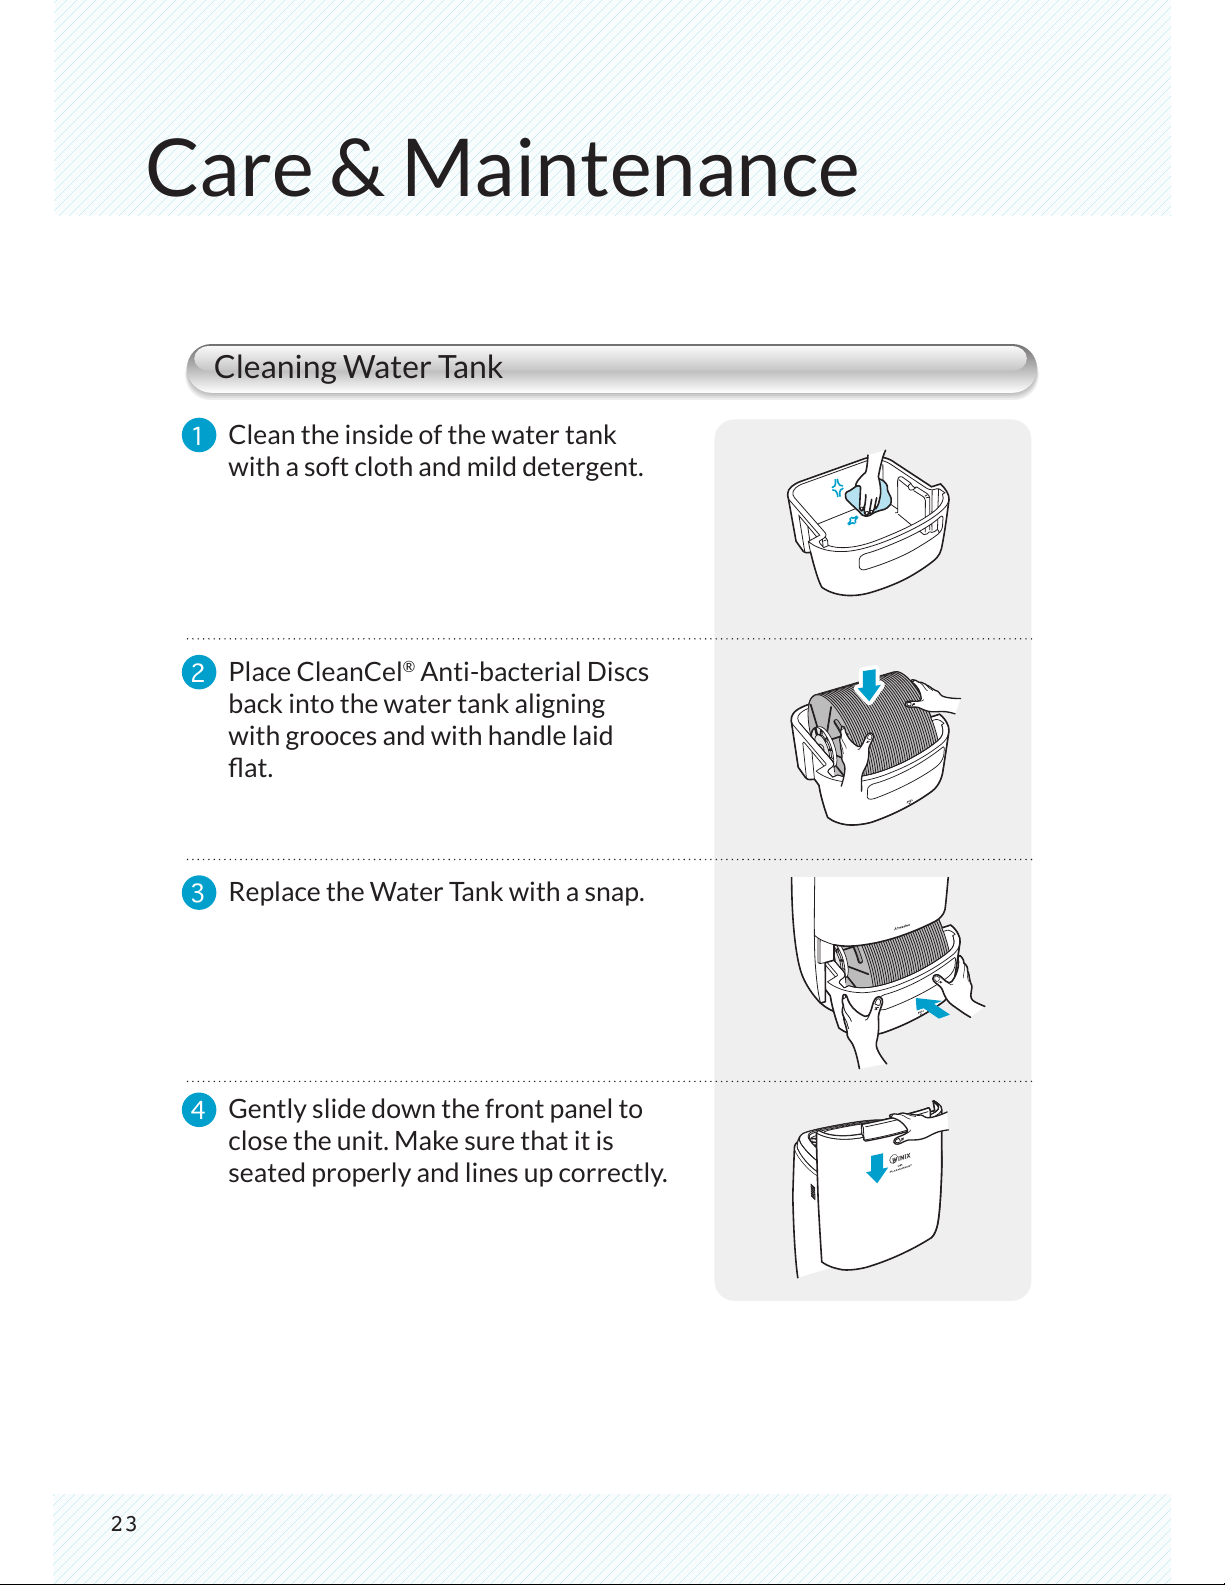
Cleaning Water Tank
Clean the inside of the water tank
with a soft cloth and mild detergent.
1
2
3
4
Place CleanCel
®
Anti-bacterial Discs
back into the water tank aligning
with grooces and with handle laid
at.
Replace the Water Tank with a snap.
Gently slide down the front panel to
close the unit. Make sure that it is
seated properly and lines up correctly.
24
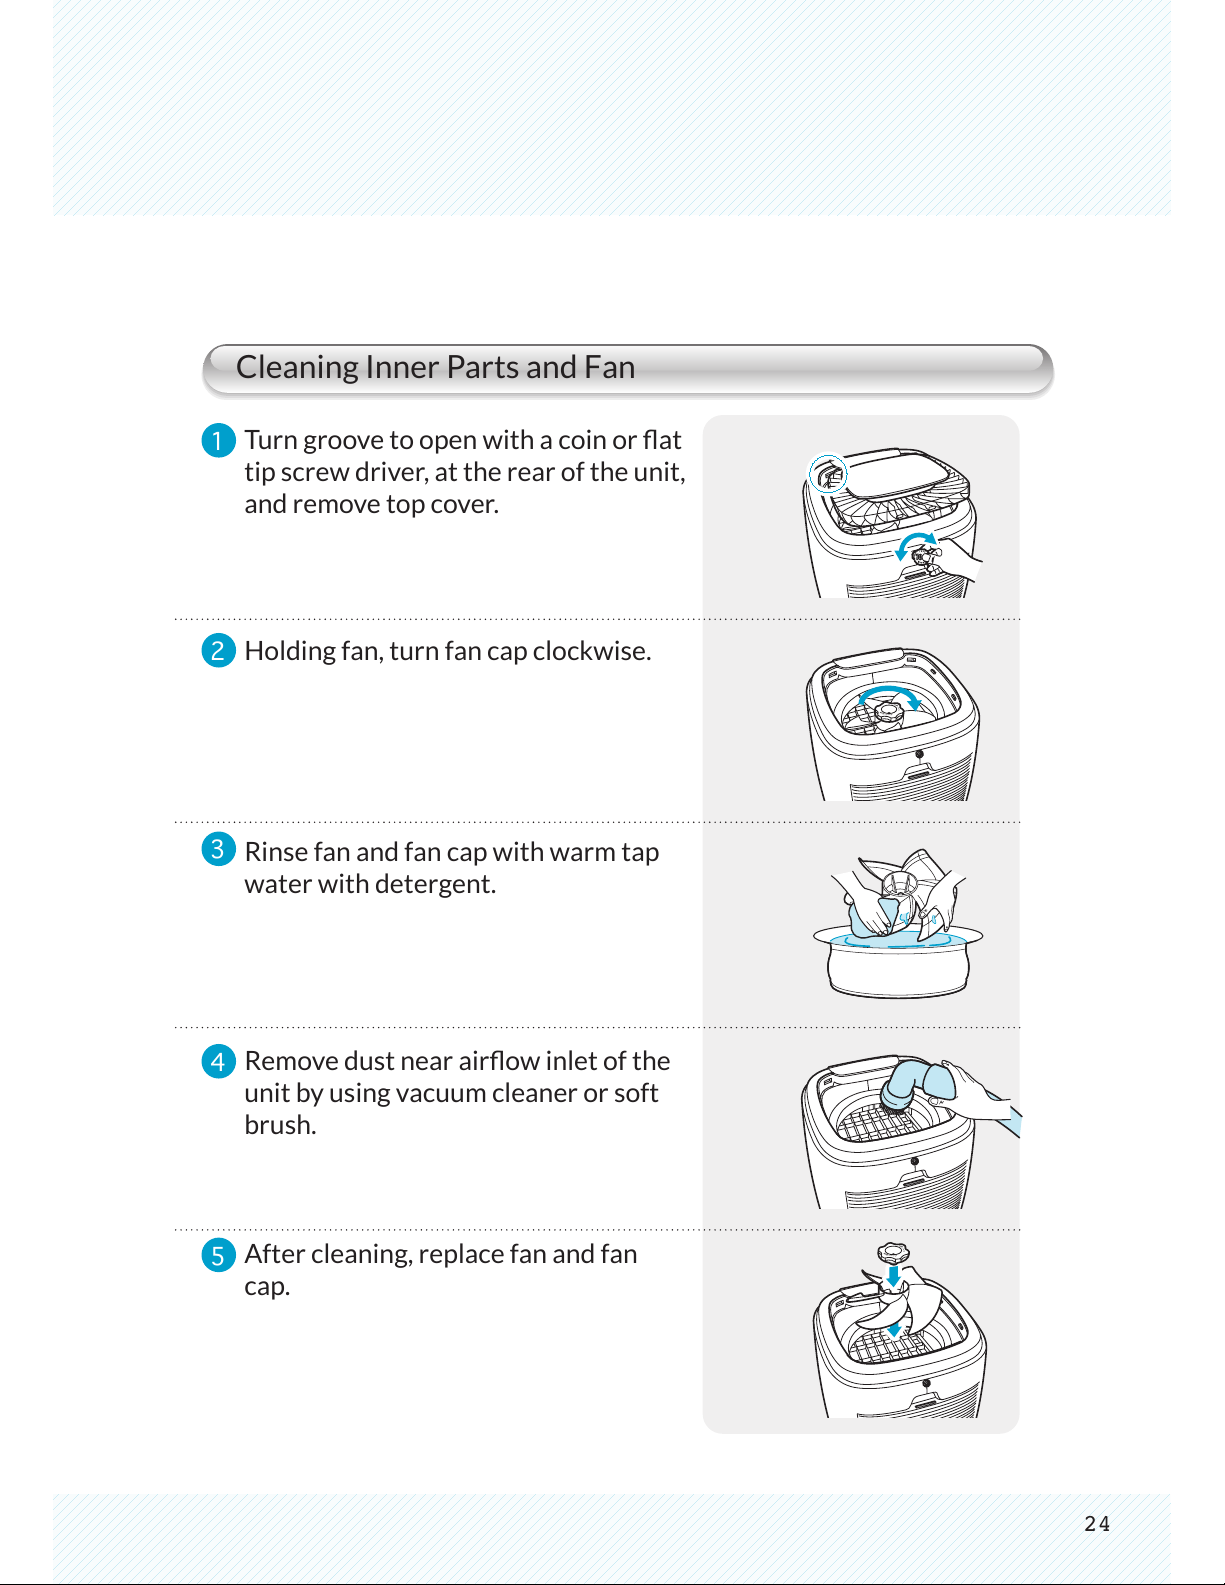
Cleaning Inner Parts and Fan
1
2
3
4
5
Turn groove to open with a coin or at
tip screw driver, at the rear of the unit,
and remove top cover.
Holding fan, turn fan cap clockwise.
Rinse fan and fan cap with warm tap
water with detergent.
Remove dust near airow inlet of the
unit by using vacuum cleaner or soft
brush.
After cleaning, replace fan and fan
cap.
25
Care & Maintenance
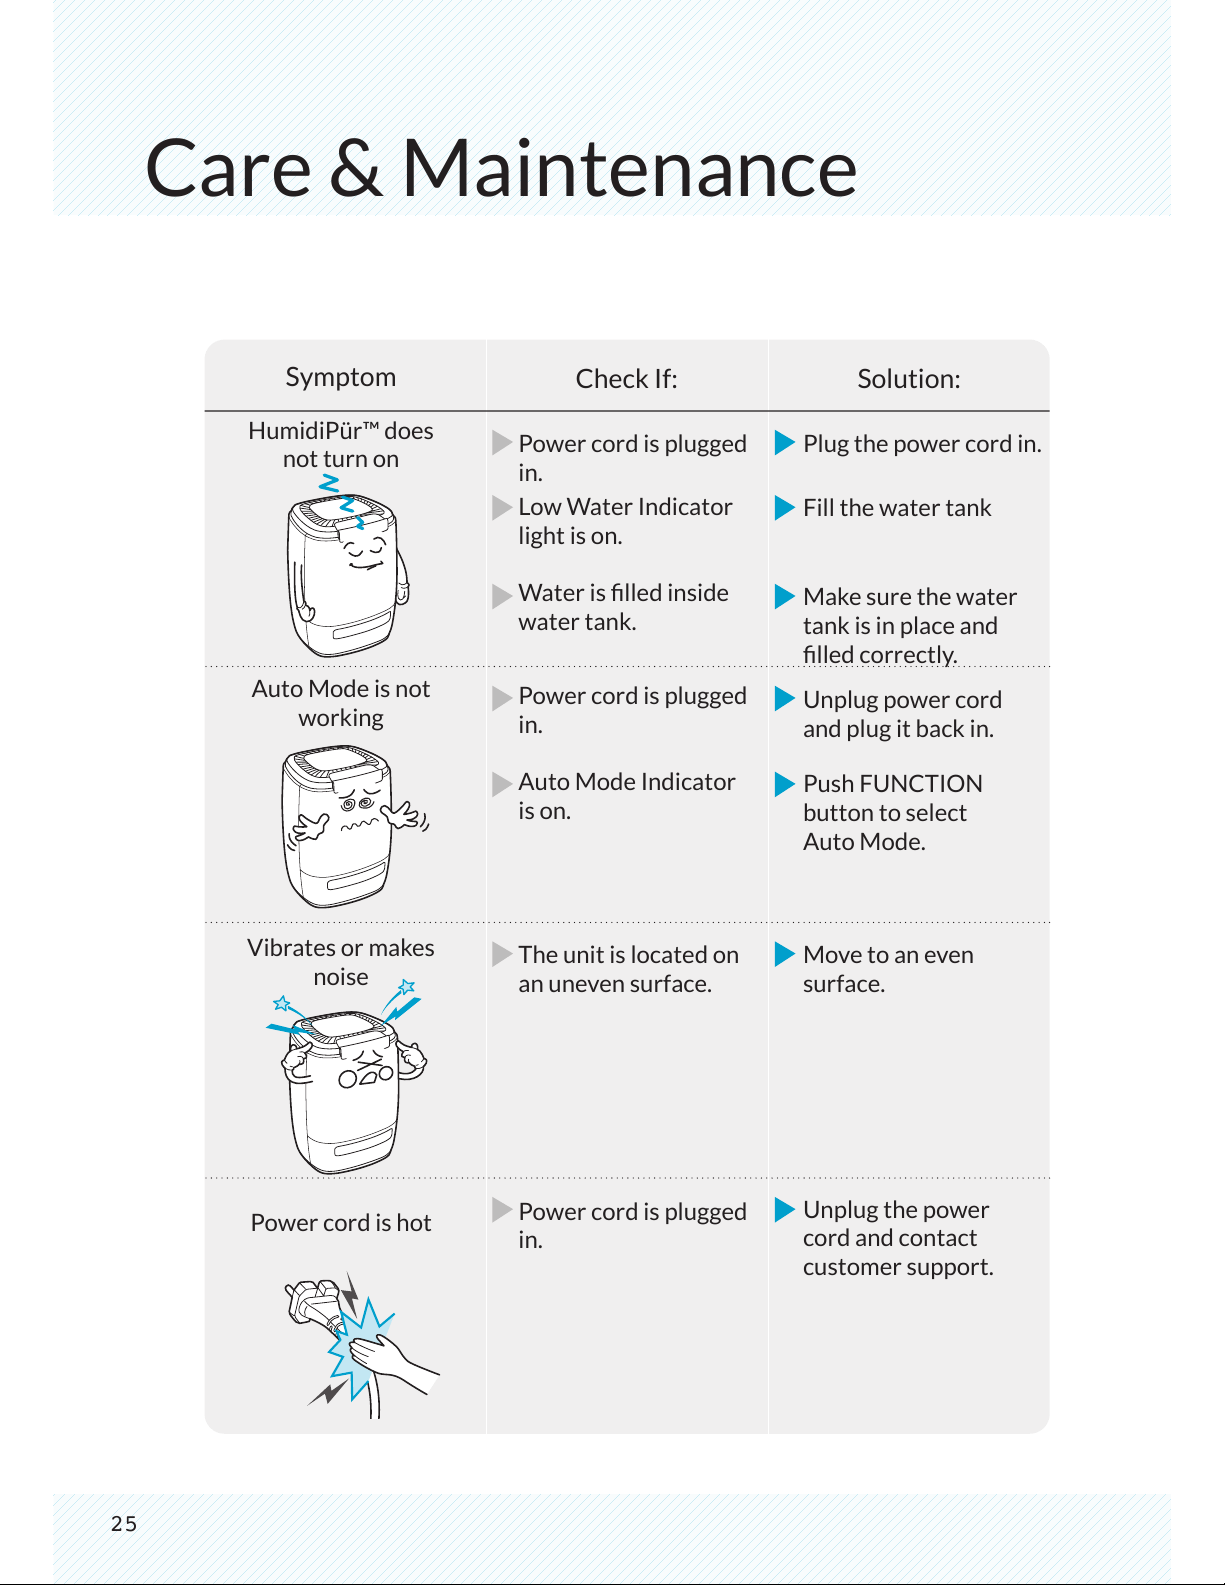
Symptom
HumidiPür™ does
not turn on
Auto Mode is not
working
Vibrates or makes
noise
Power cord is hot
Power cord is plugged
in.
Low Water Indicator
light is on.
Water is lled inside
water tank.
Power cord is plugged
in.
Auto Mode Indicator
is on.
The unit is located on
an uneven surface.
Power cord is plugged
in.
Plug the power cord in.
Fill the water tank
Make sure the water
tank is in place and
lled correctly.
Unplug power cord
and plug it back in.
Push FUNCTION
button to select
Auto Mode.
Move to an even
surface.
Unplug the power
cord and contact
customer support.
Check If: Solution:
26
¢ ¢
¢ ¢
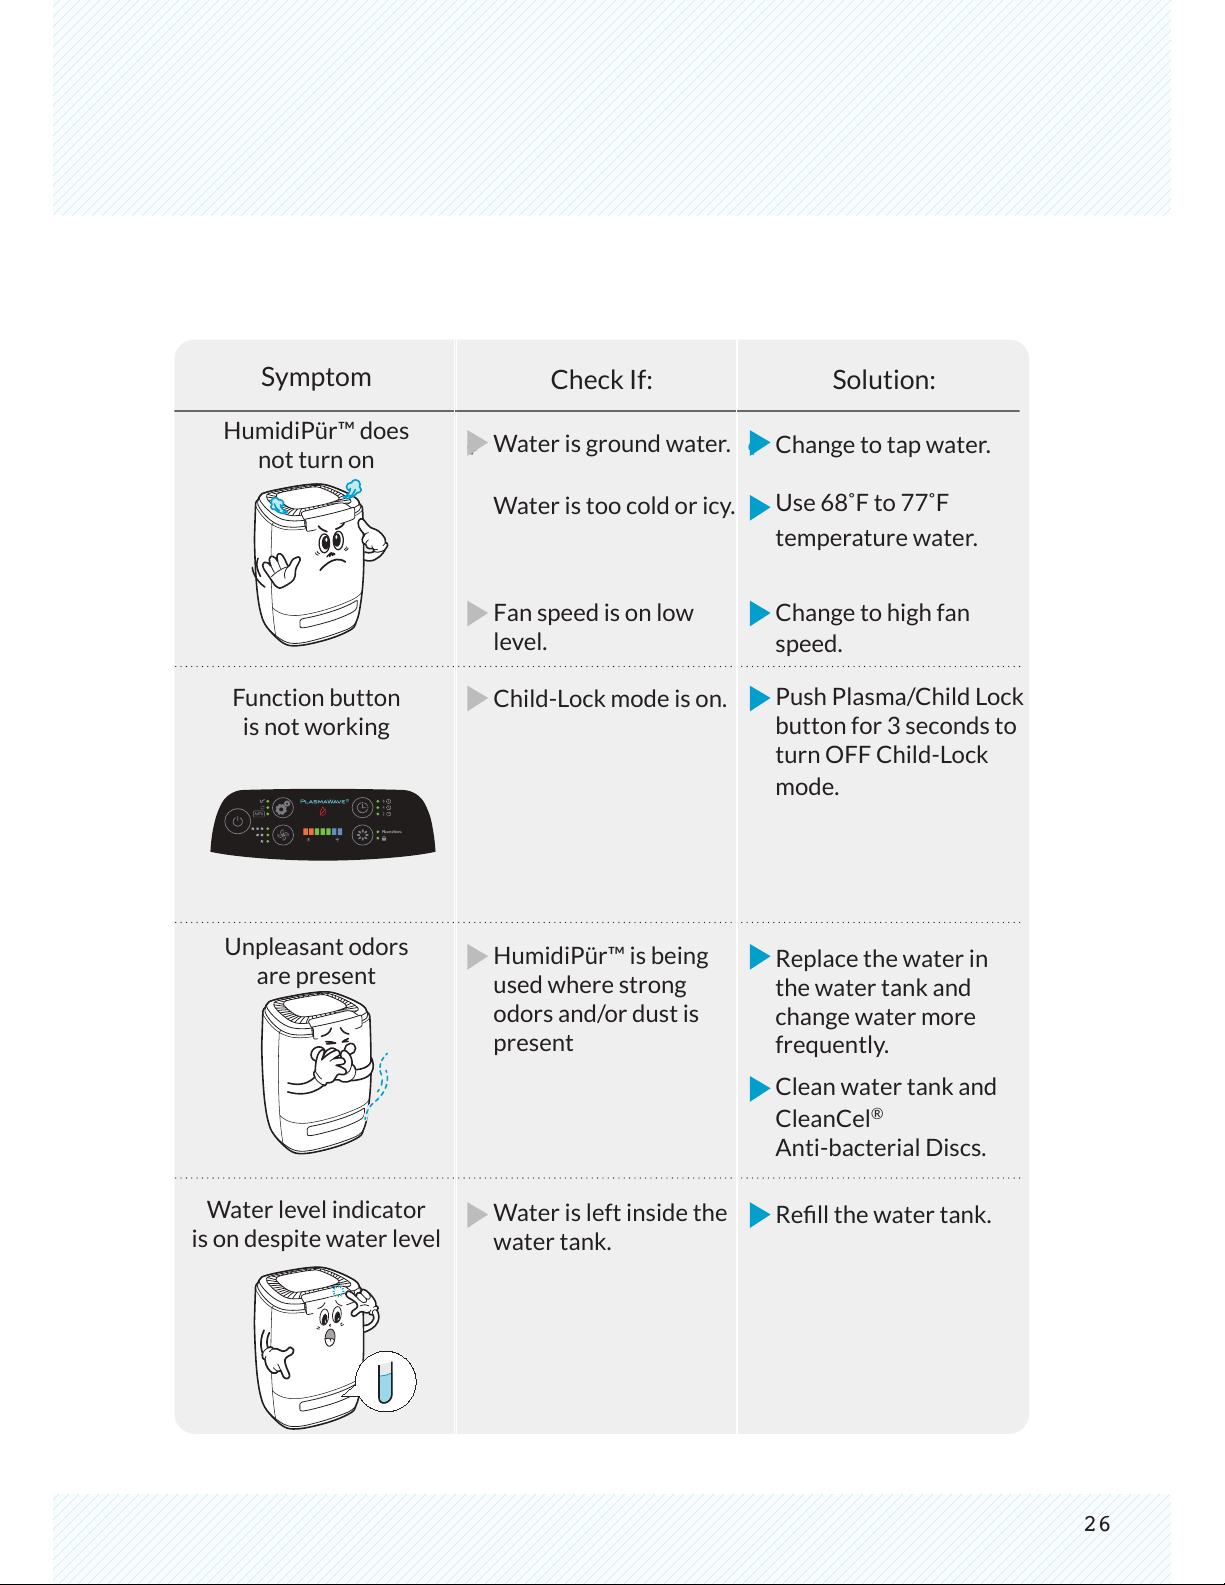
Symptom
HumidiPür™ does
not turn on
Function button
is not working
Unpleasant odors
are present
Water level indicator
is on despite water level
Water is ground water.
Water is too cold or icy.
Fan speed is on low
level.
Child-Lock mode is on.
HumidiPür™ is being
used where strong
odors and/or dust is
present
Water is left inside the
water tank.
Change to tap water.
Use 68˚F to 77˚F
temperature water.
Change to high fan
speed.
Push Plasma/Child Lock
button for 3 seconds to
turn OFF Child-Lock
mode.
Replace the water in
the water tank and
change water more
frequently.
Clean water tank and
CleanCel
®
Anti-bacterial Discs.
Rell the water tank.
Check If: Solution:
27
-
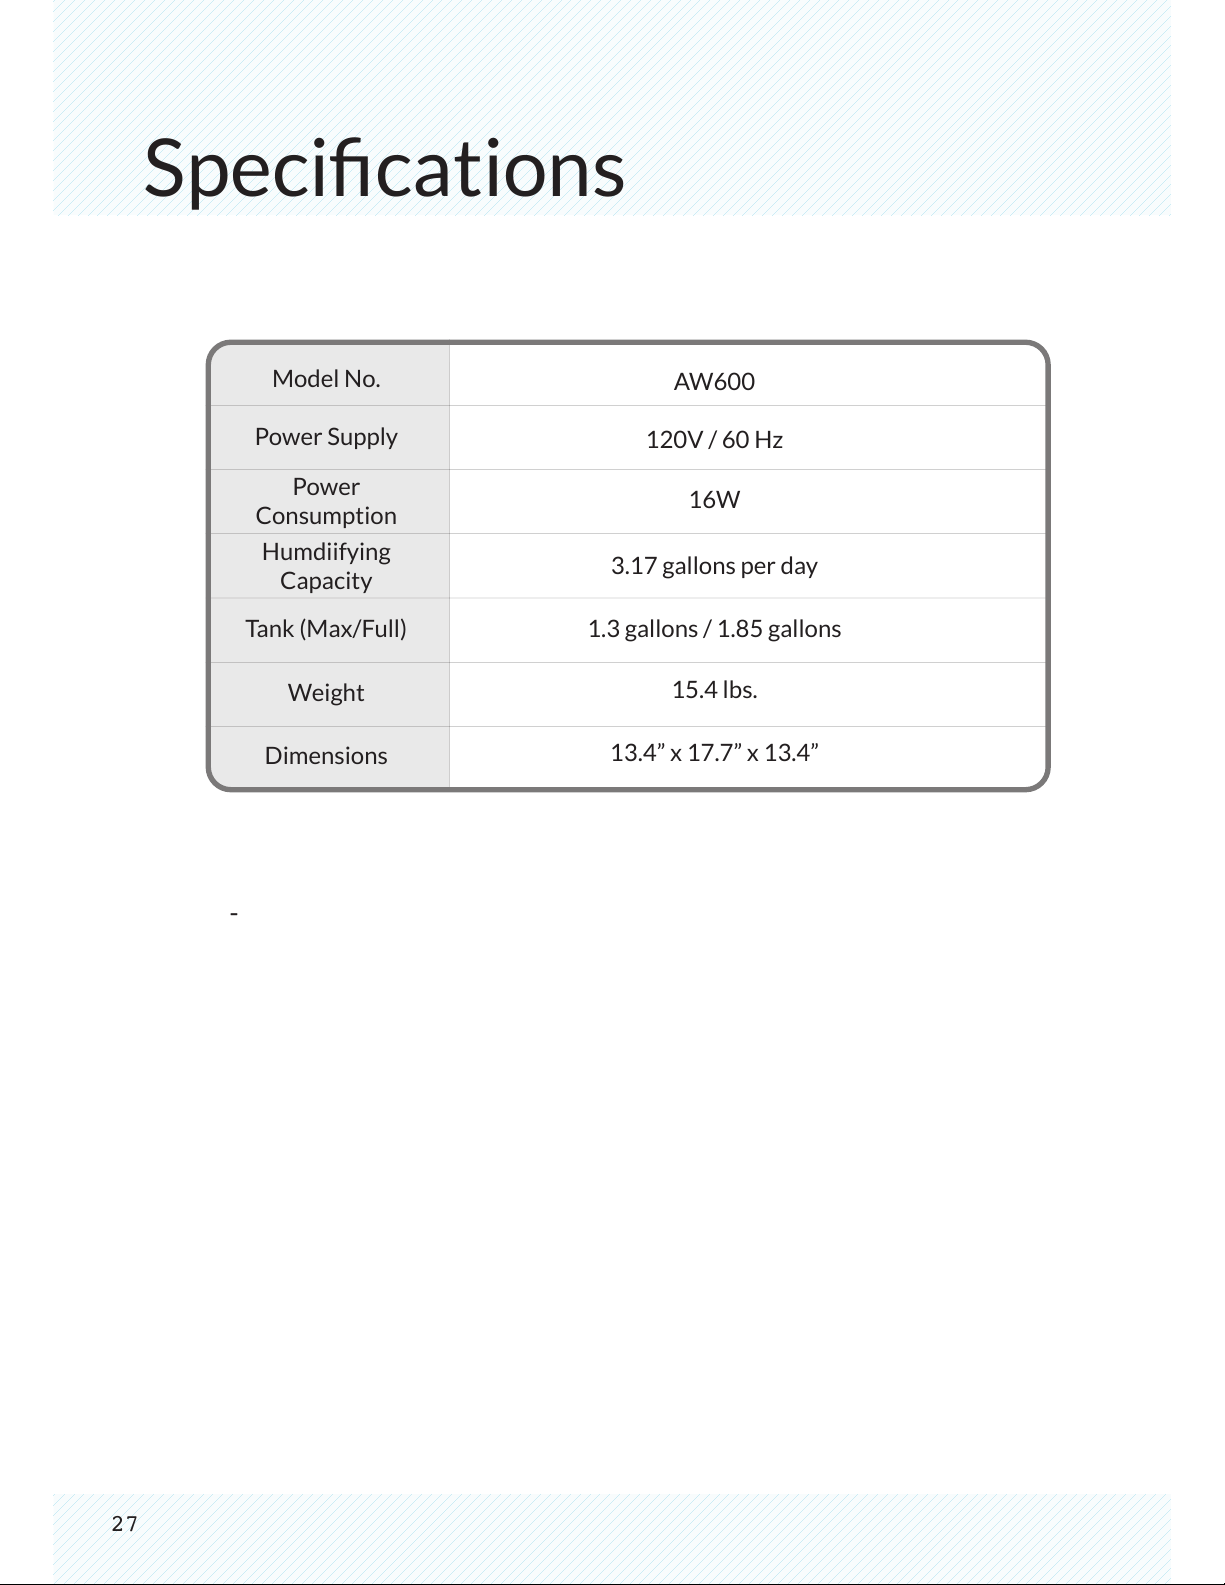
Specications
Model No.
Power Supply
Power
Consumption
Humdiifying
Capacity
Tank (Max/Full)
Weight
Dimensions
AW600
120V / 60 Hz
16W
3.17 gallons per day
1.3 gallons / 1.85 gallons
15.4 lbs.
13.4” x 17.7” x 13.4”

Notes
This marking shown on the product or its literature. Indicates that it
should not be disposed with other household wastes at the end of its
working life. To prevent possible harm to the environment or human
health from uncontrolled waste disposal. Please separate this from
other types of wastes and recycle it responsibly to promote the
sustainable reuse of material resources.
Household users should contact either the retailer where they
purchased this product, or their local government ofce, for details
of where and how they take this item for environmentally safe recycling.
Business users should contact their supplier and check the terms
and conditions of the purchase contract. This product should not
be mixed with other commercial wastes for disposal.
www.winix.com