Loading ...
Loading ...
Loading ...
37
English
Installation
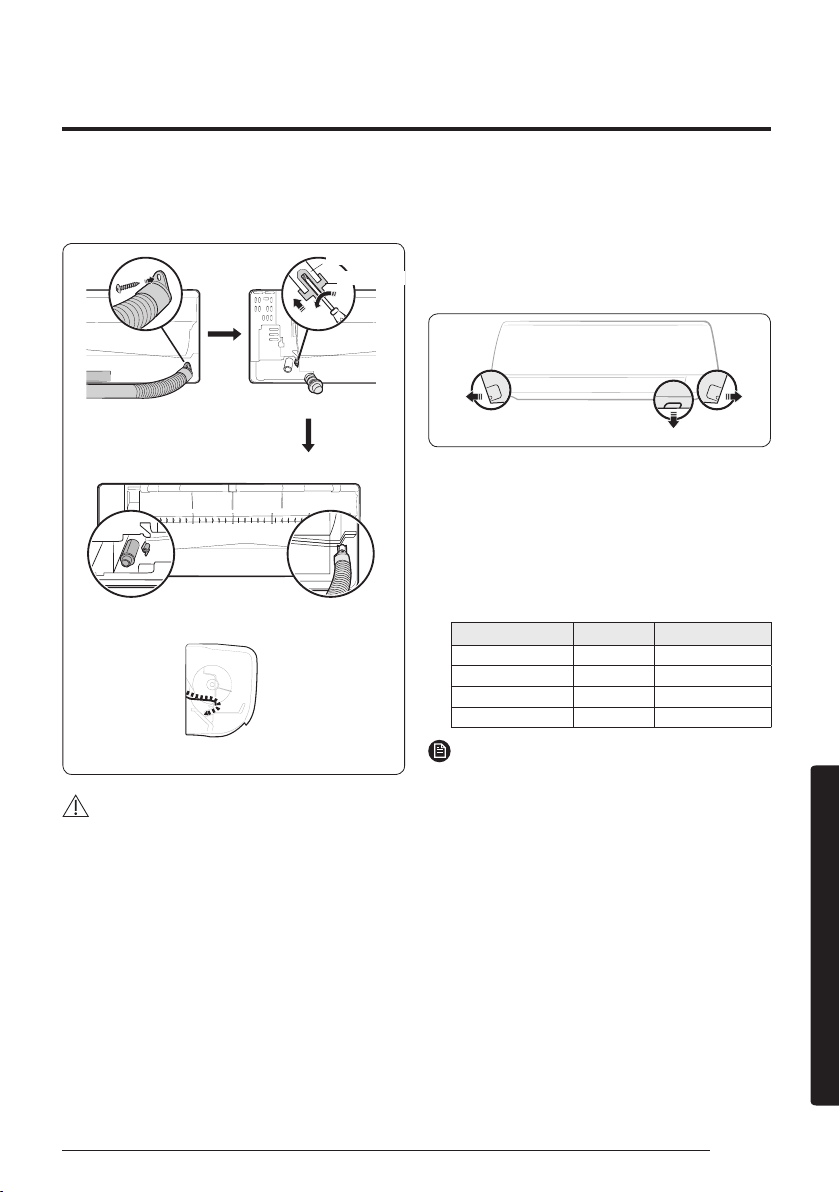
Step 2.5 Optional: Changing the
direction of the drain hose
CAUTION
• Make sure that the indoor unit is in upright position when
you pour water to check for leakage. Make sure that the
water does not overflow onto the electrical part.
Step 2.6 Installing and connecting
the assembly pipes to the refrigerant
pipes (assembly pipe)
Connect indoor and outdoor units with field-supplied copper
pipes by means of flare connections. Use insulated seamless
refrigeration grade pipe only, (Cu DHP type according to
ISO1337), degreased and deoxidized, suitable for operating
pressures of at least 4200 kPa and for burst pressure of at
least 20700 kPa. Under no circumstances must sanitary type
copper pipe be used.
There are 2 refrigerant pipes of different diameters:
• The smaller one is for the liquid refrigerant
• The larger one is for the gas refrigerant
A short liquid refrigerant pipe and a short gas refrigerant
pipe are already fitted to the air conditioner. The connection
procedure for the refrigerant pipes varies according to the
exit position of each pipe when facing the wall:
1. Cut out the appropriate knock-out piece (A, B, C) on
the rear of the indoor unit unless you connect the pipe
directly from the rear.
2. Smooth the cut edges.
3. Remove the protection caps of the pipes and connect
the assembly pipe to each pipe. Tighten the nuts
first with your hands, and then with a torque wrench,
applying the following torque:
Outer diameter (mm) Torque(N•m) Torque(kgf•cm)
ø 6.35 14 to 18 140 to 180
ø 9.52 34 to 42 350 to 430
ø 12.70 49 to 61 500 to 620
ø 15.88 68 to 82 690 to 830
NOTE
• If you want to shorten or extend the pipes, see Step
2.7 Shortening or extending the refrigerant pipes
(assembly pipe) on page 38.
4. Cut off the remaining foam insulation.
5. If necessary, bend the pipe to fit along the bottom of the
indoor unit. Then pull it out through the appropriate hole.
• The pipe should not project from the rear of the
indoor unit.
• The bending radius should be 100 mm or more.
6. Pass the pipe through the hole in the wall.
Drain pan outlet
Rubber cap
Pour water in the direction of arrow.
Direction of the drained water
<Front view>
<Side view>
Left(A)
Underside(C)
Right(B)
Loading ...
Loading ...
Loading ...