Loading ...
Loading ...
Loading ...
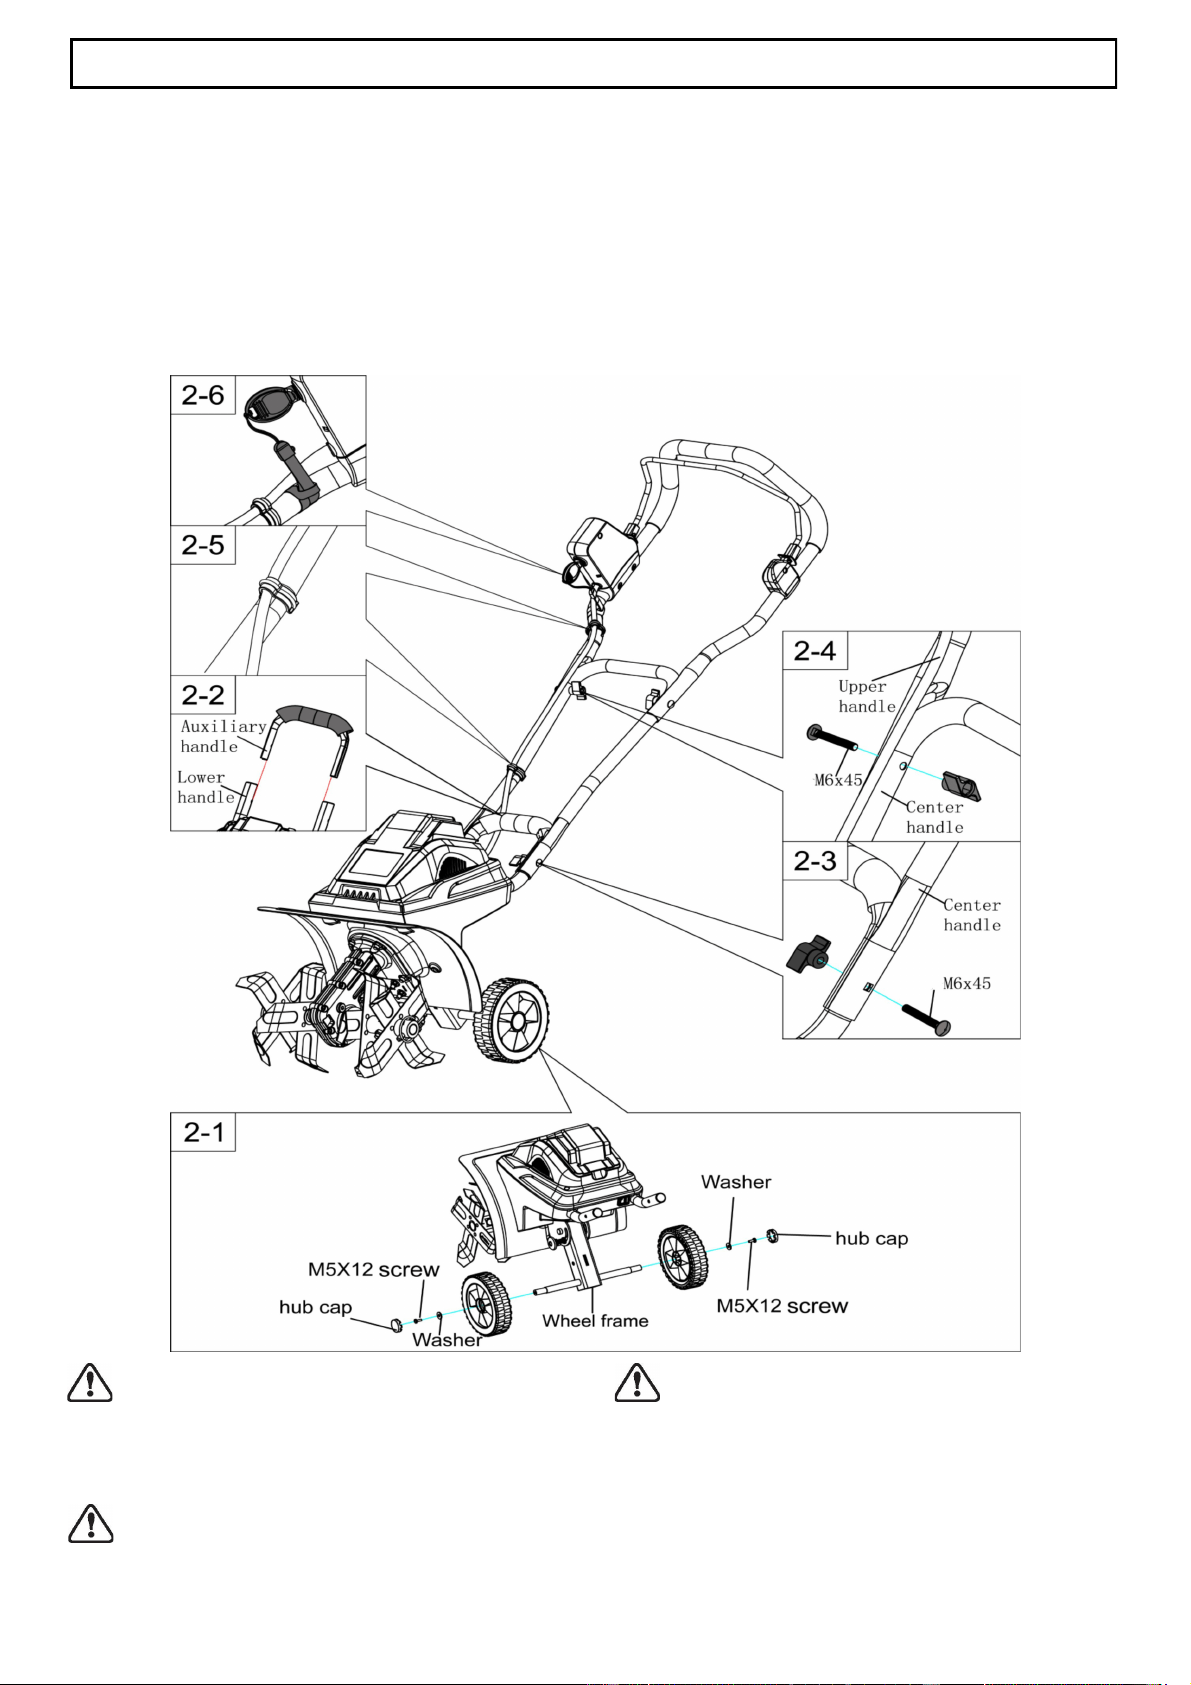
4. Attach the center handle to the auxiliary handle and
the lower handles using the two supplied M6 X 45
bolts and wing nuts. (Fig. 2-3)
5. Fasten the upper handle to the center handle using
the two supplied M6 X 45 bolts and wing nuts.
(Fig. 2-4)
6. Use the two supplied cable clips to secure the cord
to the handle. (Fig. 2-5)
7. Attach the key strap to the handle as shown.
(Fig. 2-6) When not in use, remove the key and
place it out of reach of children.
ASSEMBLY
6
This product must be assembled correctly before use.
1. Remove the screws (M5 X 12) and washers from
each end of the wheel frame axle. Assemble the
wheels onto the axle, then install washers and
screws (M5 X 12) to secure. (Fig. 2-1)
2. Press the hub caps into the wheels and cover the
ends of the axles. You may use a hammer to seat
the hub caps securely into the wheels. (Fig. 2-1)
3. Align the auxiliary handle with the lower handles.
Make sure the holes are aligned. (Fig. 2-2)
WARNING: If any parts are damaged or
missing do not operate this product until the parts
are replaced. Failure to heed this warning could
result in serious personal injury. Call our customer
service help line at -800-313-5111 for assistance.
WARNING: Do not install battery until
assembly is complete. Failure to comply could
result in accidental starting and possible serious
personal injury.
WARNING: Do not attempt to modify this
product or create accessories not recommended
for use with this product. Any such alteration or
modification is misuse and could result in a
hazardous condition leading to possible serious
personal injury.
Loading ...
Loading ...
Loading ...