Loading ...
Loading ...
Loading ...
16
VENT HOOD INSTALLATION (WITHOUT SOFFIT)
SITE PREPARATION:
In cases where the installation site does not have a soffit structure, the Vent Hood assembly may be secured directly to
the wall from the rear of the unit.
NOTE: When installing the Vent Hood directly to the rear wall, an adequate structural wall support (studs) must exist to
secure the unit.
NOTE: The Capital Duct Cover should be ordered and installed when installing the Vent Hood in a site without a soffit.
Capital offers both a 6” and 12” height Cover. Keep the 6” or 12” dimension in mind when allowing for clearance
between the top of the Vent Hood and the ceiling. (see fig.8)
1. With the Vent Hood width, and installation site in mind, mark the centerline of the installation.
2. See the chart in fig. 8 to determine the centerline to centerline dimension of the wall mounting holes for the
particular model being installed.
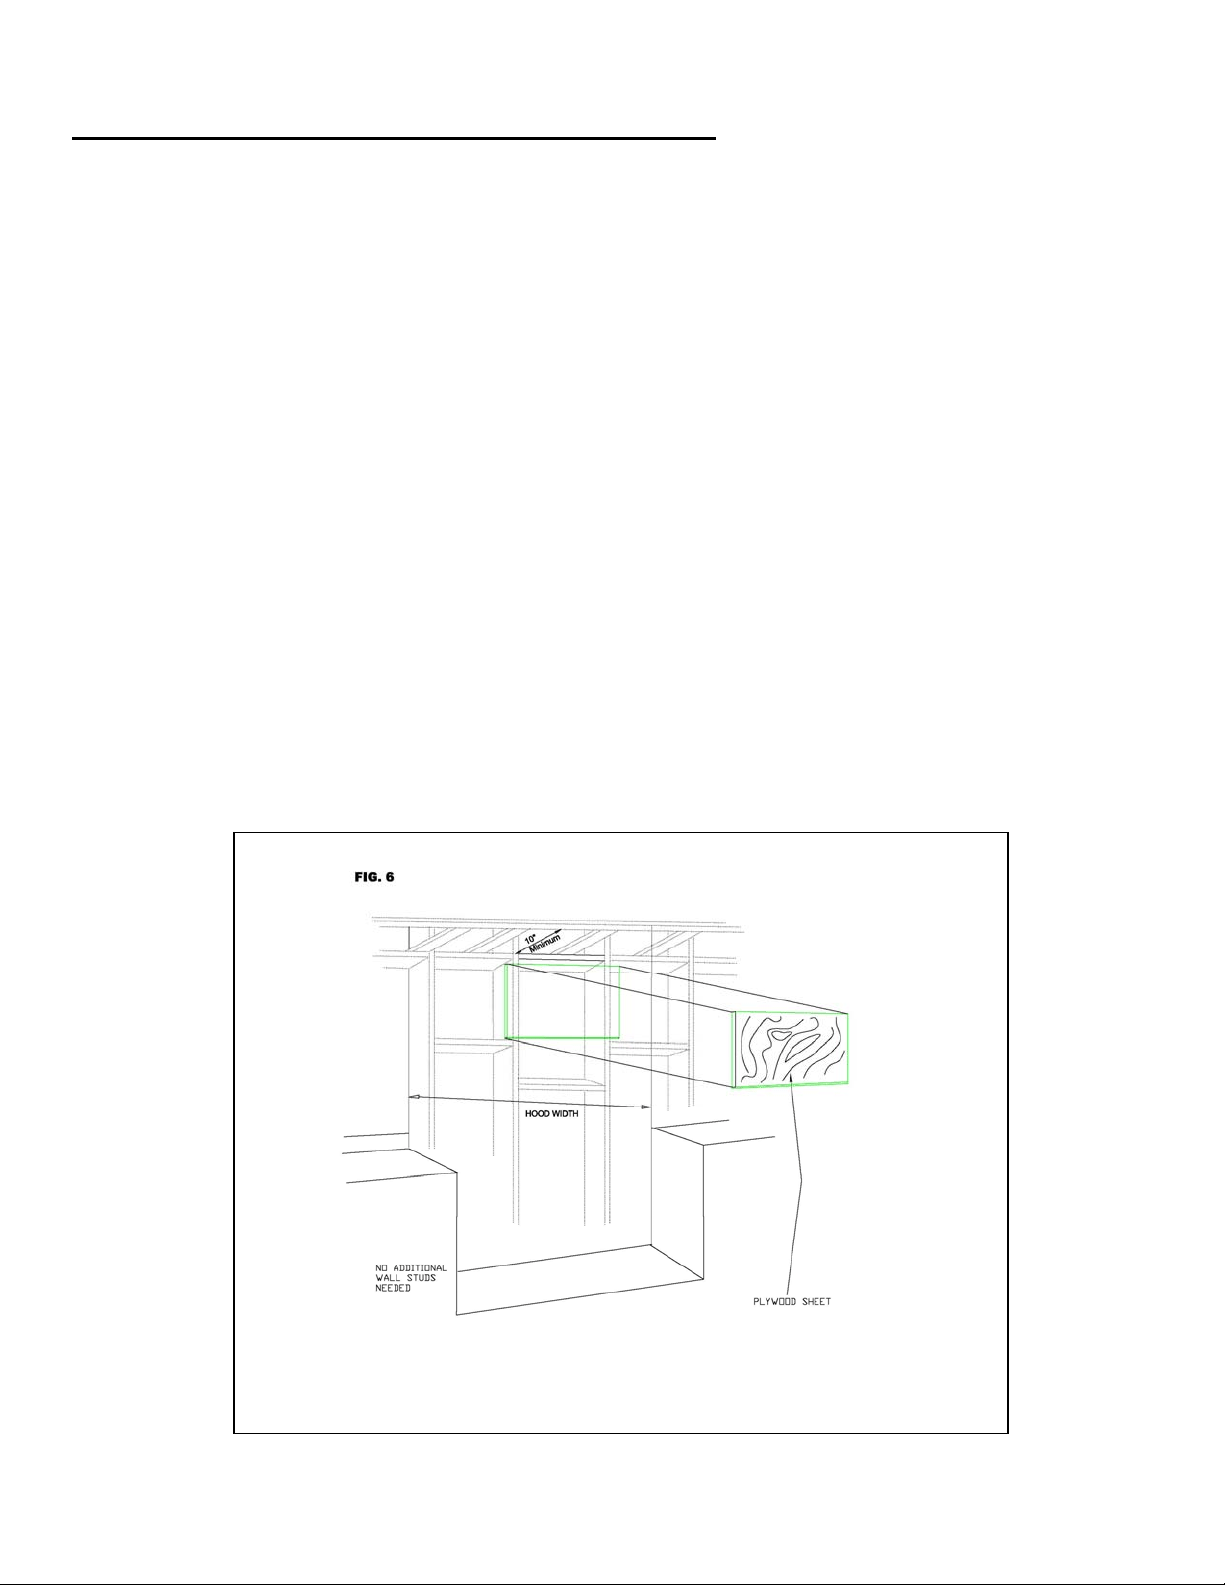
3. Cut away enough drywall (if installed) to expose 2 vertical studs (1 in each side of the hood centerline). It will be
necessary to construct a plywood wall insert (see fig. 6) or install aligning wall studs. (see fig. 7)
WALL MOUNTING
After an adequate wall structure has been completed, secure the Capital Duct Cover (6” or 12”) to the top of the Vent
Hood. Carefully lift the hood with the duct cover into the installation site and secure the hood into the wall structure with
six mounting screws. Once the hood assembly has been secured to the wall, the front of the soffit chimney may be
removed for ductwork connections.
GO TO FINISHING THE INSTALLATION – Page 11
`
Loading ...
Loading ...
Loading ...